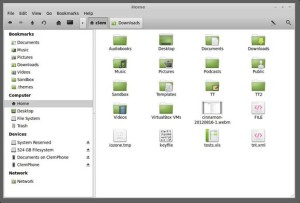
Nemo file manager is the default on Linux Mint. It’s a complete fork of Nautilus 3.4. Here’s how to install it on Ubuntu 13.10 Saucy.
It looks similar to Nautilus. At the moment the only visual differences are on the toolbar and the sidebar. The content pane and desktop layer look the same as before.
Press Ctrl+Alt+T to open terminal, then get started with below steps:
1.) Copy and paste this command and run to add the ppa repository:
sudo add-apt-repository ppa:gwendal-lebihan-dev/cinnamon-stable
2.) Update the package lists:
sudo apt-get update
3.) Install the file manager:
sudo apt-get install nemo
To make Nemo as default file manager:
xdg-mime default nemo.desktop inode/directory application/x-gnome-saved-search
To set up Nemo to handle your desktop via 2 commands:
gsettings set org.gnome.desktop.background show-desktop-icons false
gsettings set org.nemo.desktop show-desktop-icons true


if someone would like to have links on your desktop opened by nemo too , then this command will make it work:
xdg-mime default nemo.desktop inode/symlink application/x-gnome-saved-search