I used to create bootable Ubuntu USB installer with UNetbootin, then with Ubuntu’s built-in USB creator. Now Ventoy is a good choice that I use often to try different operating systems.
Why Ventoy:
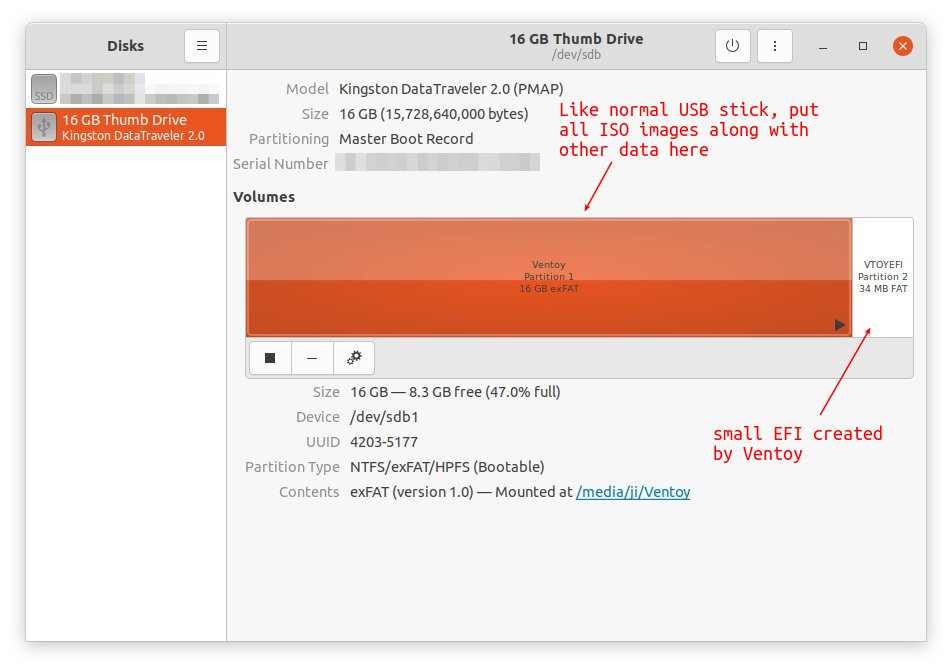
Different to other USB creators, you don’t need to format your USB stick again and again to write data from ISO images. With Ventoy, it just format your USB one time, create a small (34 MB in my case) EFI partition, and leave all other spaces free in another partition.
Without extracting, just drag and drop to move ISO images into USB drive, and it will boot them! Like normal USB drive, you can put your photos and other data along with ISO images. Ventoy will find what to boot and show them all in startup menu.
Ventoy features:
Ventoy is a free and open-source tool written mainly in C. It features:
- Just copy ISO to USB and boot it! No extraction needed.
- Mutil-boot support. As many ISO images as your USB stick can store.
- Save all other data along with ISO images, just like a normal USB driver.
- 700+ ISO files supported (Windows, Linux, WinPE, Unix, Vmware, Xen).
- Windows auto installation supported
- Also support Local Disk, SSD, NVMe, SD Card
- and more.
How to Install Ventoy:
The software provides ISO image as well as installers for Windows and Linux. Download them from the link below:
a.) using Ventoy’s graphical app for Linux:
The software now provides graphical user interface for Linux since version 1.0.52. Both GTK and Qt are supported. And it runs in either modern 64-bit PC, old 32-bit machine, ARM64 OS like Phytium/Kunpeng, and mips64el Loongson 3A MIPS OS.
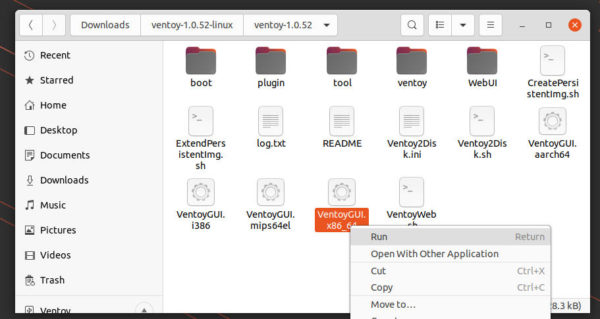
Simply download the “linux.tar.gz” tarball from the above button, extract, and right-click on the executable to “Run” it will bring up the UI:
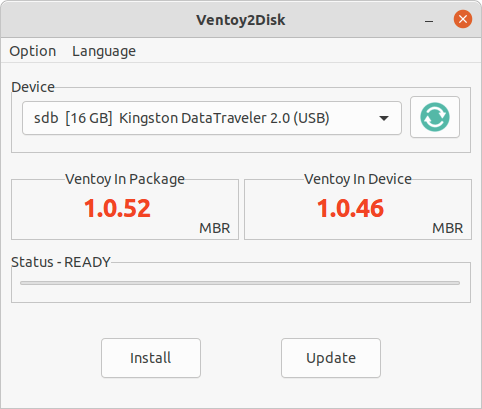
Same to the Windows app and Web UI, plug your USB into computer and select it from the app window (click Refresh if you don’t find it). And use either “Install” or “Update” button to install /upgrade Ventoy to the USB drive.
From the “option” menu, it’s possible to enable Secure Boot support, select partition to MBR for compatibility or GPT for most modern PCs. You may also preserve some space at the end of the disk.
NOTE: Installing Ventoy will format the USB stick. All data will be lost. Make a backup before getting started!
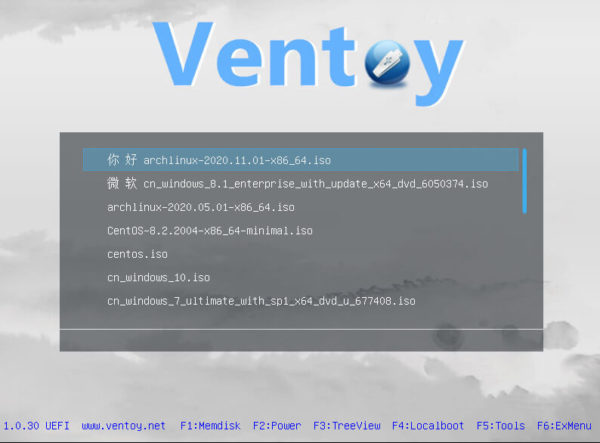
After installation, copy and paste some system discs (iso images) into the USB stick. Then start or re-start your machine, and select boot the USB. It will bring you into menu of iso image entries, like the picture shows:
b.) Install Ventoy in Linux from command line:
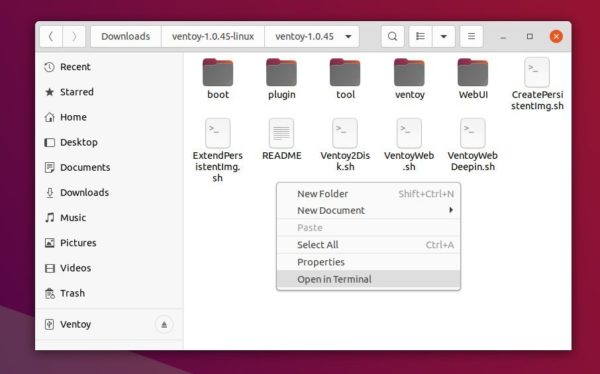
Also download the “linux.tar.gz” tarball. Then extract, and right-click on blank area in generated folder to open the directory in terminal via ‘Open in Terminal’ menu option.
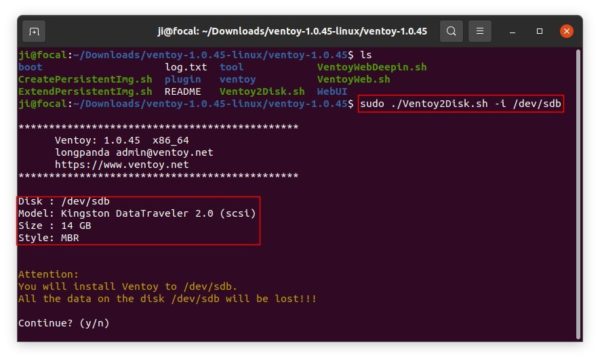
When terminal opens, copy and paste the command below into it and hit Enter to install Ventoy to USB:
sudo ./Ventoy2Disk.sh -i /dev/sdb
If your machine boot with UEFI mode, also add -s flag for secure boot support, so the command will be:
sudo ./Ventoy2Disk.sh -i -s /dev/sdb
mount command, etc to confirm.
If you want to use GTP partition table instead of MBR, add “-g” flag, so the command will be sudo ./Ventoy2Disk.sh -i -g /dev/sdb.
Type ‘y’ to confirm twice. If everything’s done successfully, it will prompt ‘Install Ventoy to /dev/sdb successfully finished.‘
c.) Install Ventoy in Windows or Linux via Web UI
The software also has a Web UI which has same appearance to the Windows app.
As the previous step did, download ‘linux.tar.gz‘, extract and go to source folder. Then right-click on blank area to select ‘Open in Terminal‘.
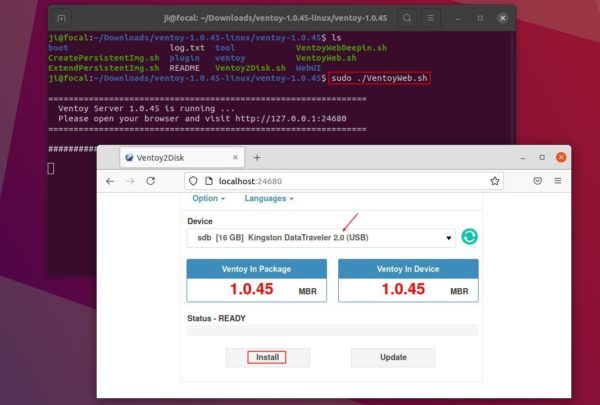
When terminal opens, run command to start the Web UI service:
sudo ./VentoyWeb.sh
Next in web browser go to “http://127.0.0.1:24680” will open the web installation page:
In the web UI, select your USB device and click ‘Install’. Also for UEFI mode enable ‘Secure Boot‘ under options.
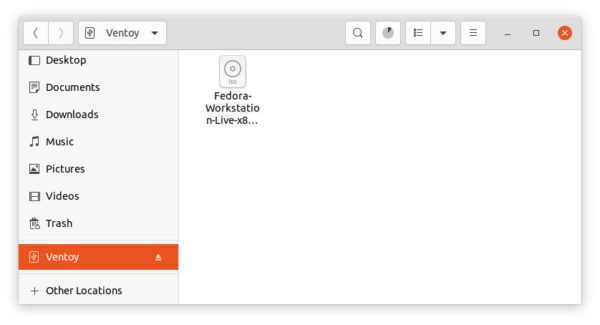
When everything’s done, you’ll find the USB driver mounted with name “Ventoy”, put ISO images into it and boot it when required. As mentioned, you may treat it as normal USB disk by storing photos, documents, etc, along with disc images.


