This tutorial shows you how to install LEMP stack in Ubuntu 13.10. LEMP stands for Linux, Nginx (pronounced “engine x”), MySQL and PHP. The nginx project started with a strong focus on high concurrency, high performance and low memory usage. So it’s a good alternative to Apache webserver for building websites on low memory hosts.
Tutorial Objectives:
- Install Nginx, Php5, MySQL (LEMP) in Ubuntu 13.10 Server
- Enjoy!
To get started, first login your Ubuntu Server and follow the steps below:
1. Intall MySQL
MySQL is a database management system which stores and organizes references to the information the webserver needs.
To install it, run command:
sudo apt-get install mysql-server mysql-client
While the installing process, you’ll be asked to type a password for MySQL root user.
2. Install Nginx
Nginx is available in Ubuntu’s repository, run command below to install it:
sudo apt-get install nginx
Or you can install the latest stable version from Nginx PPA:
sudo apt-get install python-software-properties

sudo add-apt-repository ppa:nginx/stable

sudo apt-get update

sudo apt-get install nginx
Once installed, start Nginx by:
sudo service nginx start
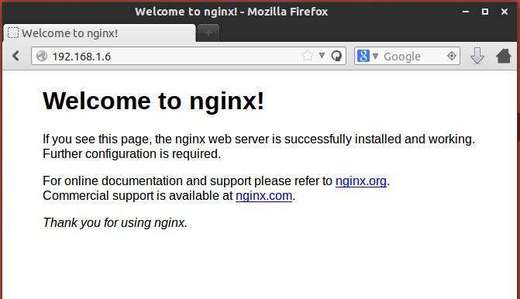
To check out if nginx is working, go to http://serverip:
3. Install PHP5
PHP is a reflective programming language, which makes it possible for all these different parts to work together.
We can make PHP5 work in nginx through PHP-FPM, which is an alternative PHP FastCGI implementation with some additional features useful for sites of any size, especially busier sites.
Run command below to install php5-fpm:
sudo apt-get install php5-fpm
4. Setup Nginx
The nginx configuration is in /etc/nginx/nginx.conf, read this configuration example.
Now, let’s modify the default site example:
sudo vi /etc/nginx/sites-available/default
Here you can define root directory (to put WordPress files there), your site domain, as well as other settings. See the example below:
server {
	listen 80 default_server;
	listen [::]:80 default_server ipv6only=on;

	root /usr/share/nginx/html;
	index index.php index.html index.htm;

	# Make site accessible from http://localhost/
	server_name localhost;

	location / {

		try_files $uri $uri/ /index.php;

	}

	location /doc/ {
		alias /usr/share/doc/;
		autoindex on;
		allow 127.0.0.1;
		allow ::1;
		deny all;
	}

	#
	error_page 500 502 503 504 /50x.html;
	location = /50x.html {
		root /usr/share/nginx/html;
	}

	location ~ \.php$ {

		# With php5-fpm:
                try_files $uri =404;
		fastcgi_pass unix:/var/run/php5-fpm.sock;
		fastcgi_index index.php;
		include fastcgi_params;
	}

	# deny access to .htaccess files, if Apache's document root
	# concurs with nginx's one
	#
	location ~ /\.ht {
		deny all;
	}
}
After that, reload Nginx:
sudo service nginx reload
4. Check out if PHP is working
Create the test file:
sudo vi /usr/share/nginx/html/info.php
Add following lines and save the file:
<?php
phpinfo();
?>
Go to http://serverip/info.php in client’s web browser and you’ll see:
5. Get MySQL working with PHP
Install Xcache, a free and open PHP opcode cacher for caching and optimizing PHP intermediate code, as well as other PHP modules:
sudo apt-get install php5-mysql php5-curl php5-gd php5-intl php-pear php5-imagick php5-imap php5-mcrypt php5-memcache php5-ming php5-ps php5-pspell php5-recode php5-snmp php5-sqlite php5-tidy php5-xmlrpc php5-xsl php5-xcache
Then restart php5:
sudo service php5-fpm restart
Now reload http://serverip/info.php page and scroll down to find out if there’s a section about MySQL:
Now your LEMP server is up and running, see how to install wordpress on Ubuntu 13.10

Perfect tutorial, just miss the phpmyadmin setup thank you ;)
It’s very good lesson thank you, also I read mysql 5.6 is faster, true??
http://www.collegetimes.tv/lemp-server/