Nutty is a free open-source network utility made for Linux. It monitors the devices on your network and check bandwidth and speed details.
Nutty is made for elementary OS and it works on Ubuntu. The software features:
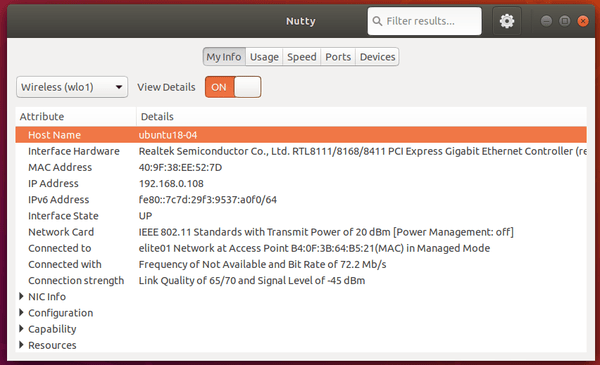
Display basic and detailed information for the device network card
Provides network data usage in two views: historical usage and current usage
Check Upload and Download speeds and get route times to a host
Provides information on active ports and application using them on the local device
Monitors, alerts and provides information on the other devices connected on the network
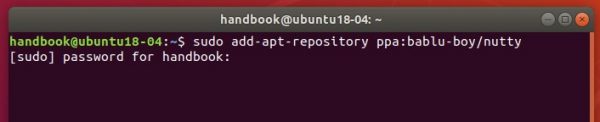
To install Nutty in Ubuntu 16.04, Ubuntu 18.04, Ubuntu 20.04, and Ubuntu 22.04, open terminal from application launcher or by pressing Ctrl+Alt+T on keyboard. When it opens, run following commands one by one.
For Ubuntu 18.04, Ubuntu 19.10, and higher with the default Gnome desktop environment, there’s a built-in screen recording tool you may not know.
For Ubuntu 23.10, Ubuntu 24.04, and later, the built-in screen recorder is now available in top-right system tray menu.
There’s no app shortcut or manual page for the hidden video recording tool. It has limited features that include:
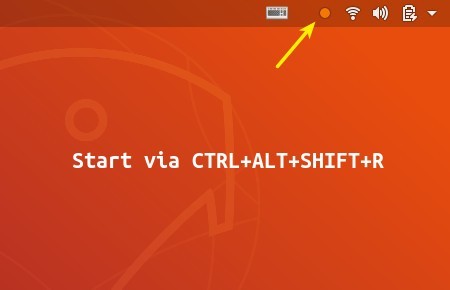
Start recording by pressing Ctrl+Alt+Shift+R on keyboard.
Stop recording also by pressing Ctrl+Alt+Shift+R.
Maximum video length is 30s (change it via following steps).
Full-screen recording only.
Record to WebM only.
Automatically saved videos to user’s Videos folder.
Change video length time limit:
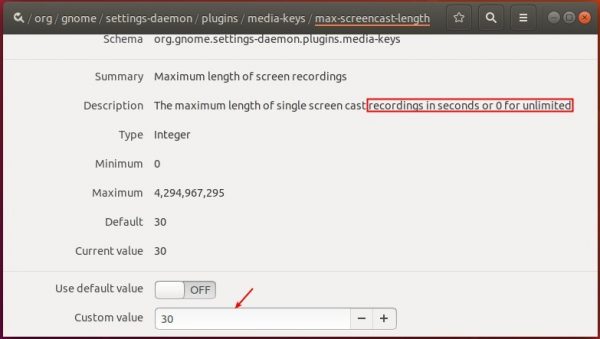
The maximum video length is 30 seconds by default. You can change 30 to any number in seconds or 0 with no time limit. Then you can press the shortcut key again at any time to stop the recording process.
1. Install Dconf Editor from Ubuntu Software and then launch it.
When it opens, navigate to org/gnome/settings-daemon/plugins/media-keys.
Screen down and click to change the value of ‘max-screencast-length’ as you want.
2. Alternatively, run single command in terminal (Ctrl+Alt+T) to change the value:
gsettings set org.gnome.settings-daemon.plugins.media-keys max-screencast-length 0
You may replace number 0 in the command as you want.
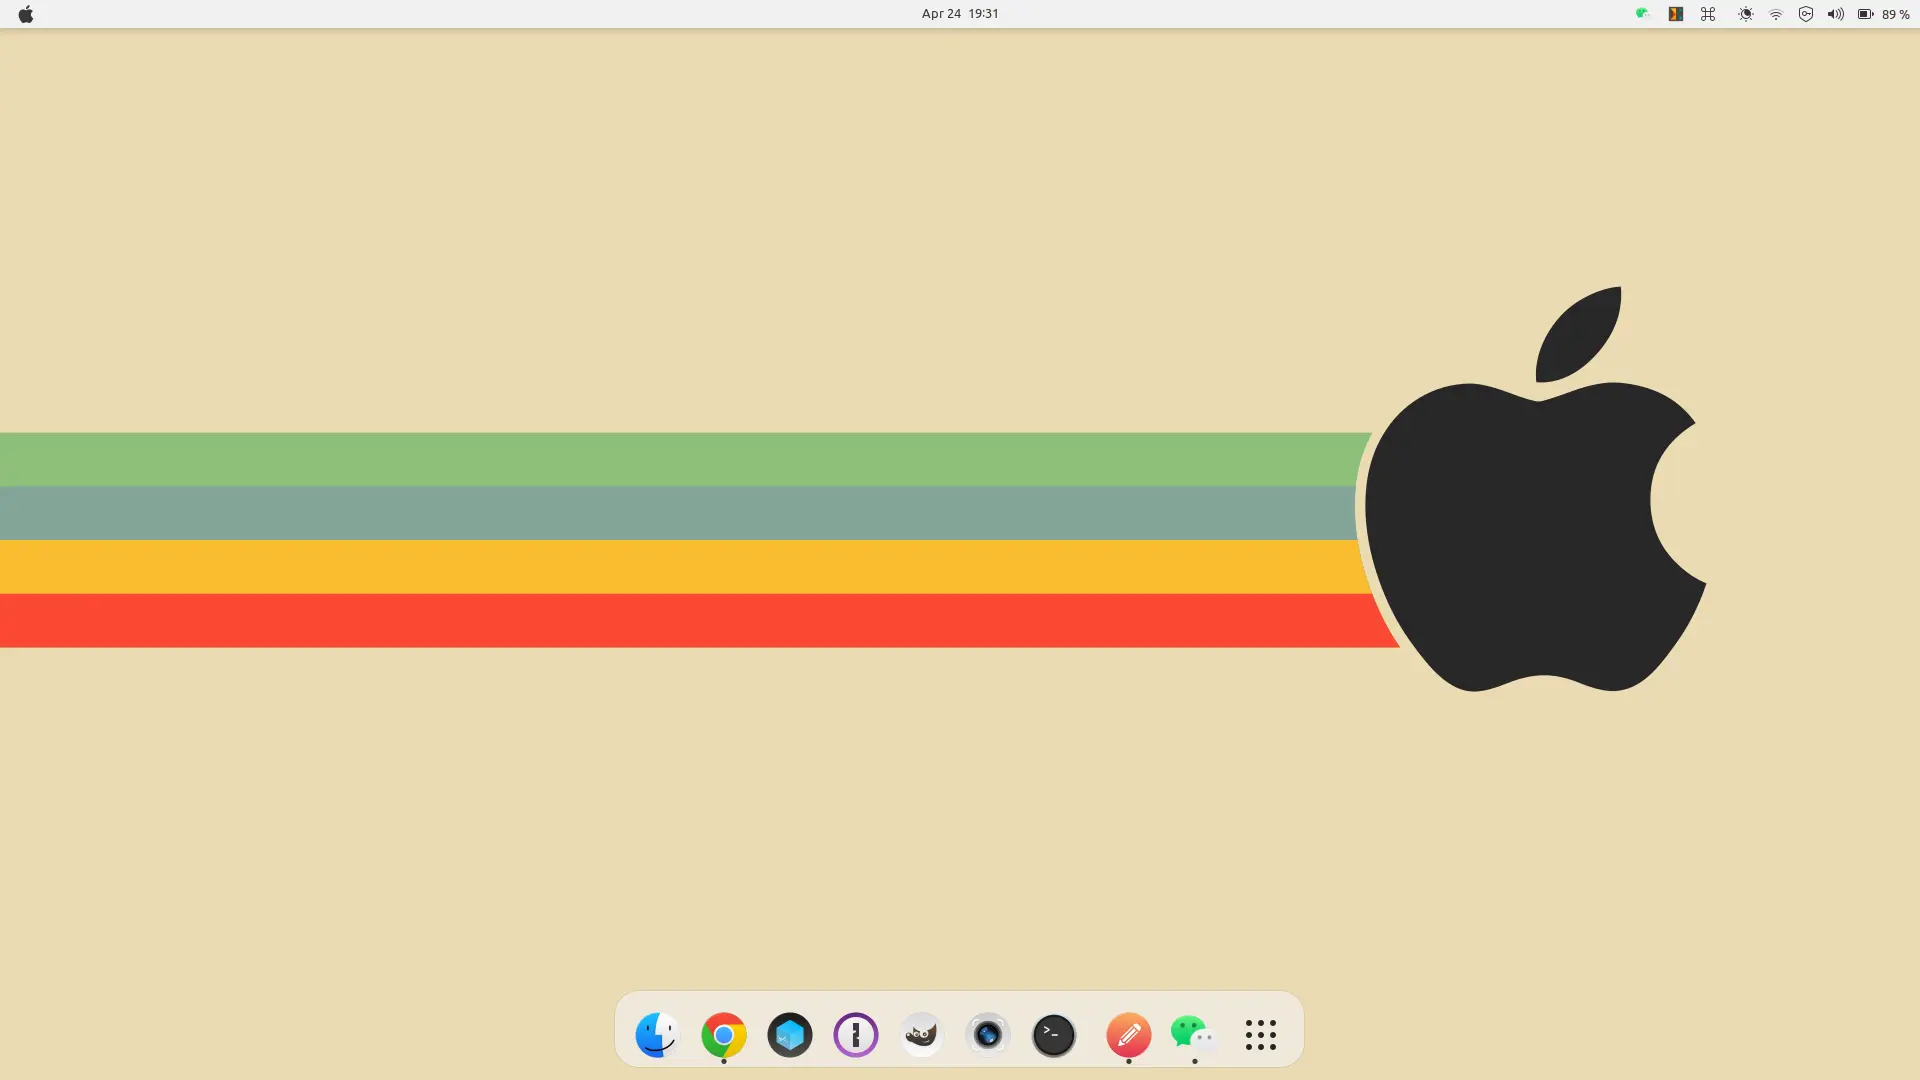
This simple tutorial shows how to install ‘McMojave’, a Mac OS Mojave like theme, in Ubuntu 18.04, Ubuntu 20.04, Ubuntu 22.04, and Ubuntu 24.04 with default GNOME Desktop.
Following steps will first download and install the GTK theme, icons theme, and a set of wallpapers. And then apply new themes and tweak the left dock to make your Ubuntu desktop look like Mac OS X.
Install Mojave GTK theme:
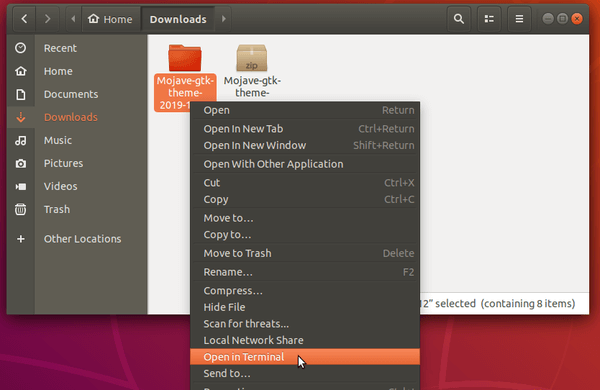
1. First download the source code of GTK theme from the project releases page:
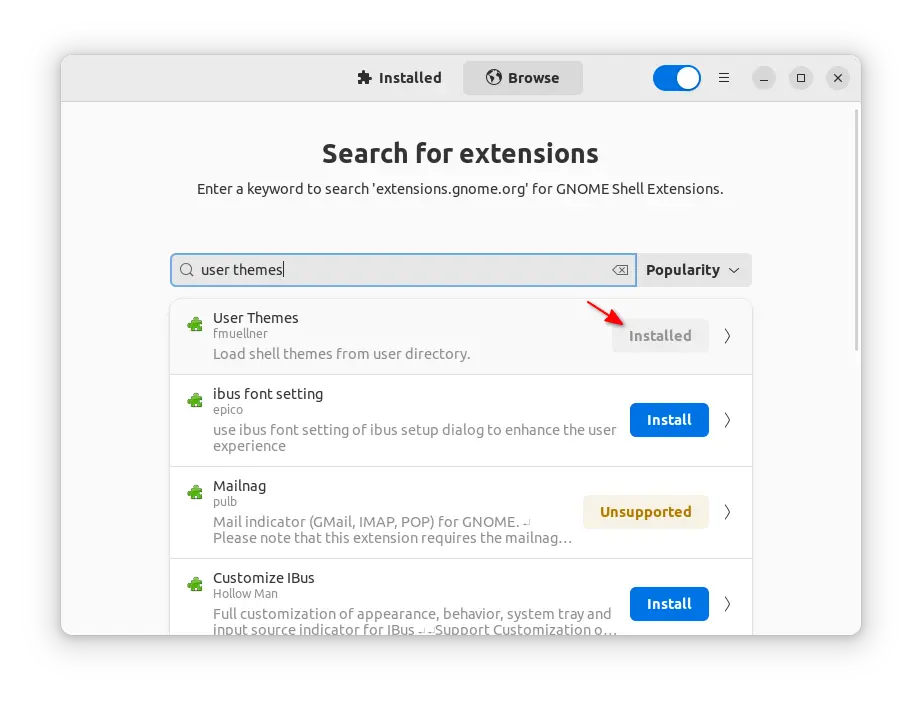
2. Search for and install “user themes” extension from GNOME Extension Manager (available in Ubuntu Software or App Center), so you can change the ‘Shell’ theme in next step (may need a log out and back in to apply).
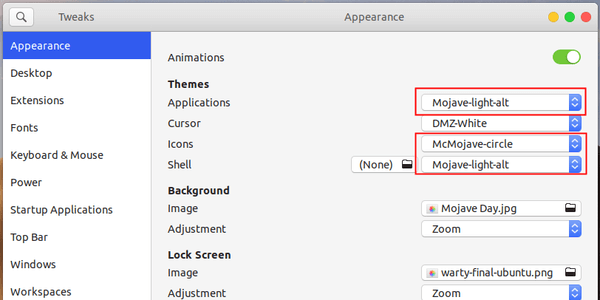
3. Open Gnome Tweaks, and select the new themes under Applications, Icons, and Shell.
Mozilla Firefox 72.0 was released today. Picture-in-picture video now is available for Linux and Mac OS.
“Picture-in-picture” feature allows web video to be played in a “pop out” window. Simply select the blue icon from the right edge of a web video to pop open a floating window so you can keep watching while working in other tabs.
Block fingerprinting scripts by default for all users
Replaces notification request pop-ups with speech bubble in address bar.
Remove support for blocking images from individual domains.
Various security fixes.
Download / Install Firefox in Ubuntu:
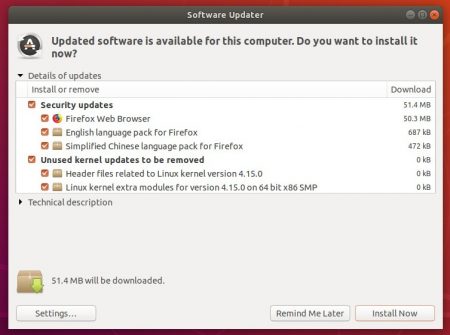
You’ll be able to upgrade the pre-installed Firefox to the latest 72.0 release in Ubuntu 16.04, Ubuntu 18.04, and Ubuntu 19.10, through the Software Updater in 2 or 3 days (check the building page).
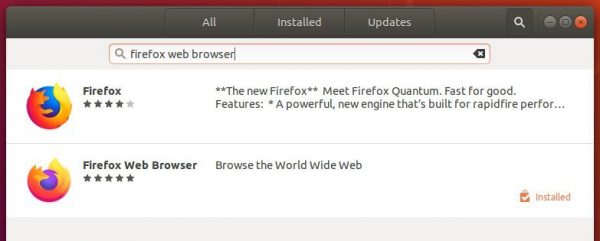
Or install the Firefox 72 Snap package (runs in sandbox) simply from Ubuntu Software. It can be installed alongside pre-installed Firefox, and will automatically update to the latest.
Also Mozilla Firefox website offers non-install (extract and run the executable) tarball for all Linux desktop.
KeePassXC, KeePass cross-platform community edition, released version 2.5.2 a few days ago. Here’s how to install it in Ubuntu 18.04, Ubuntu 16.04, Ubuntu 19.10 via PPA.
KeePassXC 2.5.2 features significant stability and usability improvements. Changes in the release include:
Show UI warning when entering invalid URLs
Option to use an entry only for HTTP auth
Disable the user interface when merging or saving the database
Ability to hide protected attribute after reveal
Improve GUI tests reliability on Hi-DPI displays
Fix crashes when saving a database to cloud storage
How to Install KeePassXC 2.5.2 in Ubuntu:
For Ubuntu 18.04 and higher, KeePassXC Snap package (runs in sandbox) can be easily installed via Ubuntu Software.
For those prefer native Ubuntu .deb package, open terminal from application menu or press Ctrl+Alt+T on keyboard, and run following commands one by one:
1.) Run command to add the official PPA, which so far supports for Ubuntu 16.04, Ubuntu 18.04, Ubuntu 19.04, and Ubuntu 19.10.
sudo add-apt-repository ppa:phoerious/keepassxc
Type user password (no asterisk feedback due to security reason) when it prompts and hit Enter to continue.
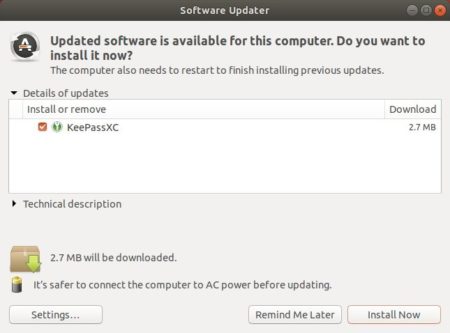
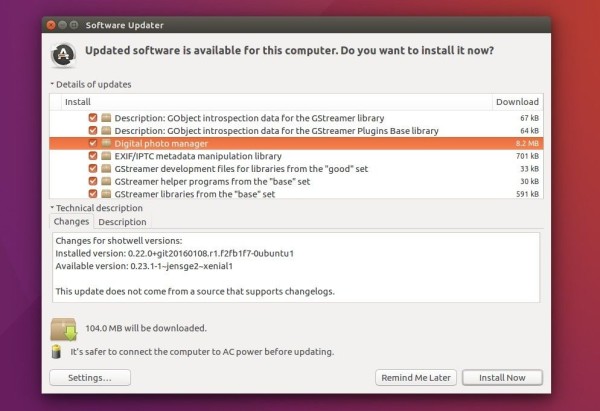
2. Then upgrade KeePassXC from previous release via Software Updater:
or run commands one by one in terminal to install the password manager:
sudo apt update

sudo apt install keepassxc
Uninstall:
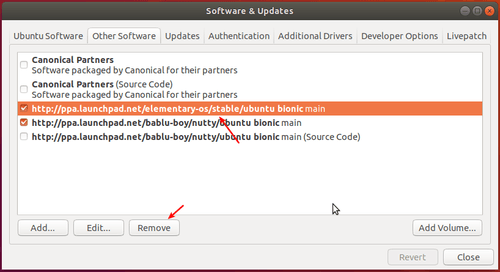
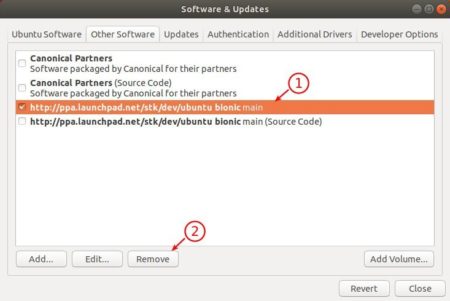
To remove the PPA, open Software & Updates and navigate to Other Software tab.
To remove KeePassXC .deb package, run command in terminal:
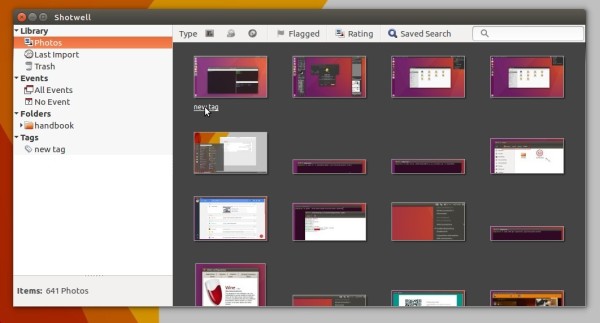
Shotwell 0.30.8 was released today as the latest stable version. Here’s how to install it in Ubuntu 18.04 and higher.
Shotwell 0.30.8 comes with updated translations and some bug-fixes, including:
Fix keyboard shortcut for adding tags
Fix Tumblr publishing issue
Fix month name translation in date/time chooser
How to install Shotwell 0.30.8 in Ubuntu:
If you’re OK with the flatpak package, which runs in sandbox, Shotwell 0.30.8 flatpak is available HERE.
Also Shotwell stable PPA maintains native .deb packages for Ubuntu 18.04 and higher, and v0.30.8 will be available in a few days (You may check the PPA link before getting started).
1. Open terminal (Ctrl+Alt+T) and run command to add PPA:
sudo add-apt-repository ppa:yg-jensge/shotwell
2. To upgrade Shotwell from a previous, launch Software Updater and install available updates.
NOTE: To undo the installation, and downgrade shotwell to the stock version in your Ubuntu repository, run command to purge the PPA:
The first release candidate of Clementine 1.4.0, an audio player inspired by Amarok 1.4, was released today.
Though the last 1.3.1 was released more than 3 years ago, the development of Clementine is being active all the time. Now Clementine 1.4.0 rc1 is available to install in Ubuntu 18.04, Ubuntu 19.04, Ubuntu 19.10 with no announcement or change-log though.
Go to the release page by clicking the link below:
Select download the .deb package from your Ubuntu edition.
bionic for Ubuntu 18.04, and Linux Mint 19.x
disco for Ubuntu 19.04
eoan for Ubuntu 19.10.
and amd64 for 64-bit system, i386 for 32-bit system.
Finally install the package either via Gdebi package installer or by running command in terminal:
sudo dpkg -i ~/Downloads/clementine_1.4.0*.deb
Once installed, open the music player from your system application launcher and enjoy!
Cozy is an open-source audio book player with a modern user interface. It’s written in Python programming language. Since version 1.3.0, the app is ported to GTK+ 4 and LibAdwaita for its user interface, and works in Linux and Mac OS.
Cozy automatically scans media library and imports your audiobooks in one directory. You can also drag and drop and audiobook into the app window to import it.
As a GTK app, it’s well integrated in Ubuntu, Fedora, and other Linux with Gnome Desktop. And dark mode is available to work at night. With libhandy library, it has an adaptive user interface that works well in different screen sizes, e.g., on PC, laptop, and mobile.
audio-book player features:
Sort audio books by author, reader & name
Remembers playback position
Sleep timer
Playback speed control
Offline Mode
Support for DRM free mp3, m4a (aac, ALAC, …), flac, ogg, wav files
Mpris integration (Media keys & playback info for desktop environment)
Option 1: How to Install Cozy in Ubuntu via Official PPA:
Cozy has an official Ubuntu PPA that so far contains packages for Ubuntu 22.04, Ubuntu 23.10, and Ubuntu 24.04.
NOTE: Due to this bug, copy has package conflict to Gnome Extension Manger app. If you want to install both apps in your system, use the Flatpak package (See Option 2) instead!
Though Ubuntu 20.04 is not supported due to outdated libraries, it still can be installed via little modification.
1. Add Cozy PPA
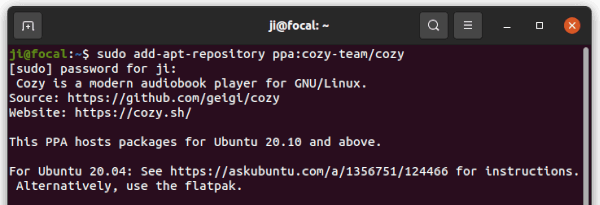
Firstly press Ctrl+Alt+T on keyboard or search for and open ‘terminal’ from start menu. When it opens, run command to add the PPA repository:
sudo add-apt-repository ppa:cozy-team/cozy
Type user password, no asterisk feedback, when it asks and hit Enter to continue.
2. Install dependencies and modify PPA for Ubuntu 20.04 ONLY!
For Ubuntu 20.04 and Linux Mint 20, you can either tweak PPA and install mismatched dependency libraries manually, or install Flatpak package (see next step) instead.
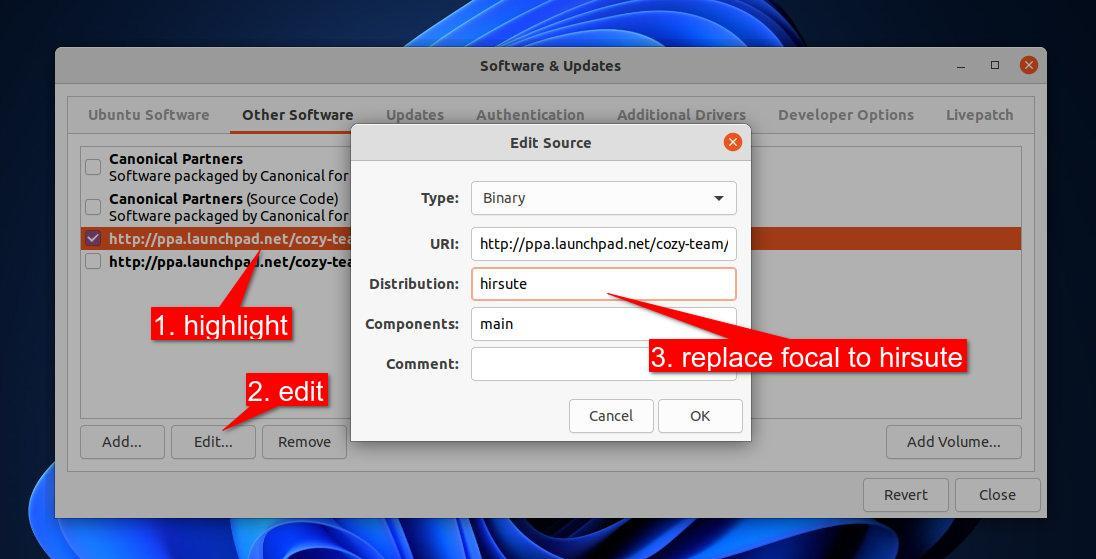
a.) Open “Software & Updates” utility, and navigate to “Other Software” tab. There choose and edit the Cozy PPA repository, and change value focal to hirsute for Distribution so it will install the package for Ubuntu 21.04 Hirsute instead.
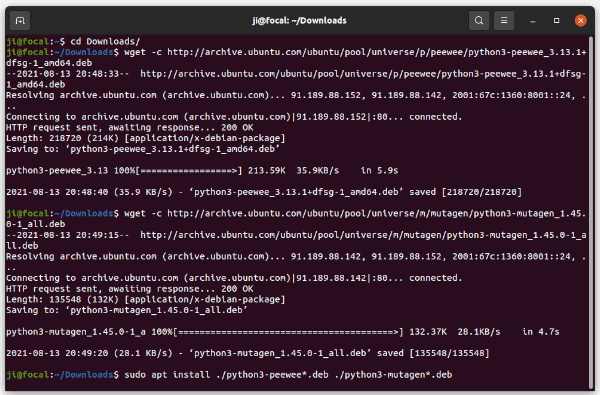
b.) Open terminal (Ctrl+Alt+T) and run commands to download & install updated python3-peewee and python3-mutagen libraries.
Navigate to the Downloads folder via cd command:
cd ~/Downloads
Download python3-peewee via wget network downloader:
NOTE: since the command download & install 64-bit packages for Desktop PC/Laptop. For mobile or other devices, you can grab them by searching the package name in packages.ubuntu.com.
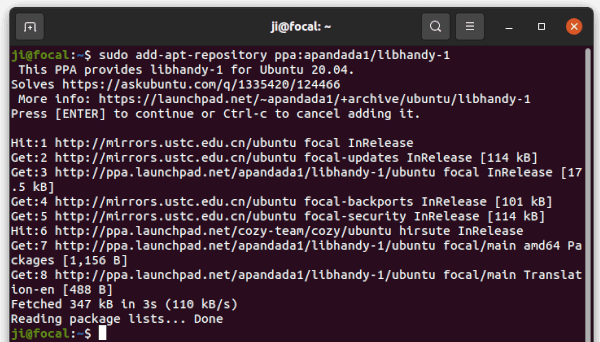
c.) Add PPA for Libhandy-1 library.
Ubuntu 20.04 also lacks libhandy-1 library, which can be installed from another PPA via the maintainer. Open terminal and run command to add the PPA:
sudo add-apt-repository ppa:apandada1/libhandy-1
You don’t have to run a individual command to install the library, because the next apt command will automatically install it as a dependency package.
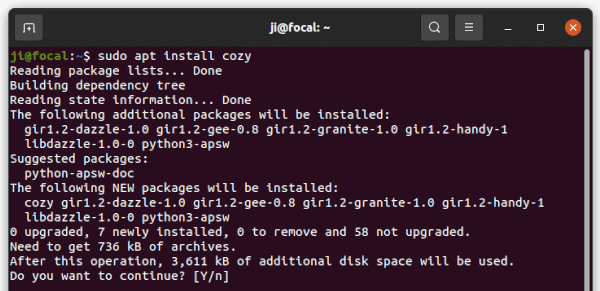
3. Install Cozy via apt command.
Finally, run command in terminal to install Cozy audiobook player:
sudo apt install cozy
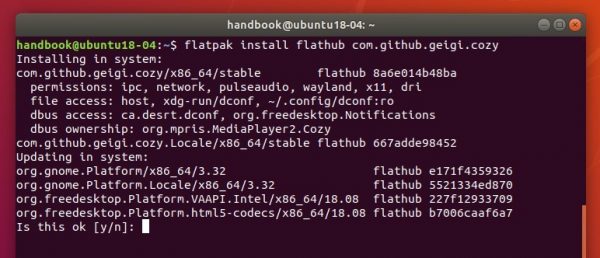
Option 2: How to Install Cozy in Ubuntu 18.04 & Higher via Flatpak:
Cozy audio book player is available as Flatpak package which runs in sandbox. It’s an universal package format that installs on most Linux distributions.
Open terminal either via Ctrl+Alt+T keyboard shortcut or by searching for ‘terminal’ from application menu. When it opens, run following commands one by one.
1. Copy and paste the command and run to install flatpak framework:
sudo apt-get install flatpak
2. Add flathub, the official repository hosts most Flatpak packages:
For Cozy installed via Ubuntu PPA, remove it via command:
sudo apt remove --autoremove cozy
NOTE: the command may also remove libhandy-1 as well as Gnome Tweaks. Don’t worry, just install Gnome Tweaks back and it will re-depends on libhandy 0.x in Ubuntu 20.04.
To remove the Ubuntu PPAs, either open “Software & Updates” and go to “Other Software” tab, or run command: