
![]()
This tutorial shows you how to check the health status, amount of read/written data, temperature, media error, and other useful info of your SSD in Ubuntu.
For Windows, there’s a popular CrystalDiskInfo utility for reading and monitoring HDD/SSD disk status. For those who’re looking for free open-source alternatives for Linux, here are 3 options:
- Option 1:
smartctlcommand line utility. - Option 2: GSmartControl – Graphical app based on smartctl + GTK3.
- Option 3: QDiskinfo – Qt app with CrystalDiskInfo style user interface.
Option 1: Use smartctl command
For advanced users or Linux server without desktop environment, then smartctl and smartd commands are good choice to control and monitor modern ATA/SATA, SCSI/SAS and NVMe disks.
The tool is available through the smartmontools package, which is available in most Linux system repositories, including Ubuntu.
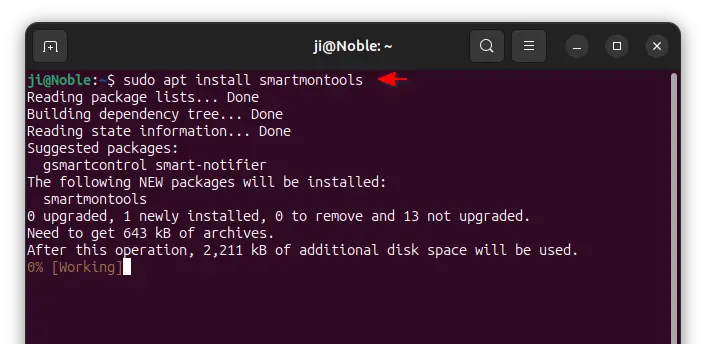
1. For Ubuntu, simply press Ctrl+Alt+T to open up a terminal window, then run command to install the package:
sudo apt install smartmontools
2. Then, list all available storage device by running command:
lsblk |grep -v ^loop
In command |grep -v ^loop tells to exclude any with keyword “loop”, which will shorten the output in Ubuntu.
In my case, I have a NVMe M.2 named nvme0n1. Depends on your computer, there may be sda, sdb, etc for SATA SSD disks.

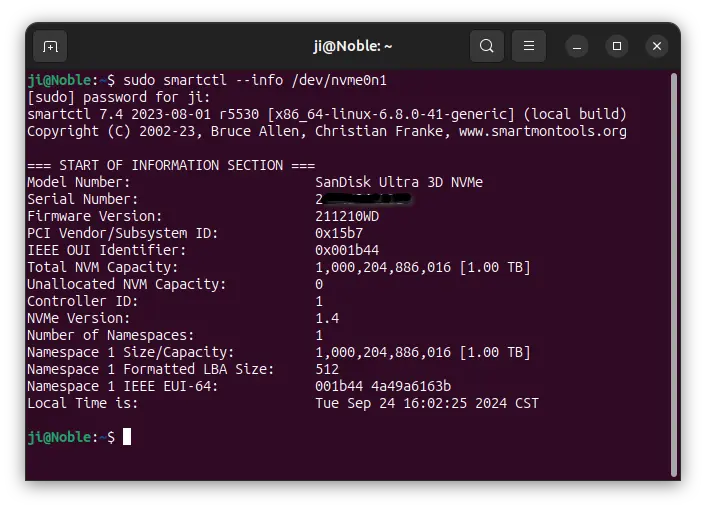
3. Finally, run smartctl command to tell your disk information:
sudo smartctl --info /dev/nvme0n1
In the command, replace nvme0n1 depends what you got in last command. In the output, you’ll see the module name, serial number, firmware version, and some other basic info about the disk.
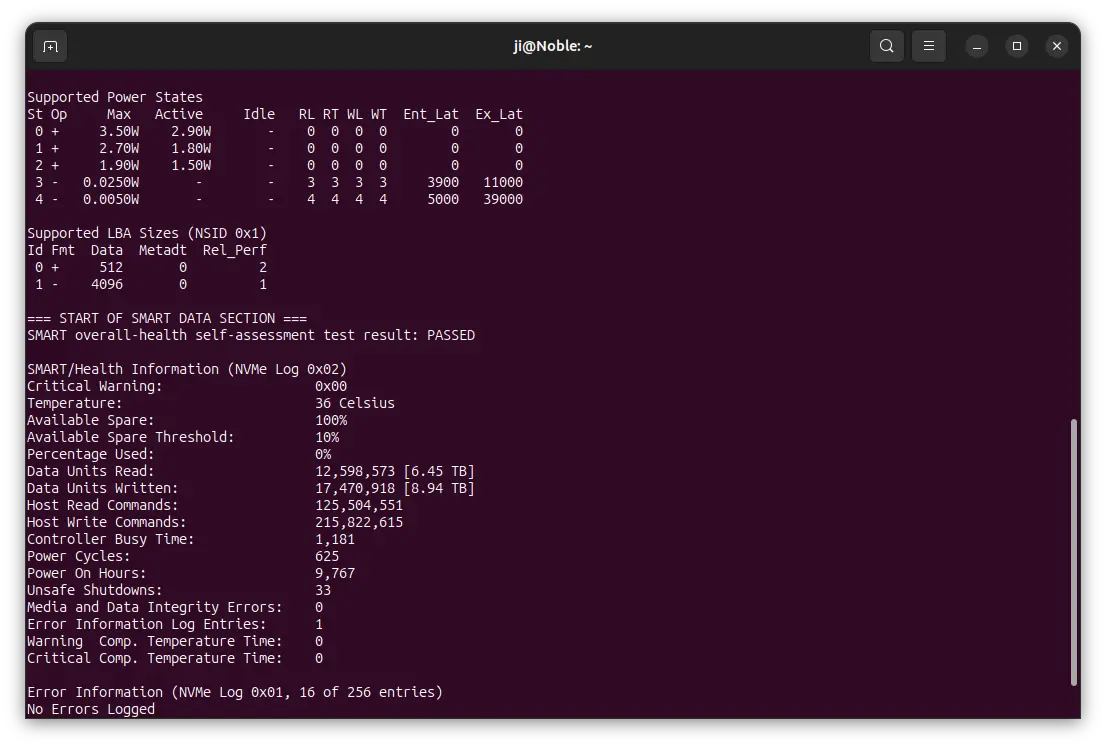
For choice, you may run the command below instead:
sudo smartctl --all /dev/nvme0n1
Which will show more info about the disk, including supported power states, temperature, available spare, how much data it have read/written, as well as power circles, unsafe shutdown, errors and warnings, etc.
For more about how to use the command, just run man smartctl.
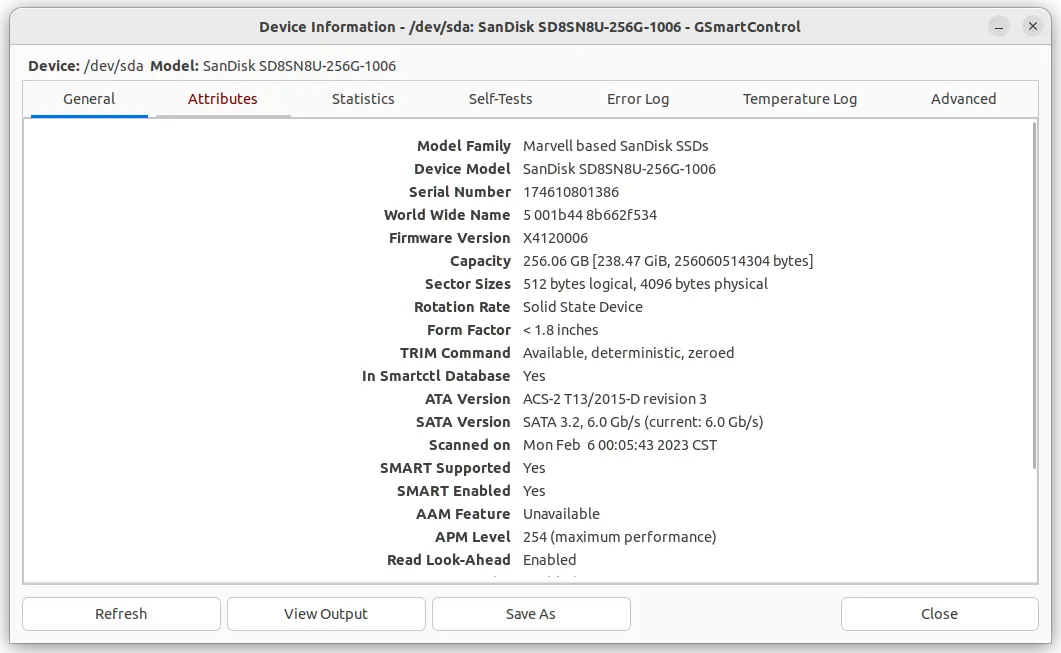
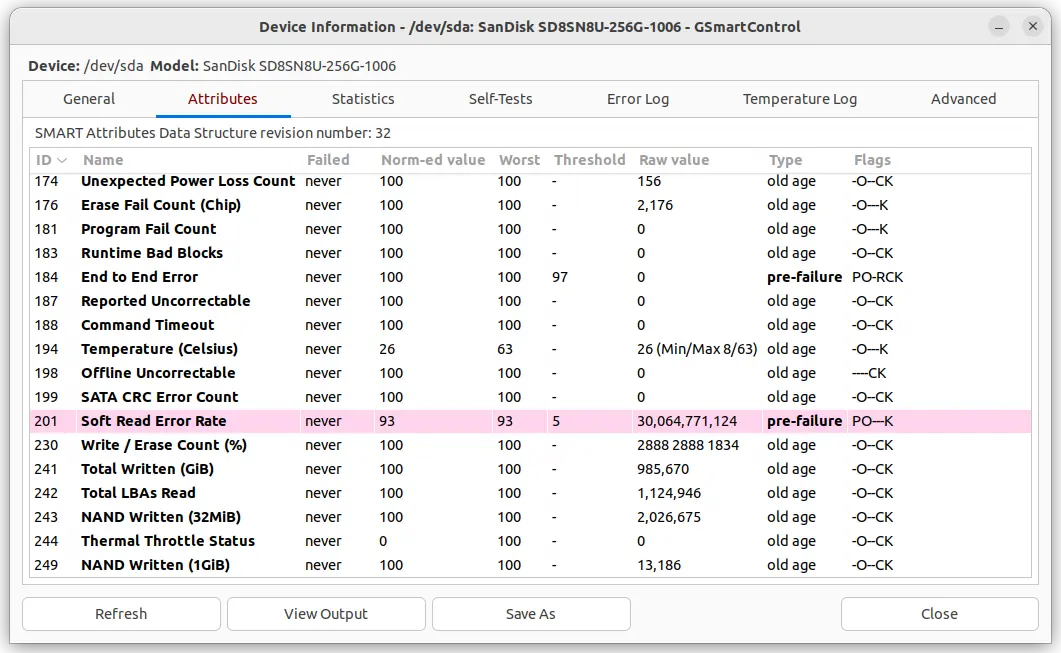
Option 2: Use GsmartControl (No NVMe support)
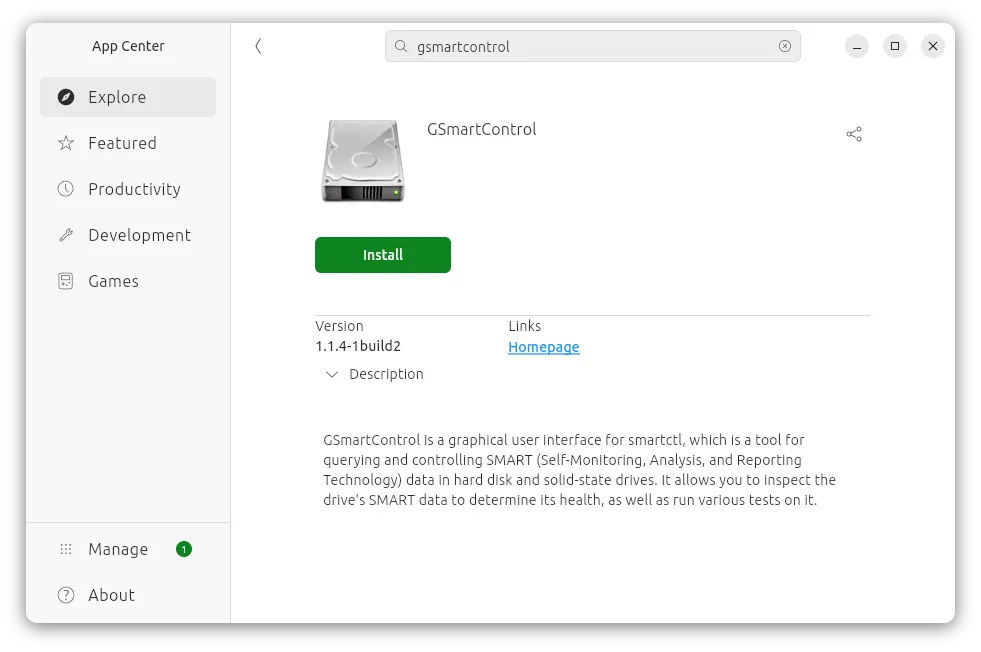
For graphical application, there’s a free open-source GsmartControl which is based on smartctl and GTK3 toolkit.
GsmartControl so far does NOT support NVMe, through the developer has been working on it.
The tool is available in Ubuntu system repository, simply search for and install it from App Center (filter by Debian package) or Ubuntu Software.
Then, launch the tool. Double click your disk in the main window, then you can see the detailed information about it in tabs.
Option 3: Use QDiskinfo
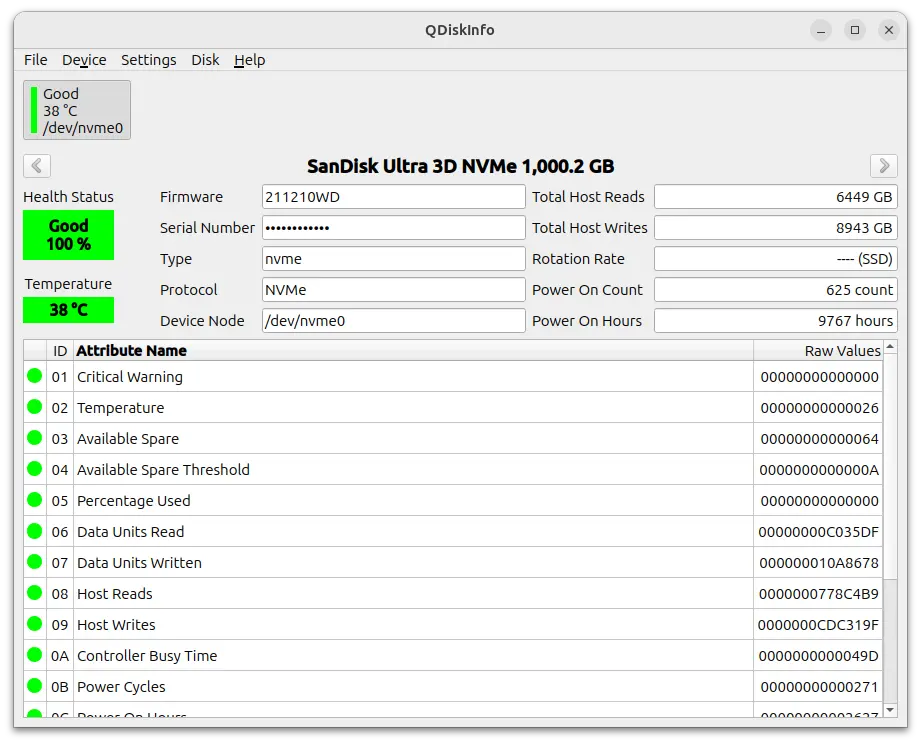
QDiskinfo is a new project! It’s also a frontend for smartctl, but uses Qt (Qt6 so far) toolkit for its user interface.
As you can see in the screenshot above, it provides a CrystalDiskInfo style user interface, allowing user to easily read the disk health status, temperature, firmware, serial number, how much data reads/writes, how many power circles, as well as available spare, critical warning, media errors, etc.
Install QDiskinfo
The tool has been made into Debian 12, Debian Testing/Unstable, Ubuntu 24.10, and some other Linux repositories. Users of them can just search for and install the package from system package manager (e.g., App Center).
For current Ubuntu 24.04 and Ubuntu 22.04, besides building from the source (see link above) or waiting for official binary package, I’ve uploaded version 0.3 into this unofficial PPA with amd64, arm64/armhf platforms support.
User can either open terminal (Ctrl+Alt+T) and run commands below one by one to add the PPA & install the package:
sudo add-apt-repository ppa:ubuntuhandbook1/qdiskinfo
sudo apt update
sudo apt install qdiskinfo
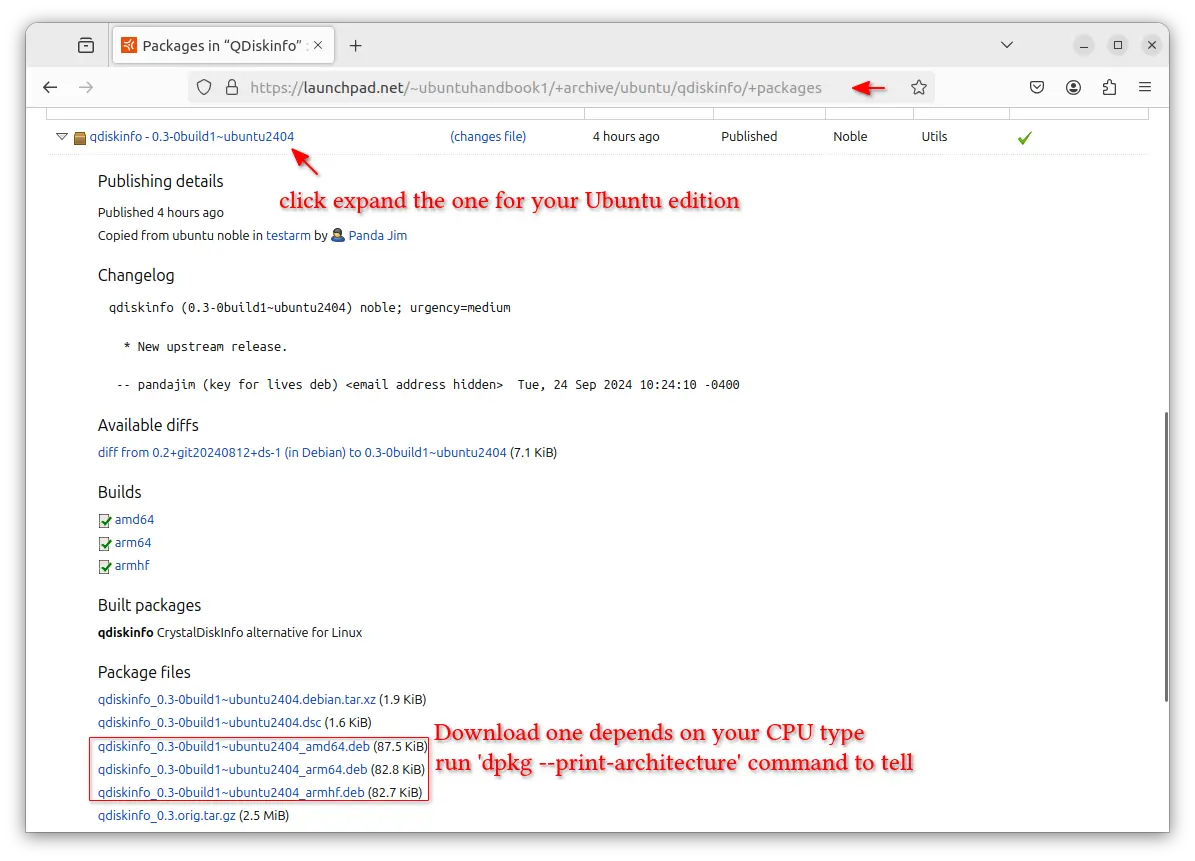
Or, just go to the PPA package page, scroll down and click expand the source from your Ubuntu version. Finally, click download corresponding .deb package. You may run dpkg --print-architecture command in terminal to print your CPU architecture type.
After downloaded the .deb package, double-click to open with “Software Install” or App Center to install. Finally, launch it from either start menu or GNOME overview depends on your desktop.
Uninstall QDiskinfo
To uninstall the software package, open terminal and run command:
sudo apt install --remove qdiskinfo
Also remove the PPA if added, by running command:
sudo add-apt-repository --remove ppa:ubuntuhandbook1/qdiskinfo


