This tutorial shows how to add (or remove) the “proposed” repository to install (or downgrade) the pre-released packages/updates in Ubuntu.
As you may know, Ubuntu has an area called proposed for updates that are being tested before publication. It’s recommended for developers and users who are interested in helping to test updates and provide feedback.
The proposed repository is disabled by default. If you want, here’s how to enable it in all current Ubuntu releases.
Why to Enable Proposed Repository
As mentioned, the repository is for testing and developing purpose. Software developers and/or users who can’t wait for new updates may want it.
In my case, I was going to try out the new GNOME 48 Beta in Ubuntu 25.04 daily build. Most desktop packages were ready to install/update, but few core libraries, e.g., Gnome Control Center, were still in being tested. Without waiting for few more days, I needed to enable that repository for testing all the new features in Gnome 48.
NOTE: The Proposed repository is NOT recommended for production machine, as it might break things!
1. Enable the “Proposed” Repository
User can enable the repository by either a graphical toggle option or editing the configuration file from command line.
Option 1: Use Software & Updates (Graphical Option)
First, launch Software & Updates utility. When it opens, navigate to Developer Options tab and enable the “Pre-release updates” (codename-proposed) option. Finally, click Close then Reload.
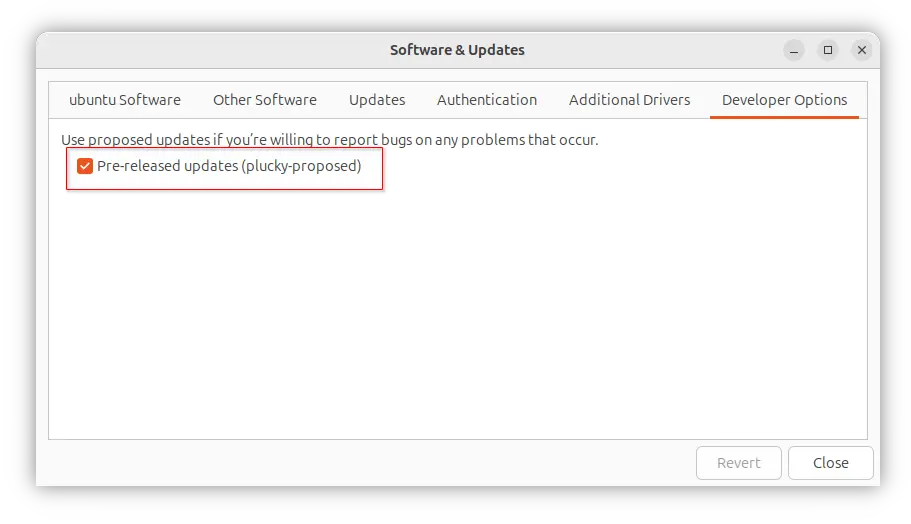
Some Ubuntu flavors may NOT have the Software & Updates utility. In the case, user may try running command sudo software-properties-gtk (for GTK based desktop) or sudo software-properties-qt (for Qt-based desktop) to launch from terminal.
Option 2: Edit Configuration File
For Server without desktop environment, or users who want to do the job from command line, open terminal (Ctrl+Alt+T) or connect to remove server, then do:
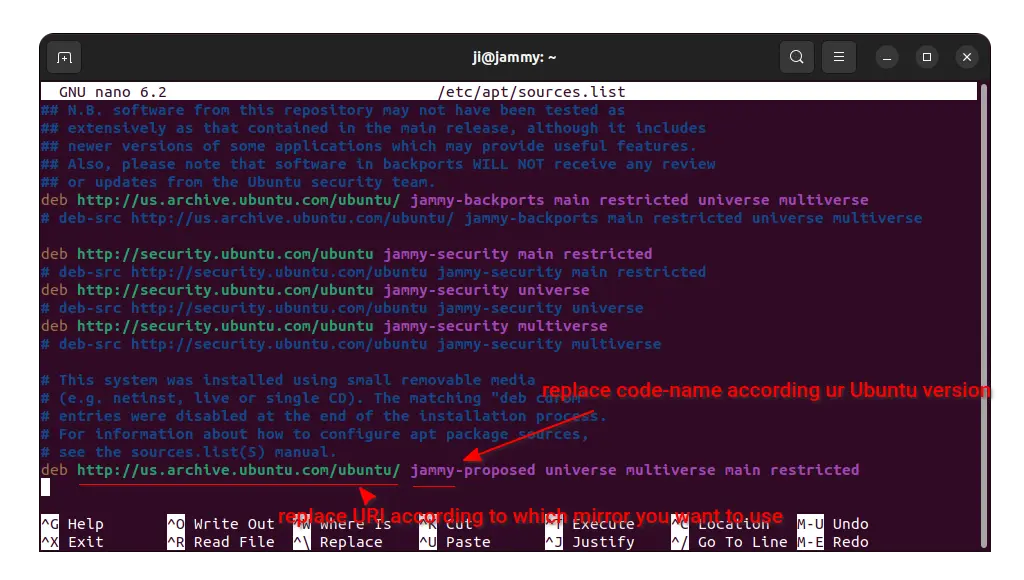
- For Ubuntu 22.04 and earlier, edit the classic
sources.listfile for the official apt repositories by running command:sudo nano /etc/apt/sources.list
When the file opens, add the line below and replace
jammywith your Ubuntu code-name (runcat /etc/os-releaseto tell). You may optionally replace the URL with your favorite download mirror.deb http://us.archive.ubuntu.com/ubuntu/ jammy-proposed universe multiverse main restricted

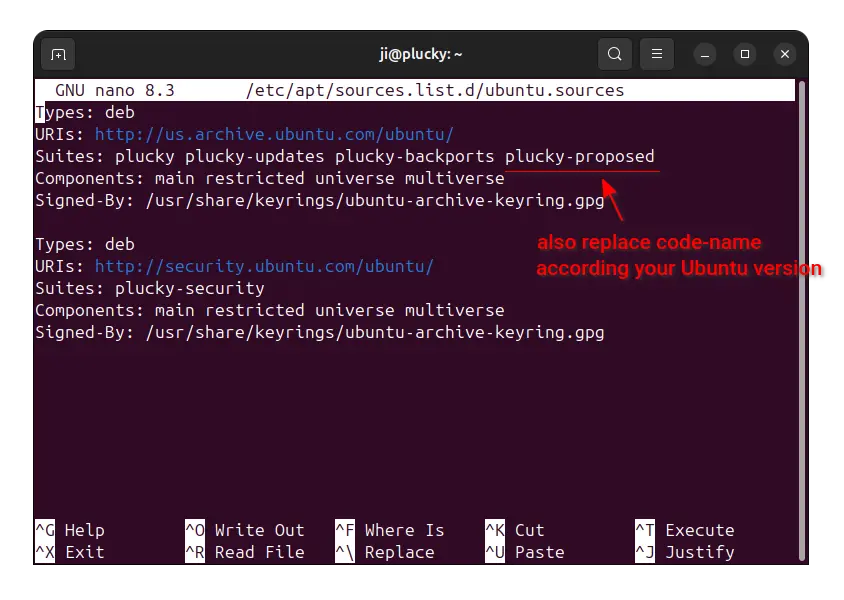
- For Ubuntu 24.04 and later, edit the new
ubuntu.sourcesconfig file instead via command:sudo nano /etc/apt/sources.list.d/ubuntu.sources
Then add CODENAME-proposed (replace CODENAME with Ubuntu code-name, e.g.,
noblefor 24.04,oracularfor 24.10) in the end of 3rd line after ‘Suites’.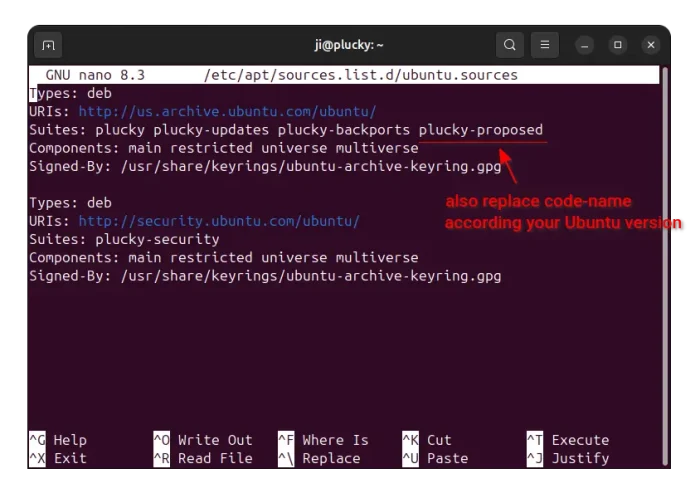
After saving the file (press Ctrl+S to save, Ctrl+X to exit), apply by running the command below to refresh cache:
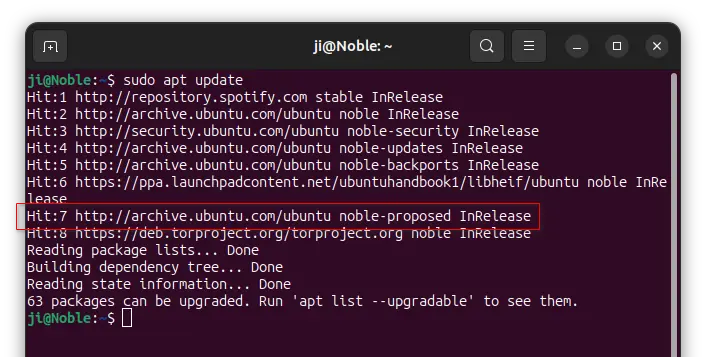
sudo apt update
In the terminal output, you’ll see similar lines look like Get:x http://archive.ubuntu.com/ubuntu noble-proposed InRelease.
2. Set the “Proposed” Repository Priority
The priority of the “Proposed” repository is by default set to 100. Software Updater and apt upgrade command won’t install any updates from it.
For certain app package, fwupd for example, either specify the package version in apt command (use apt policy package-name to tell):
sudo apt install fwupd=x.x.x-xubuntux
Or, run the command below instead (replace noble accordingly) to specify which source to install the package from.
sudo apt install fwupd/noble-proposed

If you want to install all updates from the proposed repository, then you need to set its priority to higher than 100 (usually 500 to be equal to most other repositories).
To do so, run the command below to create a custom configuration file:
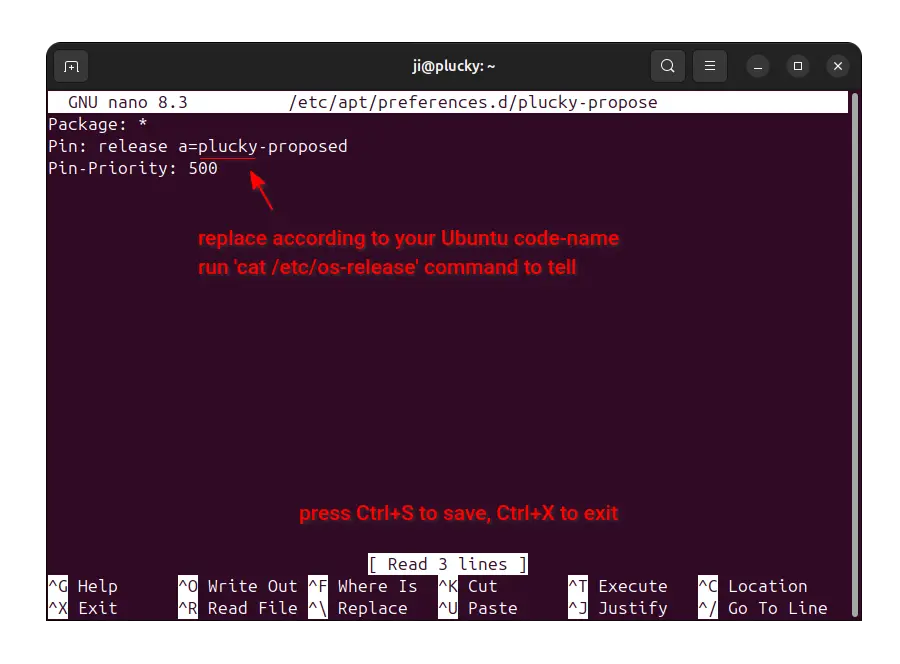
sudo nano /etc/apt/preferences.d/proposed-updates
Here you may replace the file-name proposed-updates with whatever as you prefer. When file opens, add 3 lines below (replace plucky according your Ubuntu version).
Package: *
Pin: release a=plucky-proposed
Pin-Priority: 500
It tells to set priority to 500 for all the packages from plucky-proposed repository.
After saving the change, you also need to run the command to refresh cache (and run apt policy to check priority):
sudo apt update
Finally, run the command below should install all available updates from it:
sudo apt full-upgrade
Disable “Proposed” Repository and Downgrade All Installed Packages
To disable the “Proposed” repository, simply UNDO the changes you made in Step 1, and delete the configuration file for package priority.
To downgrade the packages installed from that repository, either run apt install command along with package name and version number to force install the old versions for certain packages.
Or, do the steps below one by one to downgrade all the packages to versions from the default repositories:
NOTE: The steps below will ALSO downgrade PPA packages to the ones from default system repositories. You may either install them back later, or set PPA priority to higher than 1001 (e.g., 1002).
- First, open terminal (Ctrl+Alt+T) and run command to create an apt preferences configuration file:
sudo nano /etc/apt/preferences.d/plucky-updates
Also, you may replace the file-name
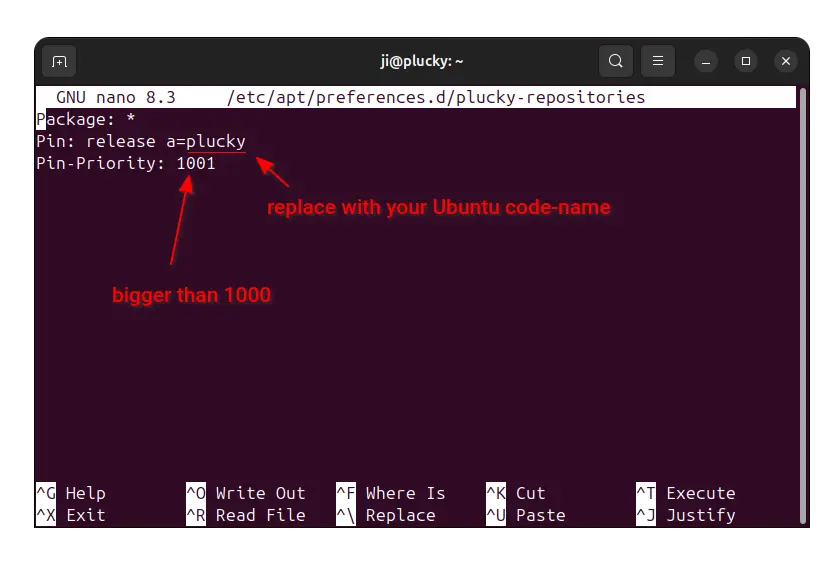
plucky-updatesto whatever that you want. - When file opens, add 3 lines below (replace plucky with your Ubuntu version code-name):
Package: *
Pin: release a=plucky
Pin-Priority: 1001
This will set the priority to 1001 (so it’s being able to even downgrade packages) for all the packages from the default Ubuntu (25.04 in the case) repositories.

- After saving the file (press Ctrl+S, then Ctrl+X), refresh package cache via command:
sudo apt update
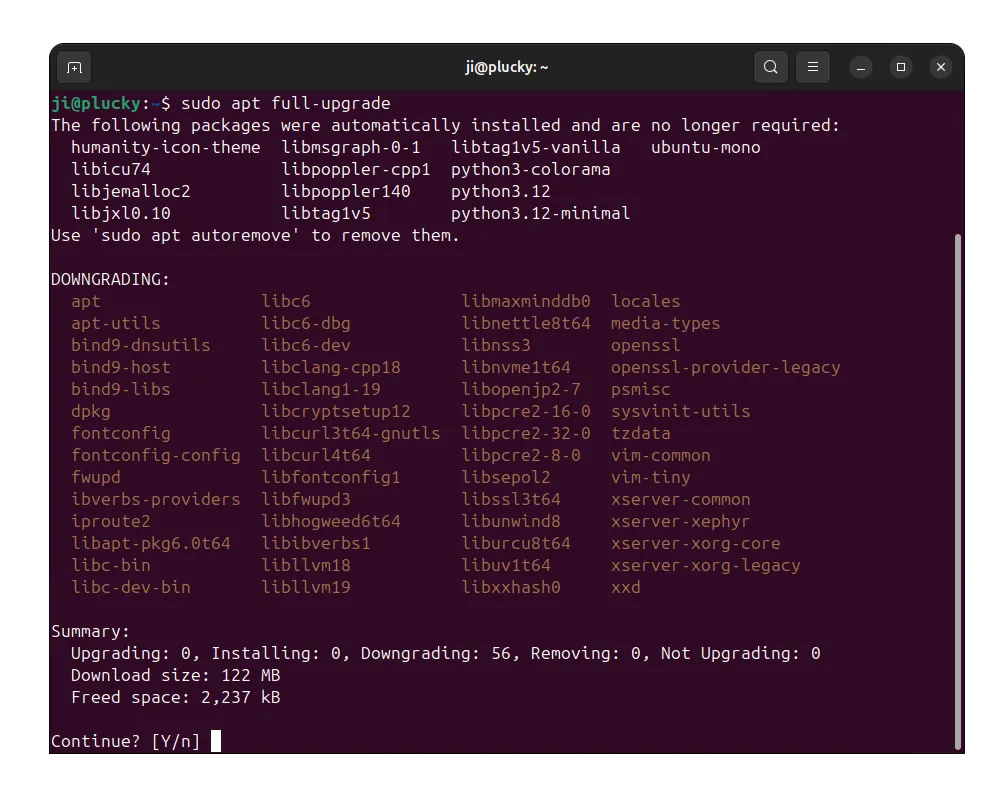
Finally, run
apt upgradecommand to install all updates (even downgrade packages) from default repositories.sudo apt full-upgrade

Afterwards, remove the configuration file you just created, so the priority will go back 500.
sudo rm /etc/apt/preferences.d/plucky-updates
NOTE: you need to replace the file-name plucky-updates with the one that your created.
Finally run sudo apt update to apply changes.