
![]()
Auto-CPUFreq, automatic CPU speed & power optimizer, released version 2.6.0 with some new features and many bug-fixes.
For those who don’t know about auto-cpufreq, it is a free open-source Linux app, which can monitor and automatically manage CPU speed according to battery state, CPU usage, temperature, and system load.
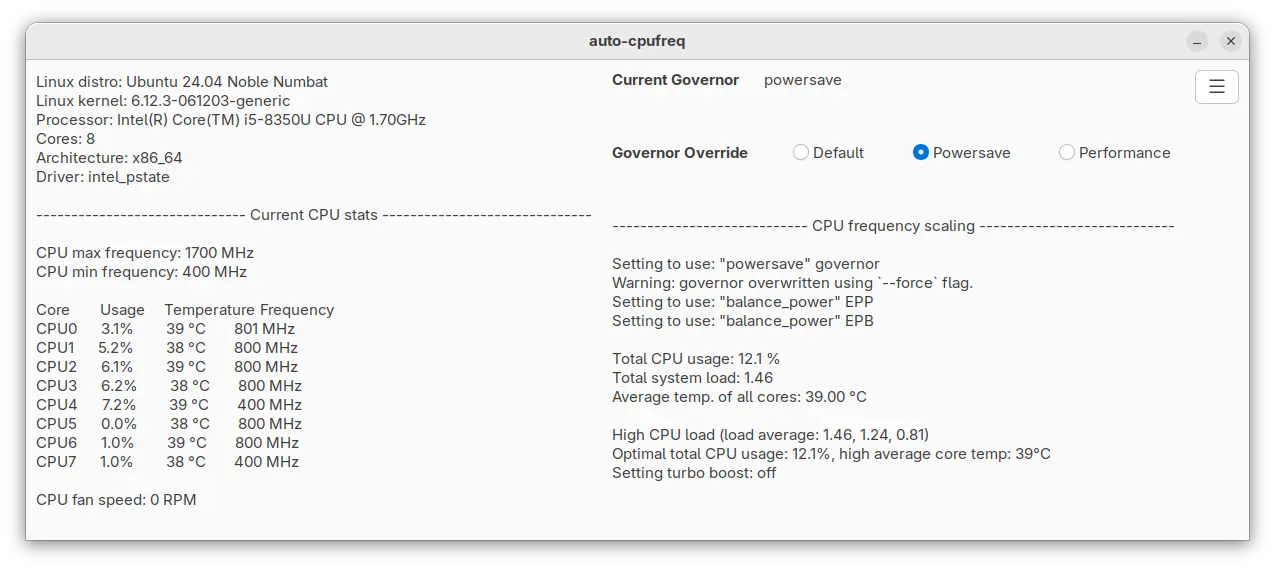
The app has a GTK user interface, as the screenshot above shows you, to monitor basic system information, CPU frequency and usage (in both total and per core basis), CPU temperature, fan speed, system load, and battery state.
By actively monitoring the information mentioned above, it automatically adjust CPU speed and turbo boost state to improve battery life for laptop users.
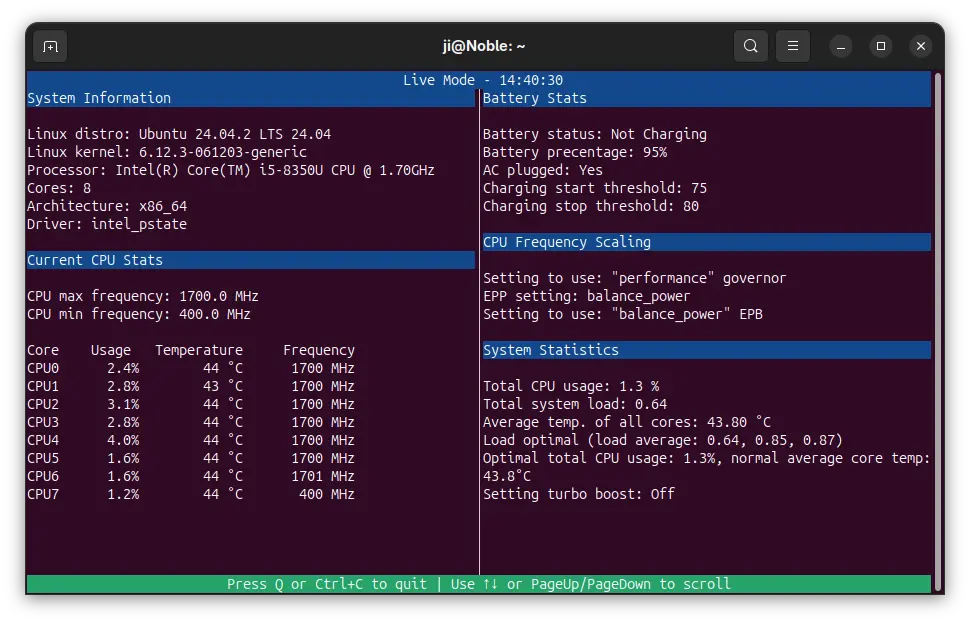
Auto-CPUFreq also includes a command line interface to do the job in terminal. By releasing v2.6.0, it enhanced the CLI interface with TUI (Terminal User Interface or Text User Interface) powered by urwid library.
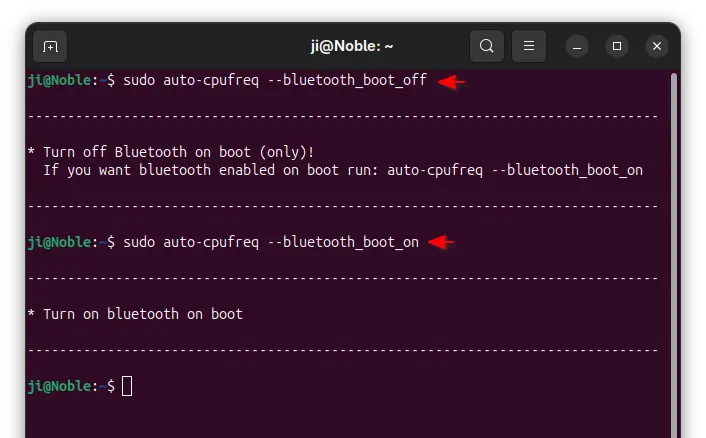
The new release also added new command line options, allowing users to automatically turn on / off bluetooth separately. The commands are:
sudo auto-cpufreq --bluetooth_boot_off
sudo auto-cpufreq --bluetooth_boot_on
Other changes in the new release include:
- update the installer for OpenSUSE support,
- fix GUI does not launch in Linux Mint,
- fix eval on NixOS,
- Update battery threshold limit on Ideapad based on manufacturer settings.
How to Install Auto-CPUFreq
NOTE 1: Auto-CPUFreq conflicts with TLP. If you have TLP power saving tool installed, remove it first via command:
sudo apt remove --autoremove tlp
NOTE 2: For Ubuntu with default GNOME Desktop, auto-CPUFreq will automatically disable the built-in power mode settings (power-profiles-daemon).
There are 2 ways to install the most recent Auto-CPUFreq package in Ubuntu.
Option 1: Snap package
The easiest way to install the app in Ubuntu is using the Snap package, which is available in App Center (or Ubuntu Software for 22.04 and earlier).

The package however lacks GTK graphical interface support, as it runs in sandbox environment. And, user needs to manually disable GNOME power profiles daemon via command:
sudo systemctl mask power-profiles-daemon.service
Option 2: use the built-in installer
For a fully functional app, it’s recommended to use the built-in auto-cpufreq-installer installer script.
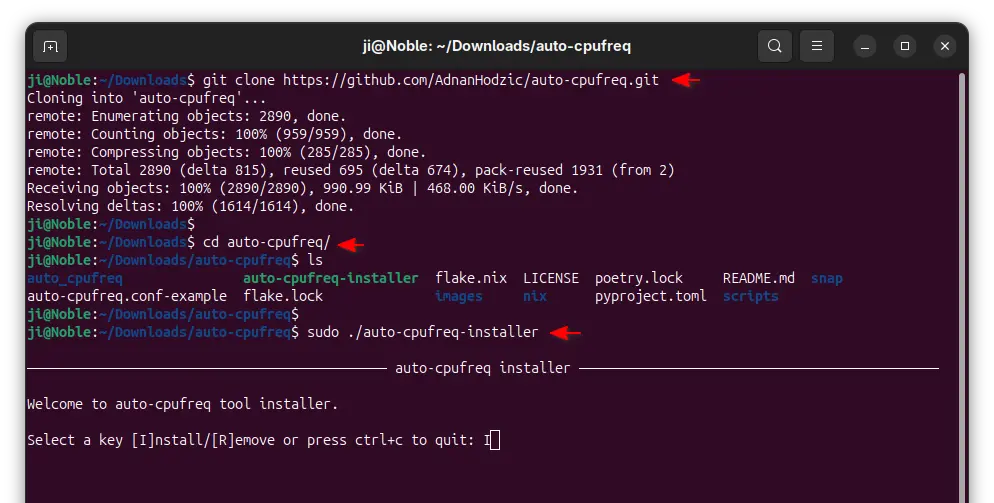
First, press Ctrl+Alt+T to open up a terminal window. When it opens, run command to get the source:
git clone https://github.com/AdnanHodzic/auto-cpufreq.git
Install git via sudo apt install git if you don’t have it.
Then, navigate to source folder and run the installer script:
cd auto-cpufreq && sudo ./auto-cpufreq-installer
For other Linux and more about the app, see it in Github page.
Uninstall Auto-CPUFreq
For the auto-cpufreq snap package, just use AppCenter (or Ubuntu Software) to uninstall, or run the command below in terminal:
snap remove --purge auto-cpufreq
If it was installed via official script, then use the command below to uninstall:
sudo auto-cpufreq-remove
And, run the commands below to restore GNOME’s built-in power mode settings:
sudo systemctl unmask power-profiles-daemon.service
sudo systemctl enable --now power-profiles-daemon.service


