![]()
Got ED2K download link, but don’t know how to open it? Try aMule, eMule based app that works in most Linux Distributions.
ED2K (aka eDonkey2000) is a peer to peer file sharing network. The original project has discontinued, but the popular open-source fork eMule is still alive. As eMule is Windows only app, aMule forked it with multi-platform (Linux, FreeBSD, OpenBSD, Windows, MacOS X and X-Box) support.
Option 1: Install aMule for general use
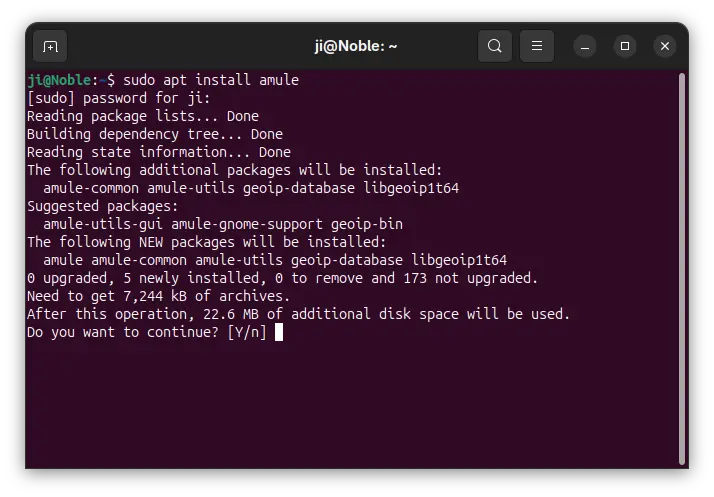
If you just want to download a file via ed2k link, then open terminal (Ctrl+Alt+T) and run command to install amule:
sudo apt install amule
Run sudo apt update to refresh cache if package not found. And for choice, you may search and install aMule from either App Center or Ubuntu Software depends on your Ubuntu version.
NOTE: aMule is NOT available in Ubuntu 20.04 repository, try to download the package for 18.04, or see this tutorial instead.
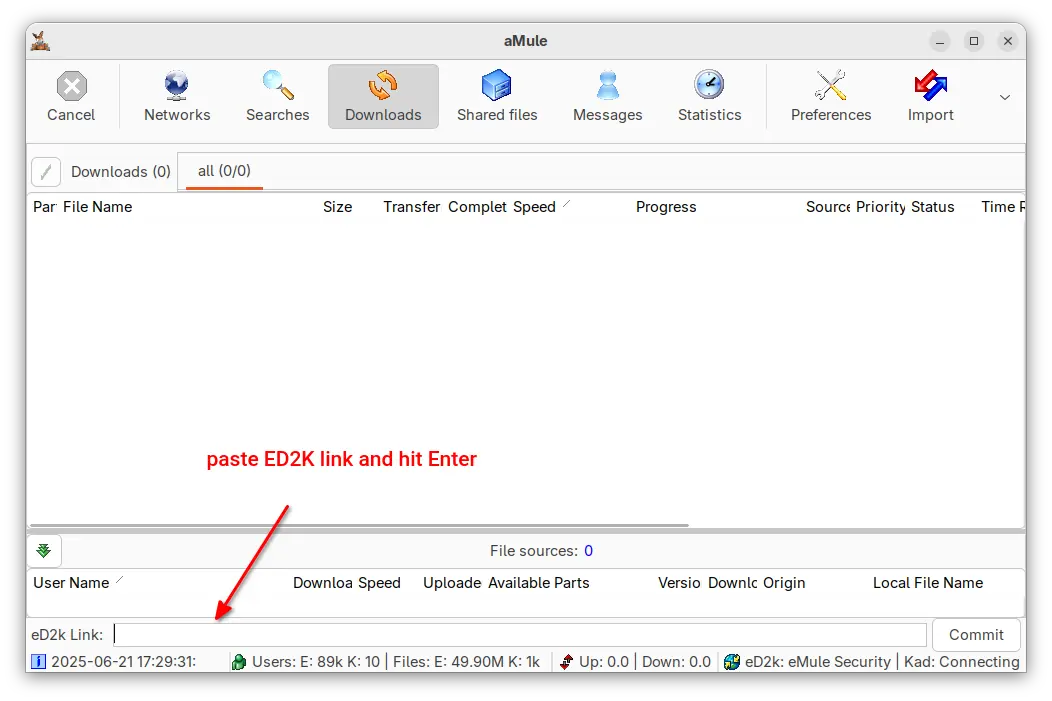
Then, launch the tool, click on “Yes” button in pop-up dialog to download server list. Finally, paste the ED2K link in the bottom input box and hit Commit to start downloading.
Option 2: Install aMule Daemon for remote management
If you want to run aMule silently in the background, e.g., for server use, then manage downloads remotely via web browser or graphical client, then run commands below one by one.
Install & Setup the Daemon
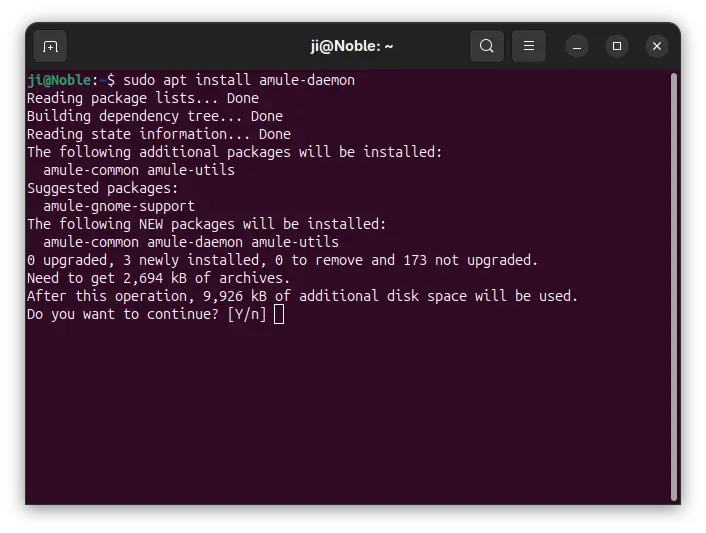
1. First, run the command below to install daemon package:
sudo apt install amule-daemon
2. Next, run the daemon for the first time by running command:
amuled
This command will generate .aMule folder in user home directory (hidden by default, press Ctrl+H to view if you’re on Ubuntu Desktop), which contains many configuration files as well as Incoming and Temp folders for downloads.
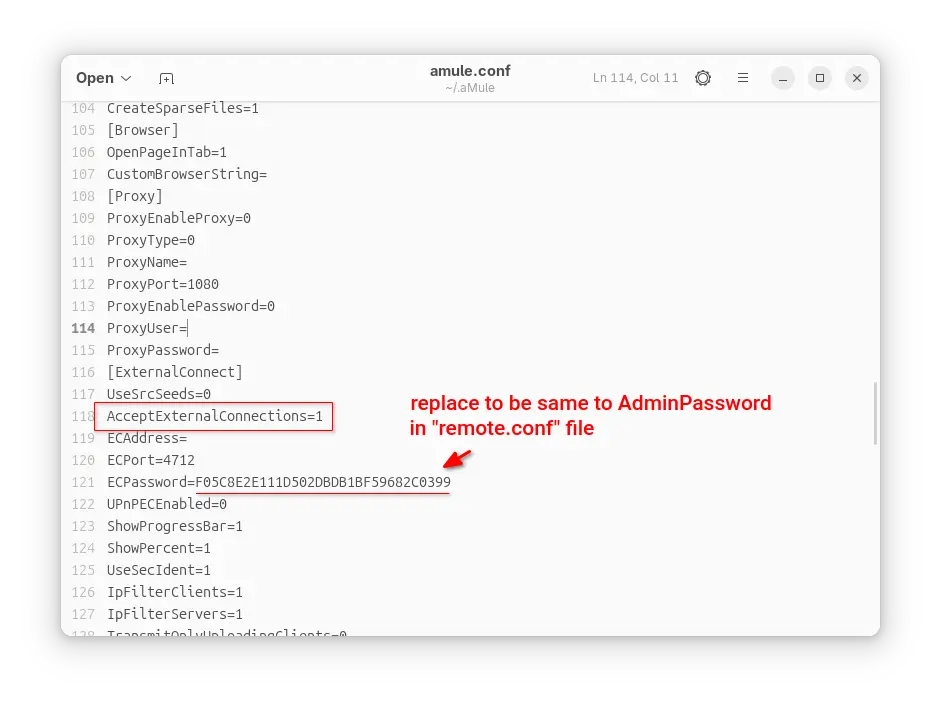
To enable remote access, first click edit amule.conf file under .aMule folder and set AcceptExternalConnection=1.
For server, run the command below to edit:
sudo nano ~/.aMule/amule.conf
After editing, use Ctrl+S to save change, and Ctrl+X to exit.
3. Then, run the command below to generate remote.conf configuration file:
amuleweb --write-config --host=localhost --password=123456 --admin-pass=654321
Here you need to replace 123456 and 654321 with your passwords.
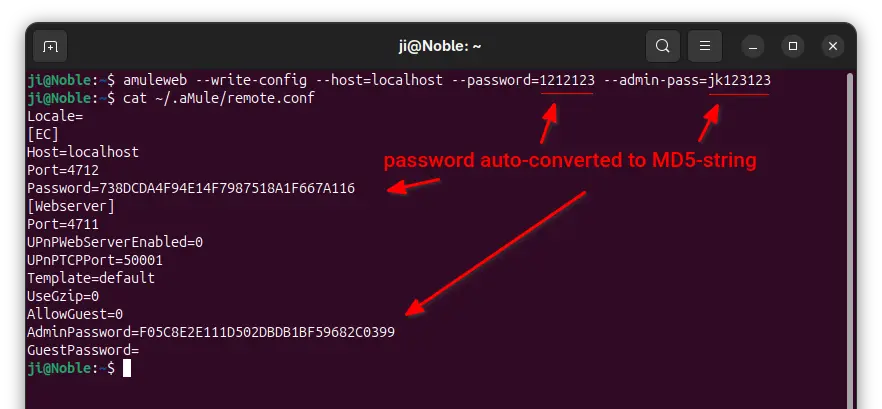
After that, you may run cat ~/.aMule/remote.conf to print the content of the new generated file.
And, you need to re-edit ~/.aMule/amule.conf and set “ECPassword” value (see the text editor screenshot above) to be same to AdminPassword.
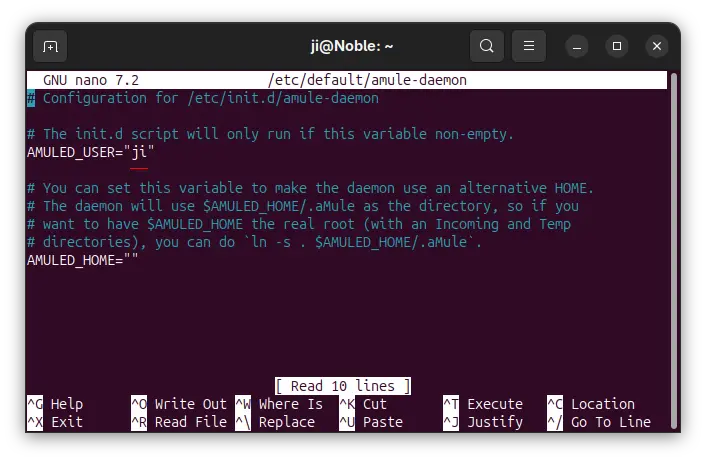
4. Finally, run command to edit /etc/default/amule-daemon file and set a user for AMULED_USER:
sudo nano /etc/default/amule-daemon
Here I set it to my current user ji. You need to replace it with yours (run whoami or echo $USER to tell), or create one by running sudo adduser NEW_USER and use it instead.
When done, press Ctrl+S to save and Ctrl+X to exit.
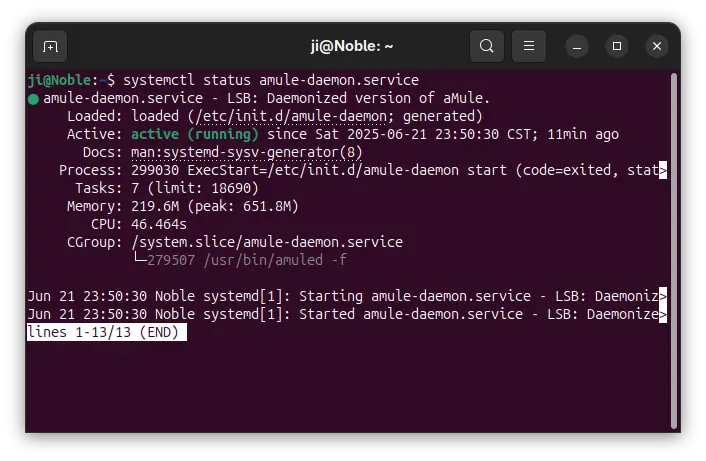
5. Finally, restart the aMule daemon service by running command:
sudo systemctl restart amule-daemon.service
For Debian, you may need to enable it first by systemctl enable --now amule-daemon. And, to check its status, use command:
systemctl status amule-daemon.service
NOTE: If you have firewall enabled (see how to configure firewall via UFW), then you need to open:
- tcp/4661, tcp/4662, udp/4665, udp/4672 allow for outgoing.
- tcp/4662, udp/4672, tcp/4711, tcp/4712 allow for incoming.
Access via GUI or Terminal
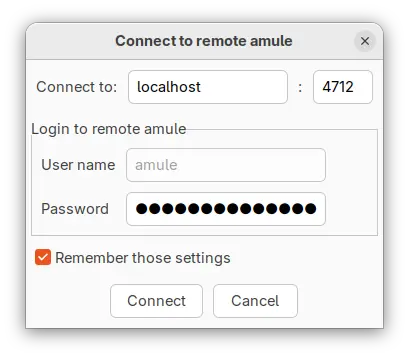
To access graphically, run the command below to install the graphical utilities:
sudo apt install amule-utils-gui
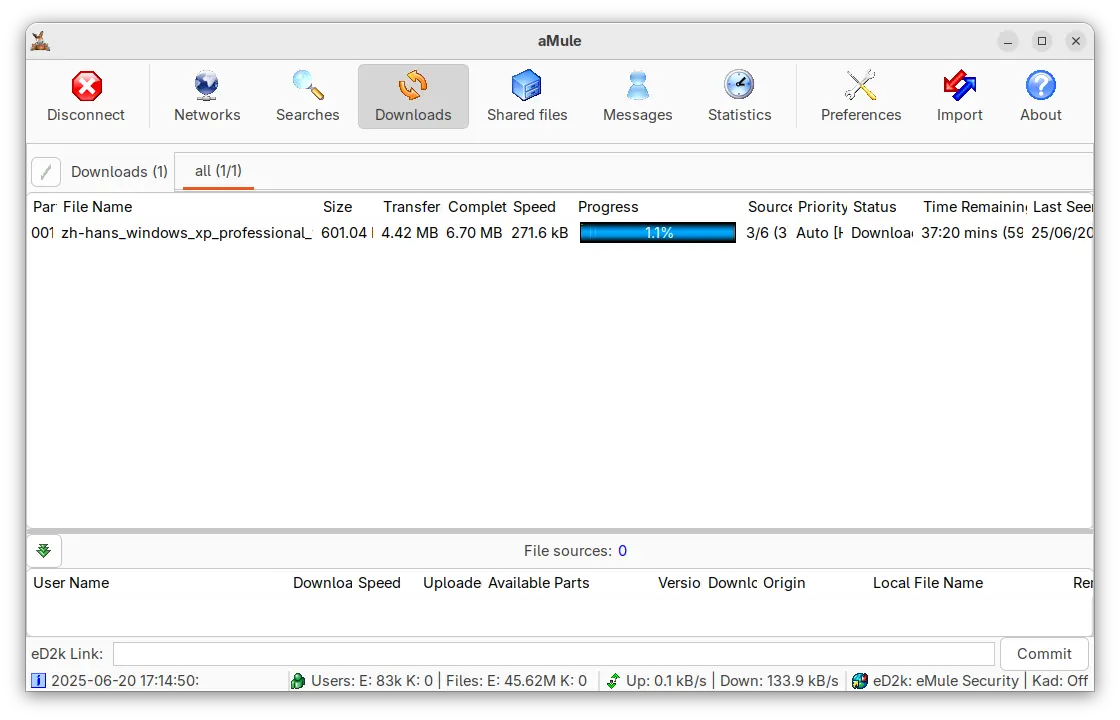
Then, you can search and launch aMuleGUI, and type the server IP (leave default if connect from local machine) and the admin password to connect.
To access from command line, first install the CLI tool:
sudo apt install amule-utils
Then, use the command below to connect:
amulecmd --host=127.0.0.1 --port=4712 --password=jk123123
Here replace 127.0.0.1 if connect from remote machine, and replace jk123123 to your password.
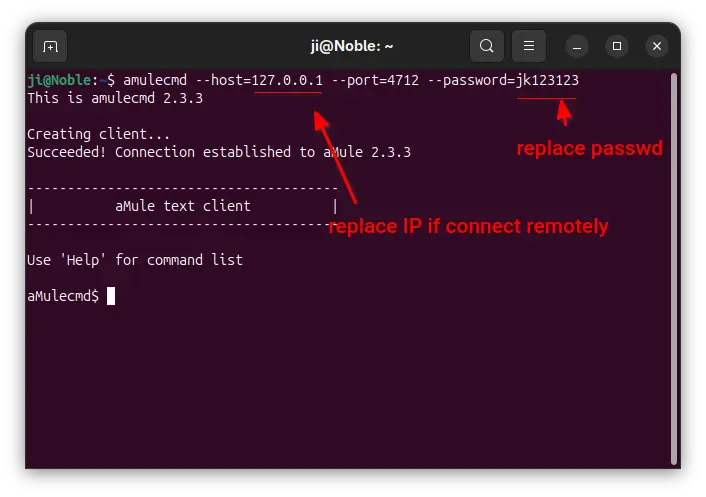
Once connected, you may add a download via add ed2k-link, or use show dl command to list downloads. For more, run help.
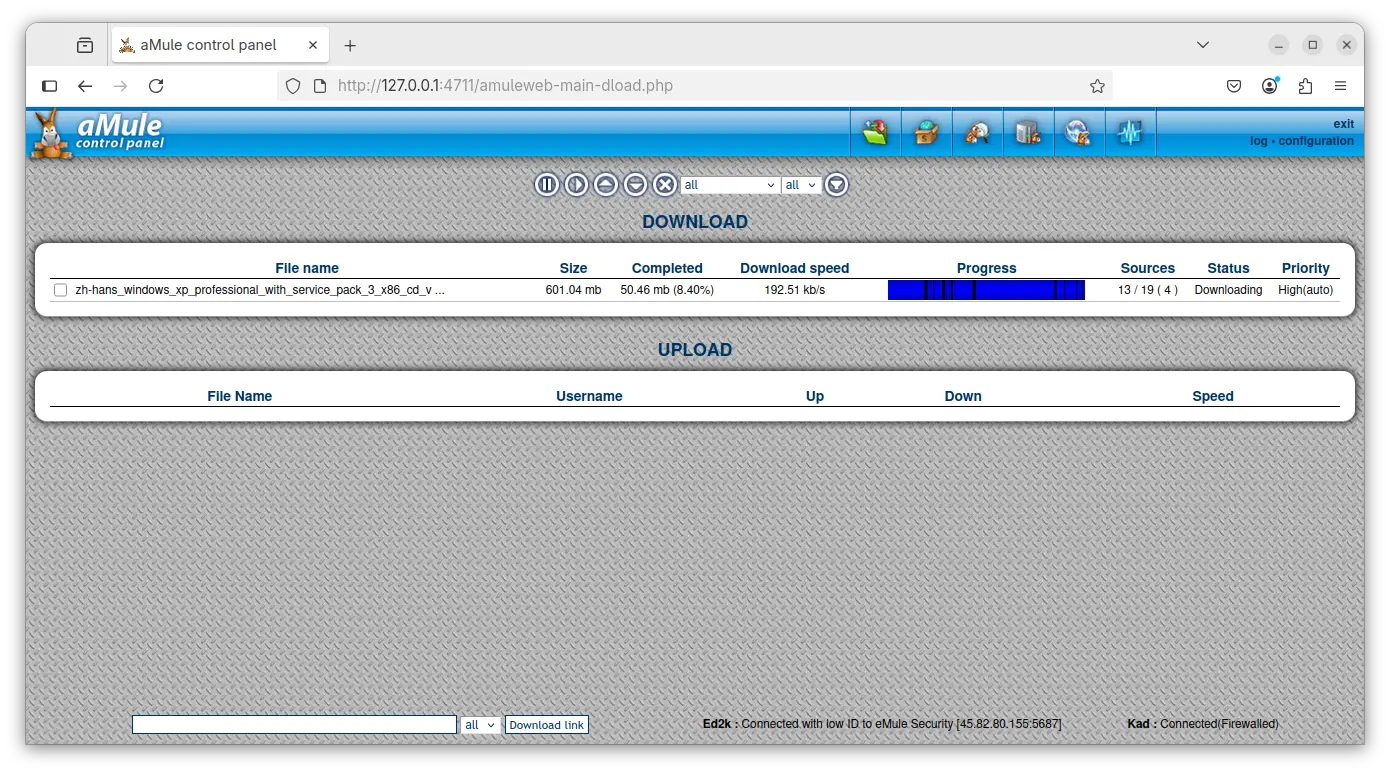
To access via web browser, the daemon sadly does not work in my case. You need to firstly run amuleweb command in the server side (or nohup amuleweb & to keep running after SSH disconnected), before being able to visit http://server-ip:4711 to access WebUI remotely.