
![]()
This is a step by step guide shows how to install and configure Music Player Daemon (MPD) in Ubuntu 24.04 and higher with default PipeWire sound server.
MPD is a free open-source audio player that can handle large music collection (tens of thousands of songs) while being very fast and using few resources.
It features server-client architecture. Just install & configure the server package in computer or laptop that contains the music database, then use a client app in same machine, smart phone, web-browser, or even command line tool to manage playlists and control the audio playback.
MPD supports streaming audio through http, meaning you can listen to music on multiple devices (e.g., smart phone, remote speaker) at the same time synchronously.
Step 1: Install MPD server package
MPD is available in Ubuntu and most Linux system repositories.
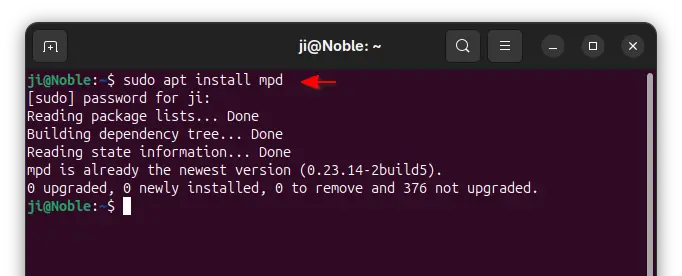
To install mpd daemon package in Debian and Ubuntu based systems, simply open terminal (Ctrl+Alt+T) and run command:
sudo apt install mpd
Just in case the installation failed, try launching “Software & Updates” utility, and make sure ‘main’ and ‘universe’ are enabled under Downloadable from the Internet section, and run sudo apt update to refresh package cache.
As MPD package in Ubuntu is always a bit old, you may download the latest version from the software website, and build it by yourself.
Step 2: Configure MPD server
After installed the daemon packages, you may edit either file below to configure the server:
~/.config/mpd/mpd.conf– per user configuration./etc/mpd.conf– for system wide configuration.
As Ubuntu now defaults to PipeWire sound server, it’s recommended to use the per user configuration and start the daemon as user service. Though, both work.
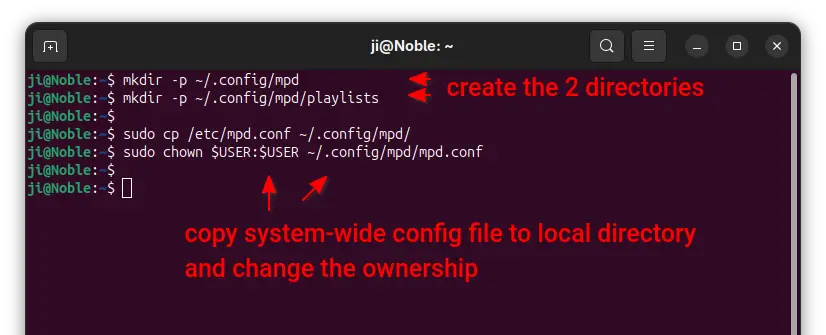
1. Create local mpd directories. The .config/mpd directory does NOT exist out-of-the-box. So, first run command in terminal (Ctrl+Alt+T) to create that directory:
mkdir -p ~/.config/mpd
Also create playlists sub-folder in that directory for storing playlists:
mkdir -p ~/.config/mpd/playlists
2. Edit per-user config file (recommend). Next, run the 2 commands below one by one to copy the conf file from /etc, and change the ownership to you.
sudo cp /etc/mpd.conf ~/.config/mpd/
sudo chown $USER:$USER ~/.config/mpd/mpd.conf
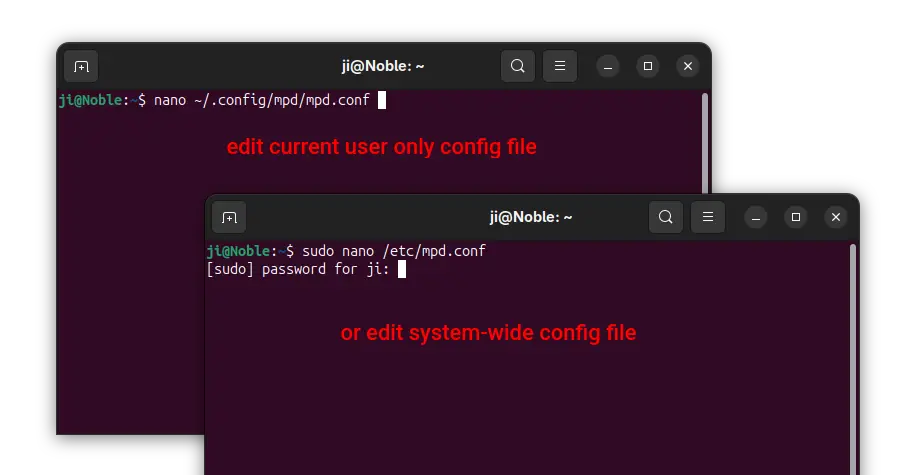
Finally, run the command below to edit it via nano command line text editor:
nano ~/.config/mpd/mpd.conf
Here I use nano that works in most Linux desktops. If you’re on Ubuntu with default GNOME, use gnome-text-editor instead.
Or, edit system-wide config by running this command instead:
sudo nano /etc/mpd.conf
When file opens, add or enable (remove # at beginning), and edit the following lines:
- Configure “music_directory” to tell where to find the songs, “playlist_directory” for saving playlists, “db_file” for load/saving database.
music_directory         "/home/ji/Music/"
playlist_directory              "/home/ji/.config/mpd/playlists"
db_file                 "/home/ji/.config/mpd/tag_cache"
If you want to use same locations that I use, replace ji with your username (run
whoamito tell).

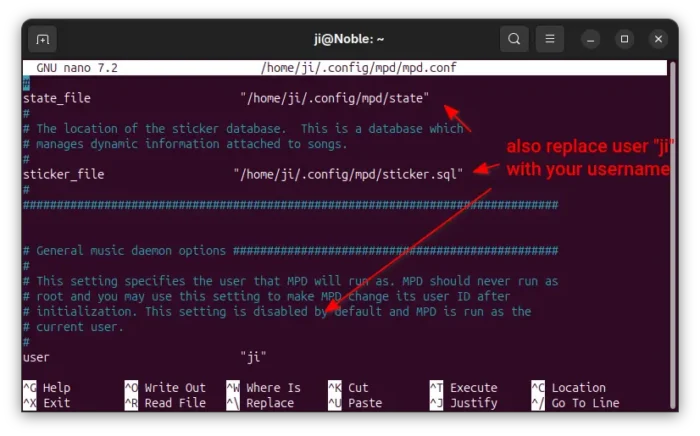
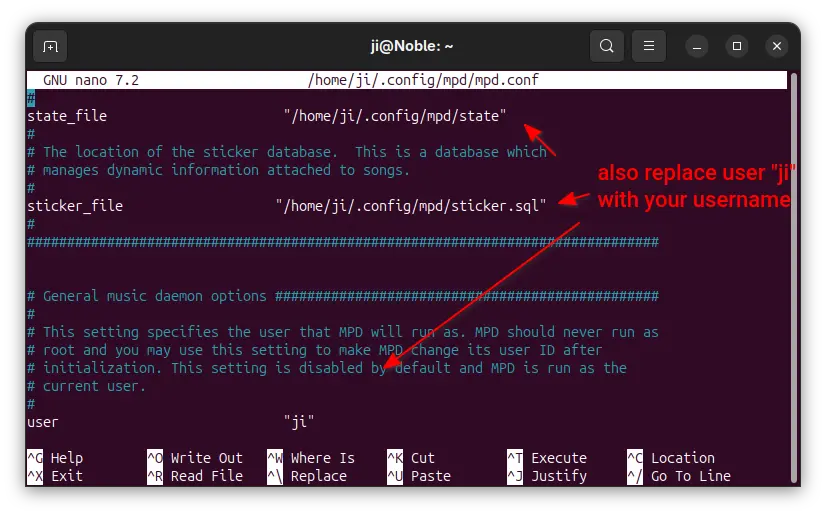
- Next, edit the location of server state and sticker database, and who to run the MPD daemon:
state_file                      "/home/ji/.config/mpd/state"
sticker_file                   "/home/ji/.config/mpd/sticker.sql"
user                            "ji"
Also, replace ji with your username.
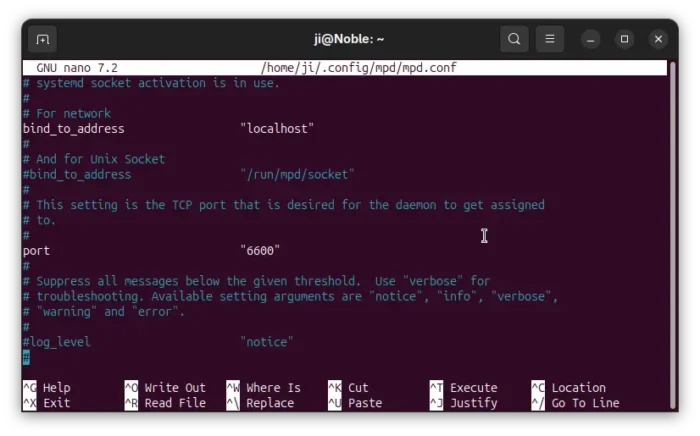
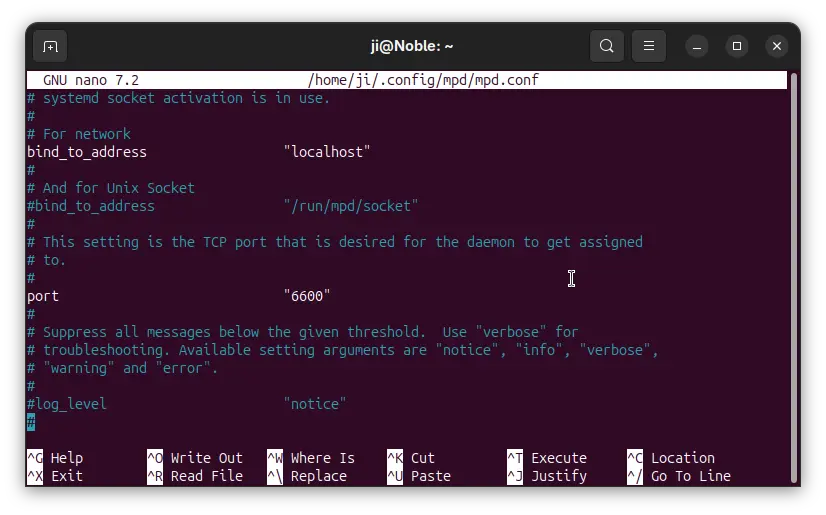
- Then, set address and listening port (default values are OK).
bind_to_address                 "localhost"
port                            "6600"
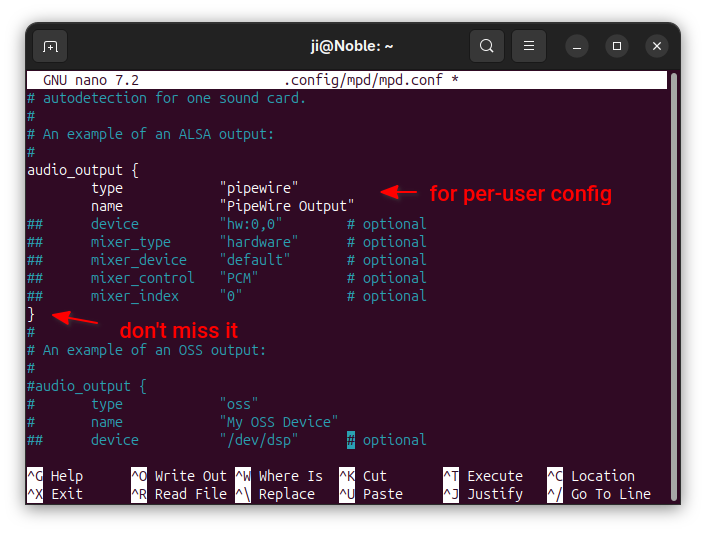
- For per-user configuration (.config/mpd/mpd.conf), set audio output to “pipewire”:
audio_output {
        type            "pipewire"
        name            "PipeWire Output"
}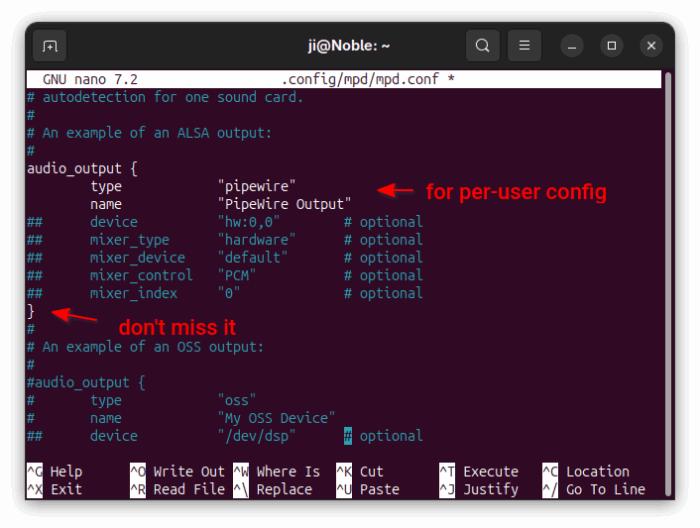
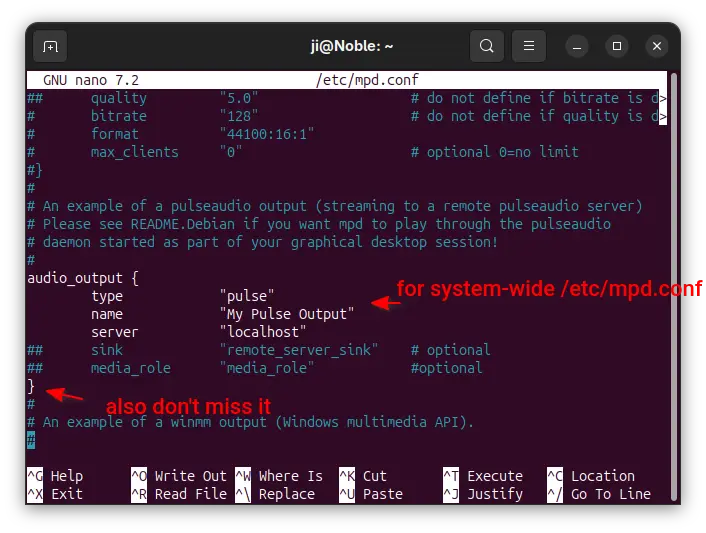
- For system-wide config (/etc/mpd.conf), enable “pulse” instead as pipewire won’t work:
audio_output {
        type            "pulse"
        name            "My Pulse Output"
        server          "localhost"
}
- To stream sound to multiple devices, enable & edit “httpd” output type:
audio_output {
        type            "httpd"
        name            "My HTTP Stream"
#       encoder         "lame"          # optional, vorbis or lame
        port            "8802"
        bind_to_address "192.168.0.104"         # optional, IPv4 or IPv6
}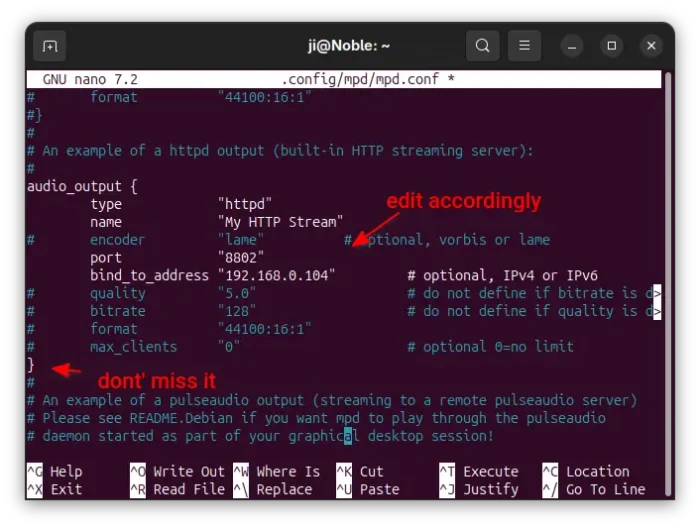
- If you want to add password authentication, set the line like below:
password "abcde564@read,add,control,admin"
In the case,
abcde564is the passphrase for authentication. When done, press Ctrl+S to save changes, and Ctrl+X to exit.


NOTE: You may change all the directory locations above accordingly. However, the “user” you set must have read permission to ‘music_directory’ and read & write permission to other directories above.
For more configurations, see either the in-file description or the official documentation.
Step 3: Configure pipewire-pulse
NOTE: This step is only required for running mpd as system service (rather than –user).
For “pulse” audio output working on pipewire sound server, you need to enable TCP listening in pipewire-pulse.conf, or your music won’t play!
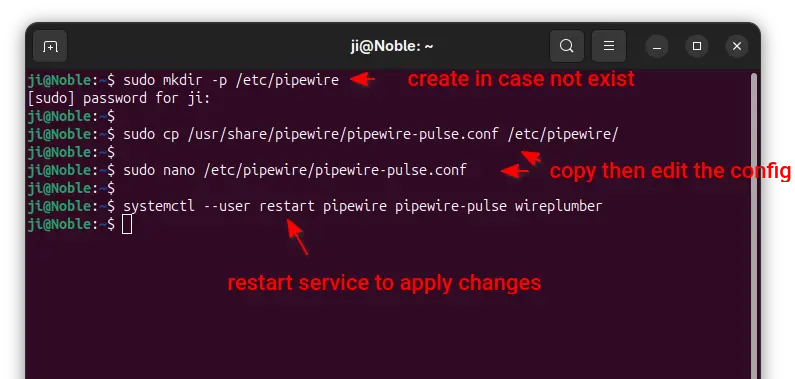
1. Edit pipewire-pulse config file. Run commands below one by one to create /etc/pipewire in case the directory does not exist, and copy the config file from /usr to that directory, finally edit it:
sudo mkdir -p /etc/pipewire

sudo cp /usr/share/pipewire/pipewire-pulse.conf /etc/pipewire/

sudo nano /etc/pipewire/pipewire-pulse.conf
2. Enable listening on TCP. When file opens, scroll down and find out “pulse.properties” section, then enable the “tcp:4713” (remove # at the beginning) line.
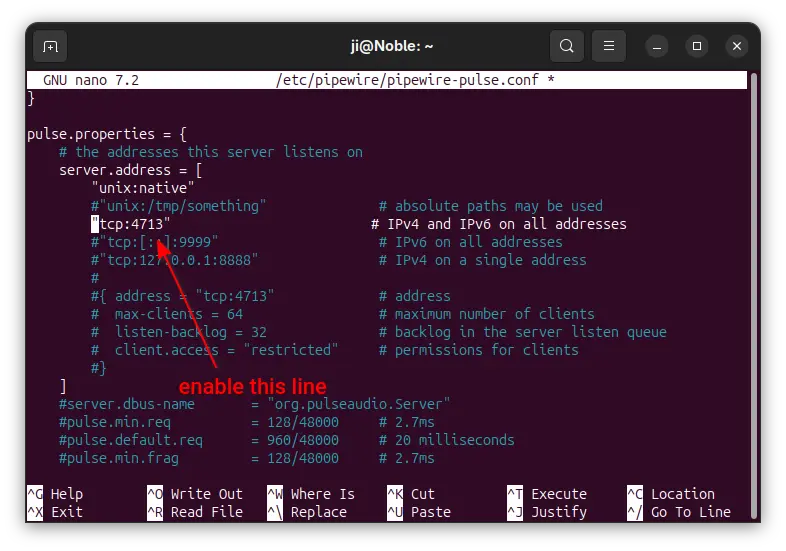
After editing the file, press Ctrl+S to save and Ctrl+X to exit.
3. Finally, restart pipewire to apply changes by running command:
systemctl --user restart pipewire pipewire-pulse wireplumber
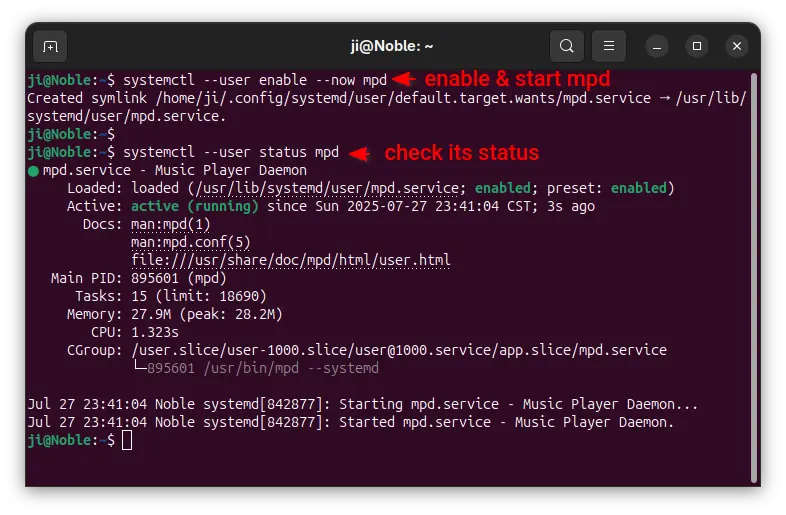
Step 4: Start MPD daemon
To run MPD as user service (recommend), run command:
systemctl --user enable --now mpd
Here --user tells to enable it as user service, and --now means to start the service once enabled.
Or run MPD as system service instead by using command:
sudo systemctl enable --now mpd
As the service may start failed due to any mis-configuration, run the command below to check the status.
systemctl --user status mpd
For any error, you may re-run the nano (with -l flag to show line number) command in Step 2 to edit the config file again. And, restart MPD service to reload changes:
systemctl restart --user mpd
Step 5: Install MPD Client, Connect, and Enjoy
Finally, install a MPD client app in either local machine, remote computer, or mobile devices. Here are some listed in the MPD website.
If you just want a working client, try Cantata that can be installed via command:
sudo apt install cantata
While GNOME users may try the modern new Euphonica app. Then, connect with server IP (localhost if from same machine), listening port (6600 by default) and password if set, and enjoy!
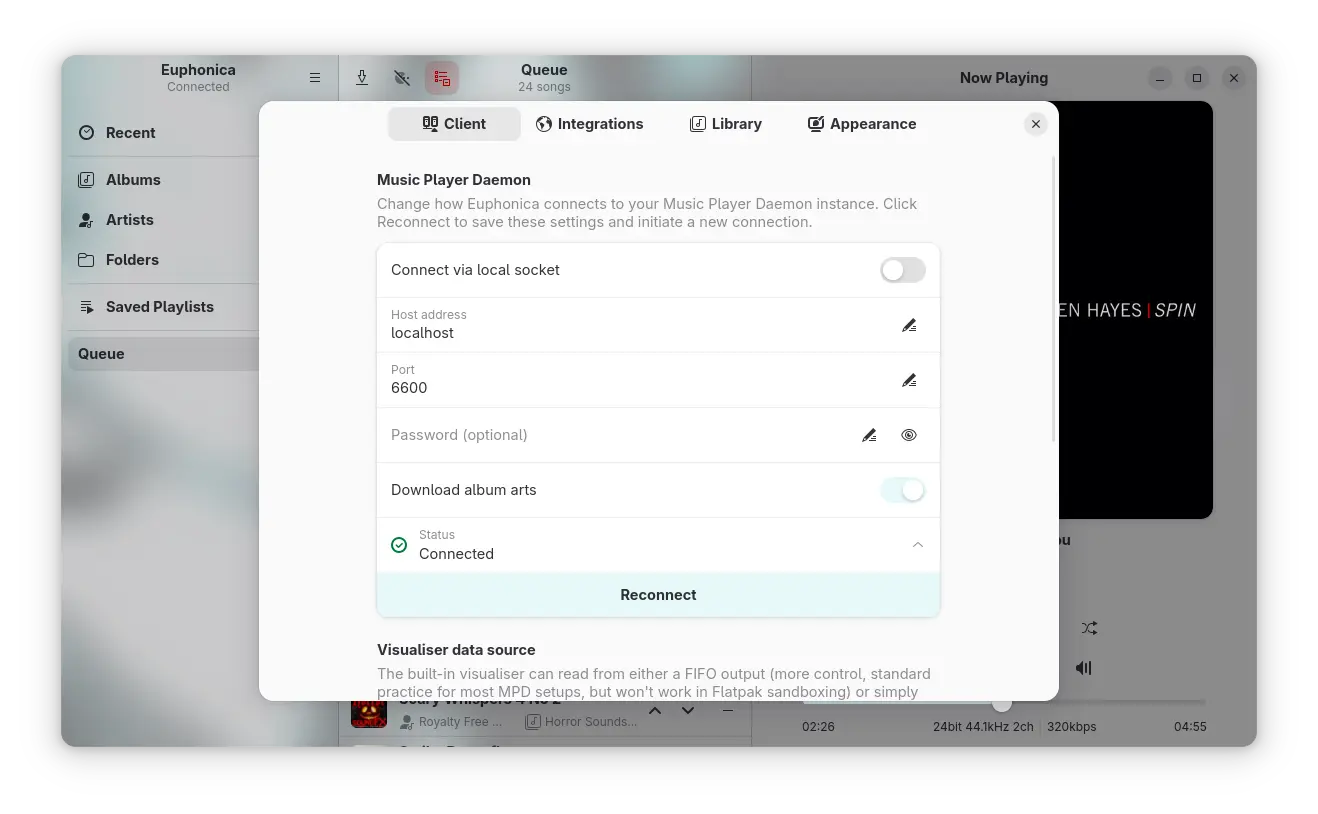
Euphonica MPD Client
Uninstall:
If you don’t want to use MPD anymore, then run command in terminal (Ctrl+Alt+T) to stop and disable the service:
systemctl --user disable --now mpd
For the system service, use this command instead:
sudo systemctl disable --now mpd
Then, remove MPD daemon package via command:
sudo apt remove mpd


I can’t thank you enough for the detailed instructions on MPD. I actually got it running on my second go, it fauled at first because of a typing error.