
![]()

Firefox introduced AI chatbot, AI powered link preview, and search images with Google Lens etc AI powered features in the past releases.
According to the Firefox Privacy Notice, it does NOT have access to the AI conversations or what user input, but do collect technical and interaction data, such as how often a chatbot provider or suggested prompts are used, and the length of selected text.
UPDATE: Firefox since 148.0 has added AI Control options in its Settings page!

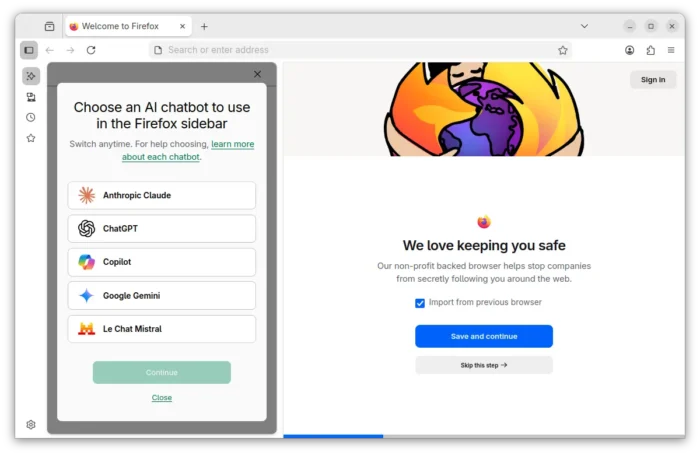
AI chatbot in Firefox sidebar
If you don’t like the AI chatbot feature, you can hide them from side-bar settings page, or remove the shortcut from the context menu of a text selection.

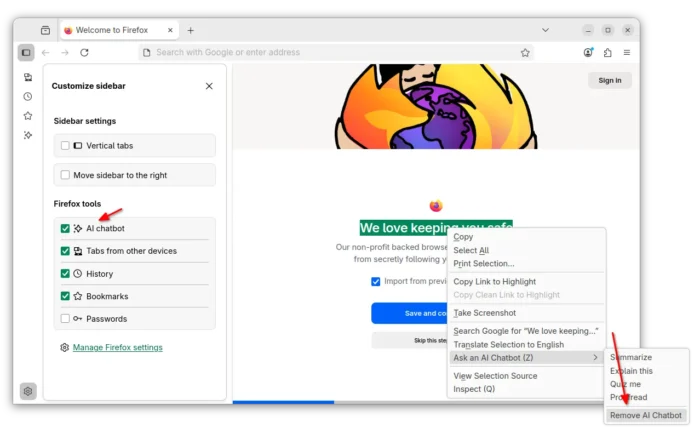
Hide AI chatbot
While, in this tutorial I’m going to show you how to disable them so that they will disappear along with the settings option, link preview, and image search with Google Lens.
No AI chatbot, no configure options, and no Google Lens image search
NOTE: This tutorial is tested in Ubuntu 24.04 with Firefox 145. As time go on, Firefox will release new versions and may add, remove, or change the AI related preference keys.
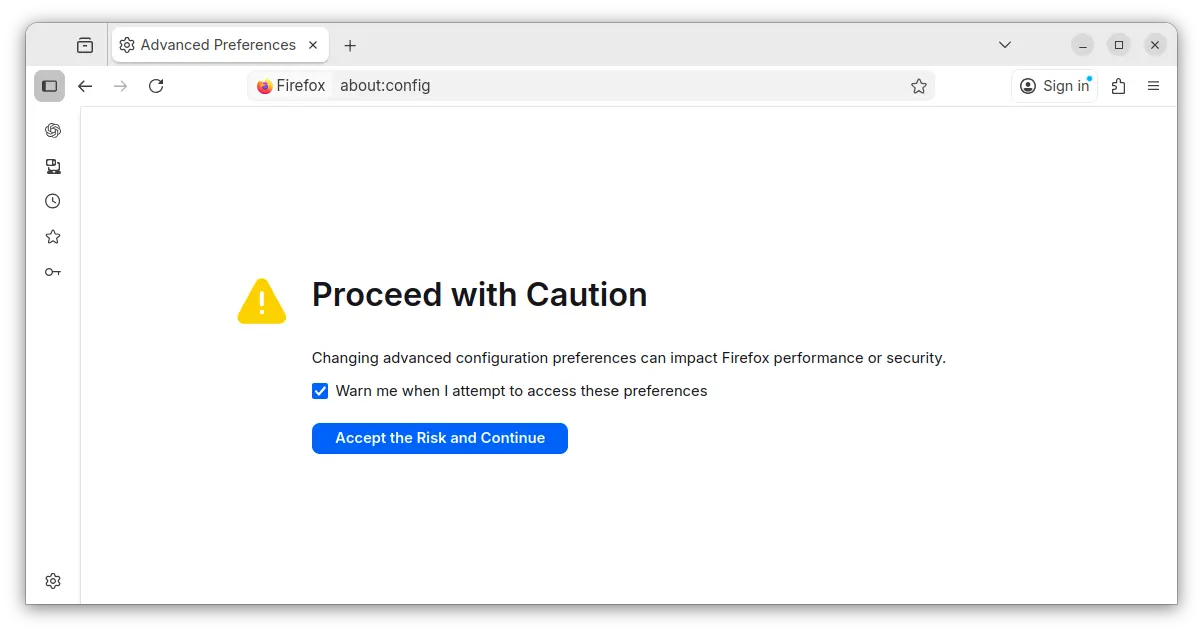
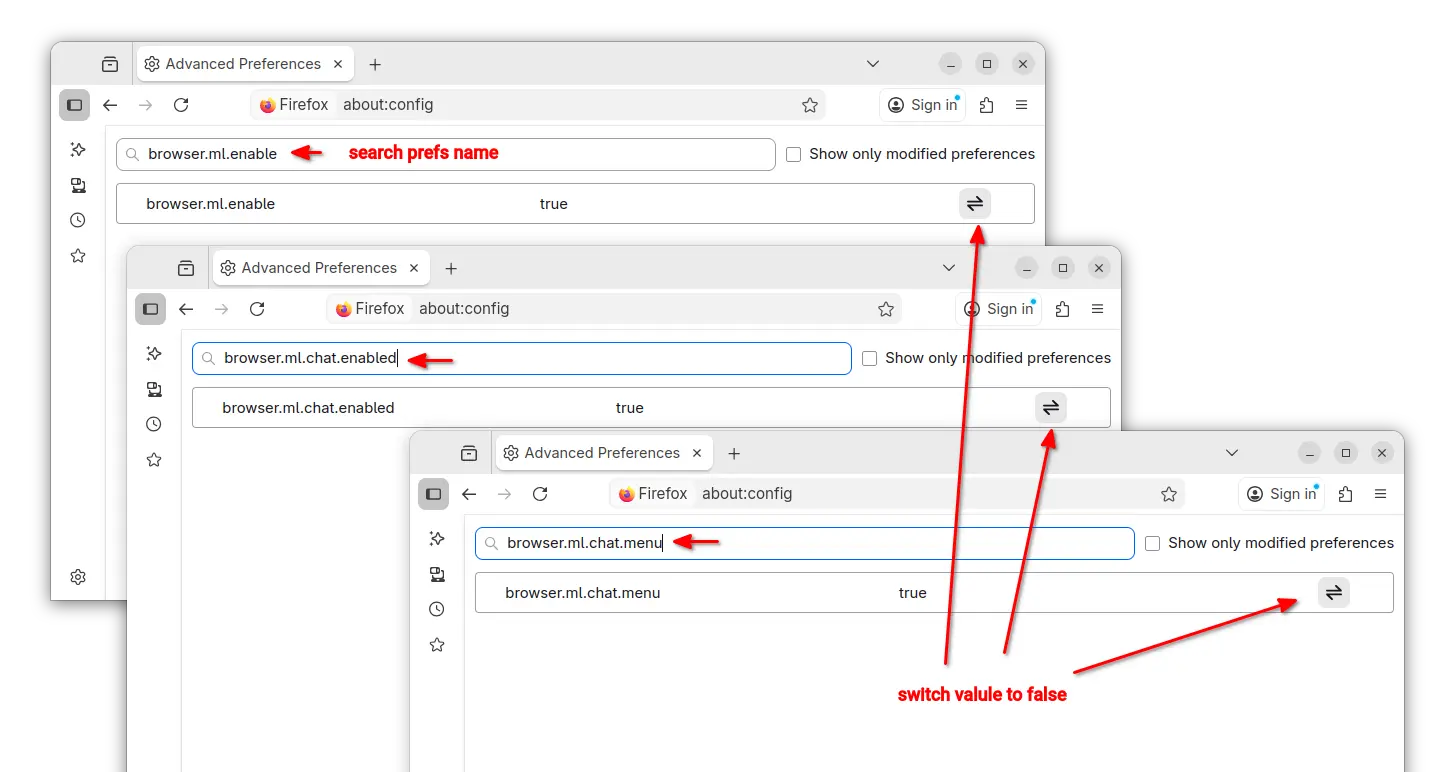
Option 1: Disable AI LLM through about:config
For current profile only, type about:config in address bar and hit Enter, then click the blue “Accept the Risk and Continue” button to access the advanced configuration page.
Next, search following preference names and set them to “false” one by one:
browser.ml.enablebrowser.ml.chat.enabledbrowser.ml.chat.menubrowser.ml.chat.pagebrowser.ml.chat.page.footerBadgebrowser.ml.chat.page.menuBadgebrowser.ml.linkPreview.enabledbrowser.ml.pageAssist.enabledbrowser.tabs.groups.smart.enabledbrowser.tabs.groups.smart.userEnabledextensions.ml.enabledbrowser.search.visualSearch.featureGate
And, it should apply the changes immediately after you set them all to false.
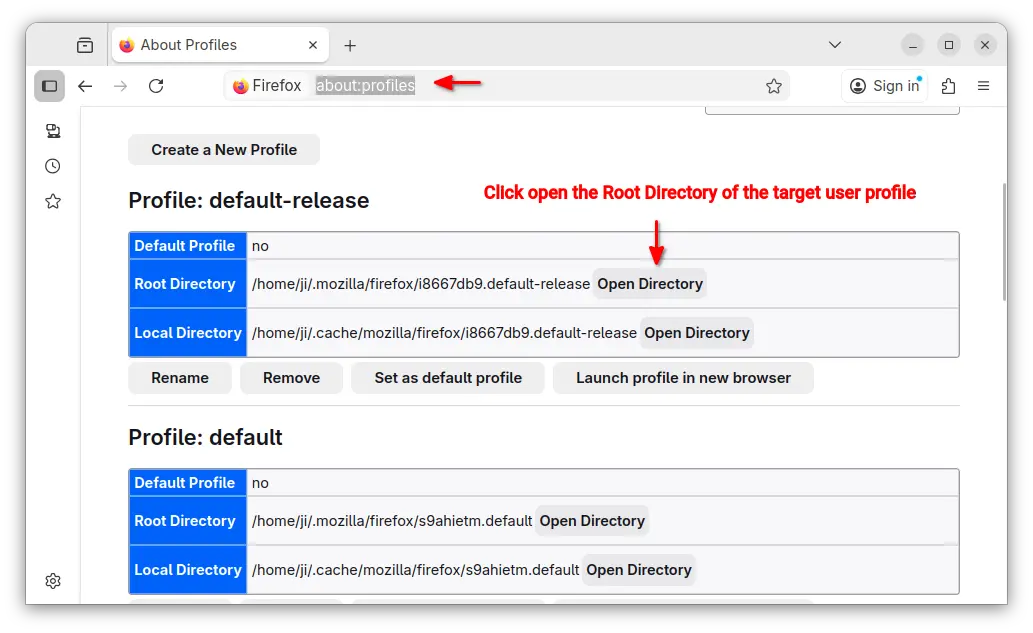
Option 2: Add configuration file to disable AI features
If you have multiple user profiles for Firefox, and you want to disable AI for them all, then it’s better to add user.js config file instead of configuring the preference keys one by one.
First, type about:profiles in address bar and hit Enter to access the profile management page.
Then, click “Open Directory” button to open the Root Directory of the target user profile.
In the opened folder, create user.js file if it does not exist. Finally, edit the file and write following content into it.
user_pref("browser.ml.enable", false);
user_pref("browser.ml.chat.enabled", false);
user_pref("browser.ml.chat.menu", false);
user_pref("browser.ml.chat.page", false);
user_pref("browser.ml.chat.page.footerBadge", false);
user_pref("browser.ml.chat.page.menuBadge", false);
user_pref("browser.ml.linkPreview.enabled", false);
user_pref("browser.ml.pageAssist.enabled", false);
user_pref("browser.tabs.groups.smart.enabled", false);
user_pref("browser.tabs.groups.smart.userEnabled", false);
user_pref("extensions.ml.enabled", false);
user_pref("browser.search.visualSearch.featureGate", false);
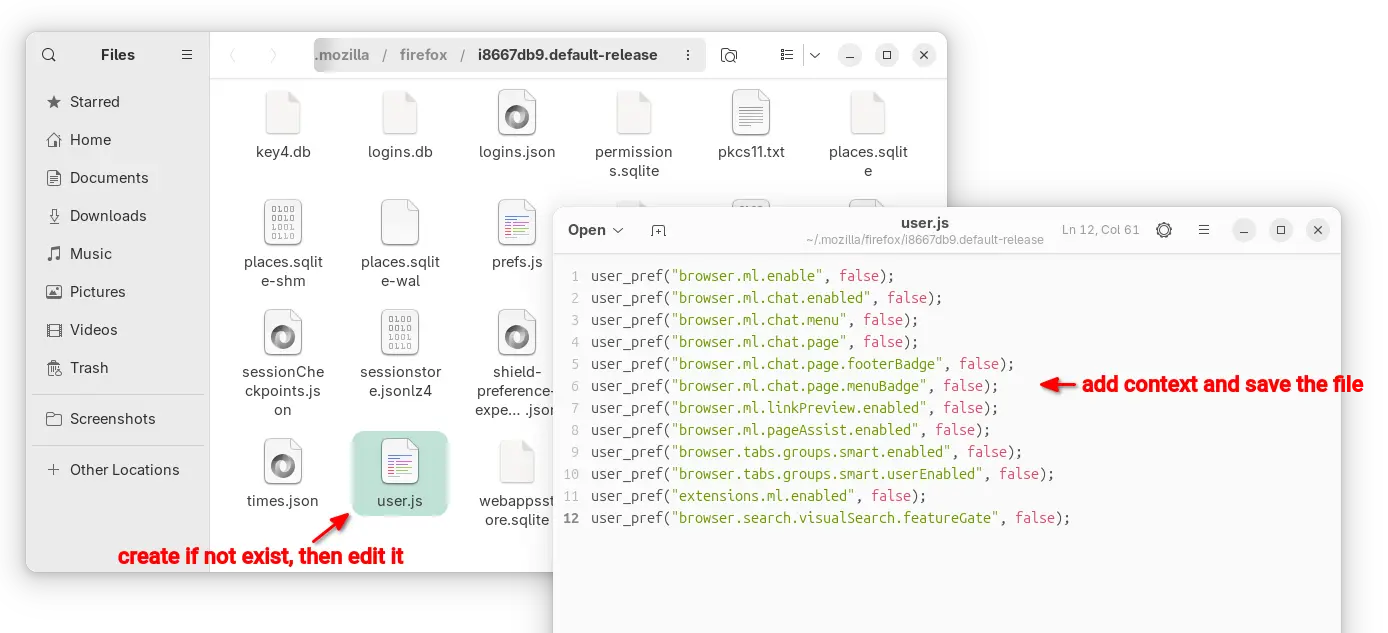
After that, you may click “Launch profile in new browser” button to open Firefox window with that profile and see if it works. And, copy the user.js file to root directories for other profiles if need.


Thank you,
Thank you Ji M!
Longtime reader here from Quebec, Canada!
I wonder why they force all that AI stuff we don’t want down our throats? Do people realize AI DataCenters currently destroy the planet faster when we should slow down everything?
Anyway, thanks for the complete list and the tip with user.js. I did not know we could do that!
Keep up the good work!
—
LeDucDuBleuet
Thanks for the file method!
Thank you
Got error messages with the user.js file as described. I created an autoconfig setup and used that to apply the pref changes.
Thanks !
Hi Ji M,
Thank you so much for this help! This was a fine way to spend Christmas morning and disabling stuff I do not need or want. ‘Tis the season to be jolly!
Thank you so much for the excellent work you shared. You guys are amazing, keep it up the good work.
Thank you Ji M