![]()
Audacity audio editor got a new major update few days ago, features real-time effects and VST3 support.
In the new 3.2.0 release, there’s a new “Effects” button in the tracks menu, allowing to place realtime effects. However, it does not yet ship with any effect so far. User has to get effects via plugins, though only Audio Units (macOS only), VST3, LV2, and LADSPA formats are supported at the moment.

The release also merged the mixer bar with the meter bars. The device tool-bar has been replaced with a new Audio Setup button, though it can be re-enabled via “View -> Toolbars” menu.
As the screenshot above shows you, there also introduced a new “Share Audio” button, allowing to upload audio into audio.com either with login account or anonymously, then share the link with your friend.
Other changes in Audacity 3.2.0 include:
- Apple Silicon (arm64) is now supported on macOS. Though, need arm64 versions of FFMPEG and plugins.
- Add support for Wavpack
- Possible to compile without JACK present in Linux.
- Use XDG directories on Linux. Need to delete
.audacity-dataand.audacityfolders in user home if exist. - Use mpg123 as mp3 importer instead of mad.
- Update license to GNU General Public License V3, though most code files remain GPLv2 or later.
- Update icons, remove Zoom tool and various bug-fixes.
How to Install Audacity 3.2.0 in Ubuntu Linux
There seems no native .deb package for the latest Audacity. User can however get the application via the universal AppImage, Snap, or Flatpak that works in most Linux.
Option 1: AppImage
For the non-install AppImage, go to the github releases page and grab the package under “Assets” section:
Then, right-click on the package and open “Properties” dialog. Add executable permission under ‘Permissions’ tab and finally click run the package to launch Audacity.
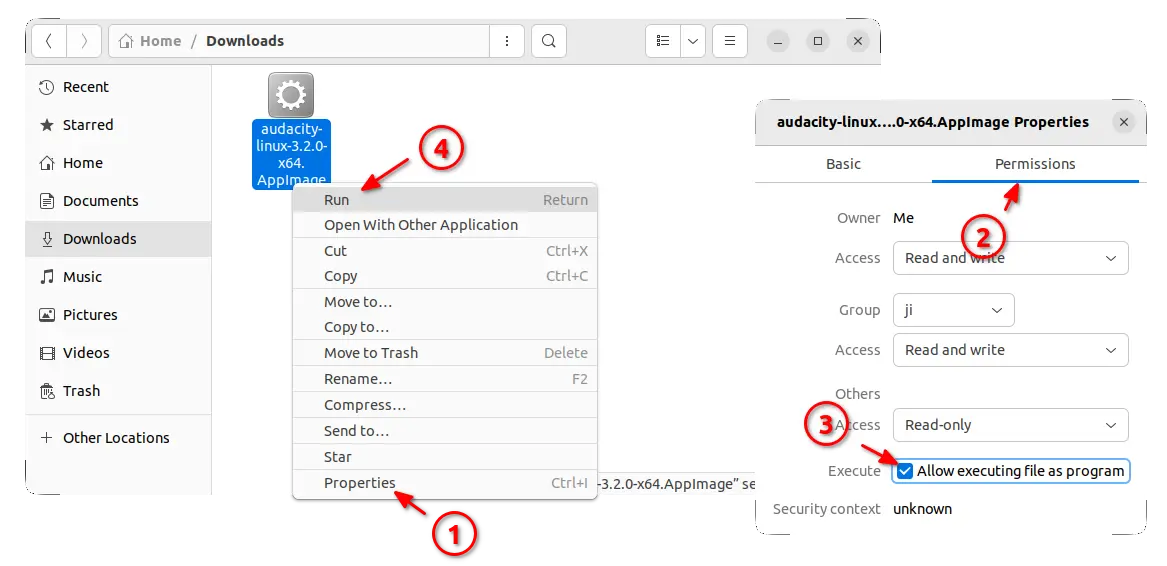
Audacity AppImage
Option 2: Flatpak
User can also install Audacity via universal Flatpak package that runs in sandbox.
First, press Ctrl+Alt+T on keyboard to open terminal in Ubuntu, then run command to make sure the daemon package is installed:
sudo apt install flatpak

Then install the audio editor as Flatpak by running command:
flatpak install https://dl.flathub.org/repo/appstream/org.audacityteam.Audacity.flatpakref
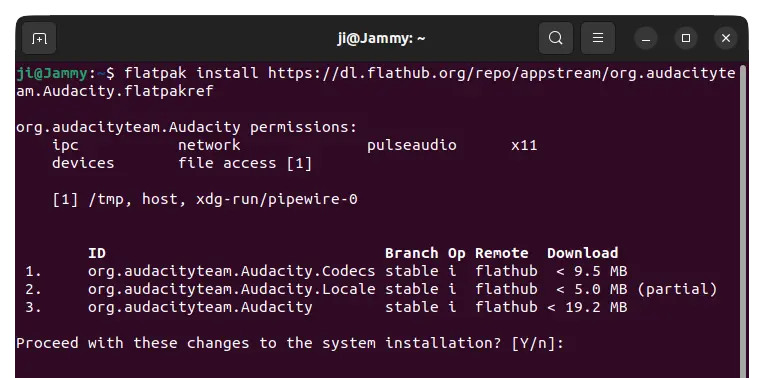
Like normal applications, search for and launch it from system start menu (‘Activities’ overview) after installation.
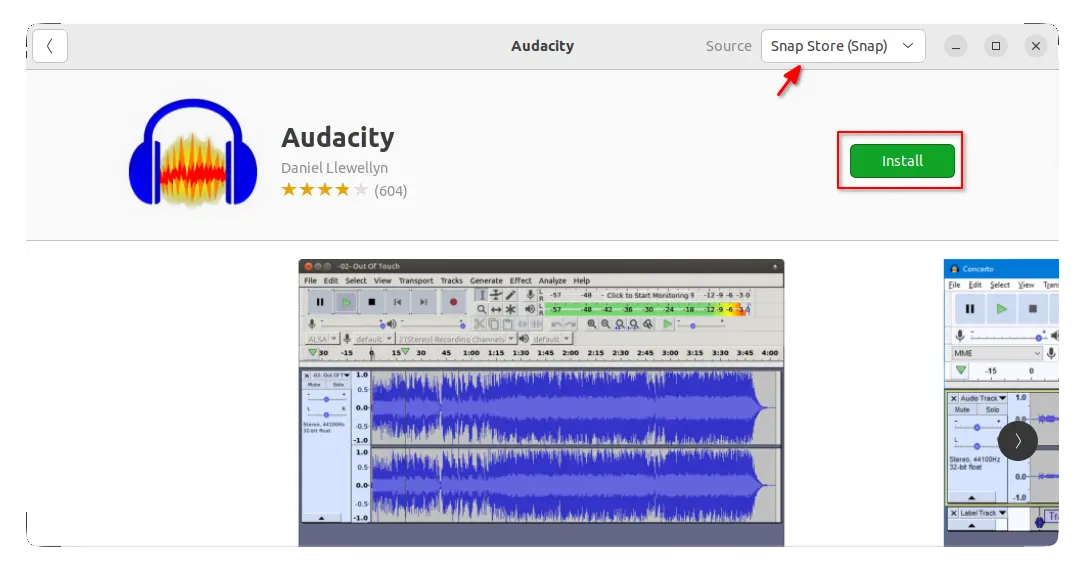
Option 3: Snap
Audacity is also available as Snap package that runs in sandbox. I put this method as last choice because it does not yet update to v3.2.0 at the moment of writing.
However, it’s quite easy to install for Ubuntu users. Simply open the Software App, search for and click install it:
Uninstall Audacity
Depends how you install the software package, uninstall the editor via:
- For AppImage, just remove the package file.
- For the Flatpak package, open terminal and run command:
flatpak uninstall org.audacityteam.Audacity
- And remove the snap package by either using Ubuntu Software or running command in terminal:
sudo snap remove audacity