For those prefer Gnome 3 style Activities overview, here’s how to bring back the vertical workspace thumbnails in Ubuntu 21.10 and Ubuntu 22.04.
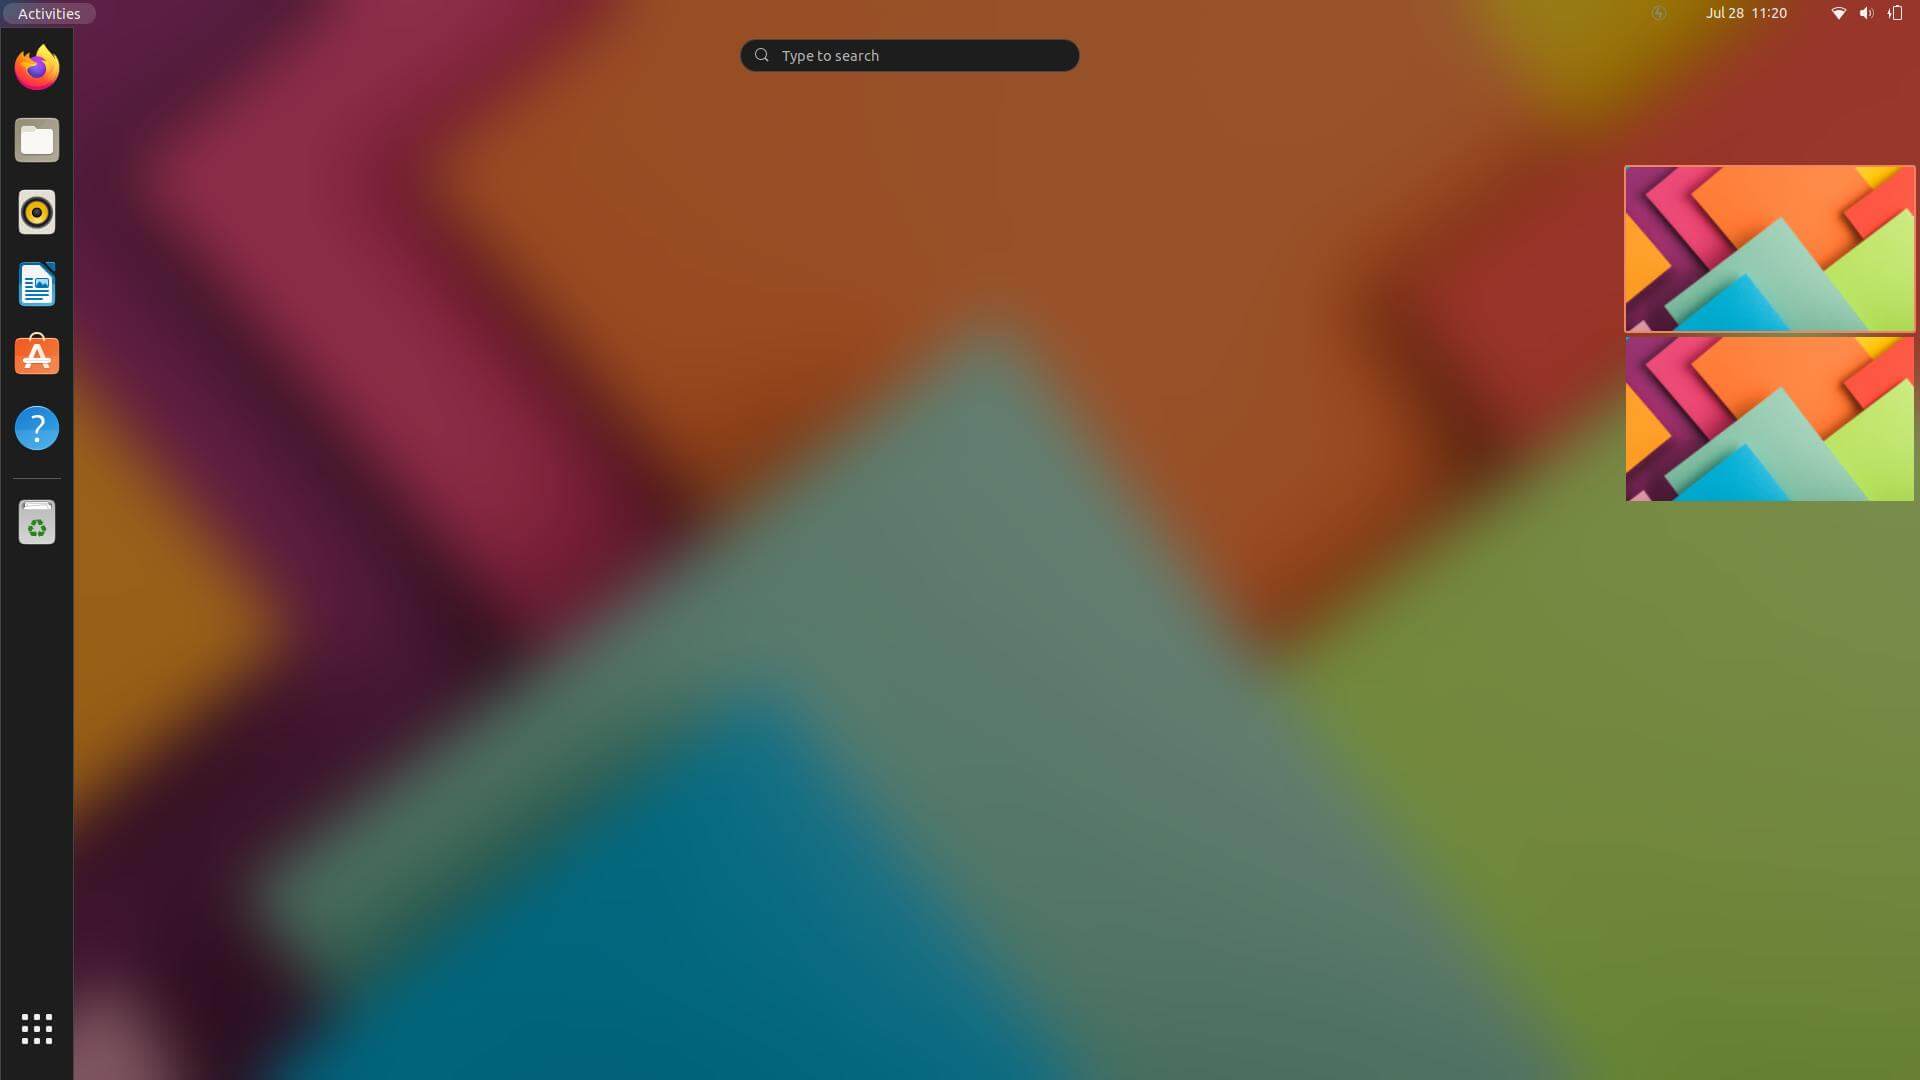
Since Ubuntu 21.10, the default GNOME desktop brings new design of the Activities overview screen. It now has large and horizontal workspaces locates across the center of screen. Along with thumbnails in the top, you can either click / use keyboard shortcuts or touchpad gestures to switch workspaces.
Personally I like the new design. But for those who are accustomed to the vertical view, here’s an extension to restore the change.
1. Prepare for installing Gnome Shell Extension:
Before getting started, make sure chrome-gnome-shell package is installed for GNOME Shell extensions integration for web browsers.
To do so, open terminal (Ctrl+Alt+T) and paste the command below and hit Enter:
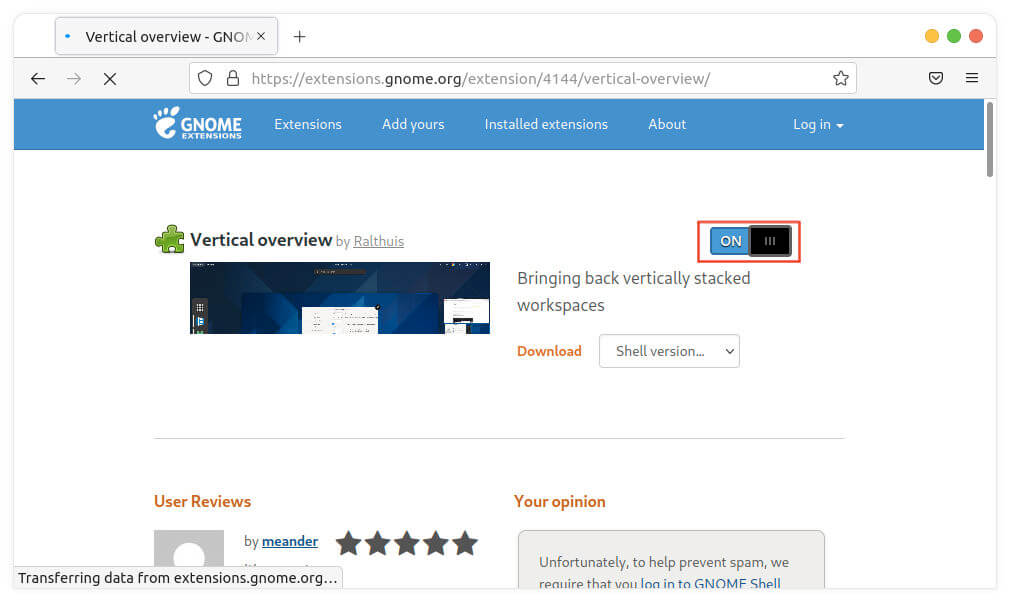
Don’t worry if you don’t see the slider icon, click the ‘click here to install browser extension’ link to install browser extension and re-fresh the web page.
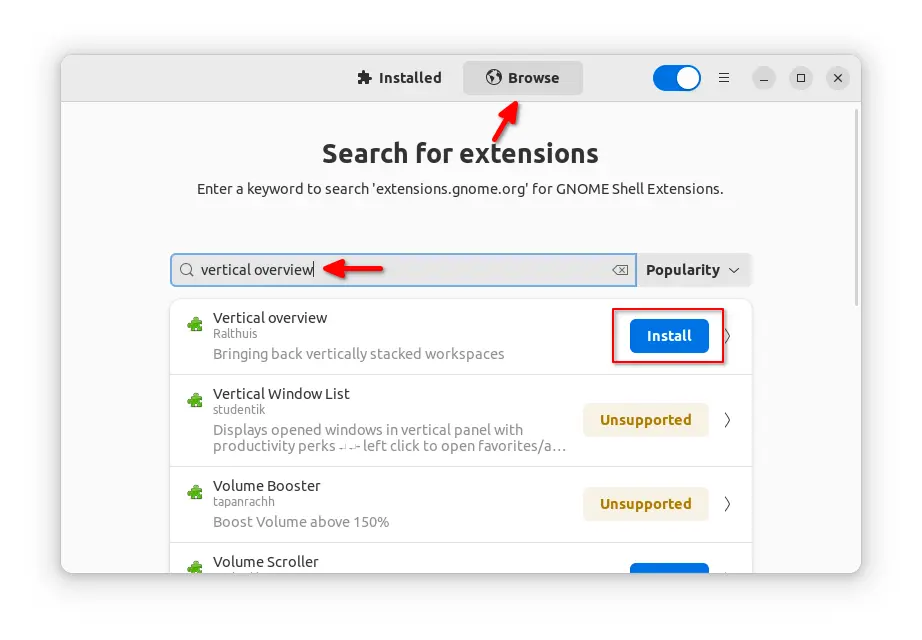
NOTE: The preinstalled Firefox in Ubuntu 22.04 does not support installing Gnome Extensions. As a workaround, you may search for & install “Extension Manager” in Ubuntu Software. Then, use the tool to search and install Vertical Overview extension.
Install the extension via Extension Manager tool
3. Configure Overview Appearance:
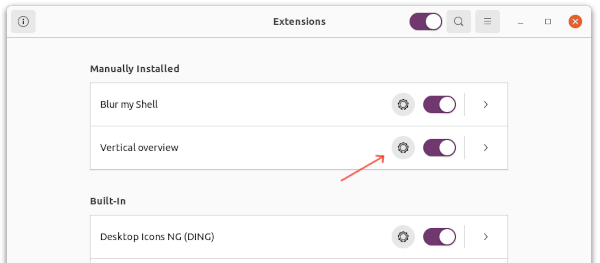
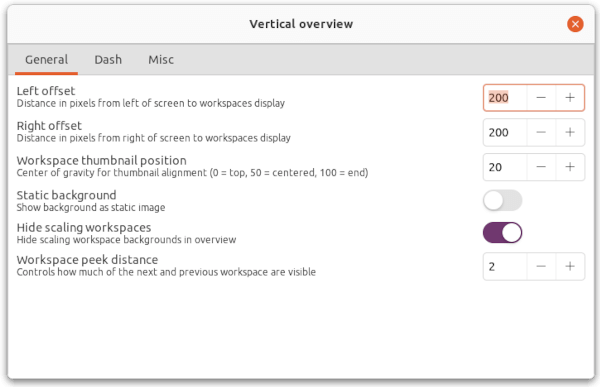
After installed the extension, you can press Win/Super key and search for and open ‘Gnome Extensions app’ to configure its settings.
Click on the gear button, then you can change the workspace thumbnail size, position, as well as toggle on / off the big central workspace.
Halfway through the year, many new apps released and many abandoned. Here are 6 weather apps that are still useful in 2021.
Without searching in web browser or watching an app on mobile, there are quite a few weather apps for Linux that display weather conditions and forecast either on desktop or via system tray applet.
And here are top ones still in active development and well working in all current Ubuntu releases.
1. Gnome Weather
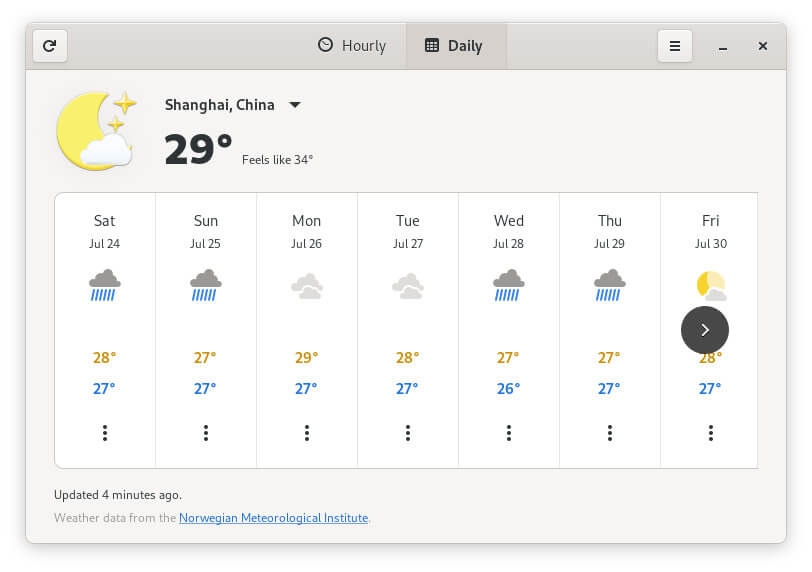
The Gnome Weather app is always the first one you should try, since it’s well designed and integrated with Ubuntu Gnome Desktop.
It shows weather conditions via a desktop window and integrates forecast into the Clock (date & time) menu. Sadly forecast does not work in Ubuntu 20.04 due to bug.
Version 40 displays the current temperature, feel like temperature, as well as cloudy/sunny/rainy icon for current weather. And it shows forecast both hourly and daily (2 weeks). As indicates, it collects weather data from Norwegian Meteorological Institute.
To install the app, open terminal (Ctrl+Alt+T) and run command:
sudo apt install gnome-weather
For Ubuntu 20.04, forecast is not available due to libgweather bug. To workaround it:
either install Gnome Weather flatpak package which runs in sandbox.
or install patched version of libgweather from my personal PPA and restart Gnome Shell.
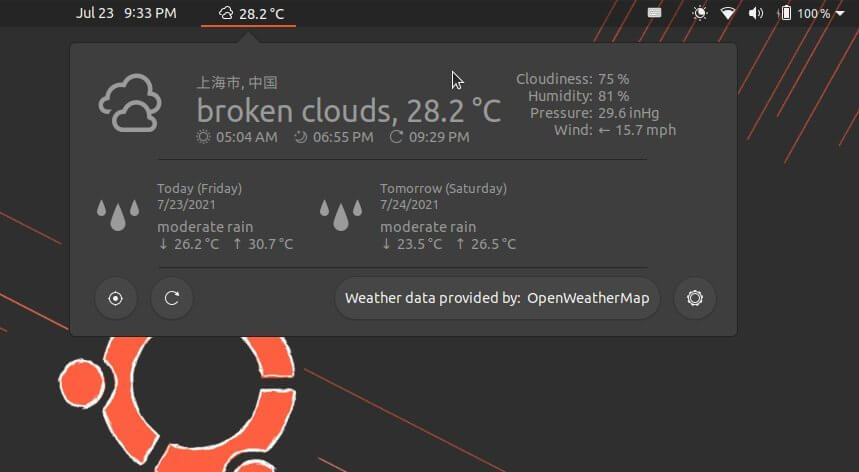
2. My Weather Indicator.
This is my favorite weather app from a Spain software developer. And it’s more than 10 years old that is still being maintained.
The app displays weather via both panel indicator and desktop widget. You can add 2 locations and choose weather services between OpenWeatherMap, Yahoo Weather, Wunderground.com, and WORLD WEATHER ONLINE.
It shows weather conditions including temperature, feels like, pressure, humidity, dew point, wind, and cloudiness. As well, it indicates the time of sunrise, sunset, and dawn/dusk.
The panel indicator offers forecast options for next hours and week days and forecast map. As well, a Moon Phase calendar is available for Waning Gibbous.
To install it, open terminal (Ctrl+Alt+T) and run commands one by one to get it from the developer’s PPA.
sudo add-apt-repository ppa:atareao/atareao
sudo apt update
sudo apt install my-weather-indicator
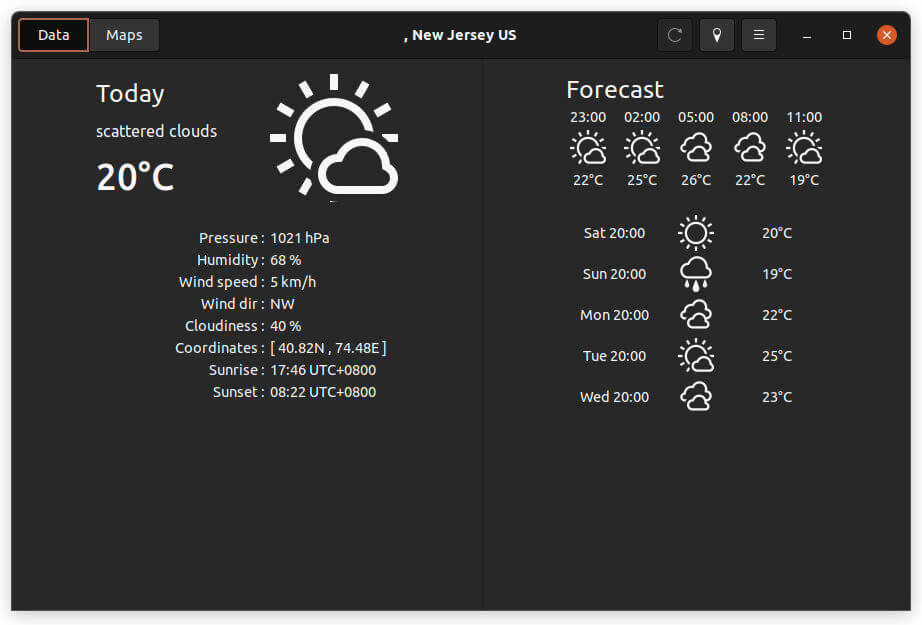
3. Meteo
Meteo is a forecast application using OpenWeatherMap API. It comes with an indicator that shows weather information including temperature, pressure, wind speed and direction, sunrise & sunset.
It also provide app window with current weather and forecast for next 18 hours and next 5 days. With it, you can also check information about temperature, pressure, wind speed, clouds, and precipitation in map mode.
The software has an Ubuntu PPA. So you can open terminal (Ctrl+Alt+T) and run following commands one by one to install it.
sudo add-apt-repository ppa:bitseater/ppa
sudo apt update
sudo apt install com.gitlab.bitseater.meteo
4. KWeather
This is a KDE weather app designed for plasma mobile. It however works good on Linux desktop even without KDE.
It shows the basic weather conditions as well as 10 days forecast in an adaptive app window. Which makes it different is the Dynamic mode that displays raining, shining, or snowing animation.
KWeather is available as flatpak package in flathub.org. To install it, first follow the setup guide and run bottom command in the link page.
5. OpenWeather Extension
This is an extension for Gnome that will work on Ubuntu, Fedora, and other Linux with Gnome Desktop.
It collects weather conditions from either OpenWeatherMap or darksky.net. And display basic info on top bar. By drop-down menu, you can see more details including:
sunrise / sunset time.
cloudiness, humidity, pressure, wind speed.
forecast (2 ~ 10 days).
The indicator position, icons, units, Geolocation provider etc are configurable via extension settings.
To install OpenWeather extension, firstly make sure chrome-gnome-shell is installed via command:
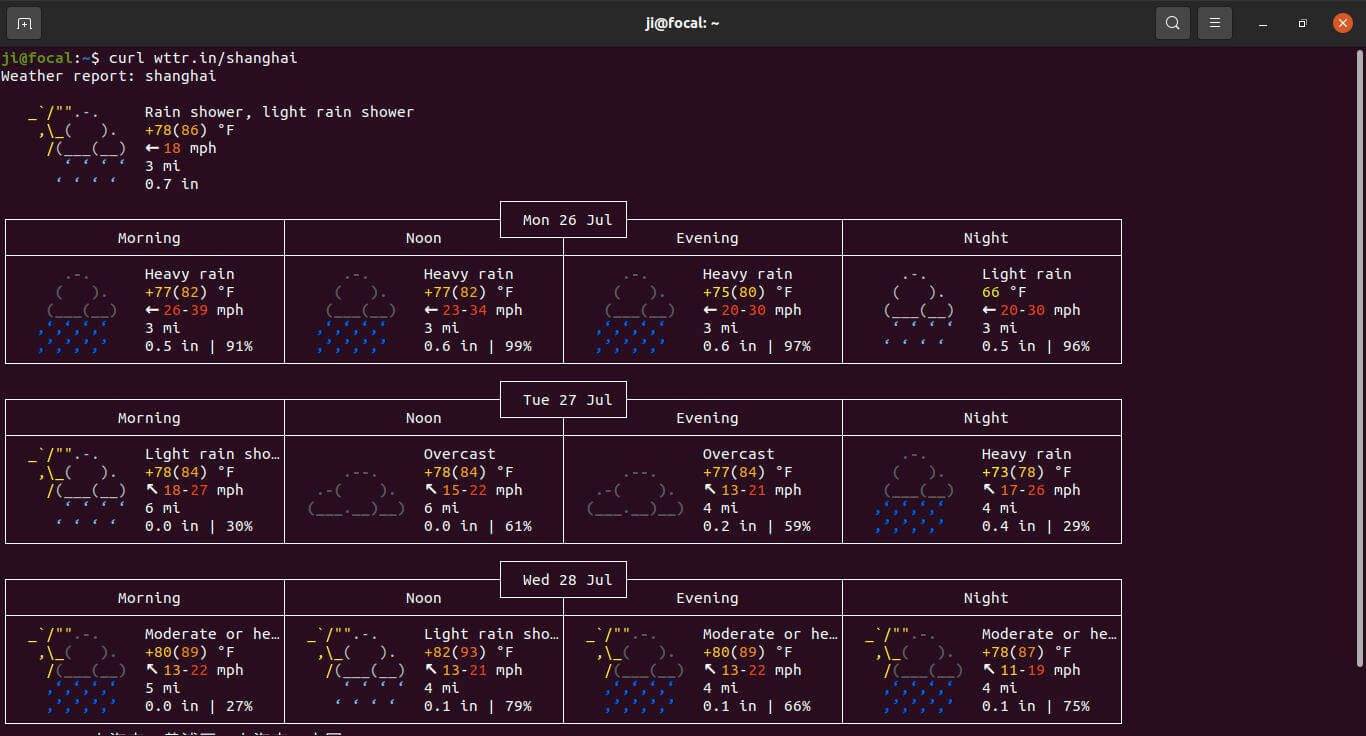
For those looking for a weather app works in command line, wttr.in is a great choice.
Just make sure curl is installed via command:
sudo apt install curl
You can then run command to get weather condition as well as forecast for current location via command:
curl wttr.in
And you may specify a location, shanghai for instance, via command:
curl wttr.in/shanghai
It’s recommended to maximize your terminal window to make the forecast table display properly.
Besides the basic info, such as, temperature, pressure, humidity, it also supports for moon phase, different units, generate PNG, and more. To get more options, run command:
curl wttr.in/:help
Final Words
There are also a few other good weather apps that I know, but they are either not maintained or not well working in my machine. If you get any other good apps, feel free to leave comment below.
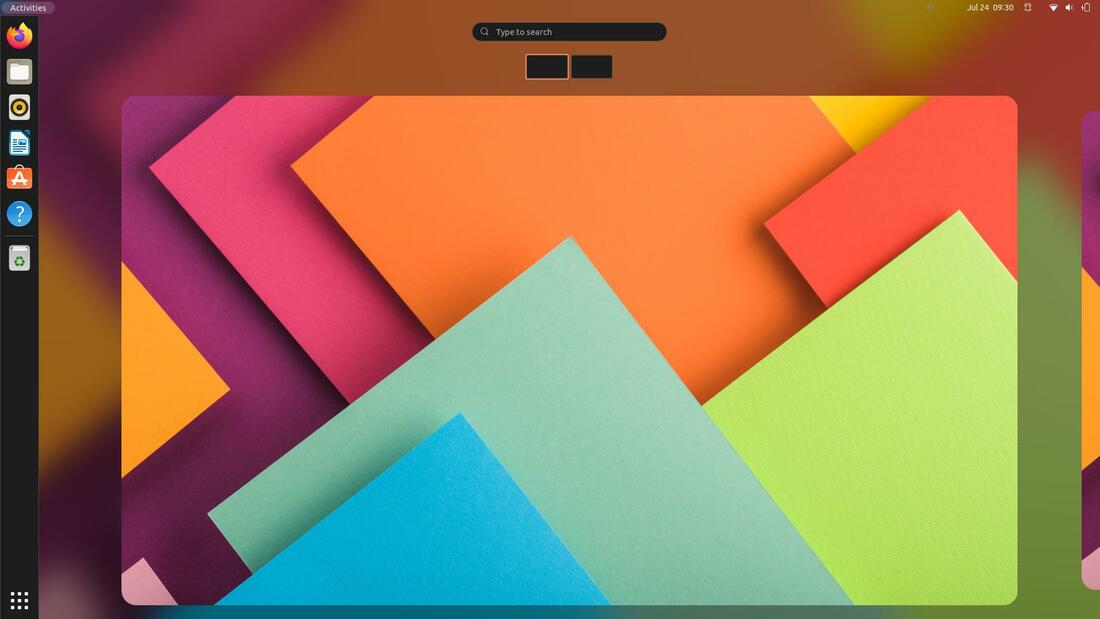
Gnome 40 automatically logs into ‘Activities’ overview screen instead of a blank desktop. Don’t like this feature? Just disable it!
Gnome 40 finally lands in Ubuntu 21.10, brings the new design of its ‘Activities’ overview screen. The workspaces are now horizontal and locate across the center of screen. Along with small boxes under the search box, all running app windows will be there. And it introduces new touchpad gestures to switch between workspaces.
Instead of a blank desktop, Gnome 40 shows you the redesigned Activities by default. It’s great for you to get start directly by searching items, or accessing favorite apps on the left dock.
But I don’t like the feature and want to disable it! Well, an extension is here to do the job.
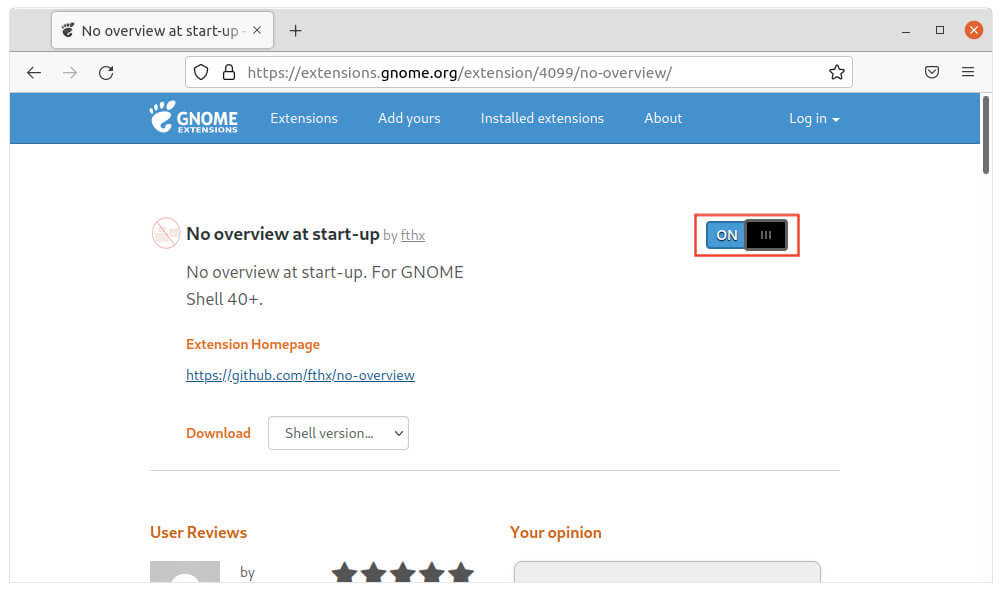
“No overview at start-up” is the simple extension to revert the change, so Ubuntu 21.10, Fedora 34 or other Linux with Gnome 40 will log into a blank desktop just like before.
Install No overview at start-up Extension:
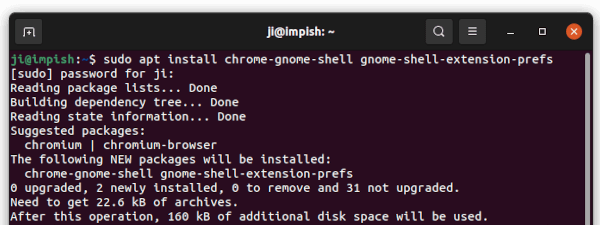
1. Firstly, press win/super key, then search for and open terminal. When terminal opens, copy and paste the command below and hit run.
The command will install the “chrome-gnome-shell” package to enable ability to install Gnome Shell Extensions from web browser. And install “gnome-shell-extension-prefs” (Gnome Extensions App) for managing extensions.
If you don’t see the slider icon, click the ‘click here to install browser extension‘ link to install browser add-on and reload the page.
The extension should function once you installed it. And you can click ‘Activities’ then search and open Gnome Extensions App to toggle on / off, or remove the extensions.
For those want to set the CPU TDP limit, a new Intel Controller app is available by Spanish Linux computer company Slimbook.
TDP stands for Thermal Design Power, in watts, and refers to the power consumption under the maximum theoretical load.
Similar to its AMD Controller app, the new app works by setting your CPU TDP value. That is, the amount of power measured in watts allowed for your CPU to either save battery or to improve the overall performance.
To use the app, you need to disable secureboot because it does not allow kernel access to CPU parameters.
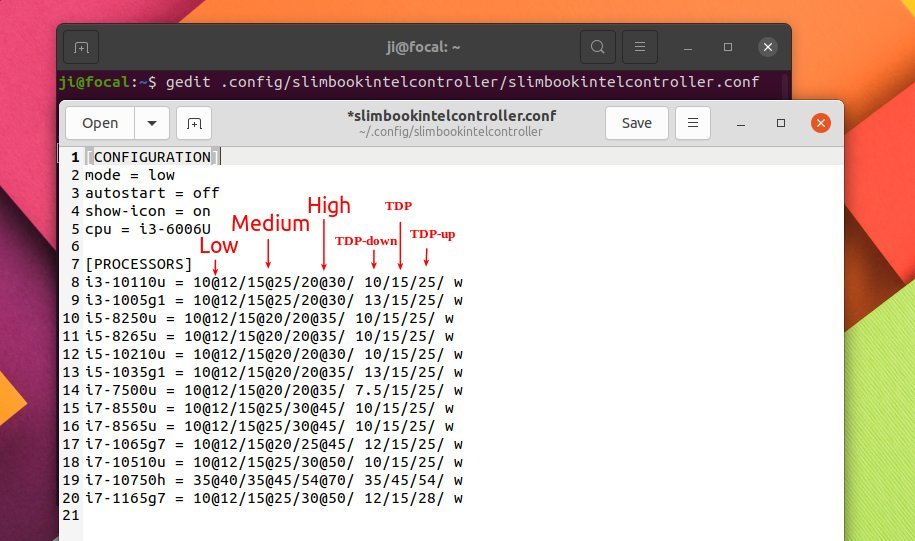
As a new project, it so far supports for: i3-10110U, i3-1005G1, i5-8250U, i5-8265U, i5-10210U, i5-1035G1, i7-7500U, i7-8550U, i7-8565U, i7-1065G7, i7-10510U, i7-10750H, i7-1165G7.
You can however test your CPU by adding into the “~/.config/slimbookintelcontroller/slimbookintelcontroller.conf” file.
Search on the web to find out your CPU Specifications, including TDP, TDP-up and TDP-down. Then add your CPU and set the Low, Medium, and High performance in watts as the picture shows. You can then choose between them via either the desktop app or indicator menu.
NOTE: The software is still in early development, they may have bugs. And in higher performance, it drains the battery faster and makes your CPU hotter. USE it at your own risk!
Install Slimbook Intel Controller:
The slimbook PPA maintains the package so far only for Ubuntu 20.04.
1. Add the PPA.
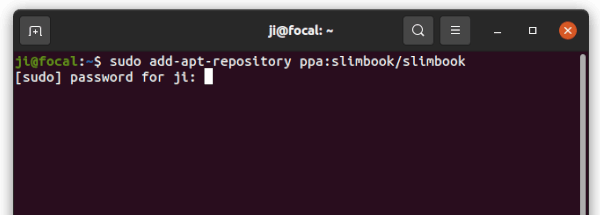
Firstly open terminal either by pressing Ctrl+Alt+T on keyboard, or by searching for and open terminal from system app launcher. When terminal opens, copy and paste the command below and hit Enter:
sudo add-apt-repository ppa:slimbook/slimbook
Type user password, no asterisk feedback, when it asks and hit Enter to continue.
2. Install the controller app.
Next run command to install the Intel Controller:
sudo apt install slimbookintelcontroller
For AMD CPU, you can install another package instead:
sudo apt install slimbookamdcontroller
Once installed, open it from system app launcher. As I mentioned above, it won’t start if your process is not in the configuration file. For the source code, go to Github.
Uninstall:
For any reason, you can copy and paste the command below into terminal and hit Run to remove the software.
sudo apt remove slimbookintelcontroller
As well, do for removing the Slimbook PPA via the command below:
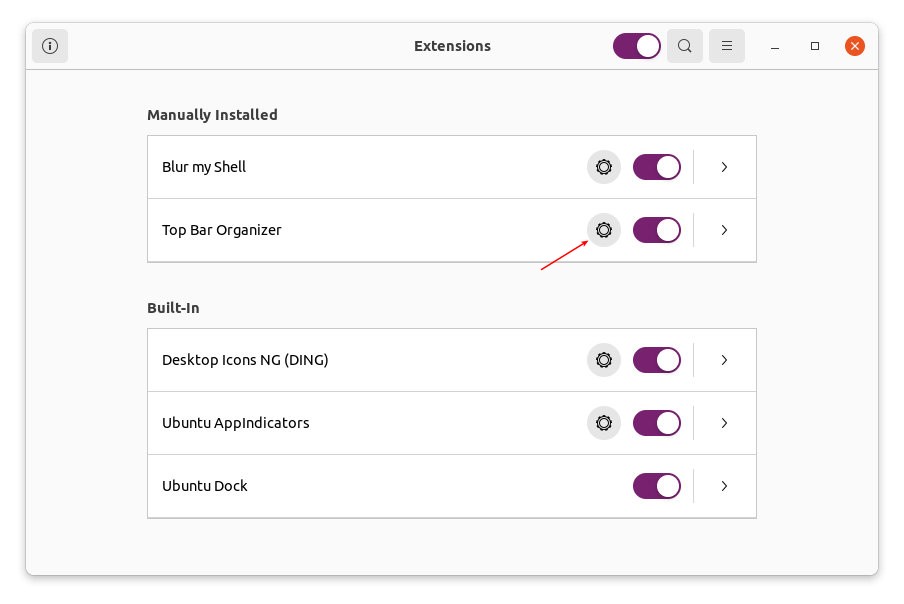
Want to change the position of top-bar items, e.g., Activities button, app menu, date and time, and system tray icons?
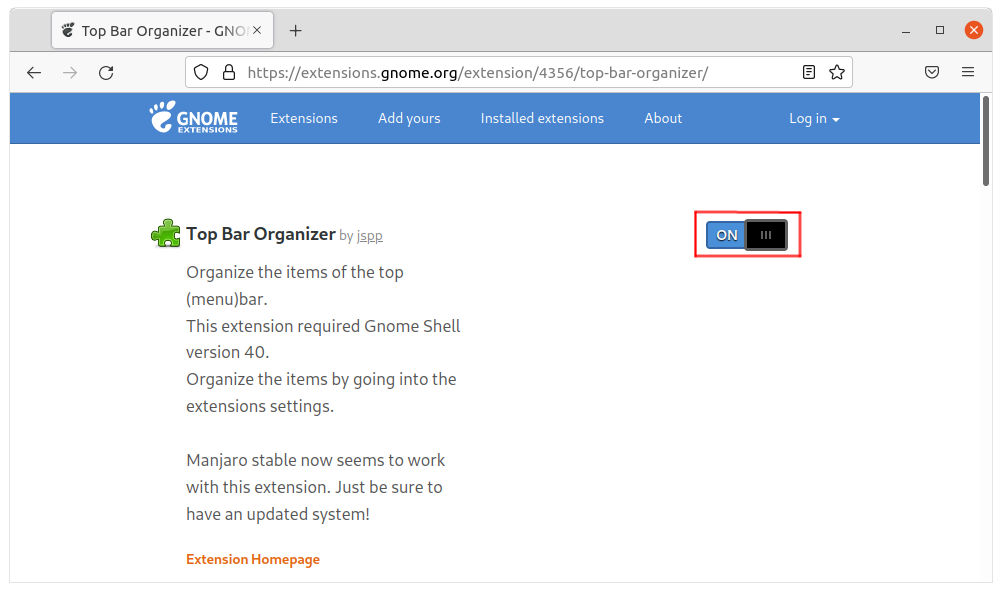
A Top Bar Organizer extension now is available for Ubuntu 21.04 Gnome 40. With it, you can drag and drop to re-order top panel items as you prefer. For example, moving the Activities button or date & time clock menu to right corner.
Install Top Bar Organizer:
1.) Firstly open terminal by pressing Ctrl+Alt+T on keyboard. When terminal opens, run command to install Gnome extension integration for web browser, as well as Gnome Extension management tool:
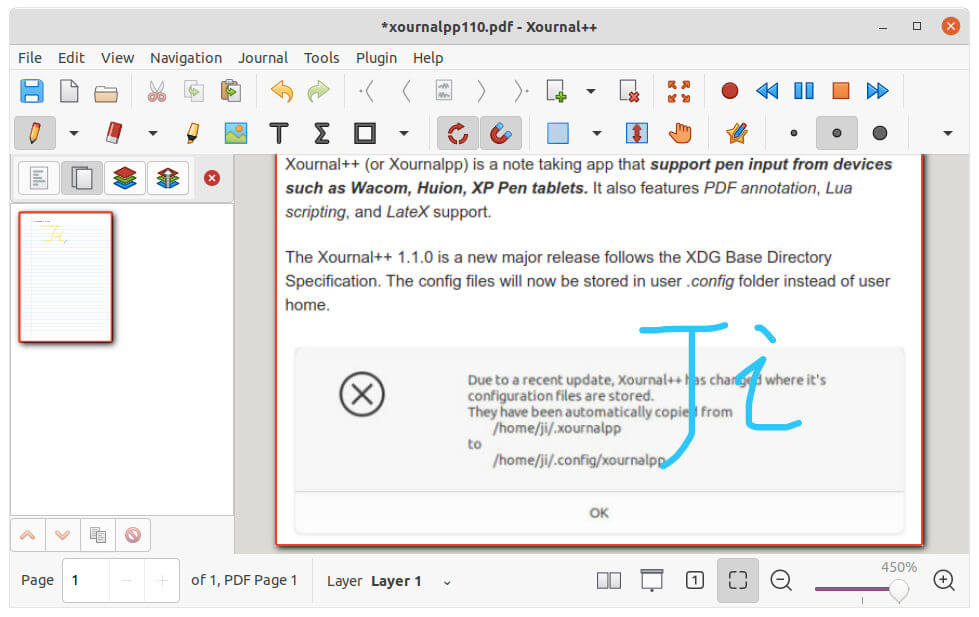
Free open-source handwriting notetaking app Xournal++ 1.1.0 was released with many new features and improvements.
Xournal++ (aka Xournalpp) is a note taking app that support pen input from devices such as Wacom, Huion, XP Pen tablets. It also features PDF annotation, Lua scripting, and LateX support.
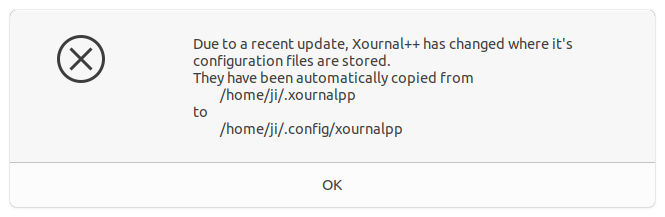
The Xournal++ 1.1.0 is a new major release follows the XDG Base Directory Specification. The config files will now be stored in user .config folder instead of user home.
A new plugin was introduced for those have non-default DPI settings, to fix incorrect text elements display issue for old documents.
Ubuntu 16.04 and Mac OS High Sierra are no longer supported. Other features include:
New “progressive mode” option to PDF export dialog.
New “Layerstack Preview” tab to show all layers up to the current layer.
Add seeking functionality during audio playback.
Remove the old input system and touch workaround.
Add a touchpad pinch gesture for zooming.
Rework LaTeX tool implementation.
Add snapping for vertical space, moving/resizing selections, recognized shapes.
Lua plugin support for Mac OS.
New action icons, and new app icon.
And tons more other improvements and changes.
How to Install Xournal++ 1.1.0 in Ubuntu:
The software offers official binary packages, available to download at the link below:
Grab the ‘xournalpp-xxx-bionic-xxx.deb‘ for Ubuntu 18.04, or ‘xournalpp-xxx-focal-xxx.deb‘ for Ubuntu 20.04/ Linux Mint 20.
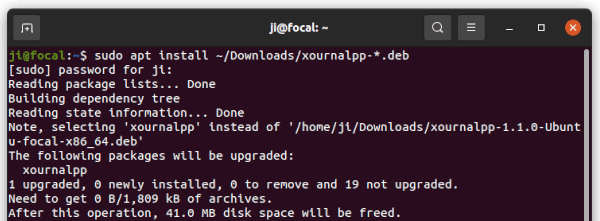
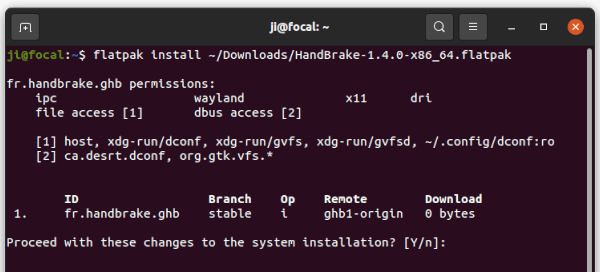
You can then install the .deb by opening terminal and running command:
sudo apt install ~/Downloads/xournalpp*.deb
For other Ubuntu releases and other Linux, choose the non-install ‘xournalpp-xxx.AppImage‘ package. By adding execute permission in the right-click menu ‘Properties’ dialog under Permissions tab, you can finally run the Appimage to launch the software.
Need the most recent HPLIP to get your HP printer or scanner working in Ubuntu? Here’s how to install guide as well as workaround to fix the python-pyqt5 dependency issue.
HPLIP is an open-source Linux drivers for HP’s inkjet and laser printers. The project is initiated and led by HP Inc. While the package in Ubuntu repositories is always old, you can install the official binary to get new devices support.
However, the most recent releases refuse to install in my Ubuntu 20.04 due to python-pyqt5 dependency issue. If you’re facing with the similar issue, then this tutorial may help!
Download & Install HPLIP in Ubuntu 20.04
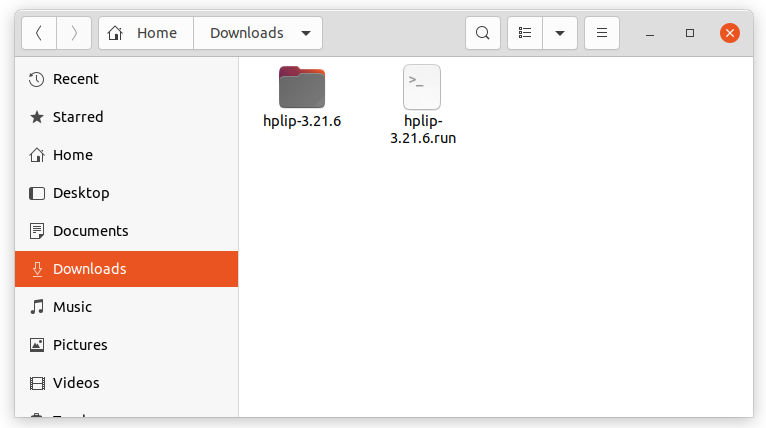
1.) Firstly, download the latest binary from the link below. It’s ‘hplip-3.21.10.run‘ at the moment.
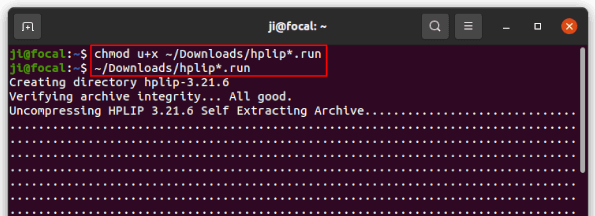
2.) Next, add executable permission by pressing Ctrl+Alt+T on keyboard to open terminal. Then run command:
chmod u+x ~/Downloads/hplip*.run
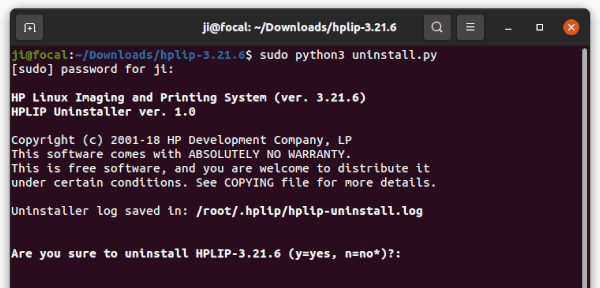
And try to install it via command:
~/Downloads/hplip*.run
Follow the terminal output and answer some questions to start installing the driver.
3.) Fix python-pyqt5 dependency issue.
As I said, it refuse to install in Ubuntu 20.04 because it tries to install old Python 2 binding for Qt5 as dependency in my case.
Thanks to Christoph Mueller, I found it has something to do with python symbolic links.
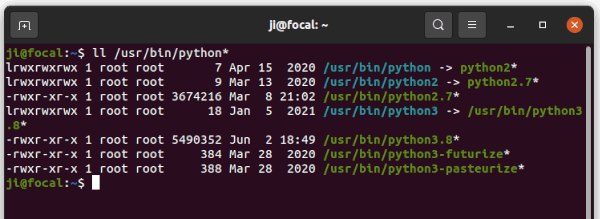
As you may know, python2 and python3 in /usr/bin are symbolic links. While python2 is python2.7, python3 links to python3.8 (or 3.9 depends on Ubuntu edition), python is not exist out-of-the-box. However, it will be created in some cases and links to either python2 or python3.
And the point is when Python links to Python2, HPLIP will mistakenly try to install Python 2 libraries as dependency.
Until HPLIP fixed the issue, the solution is either remove /usr/bin/python if you don’t need it or make it link to Python3.
Make Python to be Python3:
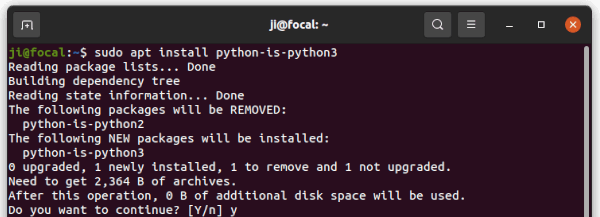
There are two choices to create symlink for python: install python-is-python3 or use update-alternatives command.
Option 1. Open terminal and run command to install ‘python-is-python3’:
sudo apt install python-is-python3
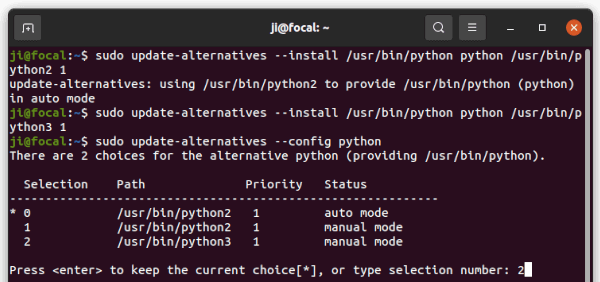
Option 2. Use ‘update-alternatives’ to choose which to link to. Firstly, add both python2 and python3 as alternatives:
Want to access your Ubuntu desktop remotely from a Windows 11 computer? It’s easy to do the job with built-in screen sharing function.
Ubuntu uses Vino as default VNC server to share your existing desktop. With it, users can access Ubuntu remotely either in or out of local network via a VNC client.
Enable Vino VNC in Ubuntu:
1. Firstly, click on ‘Activities’ in top bar, search for and open terminal from system app launcher. When it opens, run commands:
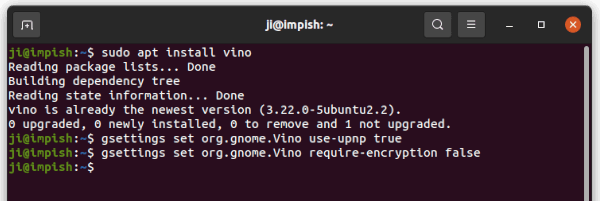
Make sure Vino is installed by running command:
sudo apt install vino
To allow computer outside of local network to access, enable upnp is your router support it:
gsettings set org.gnome.Vino use-upnp true
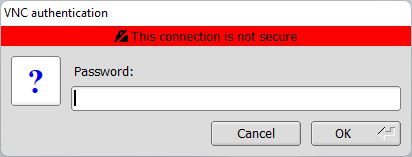
Vino requires encryption by default. However, VNC clients from Windows computer does not support the encryption type. So you may disable the feature via command:
gsettings set org.gnome.Vino require-encryption false
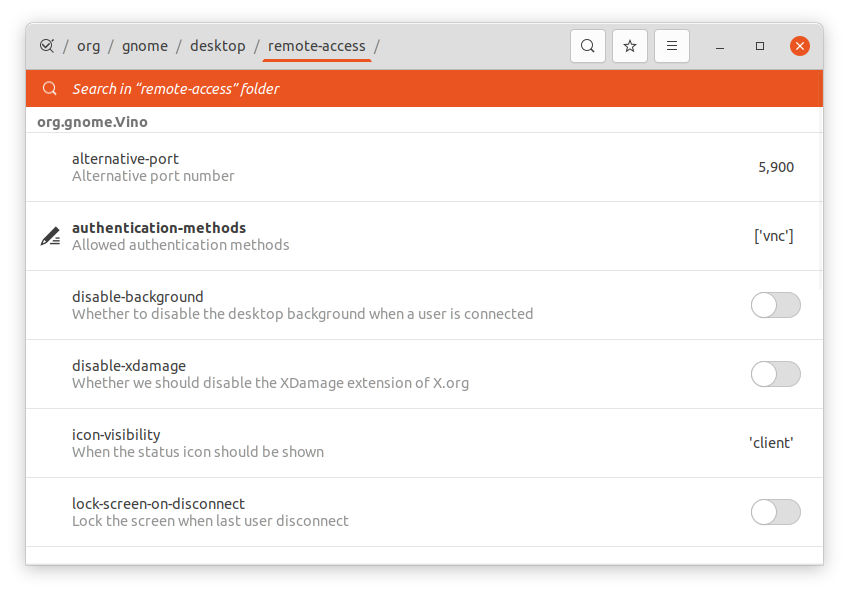
There are more settings, e.g., change listening port, disable background, lock on disconnect. And you can control them via Dconf Editor (install from Ubuntu Software), by going to ‘org -> gnome -> desktop -> remote access’.
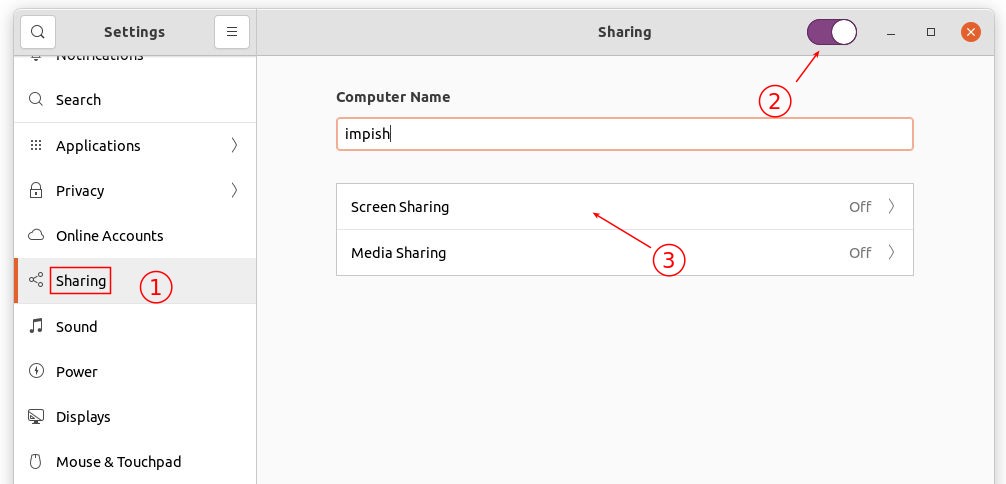
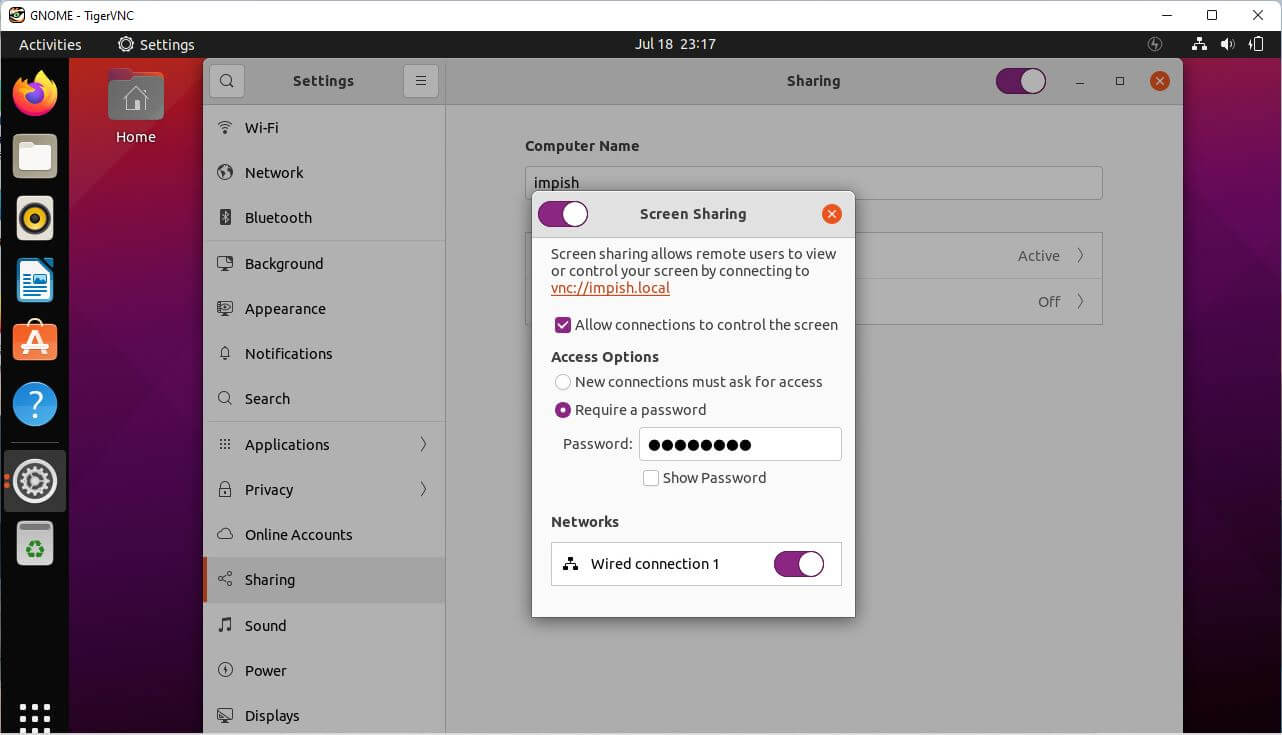
2. Secondly, open System Settings and go to Sharing in the left pane. Toggle on the slider icon on header, and then click ‘Screen Sharing’ to go to its settings page.
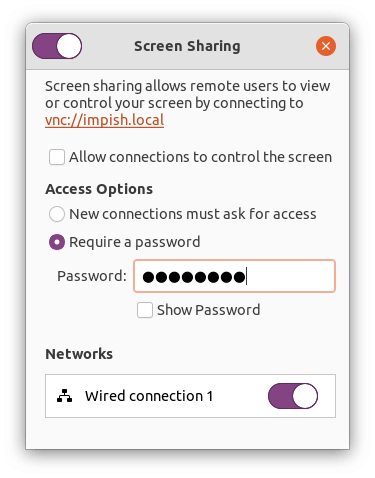
3. Finally, turn on ‘Screen Sharing’ function, and do:
Allow remote control by enabling “Allow connections to control the screen”
Set ‘New connections must ask for access’ if you’re sitting at Ubuntu computer.
Or set a hard-to-guess password for choice.
If you have both wired / wireless network connected, choose one to share with.
Remove Access Ubuntu from Windows 11:
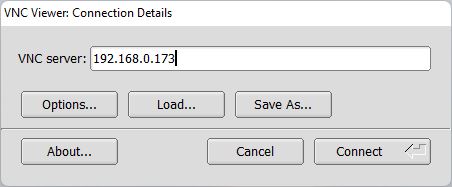
Windows uses need a VNC client to get access remote computers. And I use TigerVNC which is available to download at the link below:
The open-source video transcoder HandBrake released new 1.4.0 version with exciting new features.
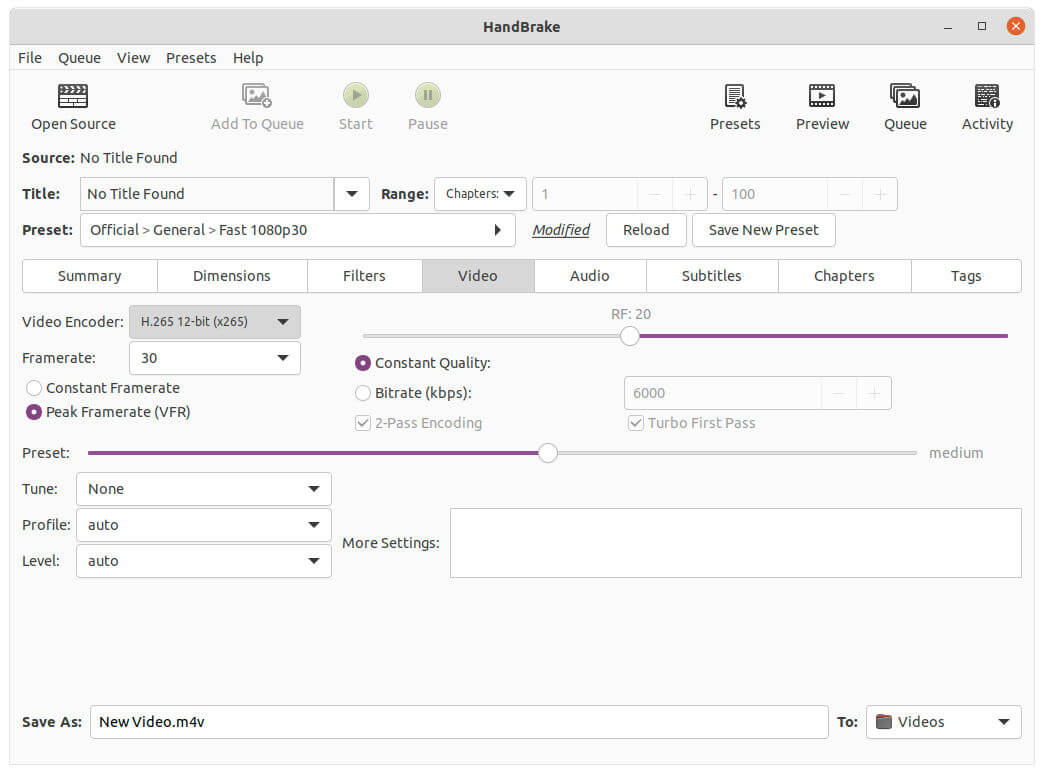
HandBrake 1.4.0 adds native 10 and 12-bit encoding support. Though it has limitations that some filters (e.g., Detelecine, Chroma Smooth, and more) do not currently support higher than 8-bit. With these filters enabled, you won’t benefit from the new feature.
You can select the new 10-bit / 12-bit encoder from the “Video codec” drop-down on the Video tab. For hardware encoders, the option will only be shown if the system supports it.
The release also adds new filters including Chroma Smooth and Colourspace Selection. New Media Foundation encoder for Windows based ARM64 devices powered by Qualcomm Chipsets.
For those sticking to the open-source graphics driver, the latest Mesa 3D graphics library is easy to install via an Ubuntu PPA.
Mesa is an open-source software implementation of OpenGL, Vulkan, VDPAU, VA-API, and other graphics API specifications.
Ubuntu uses Mesa as OpenGL implementation if no proprietary driver is in use. It is however always old. For users want to play some games with the open-source RadeonSI, RADV, Intel, or Nouveau drivers, you may try the latest Mesa via PPA.
Install Mesa via Ubuntu PPA:
A trustworthy Ubuntu PPA is available that contains the latest stable Mesa packages for Ubuntu 20.04, Ubuntu 22.04, Ubuntu 24.04, and Ubuntu 24.10 on amd64, armhf/arm64, and i386 CPU platforms.
1. Add the PPA:
Search for and open terminal from system app launcher. When it opens, run command to add the PPA:
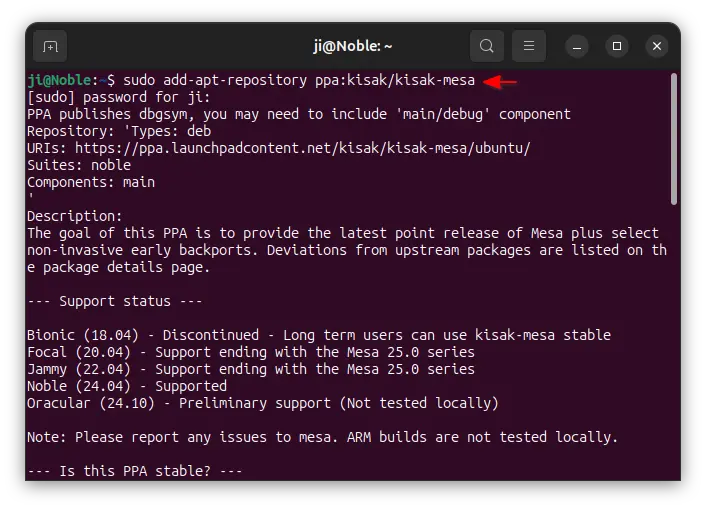
sudo add-apt-repository ppa:kisak/kisak-mesa
Type user password, no visual feedback, when it asks. Read the PPA description as you want and hit Enter to continue.
2. Install Mesa packages:
For, Linux Mint, you need to update package cache though it’d done automatically in Ubuntu while adding PPA.
sudo apt update
Finally install available upgrades of all packages including Mesa library via command:
sudo apt full-upgrade
3. Check mesa version:
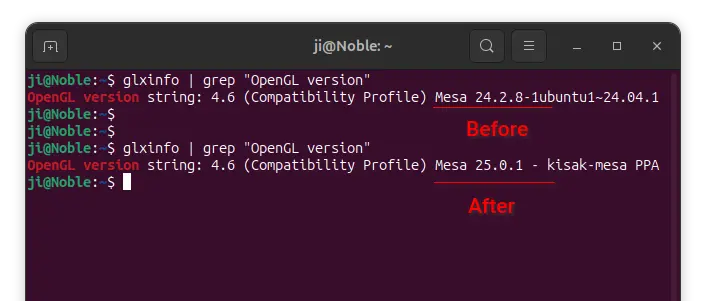
To find out the package version, use command:
glxinfo | grep "OpenGL version"
Restore Original Mesa packages:
To restore your graphics driver to the original status, firstly install ppa-purge via command:
sudo apt install ppa-purge
Next purge the Ubuntu PPA which will downgrade all the installed packages:
sudo ppa-purge ppa:kisak/kisak-mesa
For Linux Mint 21/22, it’s recommended to add -d jammy or -d noble flag to work safely:
sudo ppa-purge -d jammy ppa:kisak/kisak-mesa
Here jammy and noble is the code-name of Ubuntu that Linux Mint is based on. If you don’t know which to use, run cat /etc/os-release to tell.