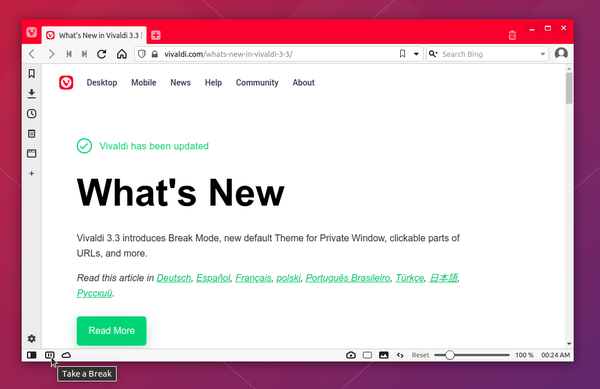
Vivaldi web browser 3.3 was released today. The new release introduces a new Break Mode.
By clicking on the new pause button at the left corner of the Status Bar, or press Ctrl + “.” on keyboard, Break Mode mutes and stops HTML5 audio and videos, hides all tabs, panels, and other content leaving the screen clean.
After taking a break, you can resume your browsing activity exactly where you left off by pressing Play to un-pause the browser.
Easier cropping of URL in the Address Bar by pressing Ctrl & clicking.
Full-page blocking support
Drag & drop Speed Dials to folders
How to Install Vivaldi 3.3 in Ubuntu:
The official Ubuntu .DEB packages are available for download at the link below:
Grab the deb matches your OS, then install it via Ubuntu Software or Gdebi package manager. Or run command in terminal:
sudo dpkg -i ~/Downloads/vivaldi-stable_3.3*.deb
Vivaldi also has apt repository, with it you can install the browser and get future updates through Software Updater utility.
Open terminal either via Ctrl+Alt+T keyboard shortcut or by searching for terminal from application menu. When it opens, run following commands one by one:
Looking for screen capturing application for your Ubuntu desktop? Here are 7 popular graphical tools you can try.
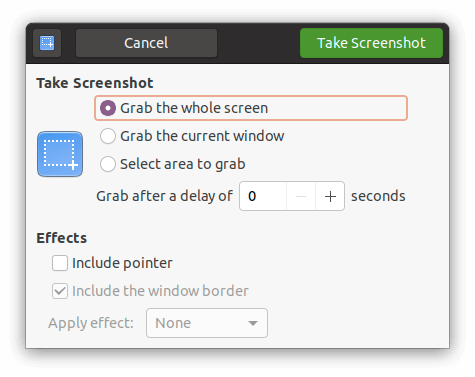
1. Gnome Screenshot
GNOME Screenshot is no longer default since GNOME 40 (meaning Ubuntu 22.04 and higher). Install it either from Ubuntu Software or by running sudo apt install gnome-screenshot command in terminal.
First of first, if you just want to take a screenshot. use the default screenshot tool by pressing PrintScreen, Alt + PrintScreen, or Shift + PrintScreen on keyboard to take screenshot of whole screen, focused app window, or selected area.
You can also launch the tool by searching for screenshot from system application launcher.
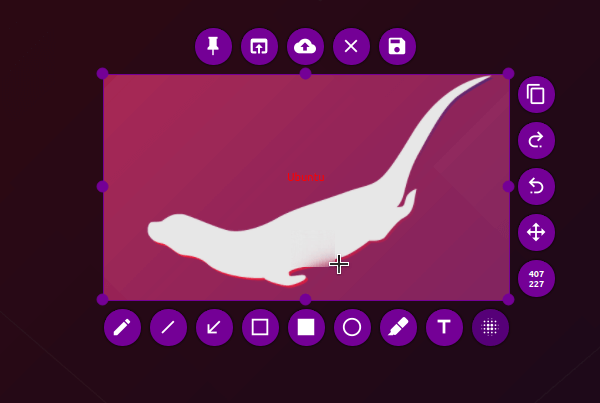
2. Flameshot
Flameshot is a powerful yet simple to use screenshot software. It starts as indicator applet with option to capture selected rectangular area.
The software features editing tools around screenshot selection area. As well, it supports for uploading to Imgur, and commands.
To install Flameshot, either search for and install it via Ubuntu Software or run command in terminal:
sudo apt install flameshot
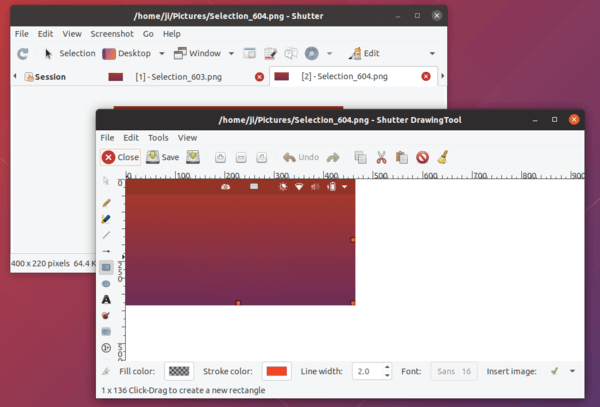
3. Shutter
Shutter is a feature-rich screenshot application with a built-in editor.
It’s one of must installed applications on my Ubuntu. The software features:
Capture rectangular area.
Capture active window, or select an app window to capture.
whole screen, workspaces.
Capture app child window.
Capture menu or cascading menus from an app.
Capture tooltips.
Upload to Dropbox, Imgur, etc.
Edit with built-in editor, or auto-open with other system image editor.
Ubuntu removed Shutter from its universe repositories due to old Gnome 2 dependency libraries. Now, the project is working on removing old libraries and getting back to Ubuntu main repositories.
To install Shutter, either install snap package, or run commands one by one to get it from PPA:
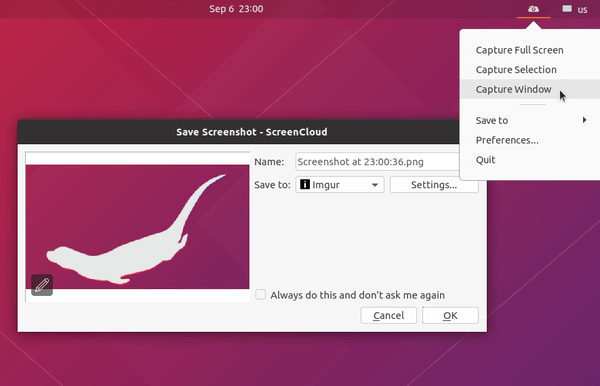
Screencloud is a screenshot sharing software that works on Linux, Windows, and Mac OS.
It starts as an indicator applet offers menu options & keyboard shortcuts to take screenshot of selection, full-screen, and window.
Screenshot URL is automatically copied to clipboard, if you have pre-defined settings, for easy sharing with your friend. Supported online services include: Dropbox, Imgur, Google Drive, OneDrive, FTP/SFTP, Shell Script.
The software is available as Snap, so you can easily install it from Ubuntu Software. For choices, an Appimage is also available to download in the link below:
Grab the .appimage package, make it executable in file “Properties -> Open With” dialog, and finally run it to launch the tool.
5. GIMP
If you edit images regularly with GIMP image editor, try its built-in screenshot function by going to menu File -> Create -> Screenshot ….
You’ll see a child window with options to capture window, full-screen, and selected area. And screenshot will be opened in a new GIMP window automatically.
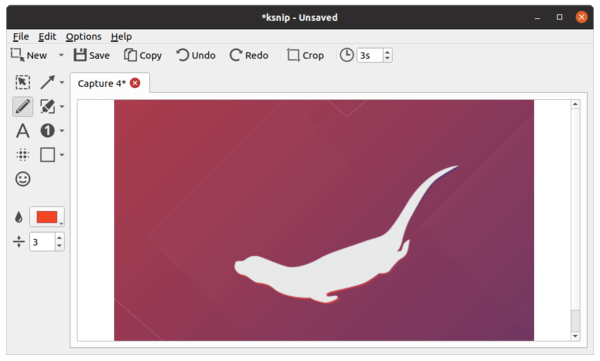
6. Ksnip
Ksnip is a Qt-based screen capture with a built-in editor. It works on X11 and Gnome / Plasma Wayland.
It includes most features that other screenshot tools have (e.g, upload to Imgur, hotkeys, etc), and can be a great alternative to Shutter. Although it’s not perfect at the moment, the development is updating regularly.
7. Kazam
Kazam is a simple screencast application which also include features to capture screenshots. Similar to the default Gnome screenshot, it only offers basic options to capture, full-screen, window, and selection area.
To install Kazam, either use Ubuntu Software, or run command in terminal:
sudo apt install kazam
Summary:
There are also many other screenshot tools (e.g., KDE Spectacle, Deepin screenshot, xfce4-screenshooter, lximage-qt) that are either not desktop independent, or not working good in my case.
So the previous 7 tools are the best for Ubuntu so far in 2020 in my private opinion.
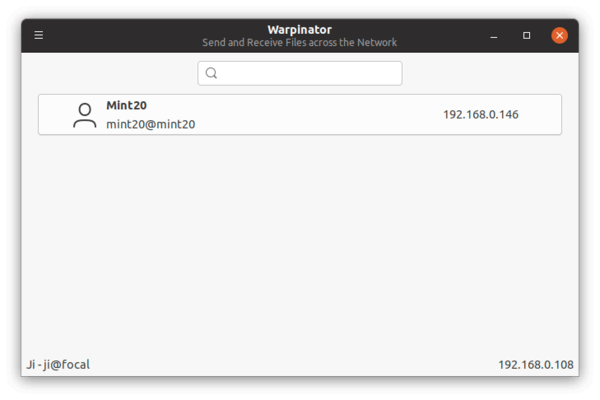
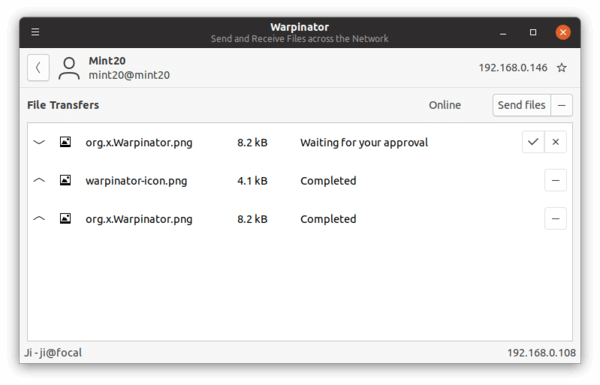
Warpinator is a local network file transfer application developed by Linux Mint. It is written with Python 3 and works on most Linux desktops via Flatpak package.
The software offers a simple clean interface that lists all available network machines with Warpinator running.
To send files, simply select a remote machine and click ‘Send files’ button. File transfer must be first approved by the recipient.
How to Get Warpinator:
For Linux Mint:
Linux Mint users can simply search for and launch terminal from start menu. Then run the command below to install the application from system repository:
sudo apt install warpinator
For Ubuntu based systems
There’s a third-party PPA contains the Warpinator package as well as a few other mint tools Ubuntu 18.04, Ubuntu 20.04, Ubuntu 22.04 and their derivatives.
Press Ctrl+Alt+T on keyboard to open terminal, and run the command below one by one to add the PPA and install the file transfer:
sudo add-apt-repository ppa:kelebek333/mint-tools
sudo apt update
sudo apt install warpinator
Install the app for most other Linux
The file transfer app is also available to install in most Linux systems as universal Flathub.
In Ubuntu with the default GNOME desktop, user may turn photos into wallpaper slideshow by creating a XML file, then select it at any time in the Background settings.
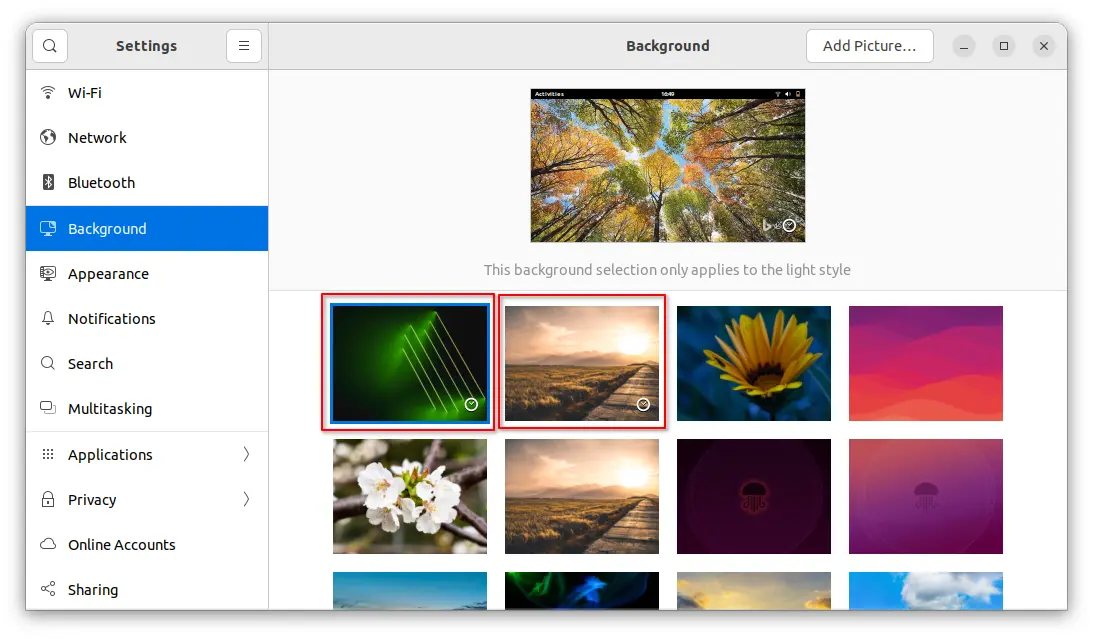
XML slideshows in Background settings are displayed with a small clock emblem in the lower-right corner of the preview. (See the red rectangle area in the picture)
NOTE: In Ubuntu 22.04, changing wallpaper or slideshow only applies in current color scheme. Switching to Light or Dark mode, also changes the wallpaper setting.
Step 1: Create & Edit XML file for slideshow:
First of all, you have to create a XML and write the rules for which photos to display as slideshow, how long they will be displayed, and the transition orders.
1. Create XML file
You can create the XML files in anywhere of your user folder. Though it recommends for software developers to put them in ‘~/.local/share/backgrounds‘ folder.
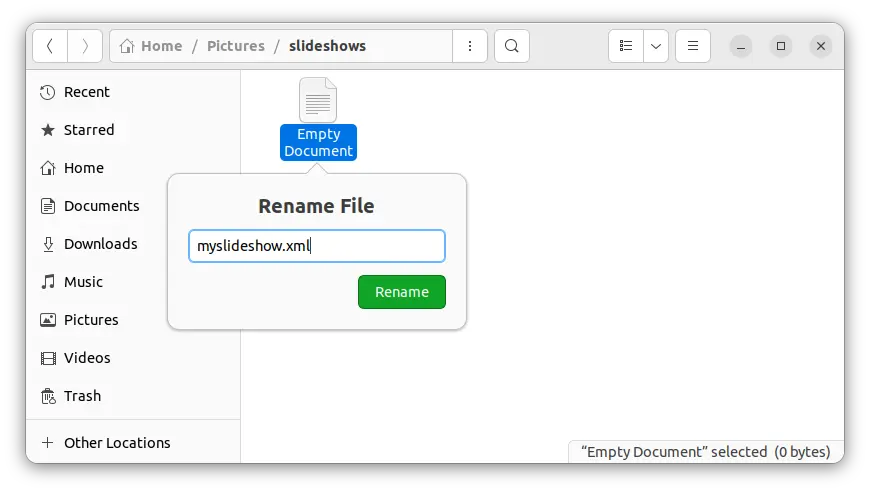
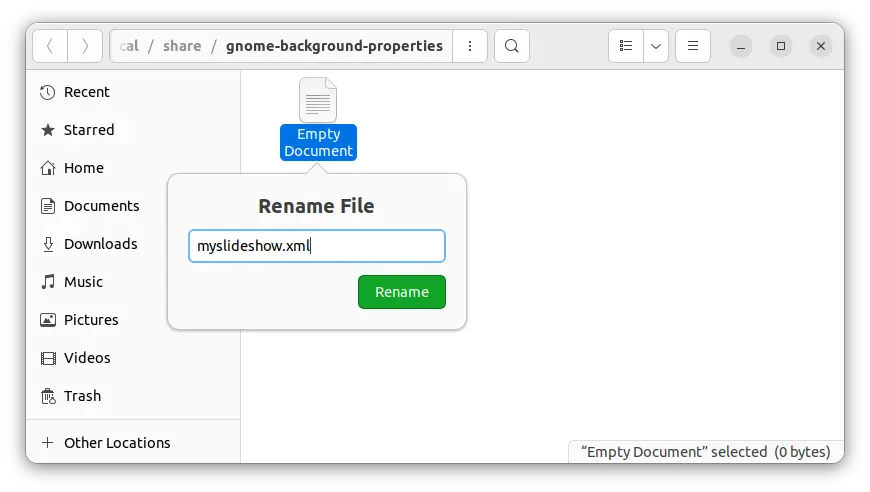
Here I created a sub-folder called ‘slideshows‘ under my Pictures folder. Then, create an empty document and re-name it as .xml file.
Create a XML file
2. Edit XML write the rules:
After created the file, open it with your favorite text editor and write something look like:
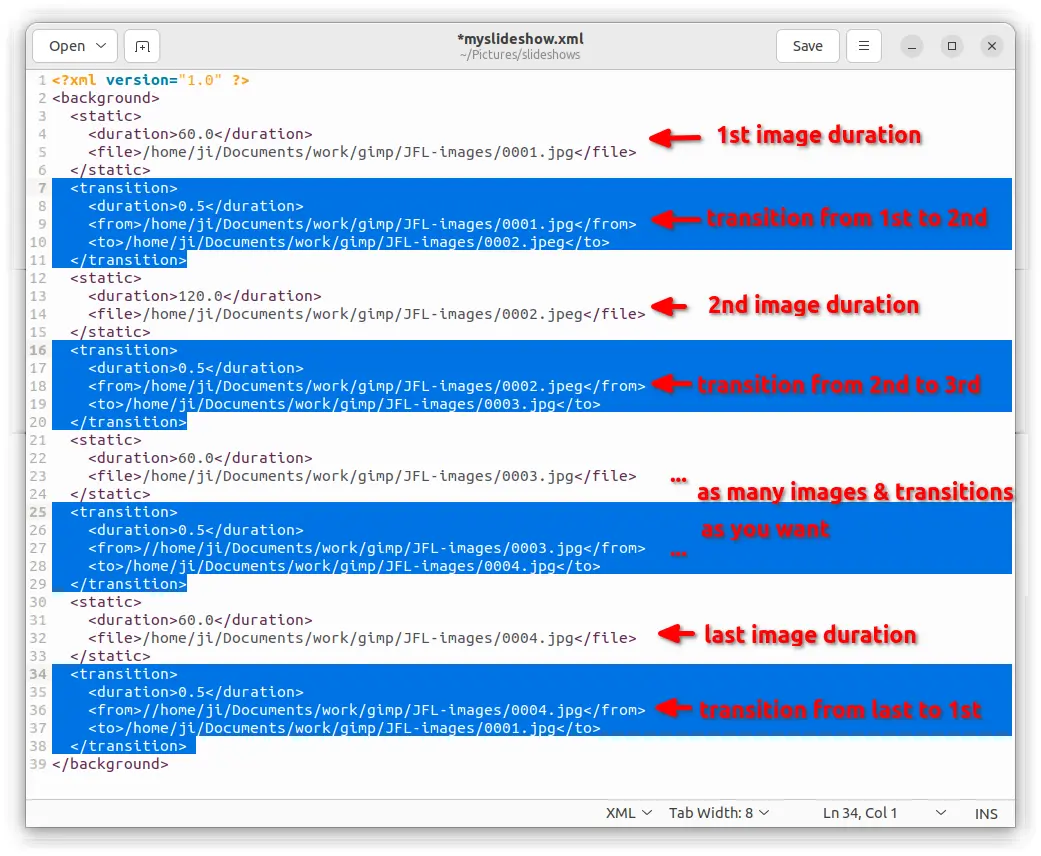
The file content is easy to read. It starts with <?xml version=”1.0″ ?>, then follows with a <background></background> node.
With in <background> node, you can add as many <static></static> and <transition></transition> nodes as you can depends on number of wallpaper files.
While the <static> node contains display time (in seconds) and path to the picture file, the <transition> contains transition time and from to file paths.
The XML slideshow file (pic is edited for easy reading)
TIP: You may drag and drop your photo files into Terminal (Ctrl+Alt+T) or web browser’s URL bar to get the file path quickly!
Step 2: Make the XML slideshow visible in Background settings
After created a XML file, you have to create another one to make it visible in system settings utility.
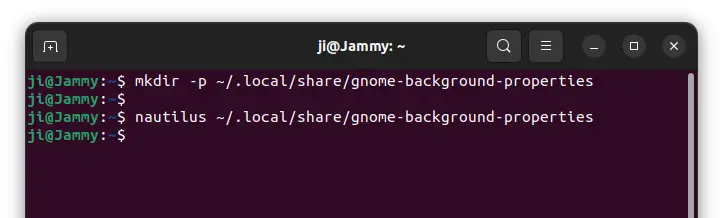
1. First, press Ctrl+Alt+T on keyboard to open a terminal window. When it opens, run command to create the local background properties directory:
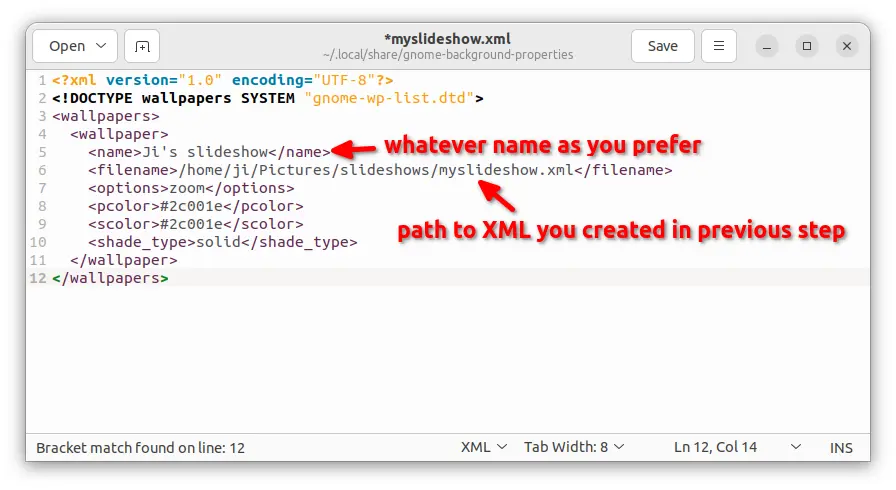
Here type whatever name within <name></name> node, and set the full path to the previous created XML with <filename></filename> node.
Apply the previous created XML slideshow
After saving the file, open or re-open ‘Background’ settings, you should see the new created background slideshow.
Summary:
In short, you can create a XML file in anywhere of user folder, write the rules to specify which photos to display, how long they will persist, and the transition order. Then, create another XML file in background properties directory to make the slideshow visible in ‘Background’ settings dialog.
In theory, the XML should work on all GNOME based Linux, e.g., Fedora Workstation, though I only tested it in Ubuntu 20.04 and Ubuntu 22.04.
System cleaning software BleachBit 4.1.0 was released a few days ago with support for cleaning Pale Moon and Zoom.
With BleachBit you can free cache, delete cookies, clear Internet history, shred temporary files, delete logs, and discard junk you didn’t know was there. Designed for Linux and Windows systems, it wipes clean thousands of applications including Firefox, Adobe Flash, Google Chrome, Opera, and more. Beyond simply deleting files, BleachBit includes advanced features such as shredding files to prevent recovery, wiping free disk space to hide traces of files deleted by other applications, and vacuuming Firefox to make it faster. Better than free, BleachBit is open source.
BleachBit 4.1.0 is marked as development release for the next 4.2.0 major release. It features:
Clean Pale Moon.
Clean Zoom.
Fix bug that not deleting whole Firefox URL History.
Fix that cleaning LibreOffice erase all its extensions.
How to Get BleachBit 4.1.0:
The deb packages for Ubuntu 16.04, Ubuntu 18.04, Ubuntu 20.04, as well as packages for Debian, CentOS, Fedora, Windows, and source code are available to download at the link below:
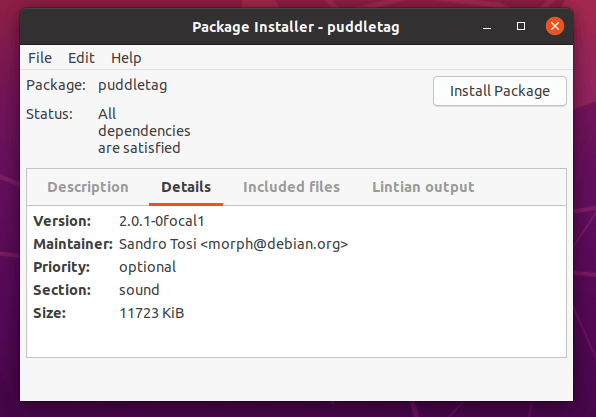
Grab the .deb package for your Ubuntu edition, open & install file with either ‘Software Install’ or ‘Gdebi package installer’ if installed.
This simple tutorial shows how to install the latest Audacity 2.4.2 via PPA in Ubuntu 20.04, Ubuntu 18.04, and Linux Mint 20.
Audacity audio editor 2.4.x was missing from the unofficial PPA for a few months, due to build system change and my poor debian packaging skill.
Since the upstream maintainer has built the 2.4.2 package for Debian unstable and Ubuntu 20.10, backports for Ubuntu 20.04 and Ubuntu 18.04 now are here for you!
How to Install Audacity 2.4.2 via PPA in Ubuntu 20.04:
Open terminal either from system application menu or by pressing Ctrl+Alt+T on keyboard. When terminal opens, run following commands one by one:
1.) Run command in terminal to add the PPA repository:
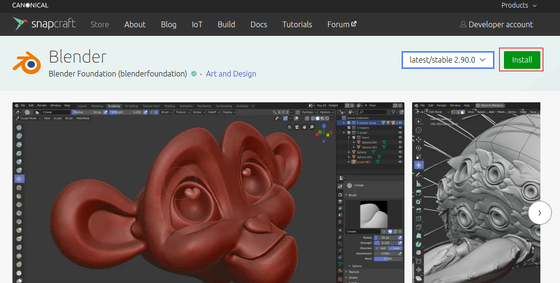
Open source 3D creation software Blender 2.90 was released as the new major series with huge feature updates and performance improvements.
Blender 2.90 release highlights include:
Faster motion blur with Intel Embree.
NVLink support for CUDA and OptiX.
New search menu.
Motion blur in EEVEE rewritten from scratch
New physically based texture for smulating the colors of the sky.
Initial Wayland Support
And improvements to EEVEE, Cycles, sculpt, VR, animation, modeling, UV editing and so much more. See the release note for details. Or see what’s new with the Youtube video:
How to Install Blender 2.90 in Ubuntu:
The official Blender snap package has been updated for the new release. You can install it either from Ubuntu Software or by going to https://snapcraft.io/blender
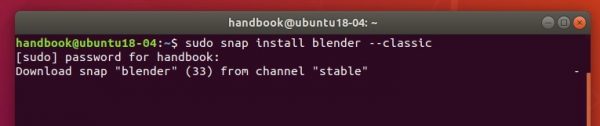
Or run command in terminal to install Blender Snap package:
sudo snap install blender --classic
If you have already installed the Snap package, it will be automatically updated to the latest.
Also the Blender download page offers Linux portable package, which you can extract and run the executable file to launch the software.
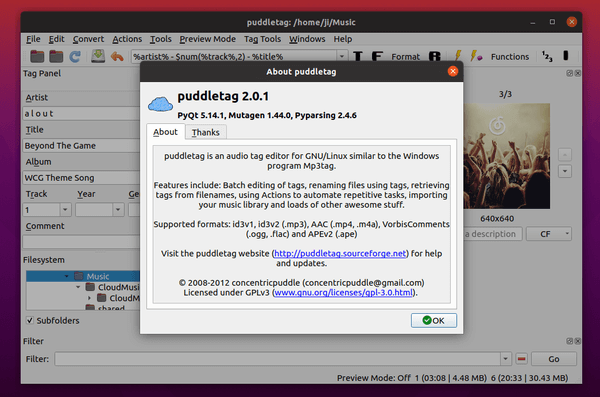
Puddletag audio tag editor 2.0.1 was released 2 days ago with official Python 3 and PyQt5 support.
Since Ubuntu 20.04 dropped Qt4 and old Python 2 libraries, Puddletag 1.2 as well was removed from Ubuntu universe repository.
The Python 3 & PyQt5 branch was started a few months ago by sandrotosi. Now it’s finally merged into Puddletag 2.0.1.
The audio tagger might be added back (hope so) into main repositories in future Ubuntu releases. Before it happens, you can either grab the source code or use an unofficial PPA.
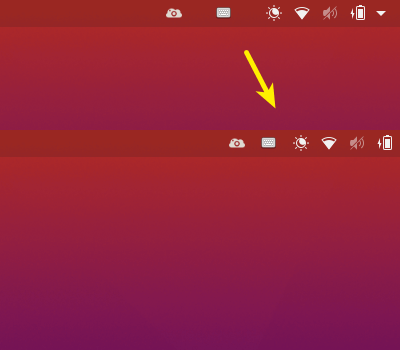
In Ubuntu 20.04 Gnome Shell, application indicator on top panel has wide spaces between icons. You can reduce the icon spacing via an extension called Unite.
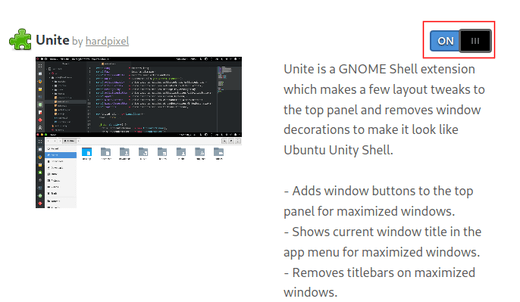
Unite is a Gnome Shell extension which makes a few layout tweaks to the top panel and removes window decorations to make it look like Ubuntu Unity Shell. With the extension, your system tray area will look like:
To install the extension, do following steps one by one.
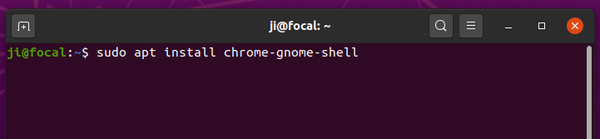
1.) Open terminal (Ctrl+Alt+T) and run command:
sudo apt install chrome-gnome-shell
2.) Run command to install the extension required x11-utils library:
If you don’t see the toggle icon, click link to install browser extension and refresh this web page
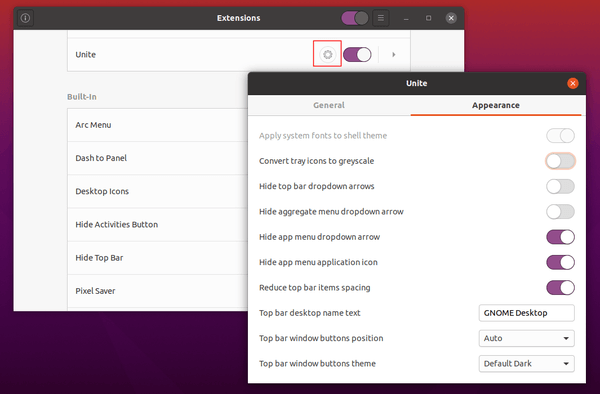
The extension by default reduces top bar item spacing. To tweak other panel appearance, open Gnome Tweaks (or Extensions tool), and go to unite settings.