Miss Realtek rtlwifi drivers or get ‘No WiFi Adapter Found‘ issue? There’s now an Ubuntu PPA that contains the most recent rtlwifi drivers for Ubuntu, Linux Mint, and derivatives.
Without building from the source code, the “Linux Mint Türkiye” team maintains a PPA that contains the most recent wireless drivers with DKMS support for rtl8723bu, rtl8822bu, rtl8188eu, rtl8188fu, rtl8192cu, rtl8192du, rtl8192ee, rtl8192eu, rtl8192fu, rtl8723au, rtl8723bu, rtl8723de, rtl8723ds, rtl8723du, rtl8812au, rtl8814au, rtl8821ce, rtl8821cu, rtl8822bu devices.
If you have a RealTek USB WiFi Adapter or a laptop / notebook with built-in chipset in the previous list, do following steps may help you install the drivers in Ubuntu 18.04, Ubuntu 20.04, Ubuntu 22.04, Ubuntu 24.04, Linux Mint 20/21/22.
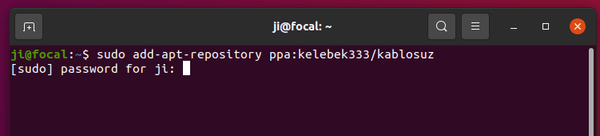
1.) First open terminal either from the system application launcher or by pressing Ctrl+Alt+T on keyboard.

2.) Then run command to add the Ubuntu PPA:
sudo add-apt-repository ppa:kelebek333/kablosuz
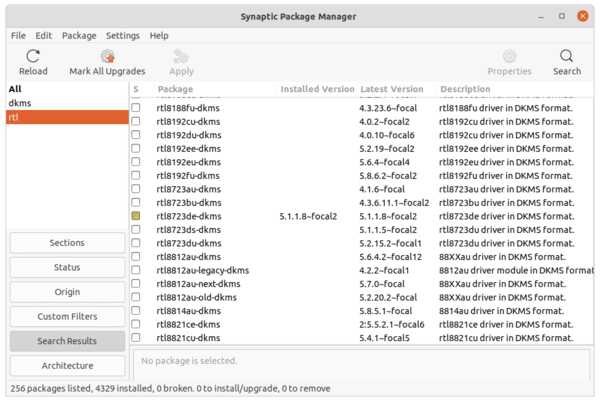
3.) Then open Synaptic package manager, click Reload button refresh package cache, search either rtl or dkms.
Scroll down to find out the list of driver packages, then right-click on the one for your chipset and select ‘Mark for Installation’, finally click on Apply button to install it.
Or you can run command in terminal to install the driver (replace rtl8723de-dkms in the code):
sudo apt install rtl8723de-dkms
4.) The wireless network should work immediately after you installed the driver. You can manually unload and re-load the kernel module via commands (replace rtl8723de-dkms in the code):
sudo modprobe -r rtl8723de

sudo modprobe rtl8723de
Uninstall the RealTek Wifi Driver:
To remove the driver, either use Synaptic package manager or run apt command in terminal:
sudo apt remove --autoremove rtl8723de-dkms
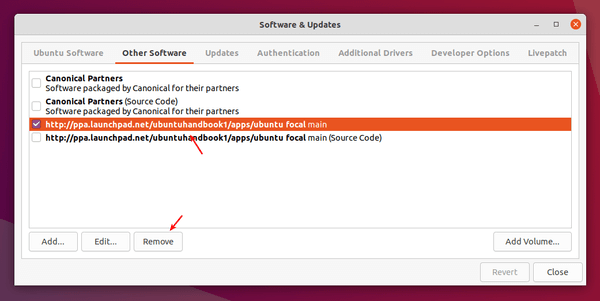
And remove the Ubuntu PPA via command:
sudo add-apt-repository --remove ppa:linuxmint-tr/wireless-ppa