The Python programming language 3.9.1 was released a few days ago as the first maintenance release of Python 3.9.
Python 3.9.1 comes with 282 changes since 3.9.0. It is the first version to support macOS 11 Big Sur. With Xcode 11 and later it is now possible to build “Universal 2” binaries which work on Apple Silicon. See the changelog for more.
How to Install Python 3.9.1 in Ubuntu:
1.) Open terminal either by pressing Ctrl+Alt+T on keyboard, or by searching for ‘terminal’ from system application launcher.
When terminal opens, run command to add the “deadsnakes” team PPA:
sudo add-apt-repository ppa:deadsnakes/ppa
Type user password (no asterisk feedback) when it prompts and hit Enter to continue.

2.) Then run commands to refresh system package cache, and install Python 3.9:
sudo apt update

sudo apt install python3.9
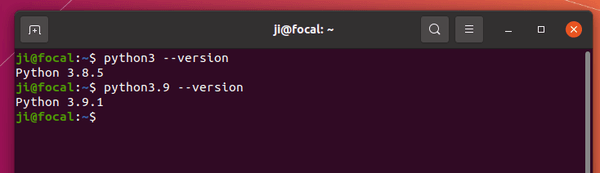
3.) Once successfully installed, check your system Python versions (python –version):
Uninstall:
To uninstall the Python3.9 packages, run command:
sudo apt remove --autoremove python3.9 python3.9-minimal
To remove the Deadsnakes PPA, launch Software & Updates and go to Other Software tab, then remove the repository line and close the window.