![]()
Microsoft PowerShell 7.1.0 was released a few days ago with a number of improvements and fixes to PowerShell 7. Here’s how to install it in Ubuntu 16.04, Ubuntu 18.04, Ubuntu 20.04, and Linux Mint 19.x, 20.
PowerShell 7.1.0 release highlights:
- Fix
$?to not be$falsewhen native command writes tostderr. - Rename
-FromUnixTimeto-UnixTimeSecondsonGet-Dateto allow Unix time input. - Make
$ErrorActionPreferencenot affectstderroutput of native commands. - Allow explicitly specified named parameter to supersede the same one from hashtable splatting.
- Make the switch parameter
-Qualifiernot positional forSplit-Path. - Resolve the working directory as literal path for
Start-Processwhen it’s not specified. - Make
-OutFileparameter in web cmdlets to work like-LiteralPath. - Fix string parameter binding for
BigIntegernumeric literals. - On Windows,
Start-Processcreates a process environment with all the environment variables from current session, using-UseNewEnvironmentcreates a new default process environment. - Do not wrap return result to
PSObjectwhen converting ScriptBlock to delegate. - Use invariant culture string conversion for
-replaceoperator.

How to Install PowerShell (7.4 Updated) in Ubuntu:
If you’re OK with containerized Snap package, simply search for and install powershell from Ubuntu Software.
For those prefer .deb package, Microsoft offers the software in its official apt repository, so far supports Ubuntu 18.04, Ubuntu 20.04, Ubuntu 22.04, and Ubuntu 24.04.
1. Setup Microsoft apt repository in Ubuntu:
Open terminal from your system application launcher. When it opens, run command to download the official .deb package:
wget -q https://packages.microsoft.com/config/ubuntu/$(lsb_release -rs)/packages-microsoft-prod.deb -O packages-microsoft-prod.deb
For Linux Mint, replace $(lsb_release -rs) in the code with 20.04 for Linux Mint 20 (or 18.04 for Mint 19.x).

Then install the package, which will install Microsoft repository and key, by running command:
sudo dpkg -i packages-microsoft-prod.deb
Type user password (no asterisk feedback) for sudo prompts and hit Enter.

2. Install PowerShell:
After adding the repository, run following 2 commands one by one to check package updates and install the software:
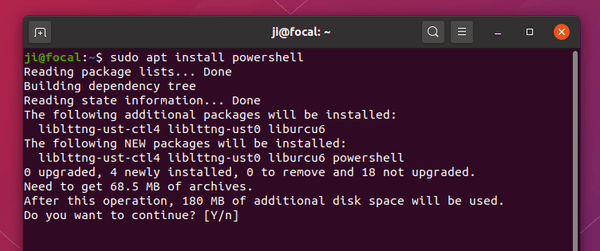
sudo apt update

sudo apt install powershell
Once installed, run pwsh to start PowerShell.
Uninstall PowerShell:
To remove the software, simply open terminal and run command:
sudo apt remove powershell
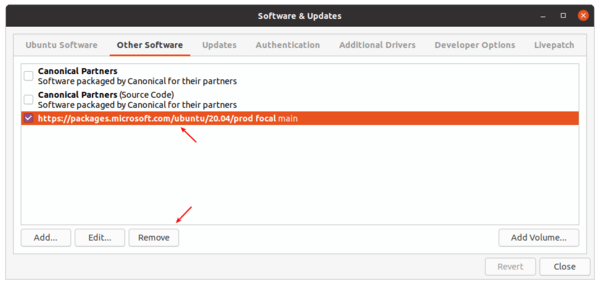
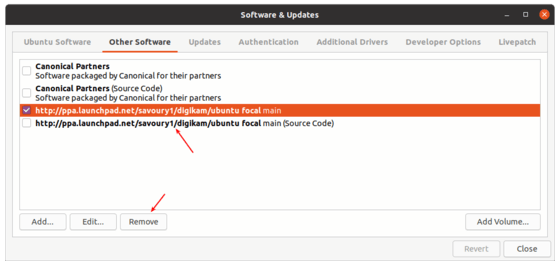
To remove the apt repository, simply go to Software & Updates > Other Software tab, and remove the relevant line.