![]()

MythTV, open source software digital video recorder (DVR), released new stable version 31 a day ago. Here’s how to install it in Ubuntu 18.04, Ubuntu 19.10.
MythTV 31 comes with significant changes to video decoding and playback, python3 support, greatly improved channel scanning, and support for the DataDirect guide service from Schedules Direct has been removed. For details, see the release note.


How to Install MythTV 31 in Ubuntu:
Mythbuntu Team PPA has made the new release packages for Ubuntu 18.04, Ubuntu 19.10, and Ubuntu 20.04.
1.) Open terminal either by pressing Ctrl+Alt+T on keyboard or by searching for ‘terminal’ from application menu. When it opens, run command to add the PPA:
sudo add-apt-repository ppa:mythbuntu/31
Type user password when it prompts (no asterisk feedback) and hit Enter to continue.


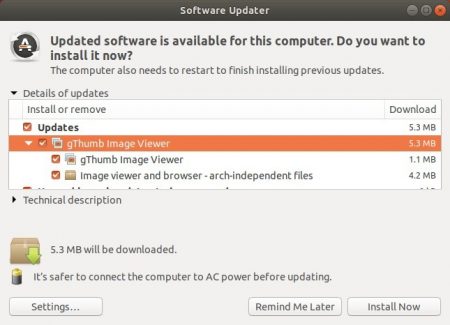
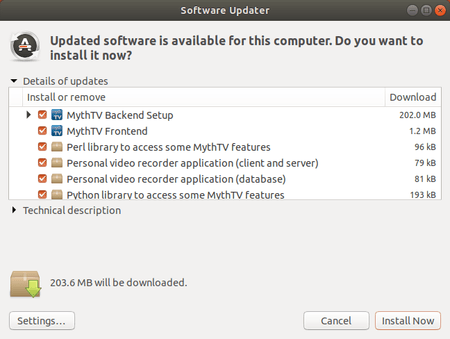
2.) Then either upgrade the software from an installed version via Software Updater:

or install it by running commands in terminal:
sudo apt update

sudo apt install mythtv
Uninstall:
To remove the PPA repository, open terminal and run command:
sudo add-apt-repository --remove ppa:mythbuntu/31
And remove the digital video recorder via command:
sudo apt remove --autoremove mythtv