This simple tutorial shows how to enable ‘minimize on click’, minimize running app window when clicking on its icon on the left dock panel.
All the opened app icons are docked on the left panel in Ubuntu GNOME desktop. Unlike Windows, it however does not minimize focused app when you click its icon on the dock. And, neither “System Setting” nor “Gnome Tweaks” has option to enable this action.
Since the Ubuntu dock is handled by the dash-to-dock extension, it does have the option to enable the feature. All current Ubuntu releases, including Ubuntu 18.04, Ubuntu 20.04, Ubuntu 22.04, and Ubuntu 24.04, can enable this feature via following steps.
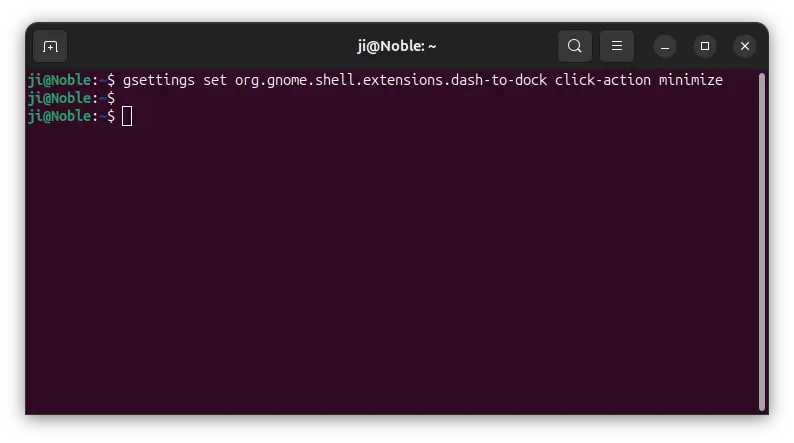
Single command to enable ‘Minimize on click’:
The dash-to-dock Gnome extension in Ubuntu is called ‘Ubuntu Dock’. As the built-in extension, it does not provide settings page in ‘Gnome Extensions’ app. However, users may run single command to change its options one by one.
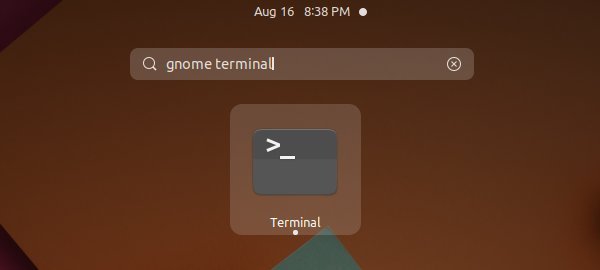
Firstly, either search for and open terminal from ‘Activities’ overview or press Ctrl+Alt+T key combination on keyboard. When terminal opens, run command:
gsettings set org.gnome.shell.extensions.dash-to-dock click-action minimize
After that, click on dock icon to open or focus an app, and click again to see effect!
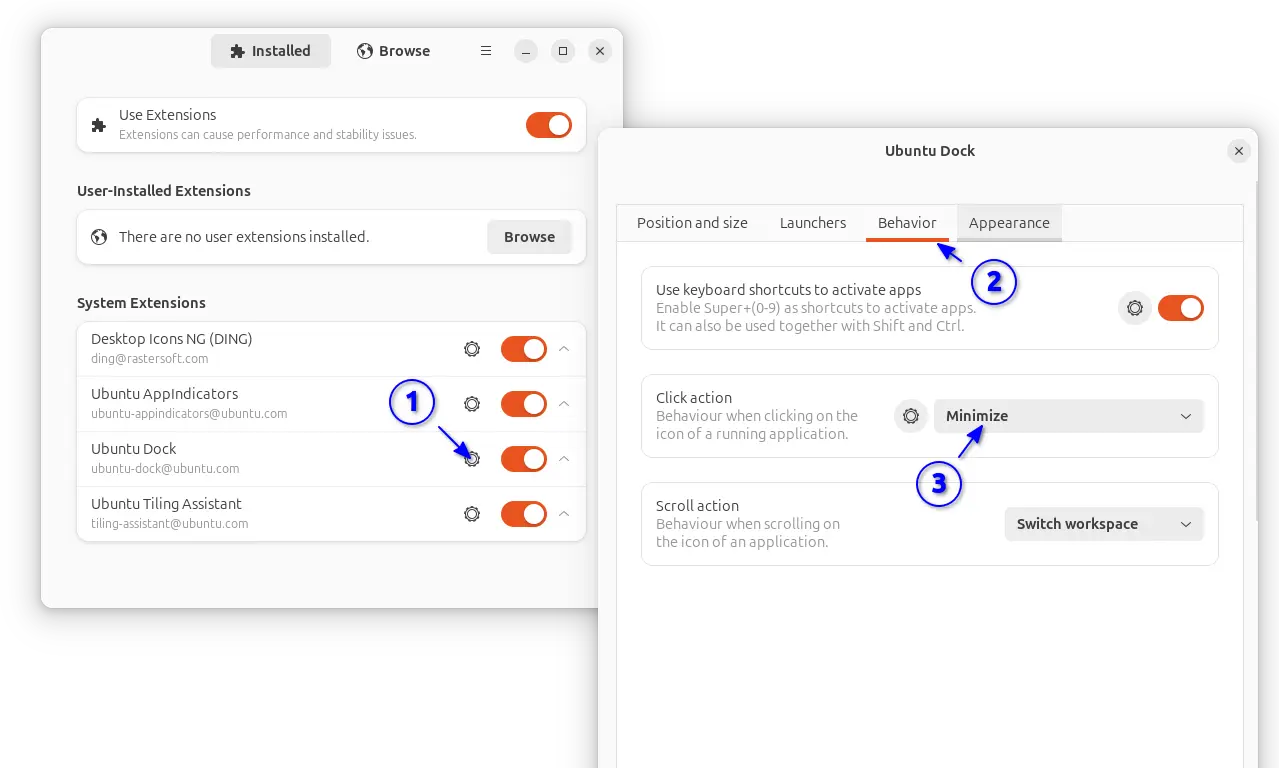
Enable ‘Minimize on click’ via Extension Manager (Graphical Tool):
In Ubuntu 24.04, user can first launch App Center, then search for and install the Extension Manager tool.

Install Extension Manager in Ubuntu Software/App Center
Then, launch “Extension Manager” and click the setting icon for “Ubuntu Dock” extension to open its preferences dialog.
In next pop-up dialog, you’ll see lots of options to configure the left dock panel. There, navigate to “Behavior” tab and set “Click action” to minimize, will do the trick enabling click app icon to minimize its window.
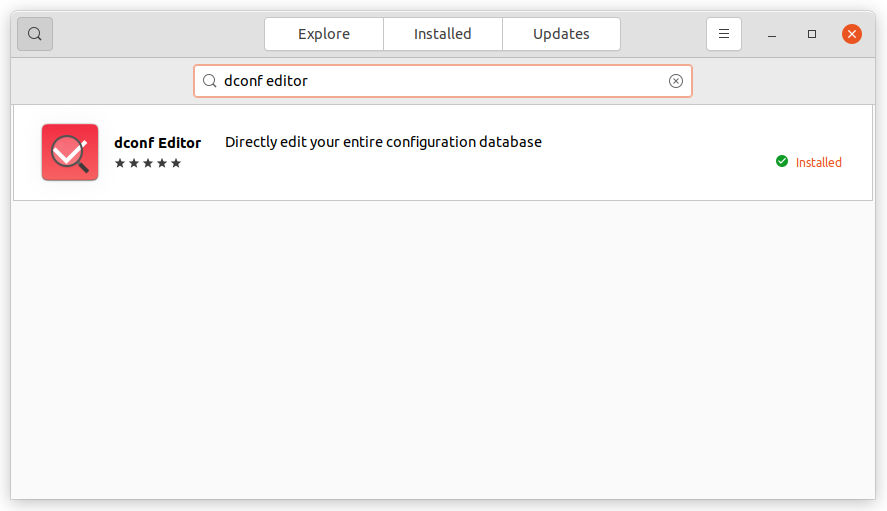
Enable ‘Minimize on click’ via Dconf Editor (Graphical Tool):
For those hate Linux command, the advanced “Dconf Editor” configuration tool is present to do the trick.
1.) Firstly, search for and install ‘dconf editor’ via Ubuntu Software if you don’t have it.
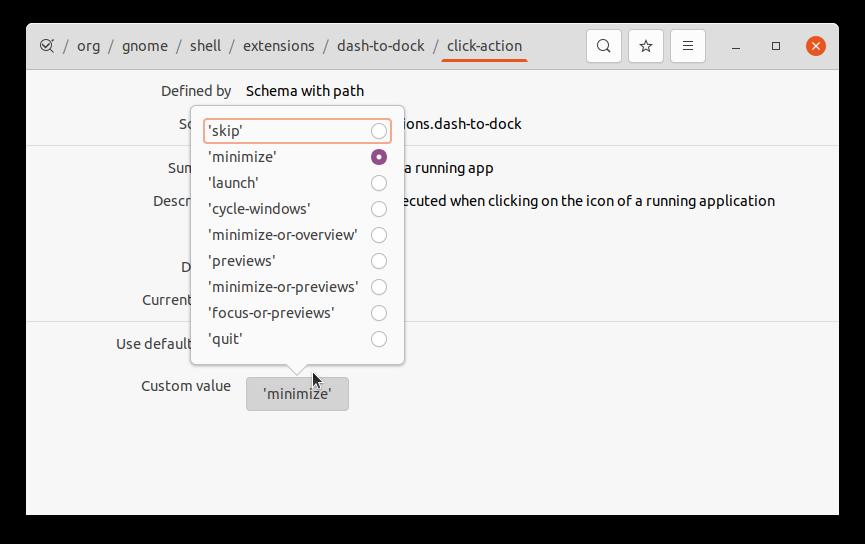
2.) Next, search for and open the tool from the upper-left Activities overview, and then navigate to org -> gnome -> shell -> extensions -> dash-to-dock.
Then scroll down and find out settings for ‘click-action’, and do:
- click the line to go into its configuration page.
- turn off the default value switch.
- select ‘minimize’ as Custom value.
You may also set the value to ‘minimize-or-overview’, which will go to overview screen if more than one windows of the same app are opened; or ‘minimize-or-previews’ that opens thumbnail preview if multiple app instances exist.
That’s it. Enjoy!