Want to block access to certain websites from your machine running Ubuntu or Linux Mint? It’s easy to do it by editing the host file.
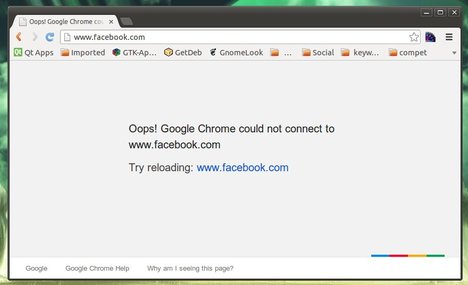
With the hosts file, you can tell Ubuntu to redirect the specific websites to 127.0.0.1. So that the web browser returns below error:
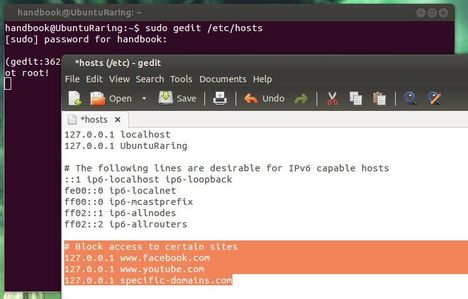
To do so, edit the /etc/hosts with your favorite editor. Press Ctrl+Alt+T on your keyboard to open terminal. When it opens, run below command to edit the hosts via gedit:
sudo gedit /etc/hosts
Add below lines to the end of the file. Exclude the “http://” and change the domain names.
# block access to certain sites
127.0.0.1 www.websites1.com
127.0.0.1 www.websites2.com
127.0.0.1 websites3.com
127.0.0.1 morewebsites.com
Save the file and re-launch your web browser. Done.
Pictoric is a simple utility for Ubuntu Unity to create a desktop slideshow out of the directory of your choice that contains either .jpg/.jpeg or .png files for a given time interval that you choose. Your desktop slideshow will then be initiated and saved to be ready to go for subsequent logins.
Just simple and efficient! To install it in Ubuntu, download and double-click to install the DEB via pop-up Ubuntu Software Center.
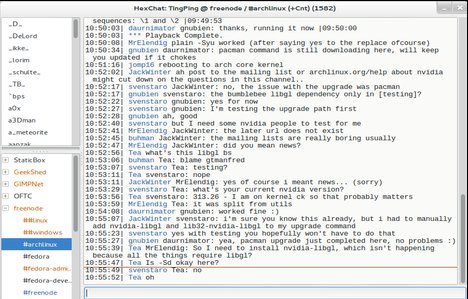
HexChat is an IRC client based on XChat, but unlike XChat it’s completely free for both Windows and Unix-like systems. HexChat was originally called XChat-WDK which in turn was a successor of freakschat.
Features:
Easy to use and customizable interface
Cross-platform on Windows and Unix-like OSes
Highly scriptable with Python and Perl
Translated in multiple languages
Fully open source and actively developed
Multi-network with auto-connect, join, and identify
Spellcheck, Proxies, SASL, DCC support and more
Here’s how to install HexChat via PPA in Ubuntu 13.10, Ubuntu 13.04, Ubuntu 12.04 and their derivatives such as Linux Mint and Elementary OS.
Press Ctrl+Alt+T on your keyboard to open temrinal. When it opens, run below commands to add the ppa:
The Audacity audio editor & recorder has reached version 2.0.4. Here’s how to install or upgrade it via PPA in Ubuntu 13.04 Raring, Ubuntu 12.04 Precise, Linux Mint and Elementary OS.
Audacity 2.0.4 replaces all previous versions, with these improvements:
New Effect > Reverb (based on Freeverb), that replaces GVerb.
New View > Go to Selection Start and Go to Selection End commands.
New Tracks > Align End to End command to append selected tracks.
WAV files import/export now supports “Album Title”, “Track Number” and “Genre” LIST INFO tags and ID3 tags.
(Windows) New support for Windows WDM/KS host which can provide very low latencies if you reduce “Audio to Buffer” in Recording Preferences.
(Windows Vista and later) You can now record computer playback by choosing the new Windows WASAPI host in Device Toolbar, then a “loopback” input.
Bugs have been fixed, involving Keyboard Preferences, Equalization curves, and Effect > Change Pitch, and several more.
Install Audacity 2.0.4
The Audacity team PPA has reached to 2.0.5 alpha. So here I use Nate Muench’s PPA.
Press Ctrl+Alt+T on your keyboard to open terminal. When it opens, run below commands one by one:
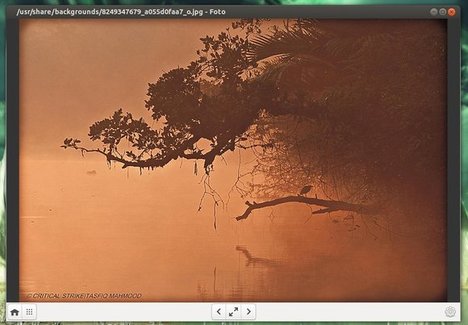
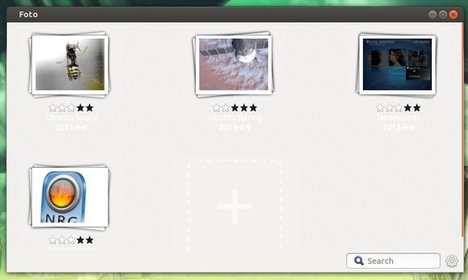
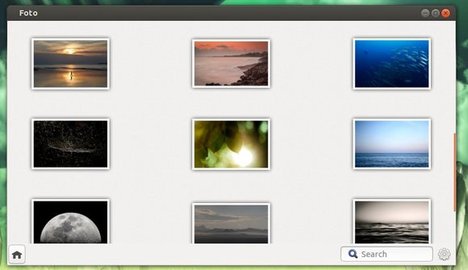
Foto is a very simple image viewer and album manager written in Vala using Gtk3, Clutter, Cairo and Granite. Here are the screenshots:
Foto is a new project, and it’s still in early development stage. If you are interested, install it in Ubuntu 13.04, Ubuntu 12.10, Ubuntu 12.04 and Linux Mint via PPA (press Ctrl+Alt+T to open terminal):
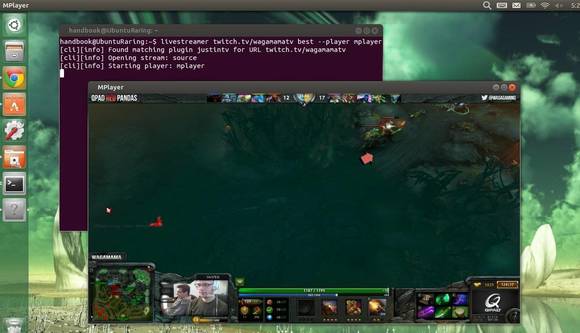
Want to watch live streams on Ubuntu via your favorite video player? Well, here’s how to do it using Livestreamer which supports most of the big streaming services such as Dailymotion, Livestream, Twitch/Justin.tv, YouTube Live, UStream.
Livestreamer is a Command Line Interface that pipes video streams from various services into a video player, such as VLC, Mplayer. The main purpose of Livestreamer is to allow the user to avoid buggy and CPU heavy flash plugins but still be able to enjoy various streamed content.
There is also an API available for developers who want access to the video stream data.
It’s very easy to use this tool. Let’s say you want to watch the stream located on http://twitch.tv/day9tv, just run below command in terminal (press Ctrl+Alt+T to open it).
livestreamer twitch.tv/day9tv
[cli][info] Found matching plugin justintv for URL twitch.tv/day9tv
Found streams: 240p, 360p, 480p, 720p (best), mobile_high, mobile_low (worst)
It will find out what streams are available and print them out for you to choose from. Simply give livestreamer the stream as the second argument and playback will start in your video player of choice.
In this case the best stream is a reference to the stream that is considered to be of highest quality, e.g 720p. The –player argument will specify the video player (It will open VLC as the default player if not specified).
livestreamer twitch.tv/day9tv best --player mplayer
Install Livestreamer in Ubuntu, Linux Mint
Press Ctrl+Alt+T on your keyboard to open terminal. When it opens run below commands to install pip installer:
sudo apt-get install python-pip
Then install Livestreamer via pip:
sudo pip install livestreamer
This will work on all current supported Ubuntu releases, include Ubuntu 13.10, Ubuntu 13.04, Ubuntu 12.10, Ubuntu 12.04, Ubuntu 10.04 and their derivatives such as Linux Mint and Elementary OS.
The Linux Kernel 3.10.11 has been released. All users of the 3.10 LTS kernel series are urged to upgrade as soon as possible. Here’s how to install or upgrade in Ubuntu 13.04, Ubuntu 12.10, Ubuntu 12.04 and Linux Mint.
This maintenance release introduces ARM, x86, and PowerPC fixes, as well as many updated drivers, including Nouveau, i915, iSCSI, and a few wireless ones. See the official announcement.
Install / Upgrade Kernel 3.10.11:
Press Ctrl+Alt+T on your keyboard to open terminal. When it opens, run below commands to download the DEBs.
Then double click to install the Deb via pop-up Ubuntu Software Center.
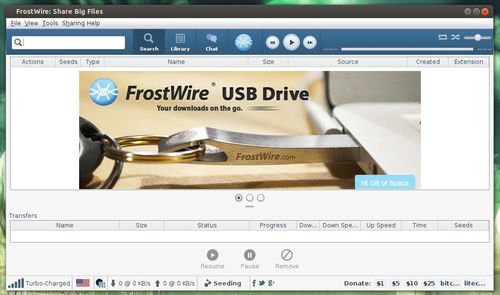
2.) The other way to install FrostWire is using the GetDeb repository. Press Ctrl+Alt+T on your keyboard to open terminal. When it opens, run below commands one by one:
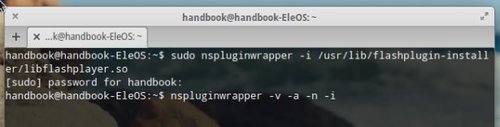
The Elementary OS Luna – Ubuntu 12.04 Precise based system – comes with lightweight browser Midori. To get Flash working for it, you’ll need to install ndiswrapper and do some tweaking. It’s not difficult, just folow the below steps, copy and paste commands into terminal and hit enter to run.
1.) To get started, press Ctrl+Alt+T on your keyboard to open terminal. When it opens, run command to install the flashplugin-installer.