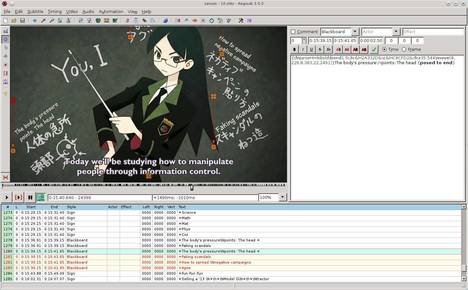
As you may know, Aegisub is a free, cross-platform open source tool for creating and modifying subtitles. Aegisub makes it quick and easy to time subtitles to audio, and features many powerful tools for styling them, including a built-in real-time video preview.
Aegisub is available in Ubuntu Software Center since Ubuntu 12.10 Quantal, but it’s old. At the moment, the latest version is 3.0.4 and it’s available for downloading at the below links:
Once downloaded, you can install it in Ubuntu 13.10, Ubuntu 13.04, Ubuntu 12.04 and their deviratives such as Linux Mint and Elementary by running below commands in terminal (Ctrl+Alt+T):
The Audacious music player has released version 3.4.1. It mainly fixed below bugs:
no gapless playing with ALSA output #314
.minipsf looks for .psflib one directory level up #316
Tray icon missing after restarting xfce4-panel #317
Neon plugin fails to play stream over proxy with authentication. # 319
Buffer size too small for HVSC songlengths db #326
no metadata display for opus files #329
metadata updating failed and other weird tag issues #332
file writer flac does not write tags #334
Fix skinned ui not being drawn properly with gtk-3 >= 3.9 #336
Install Audacious in Ubuntu:
The Webupd8 Team PPA has updated the packages for Ubuntu 13.10, Ubuntu 13.04, Ubuntu 12.10, Ubuntu 12.04 and their derivatives, such as Linux Mint and Elementary OS.
To install it, press Ctrl+Alt+T on your keyboard to open terminal. When it opens, run below command to add the ppa:
The Choqok micro-blogging client has updated to version 1.4 which brings back the Twitter support. Identi.ca support has been removed from StatusNet plugin.
The developer announced in the official website:
Sometimes ago we had two bad news, Identi.ca service switched to pump.io software and dropped it’s API, so Choqok is no longer support Identi.ca service, but it still supports StatusNet websites, because StatusNet is not died. About Identi.ca support, right now there’s no one working on pump.io support as I know, so unfortunately there’s no promise on supporting it again.
And in Twitter land, they turned off support for API v1.0 which Choqok was using, and so with this update Twitter support is back to Choqok.
other changes:
Support for Twitter API v1.1 (Thanks to Daniel Kreuter for his effort on it)
“mark timeline as read” menu item added to tabs context menu (Lim Yuen Hoe)
Show “in reply to” in twitter search timelines (Lim Yuen Hoe)
Identi.ca support removed from StatusNet plugin, we still support StatusNet
And some other minor fixes
Install Choqok 1.4 in Ubuntu:
Press Ctrl+Alt+T on your keyboard to open terminal. When it opens, run below commands to install the client in Ubuntu 13.10, Ubuntu 13.04, Ubuntu 12.10, Ubuntu 12.04 and their derivatives.
A .nrg file is a proprietary CD image file format used by Nero Burning ROM. In Ubuntu Linux, you can easily convert the .nrg to .iso file using the command line tool nrg2iso.
nrg2iso is available in Ubuntu universe repository. You can install it using Ubuntu Software Center. Or run below command if you’re on Ubuntu Server without GUI:
sudo apt-get update; sudo apt-get install nrg2iso
Once installed, you can convert .NGR file to .ISO via one command. For example:
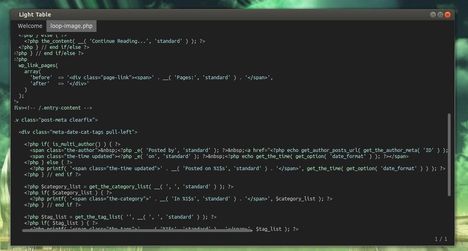
This tutorial shows how to install Light Table IDE in Ubuntu 13.10, Ubuntu 13.04,12.10, 12.04 and manually create launcher for Unity Desktop.
As you may know, Light Table is a new interactive IDE that lets you modify running programs and embed anything from websites to games. It provides the real time feedback we need to not only answer questions about our code, but to understand how our programs really work.
2.) For global use, extract the download package and put the result folder to /opt/.
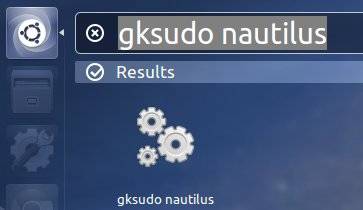
3.) You need to open Nautilus file browser as root to copy and paste Light Table Folder to /opt/. To do so, press Alt+F2 on your keyboard and type to run gksudo nautilus
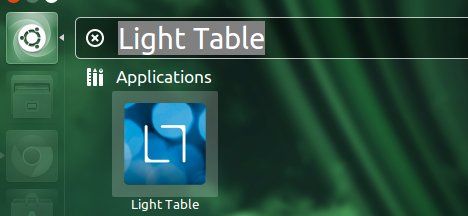
Once done, you can open the IDE via command terminal:
/opt/LightTable/LightTable
NOTE: If you have problem launching it in Ubuntu 13.04 Raring Ringtail, run below command to fix:
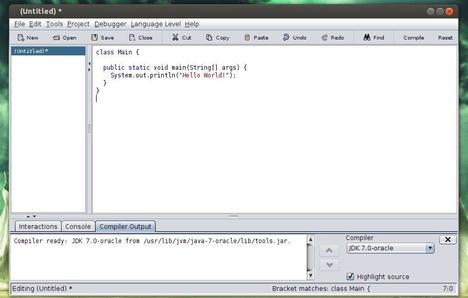
As you may know, DrJava is a lightweight programming environment for Java designed to foster test-driven software development. It includes an intelligent program editor, an interactions pane for evaluating program text, a source level debugger, and a unit testing tool.
This tutorial shows you how to install DrJava via getdeb repository in Ubuntu 13.04, Ubuntu 12.04, Ubuntu 12.10, Ubuntu 10.04 and their derivatives such as Linux Mint, Elementary, etc.
To get started, download and install the deb from the below link which will add the GetDeb repository to your system:
To install DrJava, click Reload button and search and install drjava package in Synaptic Package Manager. Or, run below command in terminal (Ctrl+Alt+T):
sudo apt-get update; sudo apt-get install drjava
Update-20170107: The tutorial should also works on current Ubuntu releases, including Ubuntu 16.04, Ubuntu 16.10, Ubuntu 14.04 and their derivatives. To uninstall, simply run commands:
Linus Torvalds has announced the Linux Kernel 3.11. Here are the new features and how to install / upgrade new kernel in Ubuntu 13.04, Ubuntu 12.10, Ubuntu 12.04 and Linux Mint.
Linus Torvalds wrote on the mailing list:
As some people noticed, I got distracted (“Ooh, look, a squirrel..”)
and never wrote an announcement for -rc7. My bad. But it wasn’t
actually all that interesting a release apart from the date, and it
had a silly compile error in ohci-pci if you hadn’t enabled
CONFIG_PM_RUNTIME, so we’ll just forget -rc7 ever happened, ok?
Instead, go and get the real 3.11 release, which is out there, all
shiny and ready to be compiled and loved.
Since rc7 (ok, I lied, it happened) there’s been just small fixes.
Most of them came in from the networking tree, but there’s some all
over: some random filesystem fixes, a couple of sound fixes, a
/proc/timer_list fix, things like that. Nothing really stands out
(unless you happened to use the new soft-dirty code, that had a buglet
that could really hurt), but let’s hope we don’t have some silly
configuration that doesn’t even compile this time around.
Shortlog appended.
Linus
The Linux Kernel 3.11 Features:
Graphics:
The DRM driver changes dominate the Linux 3.11 kernel! The big feature is Radeon dynamic power management support has finally come to AMD’s open-source driver along with early support for the Radeon HD 8000 “Sea Islands” GPUs. Phoronix tests have shown Radeon DPM is successful at improving power use and lowering temperatures while delivering great performance.
There’s a new DRM display driver for the Renesas R-Car SoC.
Intel Haswell improvements and Valley View / Bay Trail support is now ready for Linux desktop usage.
H.264 / MPEG-2 video decoding for Nouveau with select NVIDIA GPUs bearing the VP2 engine as part of the PureVideo HD support. This is exposed in Gallium3D via the VDPAU state tracker. There’s also early GK110 GPU support. The NVIDIA GK110 is the firm’s latest high-end Kepler GPU.
Disk / File-System:
LZ4 compression support.
Zswap was merged for compressed swap caching.
Various XFS file-system improvements.
Performance tuning for Btrfs.
F2FS file-system updates.
EXT4 file-system updates.
The Lustre file-system client was merged for the first time.
CPU:
AVX2 Crypto optimizations.
PowerPC improvements from IBM.
Continued ARM improvements.
Xen and KVM virtualization now work for 64-bit ARM.
General Hardware & Miscellaneous Improvements:
Input device improvements.
Lots of audio / sound improvements.
With Linux 3.11, Wine can now handle Windows RT applications.
Download & Install Linux Kernel 3.11:
The Kernel PPA has updated DEB packages for Ubuntu and its derivatives. Press Ctrl+Alt+T on your keyboard to open terminal. When it opens, run below commands to download the DEBs.
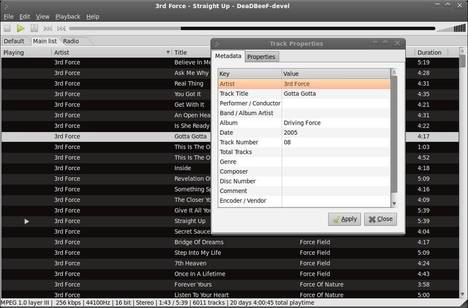
If you would like to install DeadBeef audio player in Ubuntu and its derivatives such as Linux Mint, Elementary OS. This tutorial will tell you how to do it easily
As you may kown, DeaDBeeF is a lightweight audio player for GNU/Linux systems with X11 written in C and C++. It has below features:
plays mp3, ogg, flac/oga, ape, wav, wv/iso.wv, aac/m4a, alac, mpc/mpp/mp+, tta, wma, shn, sid, nsf, mod, s3m, vtx, vgm/vgz, psf, midi, audio cds, all formats supported by ffmpeg, dumb, gme, libsndfile, adplug, and more!
light on memory and CPU use
expandable through plugins
supports cuesheets (from .cue files, and embedded), reading and writing m3u and pls playlists
plays internet radio (shoutcast, icecast, mms), as well as normal mp3 files over http and ftp (e.g. from podcasts)
global hot-keys
reads and writes id3v1, id3v2, apev2, vorbiscomment tags to/from all relevant formats; read-only mp4 itunes tags
can detect charset of bad (non-unicode) id3 tags, as well as charsets in metadata from tracker modules and chiptunes
user-customizable playlist columns with title-formatting
high quality resampling using libsamplerate
playback using ALSA, OSS and PulseAudio
last.fm/libre.fm scrobbler
sample-accurate seeking and gapless playback support for many formats
multiple playlists organized in tabs
album art display, fetching covers from music folders, id3v2 and apev2 tags, last.fm and albumart.org
18-band equalizer with presets, with importing of fb2k eq presets
track grouping using title-formatting
album art display in playlist
customizable OSD notifications with album covers
configurable converter/transcoder
replay gain (playback only)
playing files directly from zip archives
supports tagging of files with custom fields, including editing custom fields added by other taggers/players
multichannel playback, support for integer 8, 16, 24, 32 and float 32 bit sound output
localized into many languages
Download & Install DeadBeef:
The easiest way to install the DeadBeef is using the DEB package. Just download and double-click to install the package from below link. You may check your OS type (32-bit or 64-bit) by System Settings -> Details
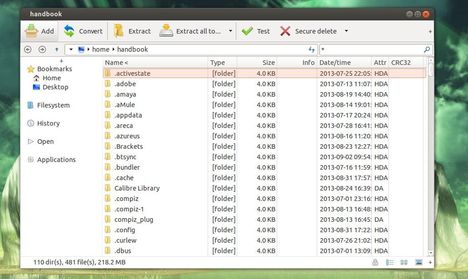
This tutorial shows how to install PeaZip 5.1 in Ubuntu 13.04 and fix the dependency problem. PeaZip depends on libgmp3c2, but it’s no longer available in Ubuntu 13.04 Raring and Ubuntu 13.10 Saucy.
As you may know, PeaZip is a free Zip files utility which supports 150+ archive formats. With it, you can compress, convert, split, encrypt, secure delete, open RAR TAR 7Z ZIP ZIPX CAB ISO files.
To get started, first download and install the libgmp3c2 package from the below links. You may check 32-bit or 64-bit by System Settings -> Details.
NOTE: I don’t know why this package is removed from Ubuntu repository. It may conflict with other packages on your system and cause problem. Use it at your own risk!
Now, download and install the peazip_5.1.0.LINUX.GTK2-2_all.deb from Sourceforge.net
You may need a restart to see the PeaZip icon in Unity Dash.
As you may know, the digital photo editor Fotoxx updates every month. Here I’ll show you how to install and keep the latest version in Ubuntu 13.04 Raring, Ubuntu 12.04 Precise and their derivatives via PPA.
So far, the latest release is 13.09. With it, you can edit photos and manage a large collection. Includes thumbnail image browser and navigator, RAW file import, a comprehensive set of edit functions working in deep color, fast full-image feedback, multiple undo/redo, select/copy/paste, file versioning, batch transforms, HDR and panorama composites, metadata edit, fast search and display, named image subsets (views). Read the changelog.
Install Latest Fotoxx:
The getdeb repository provides Fotoxx packages for Ubuntu 12.04 and Ubuntu 13.04. You can add the repository by downloading and installing the Debs from the below link:
download gedeb package
After that, you can install fotoxx and receive updates by Synaptic Package Manager or by running below commands in terminal (Ctrl+Alt+T):
sudo apt-get update; sudo apt-get install fotoxx
For other Ubuntu editions, such as Ubuntu 13.10, Ubuntu 12.10, Ubuntu 10.04, etc. Download the deb packages from the official site.