PTBatcherGUI can now also queue user defined assistant and user defined output sequences.
PTBatcherGUI: Added option to generate panorama sequences from an existing pto template.
Assistant: Added option to select different output options like projection, FOV or canvas size depending on different variables (e.g. image count, field of view, lens type).
Allow building with epoxy instead of GLEW for OpenGL pointer management.
Several improvements to crop tool (outside crop, aspect ratio, …).
For all current Ubuntu releases, including Ubuntu 18.04, Ubuntu 20.04, Ubuntu 22.04, Ubuntu 23.10, and their based systems, I’ve made the unofficial package into this PPA repository, not only for x86_64 but also 32-bit/64-bit ARM support!
I also sync the packages into the apps PPA, use either one as you prefer.
1. First, press Ctrl+Alt+T on keyboard to open terminal. When it opens, run command to add the PPA:
sudo add-apt-repository ppa:ubuntuhandbook1/hugin
Type user password (no asterisk feedback) when it asks and hit Enter to continue.
2. Update system package cache for Ubuntu 18.04 and Linux Mint, though it’s done automatically while adding PPA in Ubuntu 20.04+:
sudo apt update
3. Finally, either run the command below in terminal to install the panorama photo stitcher:
sudo apt install hugin
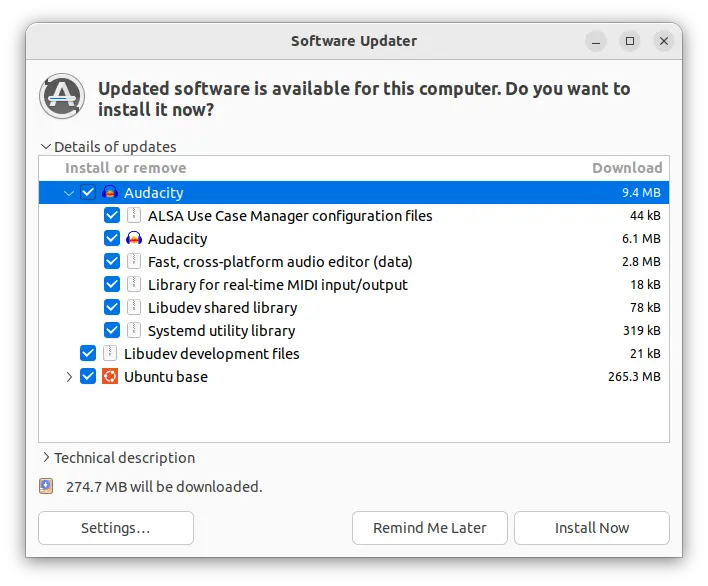
Or, upgrade the software (if an old version was installed) via Software Updater (Update Manager) app:
Uninstall hugin:
To remove the software package, simply run command:
sudo apt remove --autoremove hugin hugin-data
And, remove the PPA either by running command in terminal:
Tilix terminal emulator released version 1.9.6 few days ago. Here’s how to install it in Ubuntu 22.04, Ubuntu 23.04, and Ubuntu 23.10.
Tilix is a tiling terminal emulator, which uses the VTE GTK+ 3 widget for various features, such as split horizontally or vertically, transparent background, background images, quake mode support, custom hyperlinks, experimental trigger and badge support.
The development of Tilix is moving slowly now due to lack of maintainers. The new 1.9.6 is released more than 20 months after the last stable. And, it only includes minor new features and bug-fixes:
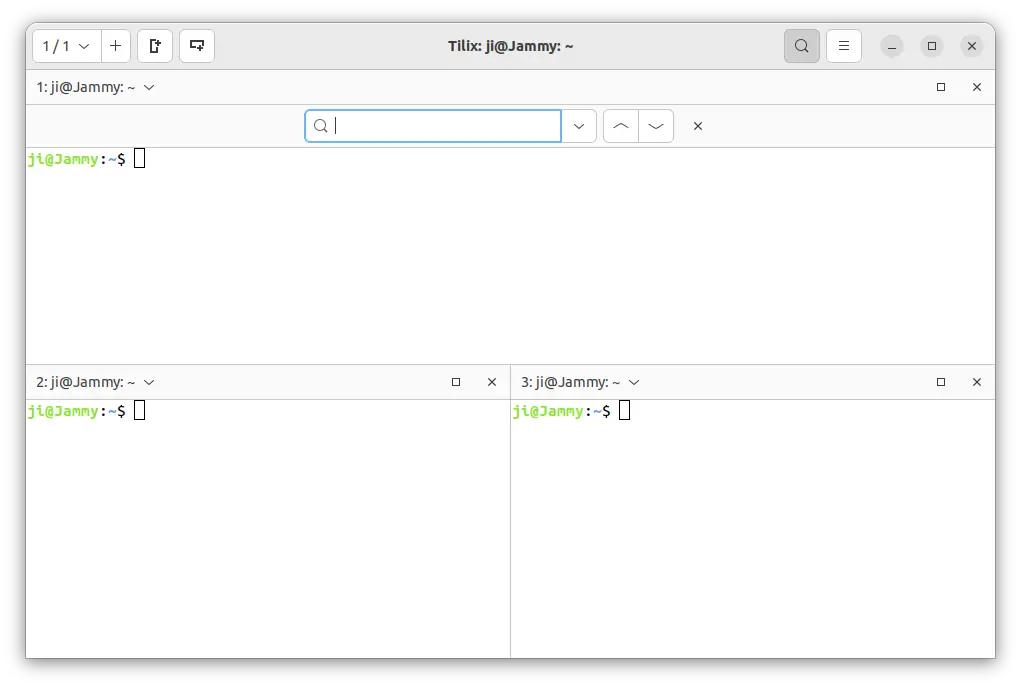
Add close button to search box.
Replace variables in custom link commands
Follow system color-scheme for default theme-variant
Add compatibility with Nautilus 43
Avoid shell injection in open-tilix plugin
Fix GLib critical warnings on startup
Update to GtkD 3.10.0
Tilix search box has close button.
How to Install Tilix 1.9.6 in Ubuntu 22.04, Ubuntu 23.10
The new release provides prebuild package for Linux, which is available to download at the link below:
It’s ‘tilix-1.9.6_x86_64-linux-gnu.tar.gz‘ for 64-bit modern PC and laptop. Just download the package, extract, and run the executable to launch the terminal emulator.
Ubuntu PPA
The official tarball does NOT include run-time libraries. You have to manually figure out “error while loading shared libraries …” errors.
To make the life easy, I’ve upload the new packages into this unofficial PPA, build against the rules from Debian Unstable. So far, it supports Ubuntu 22.04, Ubuntu 23.04, Ubuntu 23.10, on both x86_64 and AArch64(arm64).
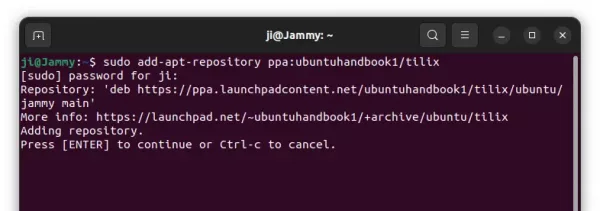
1. First, press Ctrl+Alt+T on keyboard to open terminal. When it opens, run command to add the PPA:
sudo add-apt-repository ppa:ubuntuhandbook1/tilix
Type user password (no asterisk feedback) when it asks and hit Enter to continue.
2. Linux Mint 21 users need to refresh system package cache manually, by either running the command below or using “Refresh” button in Update Manager:
sudo apt update
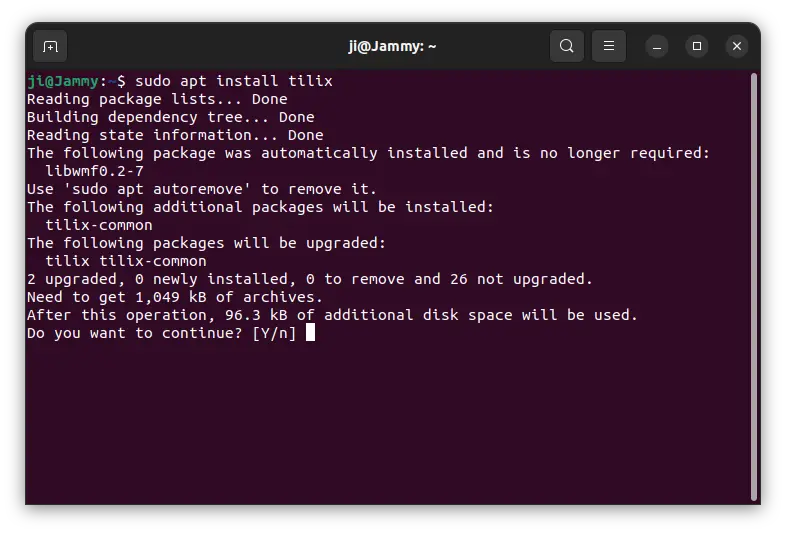
3. Finally, either run command to install the terminal emulator:
sudo apt install tilix
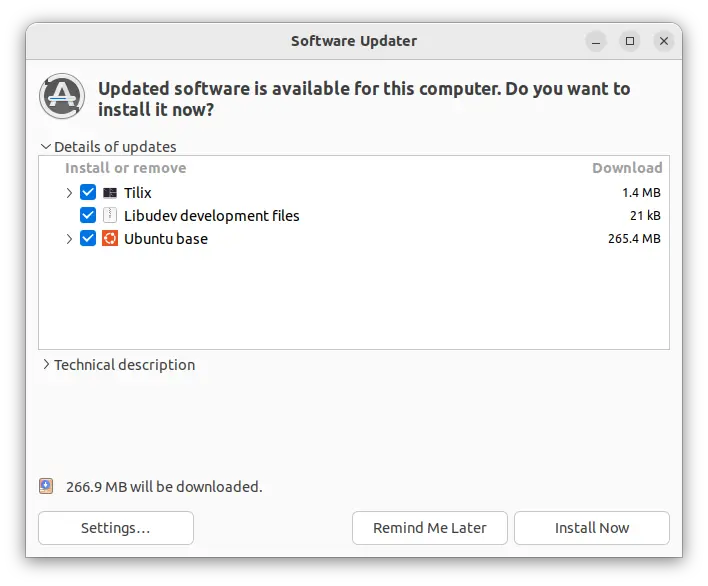
Or, update it through Software Updater (Update Manager) utility.
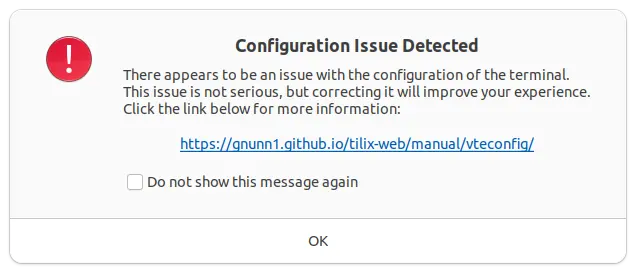
NOTE: Upgrading from v1.9.5 may cause following error pop-up at launch, but I don’t know how to correct the issue.
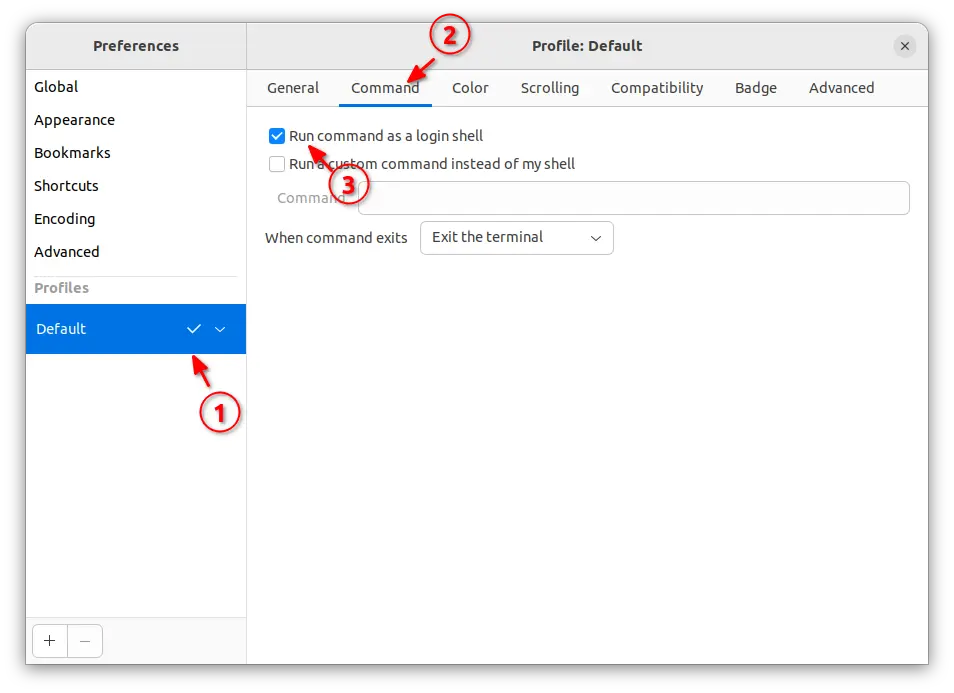
Thanks to @oswald_c, you may fix the issue by enabling ‘Run command as a login shell’ to enable it‘ option under default profile of “Preferences” dialog. See the screenshot below:
Uninstall Tilix
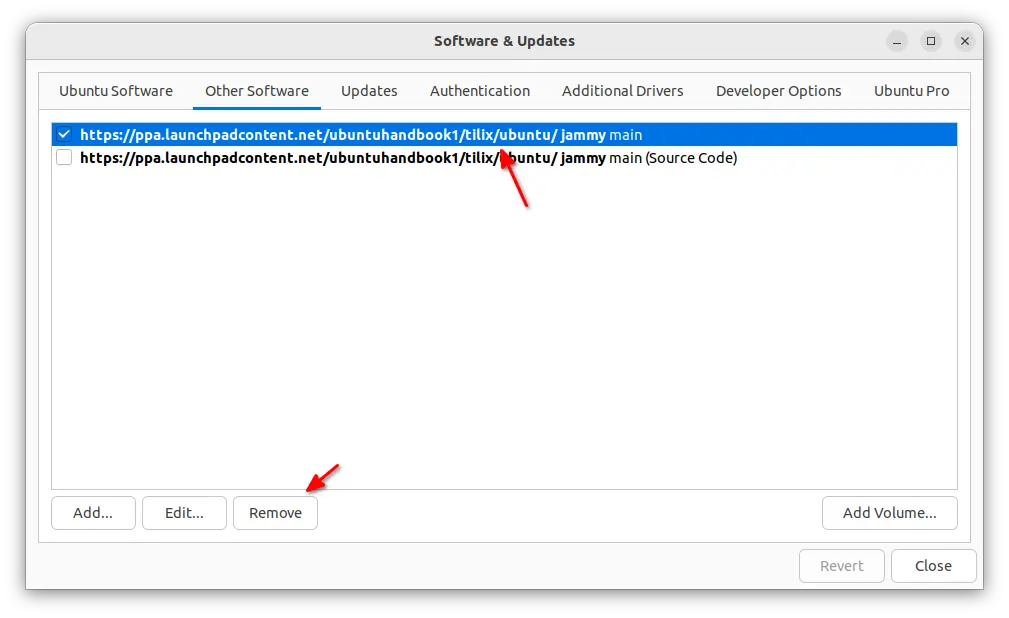
To downgrade Tilix to stock version in your system repository, open terminal (Ctrl+Alt+T) and run command to purge the PPA:
GIMP image editor now is at version 3.0.x, and I’ve made a PPA for those who prefer the native .deb package format.
If somehow you need to install the old GIMP 2.10.38 in Ubuntu, then this tutorial may help!
First of all, GIMP 2.10.38 includes Windows Ink drivers support for better tablets support on Windows. It also backports some small features from GTK3 to GTK2, with some improvements for Windows users. They include:
Use native Windows API for converting keystrokes to characters,
Fix keyboard input when using IMEs,
Fix mouse events in presence of transparent windows on the desktop,
Win32 IME Fixes, and more.
Besides the improvements for Windows users, the release also includes various bug-fixes, including that GIMP crashes every time on exit in my case in Ubuntu 24.04. See release note for more about GIMP 2.10.38.
(Old content for GIMP 2.10.36) The new release also has some new features. They include Adobe Swatch Exchange (ASE) and Adobe Color Book (ACB) palettes support.
Gradient Tool now has an “FG to Transparent (Hardedge)” option, to generate a gradient from the foreground color to transparency, with hard-edge transitions between the 2 colors. Which, as well includes a “Repeat” option to alternate repetitive colored shapes.
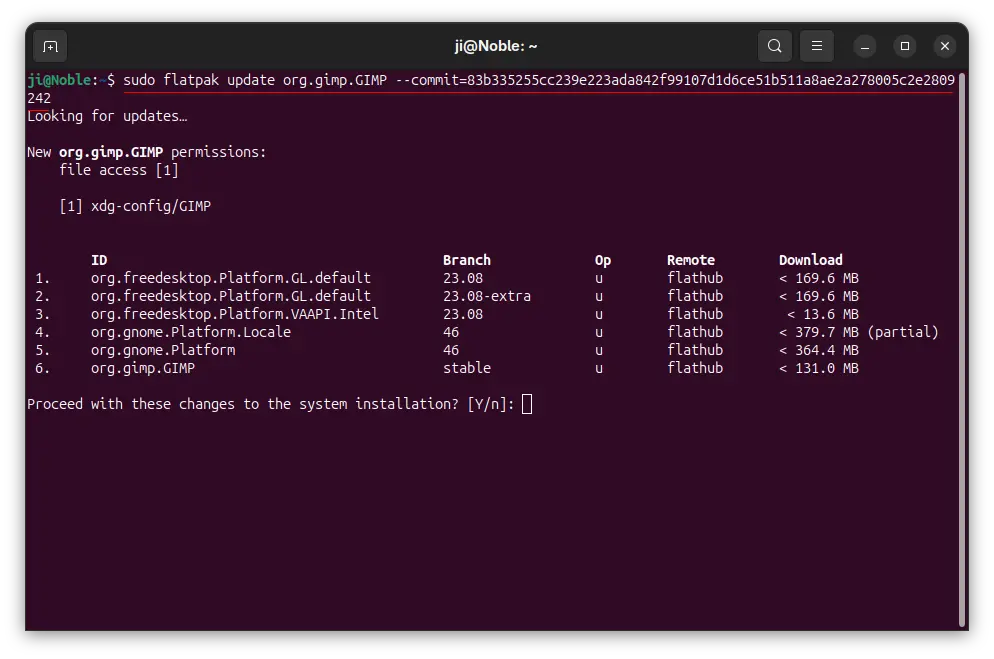
As time goes on, the old commit will be removed! At that time, this command will no longer work.
Option 2: Snap package
Like Flatpak, Snap is also an universal Linux package format runs in sandbox environment. It’s easy to install by simply search & click installing in App Center (or Ubuntu Software for 22.04 & earlier).
NOTE: The Snap package now is updated to GIMP 3.0.x!!!
Option 3: Ubuntu PPA
For those who prefer native .deb package format, this unofficial PPA contains GIMP 2.10.38 for Ubuntu 24.04, Ubuntu 22.04, Ubuntu 20.04, and Ubuntu 23.10, with amd64, arm64 and armhf support.
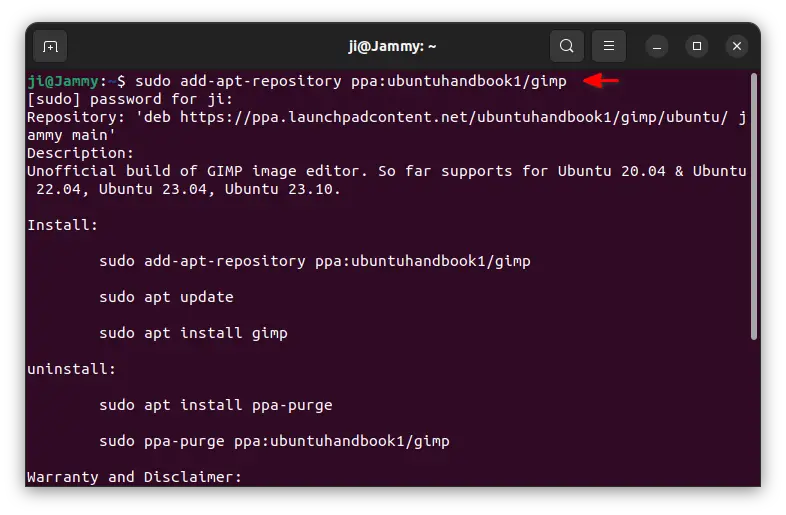
1. First, open terminal (press Ctrl+Alt+T) and run command to add PPA:
sudo add-apt-repository ppa:ubuntuhandbook1/gimp
Type user password (no asterisk feedback) when it asks and hit Enter to continue.
2. Linux Mint users need to manually refresh system package cache, though, it’s done automatically in Ubuntu while adding PPA. To do so, run command:
sudo apt update
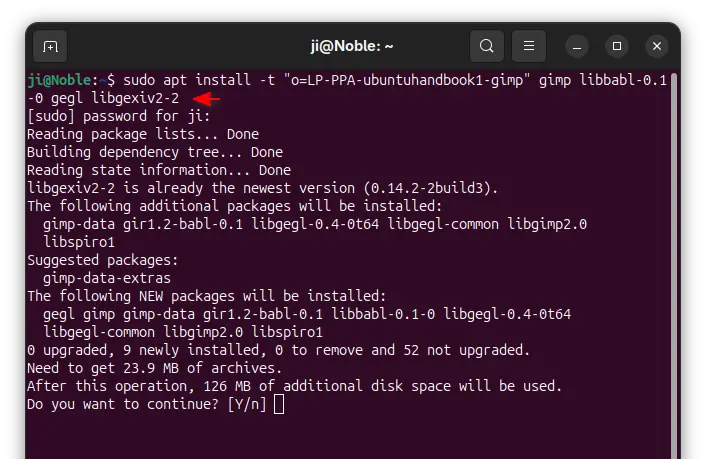
3. Finally, run command to install GIMP 2.10.38:
sudo apt install gimp gegl libgexiv2-2
NOTE: If you’ve GIMP 3.0.x installed, first remove it via the command under “Uninstall GIMP” section, then use the command below instead to install GIMP 2.10.x from this PPA:
Audacity audio editor announced the first point release for the Audacity 3.4.0 feature release today!
The release can now built again in ARM devices and BSD. And, it has various stability and other fixes that 3.4.0 users are urged to upgrade to the new release.
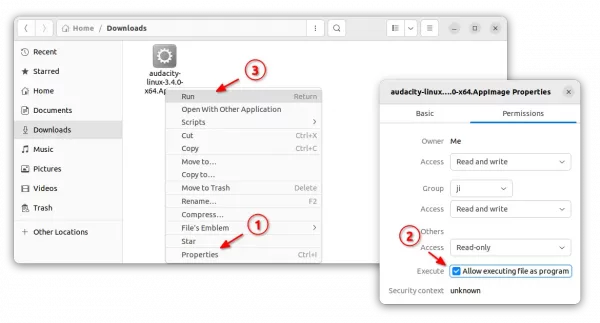
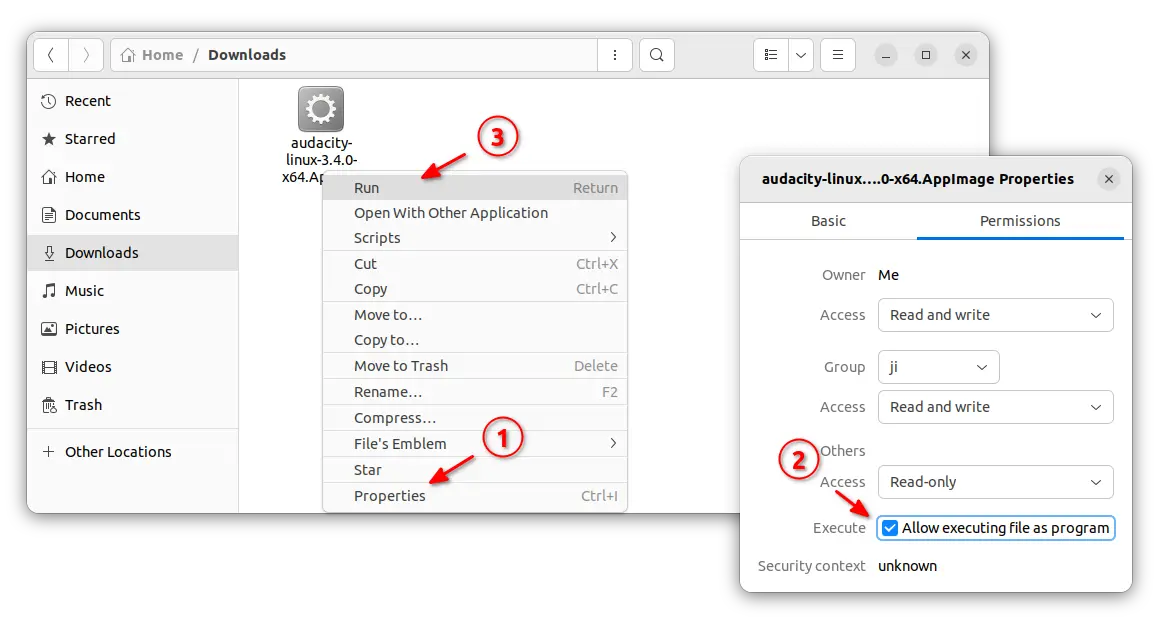
For Linux, click expand the “Assets” section and choose download the .AppImage package.
Then, right-click on the .AppImage file and go to its ‘Properties’ dialog. Add executable permission by enable ‘allow executing file as program‘. Finally, right-click on it and select “Run” to launch Audacity.
Forgive me for the old image.
Option 2: Ubuntu PPA
For choice, I’ve uploaded the new release package into unofficial PPA for Ubuntu 22.04, 23.04, and Ubuntu 23.10 with amd64, arm64, and armhf support.
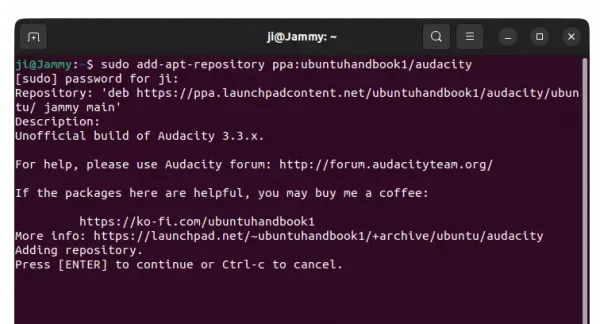
1. First, press Ctrl+Alt+T on keyboard to open terminal. When terminal opens, run command to add the PPA:
Bleachbit, the popular system cleaner app, announced new major 4.6.0 release this Sunday!
It’s been almost 2 years since the last stable v4.4.2. While, version 4.5.x is there for beta testing purpose.
Compare to the latest stable release, the new Bleachbit 4.6.0 features:
Microsoft Edge on Linux support.
Firefox, Thunderbird, and Google Chrome installed as Flatpak support.
Firefox installed as Snap (default in 22.04+) support.
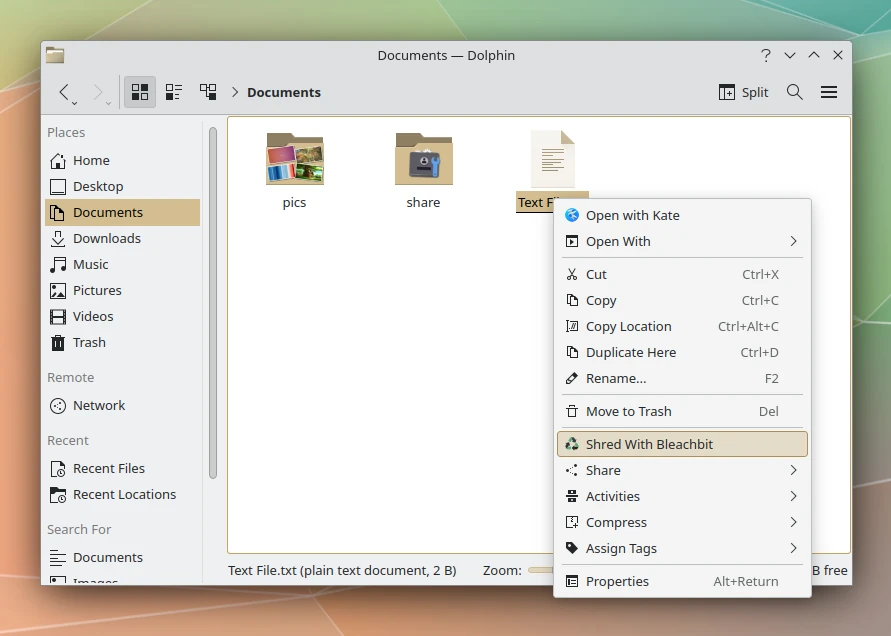
“shred with bleachbit” context menu for KDE (not enabled by default).
Clean recent documents list on KDE 5
Shred with Bleachbit context menu for KDE
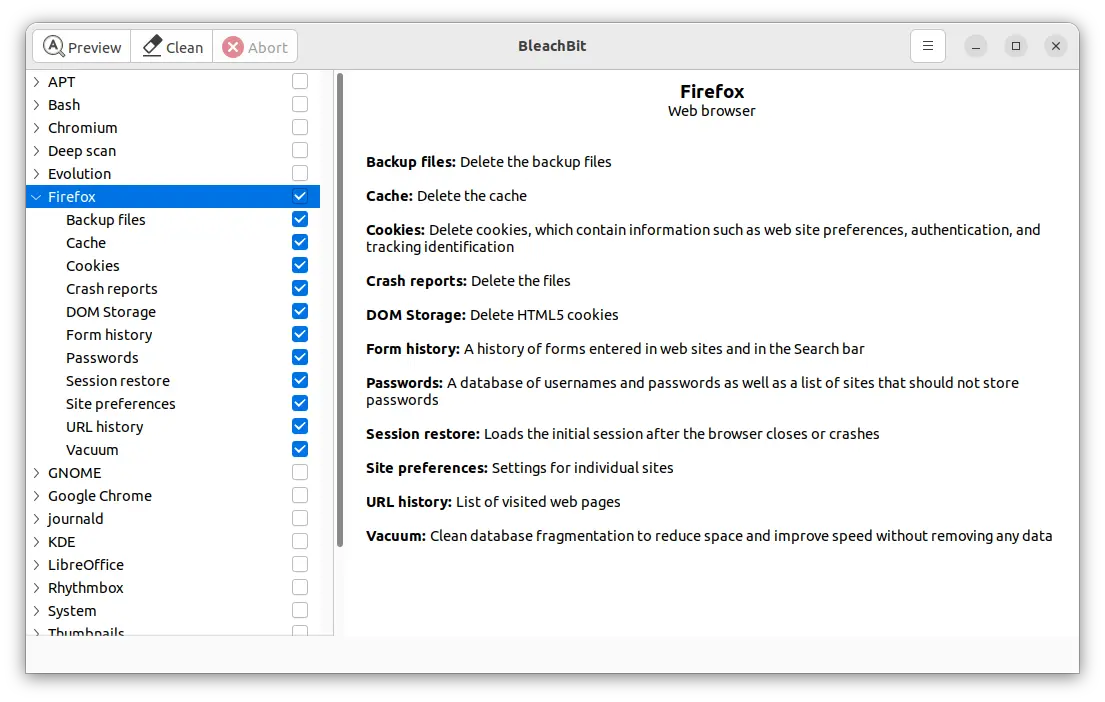
The release also has various other changes and bug-fixes. When cleaning Firefox, it does no longer show “no such table” error. And, it fixed admin mode launching issue when working on Linux with Wayland session. Other changes include:
Tips: for Linux Mint 21, click download the package for Ubuntu 22.04 Jammy Jellyfish. In case you don’t even know which Linux Distribution version is running, open terminal (press Ctrl+Alt+T) and run command cat /etc/os-release to tell.
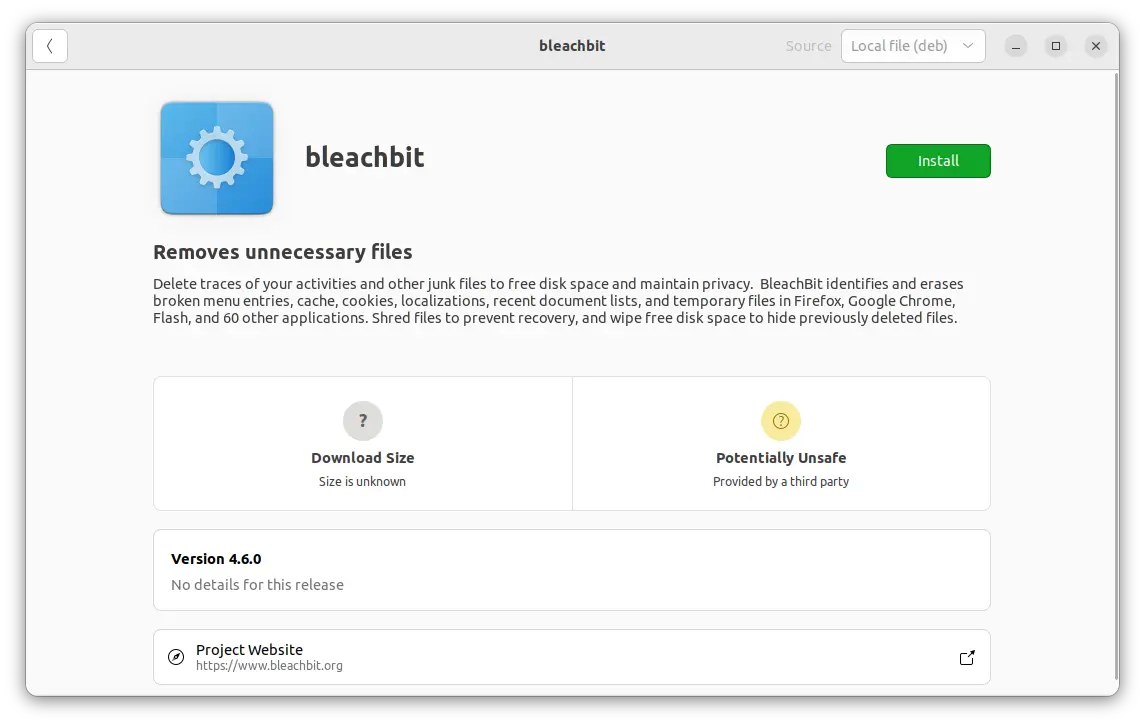
Once you got the .deb package, either click open with “Software Install”, or open with “Gdebi package installer” if you have it installed.
Install Bleachbit .deb via Software Install
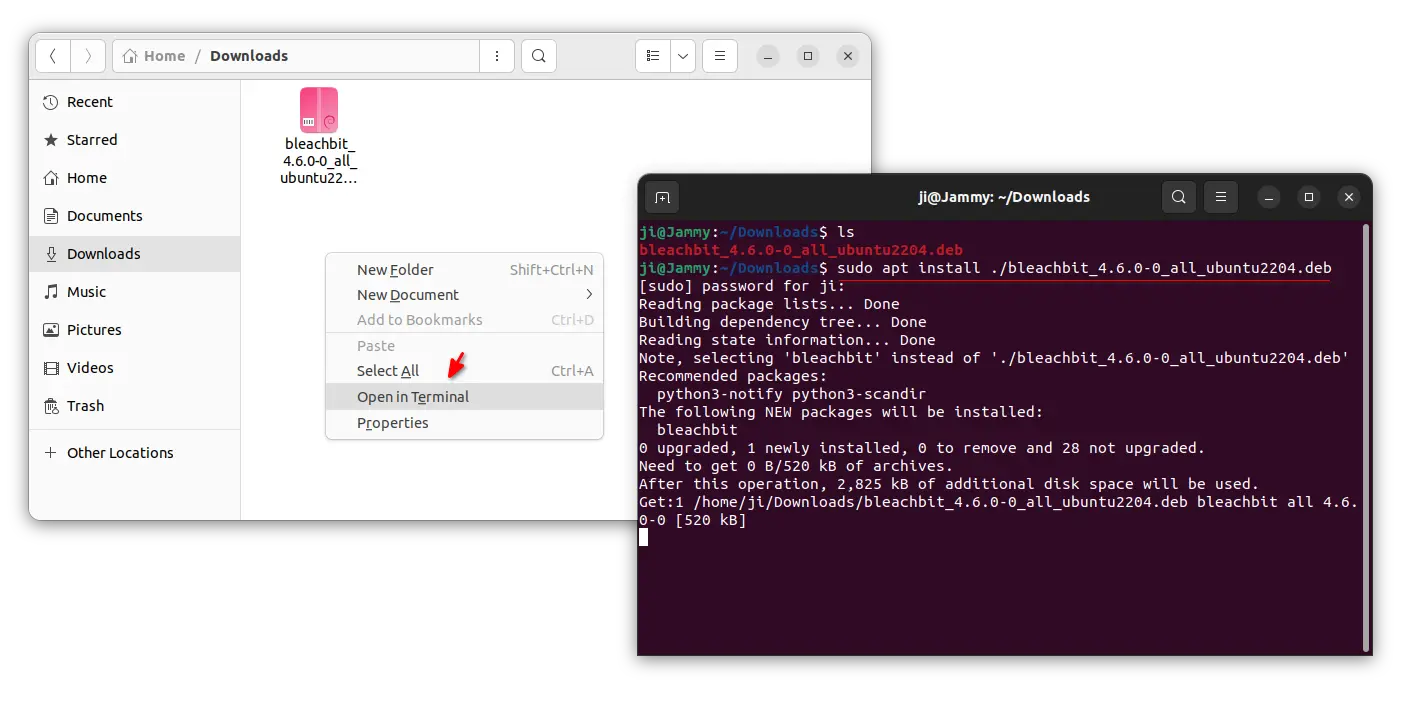
Or, right-click on blank area in your Downloads folder, and select “Open in Terminal”. Finally, run the command below to install it:
sudo apt install ./bleachbit_4.6.0*.deb
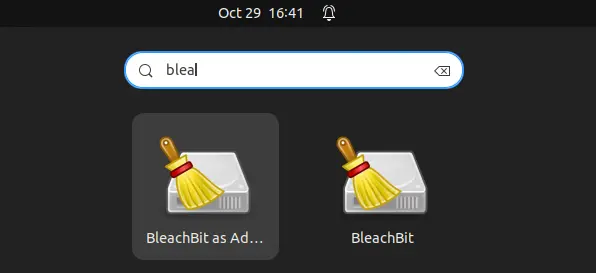
Once installed, search for and launch the tool from either start/applications menu or ‘Activities’ overview depends on your desktop environment.
Uninstall Bleachbit
To remove Bleachbit 4.6.0 in Debian, Ubuntu, Linux Mint, and their based systems, simply open terminal and run command:
Have multiple monitors connected to your Ubuntu 22.04 machine? There’s now an indicator to dim all or individual monitor screen brightness with sliders.
You can dim external monitor brightness with either physical buttons or ddcutil utility. However, an indicator applet in system tray can be more effective, and here’s one for Ubuntu 22.04 with default GNOME 42.
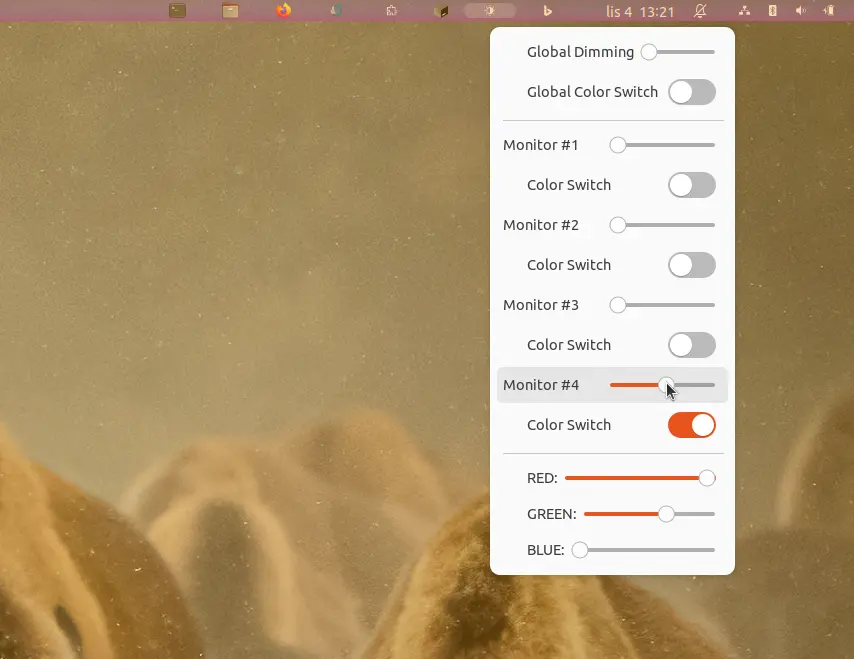
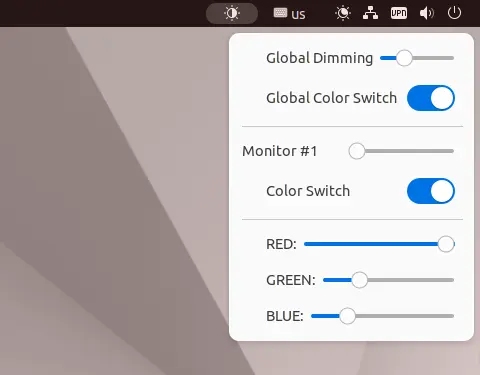
It’s a Gnome Shell extension, that adds a light bulb to top-right corner in panel. By clicking on it, will show you the slider to dim all the connected monitors, as well as individual sliders to dim certain screens.
And, by moving the slider to far right will make the screen totally dark, just like being turned off.
Besides dimming monitor screens, it can also change the colors with RGB sliders, which also can apply to either all or individual monitors.
As my laptop’s external HDMI port is broken, I can’t try out the multi-monitor support. But, the dimming and RGB color (need to at least move dim slider a bit to right) functions are working very well in my case in Ubuntu 22.04 Desktop PC.
My test without multi-monitors
How to Install the Dimming Control Indicator
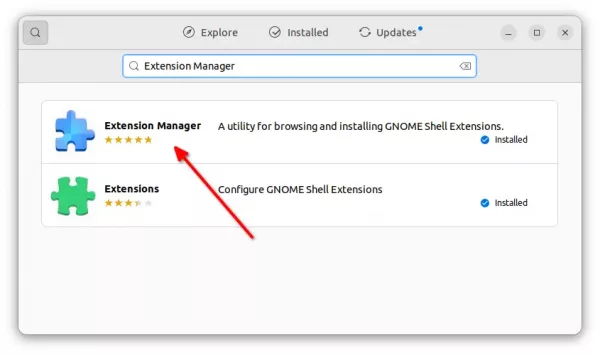
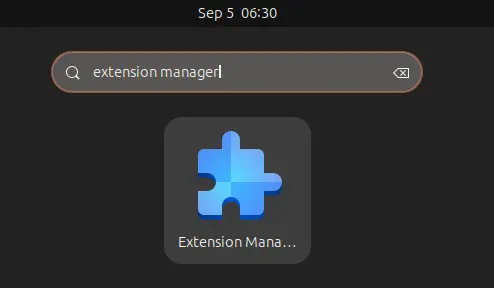
First, launch Ubuntu Software, then search for and install “Extension Manager” app.
Install Extension Manager in Ubuntu 22.04+
Then, click on top-left ‘Activities’ button to open overview screen, search for and launch ‘Extension Manager’.
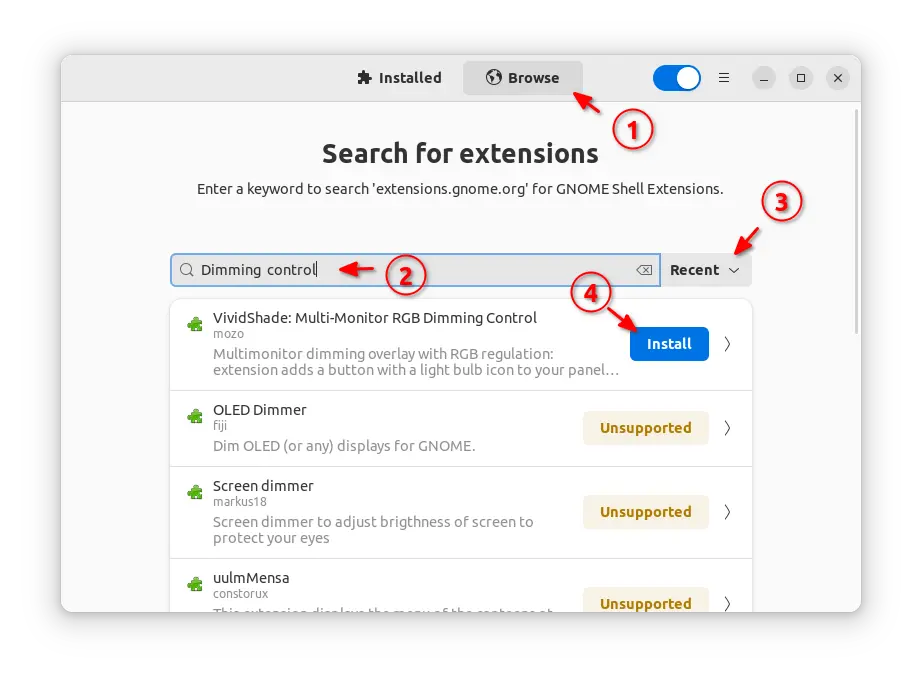
When the tool opens, navigate to ‘Browse‘ tab, and finally search and install “VividShade: Multi-Monitor RGB Dimming Control” extension.
The indicator applet will appear on panel immediately after installation.
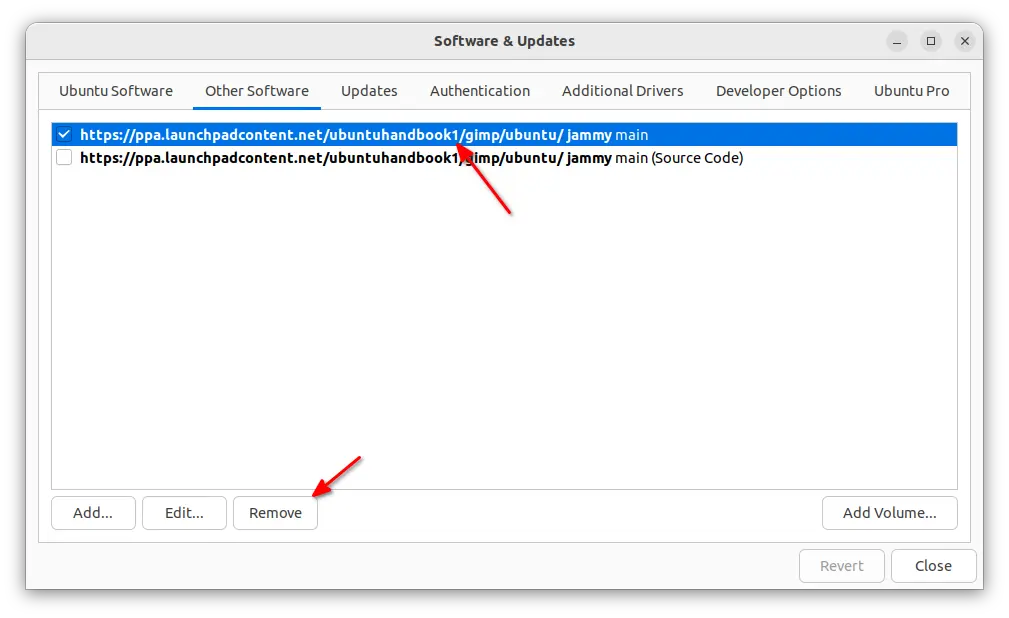
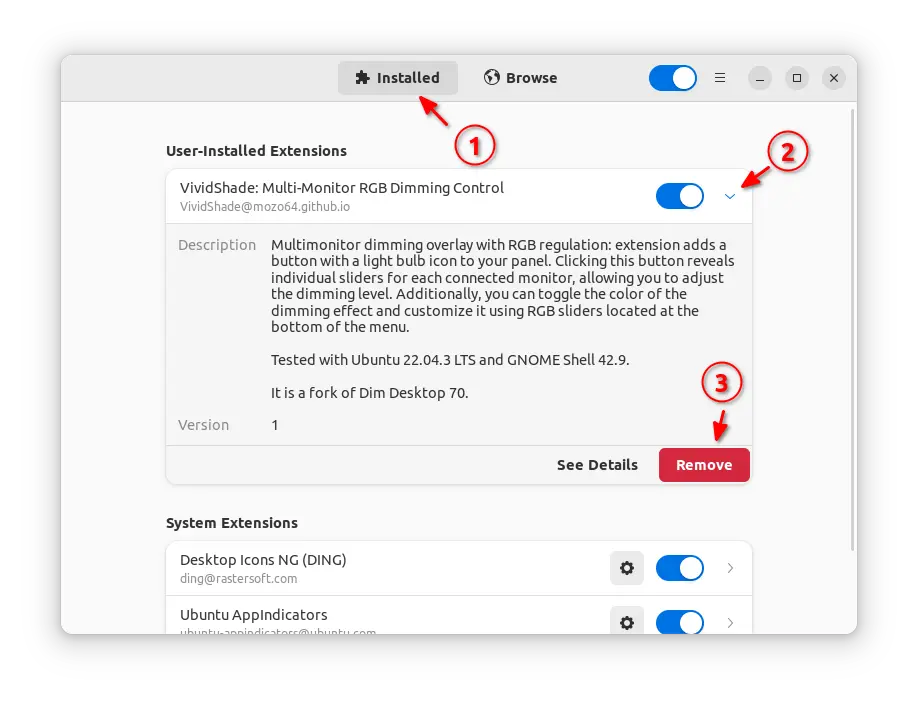
Uninstall:
To uninstall this extension, also launch “Extension Manager“. Click expand it under first tab, finally click on red “Remove” button.
Audacity audio editor and recording tool announced the new major 3.4.0 release after almost 2 weeks of beta testing.
The new release features Beats and measures grid, allows to easily align audio clips to the musical tempo and rhythm. It shows you the subdivisions of each measure depending on zoom level, and you can snap clips to the nearest beat.
It also features new time stretching algorithm, allows to change the duration of your audio clips without affecting their pitch non-destructively. Just hold “Alt” (macOS: Option) while hovering over the top third of a clip edge to stretch it.
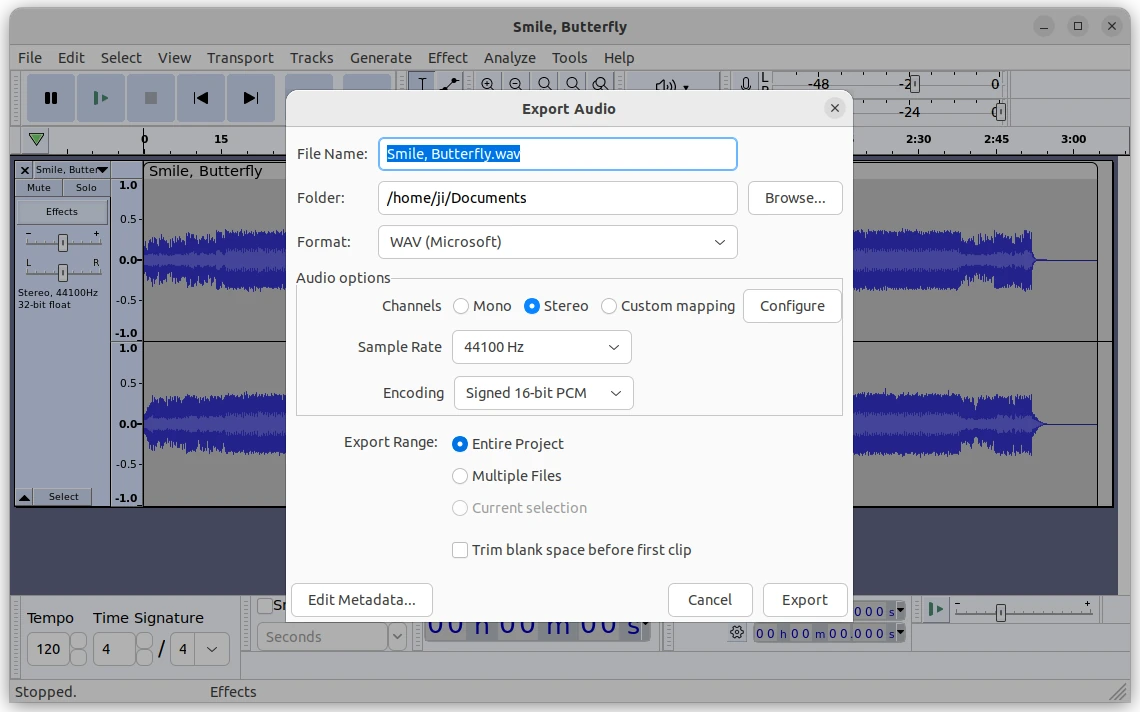
The 3.4.0 also features a new export dialog with easier access to options such as sample rate and custom mapping (for 5.1 or 7.1 audio). Additionally, the “Browse” button uses the native file browser now!
For Linux, click expand the “Assets” section and choose download the .AppImage package.
Then, right-click on the .AppImage file and go to its ‘Properties’ dialog. Add executable permission by enable ‘allow executing file as program‘. Finally, right-click on it and select “Run” to launch Audacity.
Option 2: Ubuntu PPA
For choice, I’ve uploaded the new release package into unofficial PPA for Ubuntu 22.04, 23.04, and Ubuntu 23.10.
NOTE:Due to bug, arm64 and armhf packages are excluded in the PPA until the bug-fix due in next point release.
1. First, press Ctrl+Alt+T on keyboard to open terminal. When terminal opens, run command to add the PPA:
NVIDIA announced 545.29.02 graphics driver for Linux yesterday, as a new release series for its New Feature Branch Version.
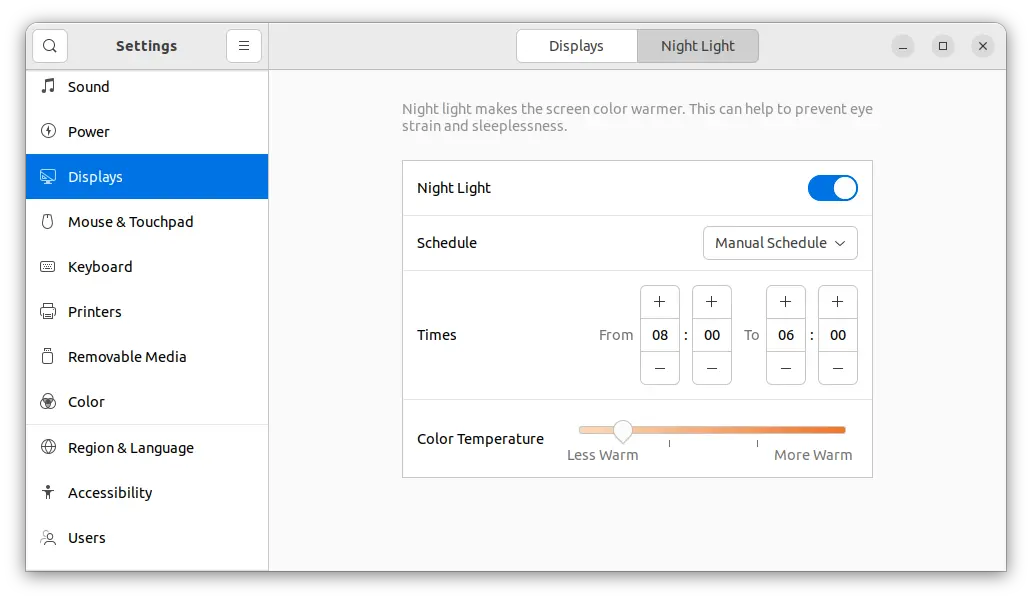
For Ubuntu 22.04 + and Fedora Workstation with default GNOME on Wayland, as well as KDE on Wayland, the new driver adds support for the CTM, DEGAMMA_LUT, and GAMMA_LUT DRM-KMS CRTC properties, which, finally make the ‘Night Light’ and ‘Night Color’ feature work for NVIDIA users.
Night Light finally works on Wayland with NVIDIA driver
For desktop GPUs, the release adds initial experimental support for runtime D3 (RTD3) power saving mode. When all the PCI functions are idle, and all required conditions are satisfied, your GPU will go to the lowest power state resulting into maximum power savings.
The new driver also added experimental support for framebuffer consoles. On kernels with implement features, nvidia-drm will install a framebuffer console when loaded with both modeset=1 and fbdev=1 kernel parameters. Though, when an nvidia-drm framebuffer console is enabled, unloading nvidia-drm will cause the screen to turn off.
Other changes in NVIDIA 545.29.02 include:
Experimental HDMI 10 bits per component support
Support for virtual reality displays
CERTIFIED-quality support for GeForce and Workstation GPUs to open kernelmodules.
Support for PRIME render offload to Vulkan Wayland WSI
Support for HDR signaling
Add support to NVIDIA VDPAU driver for running in Xwayland
Support EGL_ANDROID_native_fence_sync EGL extension.
Support VK_EXTERNAL_SEMAPHORE_HANDLE_TYPE_SYNC_FD_BIT
Support VK_EXTERNAL_FENCE_HANDLE_TYPE_SYNC_FD_BIT
For more about the new driver, see the official release note.
How to Install NVIDIA 545 Driver
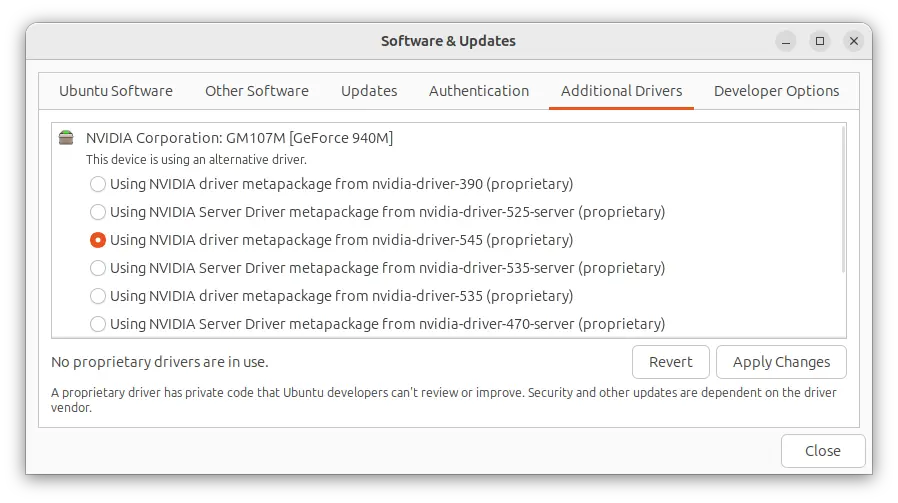
Ubuntu will build the new driver series and publish through official system repositories. So, just wait! It will be available in “Additional Drivers” utility when it’s ready.
For those who can’t wait, the “Graphics Drivers” team PPA has made the driver package for Ubuntu 20.04, Ubuntu 22.04, and higher.
Simply, press Ctrl+Alt+T on keyboard to open terminal. Then, run command to add the PPA:
sudo add-apt-repository ppa:graphics-drivers/ppa
Finally, launch the ‘Additional Drivers’ utility for installing the new driver.
Linux Torvalds announced the release of Kernel 6.6 this Monday.
It’s the latest mainline kernel so far, that features EEVDF scheduler, and per-policy CPUFreq performance boost control.
For Intel, the new kernel added Intel Shadow Stack support to prevent ROP attacks; Initial PECI support for 4th Gen Xeon Scalable “Sapphire Rapids” platforms; And, initial support for the Intel Lunar Lake VPU4.
For old laptops with Intel 4th/5th CPU, the kernel enabled Panel Self Refresh (PSR) support for power-savings.
For AMD, the kernel has Dynamic Boost Control support, Zen 5 temperature and EDAC support for AMD 1Ah processors, and FreeSync Panel Replay support with better power saving for upcoming AMD Ryzen laptops.
The cpupower utility has been updated. Now it supports for adjusting new AMD P-State driver features, include changing the AMD P-State mode, and turbo-boost mode.
For Linux system installed on EXT4 file partition, Kernel 6.6 will have 34% improvement with many concurrent writes and Apache Kafka 10% performance boost.
Linux 6.6 has many new hardware support, they include:
GameSir T4 Kaleid Controller.
SteelSeries Arctis 1 Xbox headset
New Ethernet hardware supported, including the Broadcom ASP 2.0 72165 controller, MediaTek MT7988 SoC, TI AM654 SoC, TI IEP, Atheros QCA8081 PHY. Marvell 88Q2110 PHY, and the NXP TJA1120 PHY.
MediaTek MT7981 wireless chipset
Bluetooth support for Intel Gale Peak, Qualcomm WCN3988 and WCN7850, NXP AW693 and IW624, and the MediaTek MT2925.
Other changes include:
Better protect against the illicit behavior of NVIDIA’s proprietary kernel driver.
New driver for Azoteq IQS7210A/7211A/E touch controller
Force feedback (rumble) support for the Google Stadia controller.
New sysctl interface for disabling IO_uring system-wide
Supports AP mode on the RTL8192FU, RTL8710BU (RTL8188GU), RTL8192EU, and RTL8723BU.
USB MIDI 2.0 gadget function driver
Toggle charge mode, middle fan control for ASUS WMI supported devices.
dGPU and CPU tunables for ROG laptops
How to Install Linux Kernel 6.6
The Ubuntu Mainline Kernel PPA somehow stuck at v6.6 RC5. So, there’s no proper way to get the Linux Kernel 6.6 at the moment of writing besides building from the source code.
Though, you can keep an eye on the third-party trustworthy Zabbly repository, which should update for the 6.6 Kernel in next few days.
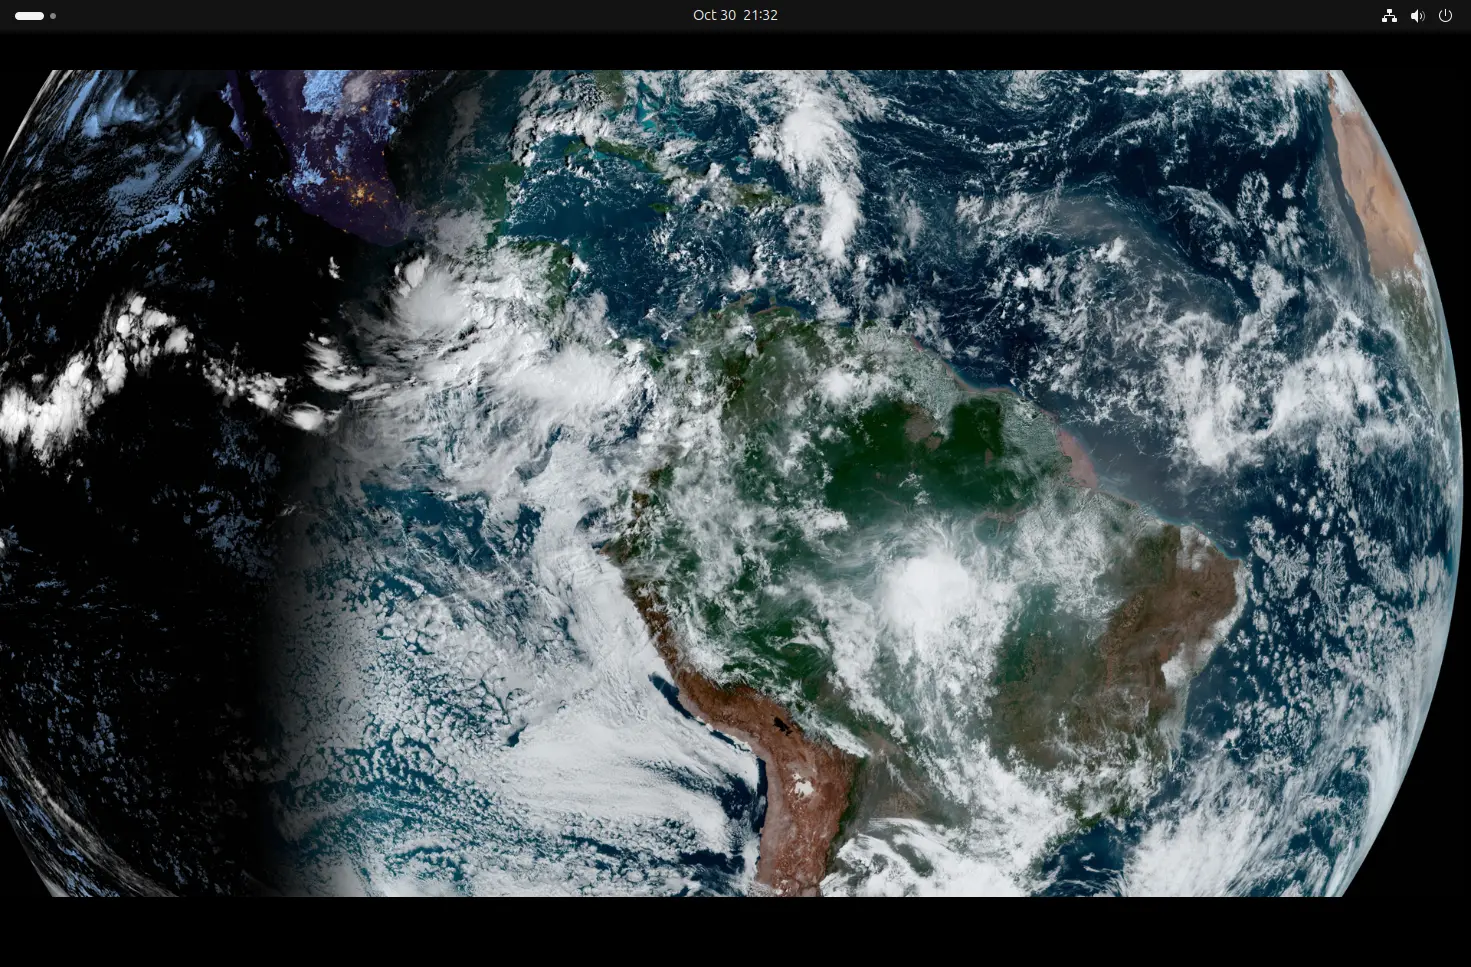
This simple tutorial shows how to display live earth as desktop wallpaper in Ubuntu 22.04 and Ubuntu 24.04.
Ubuntu has Wallch wallpaper changer in system repository, which has option to show live earth as wallpaper. However, the app is no longer updated and the feature is broken for all current Ubuntu releases.
If you’re interested in viewing high-resolution 3d real-time image of the earth in your desktop, then there’s another free open-source tool can do the job.
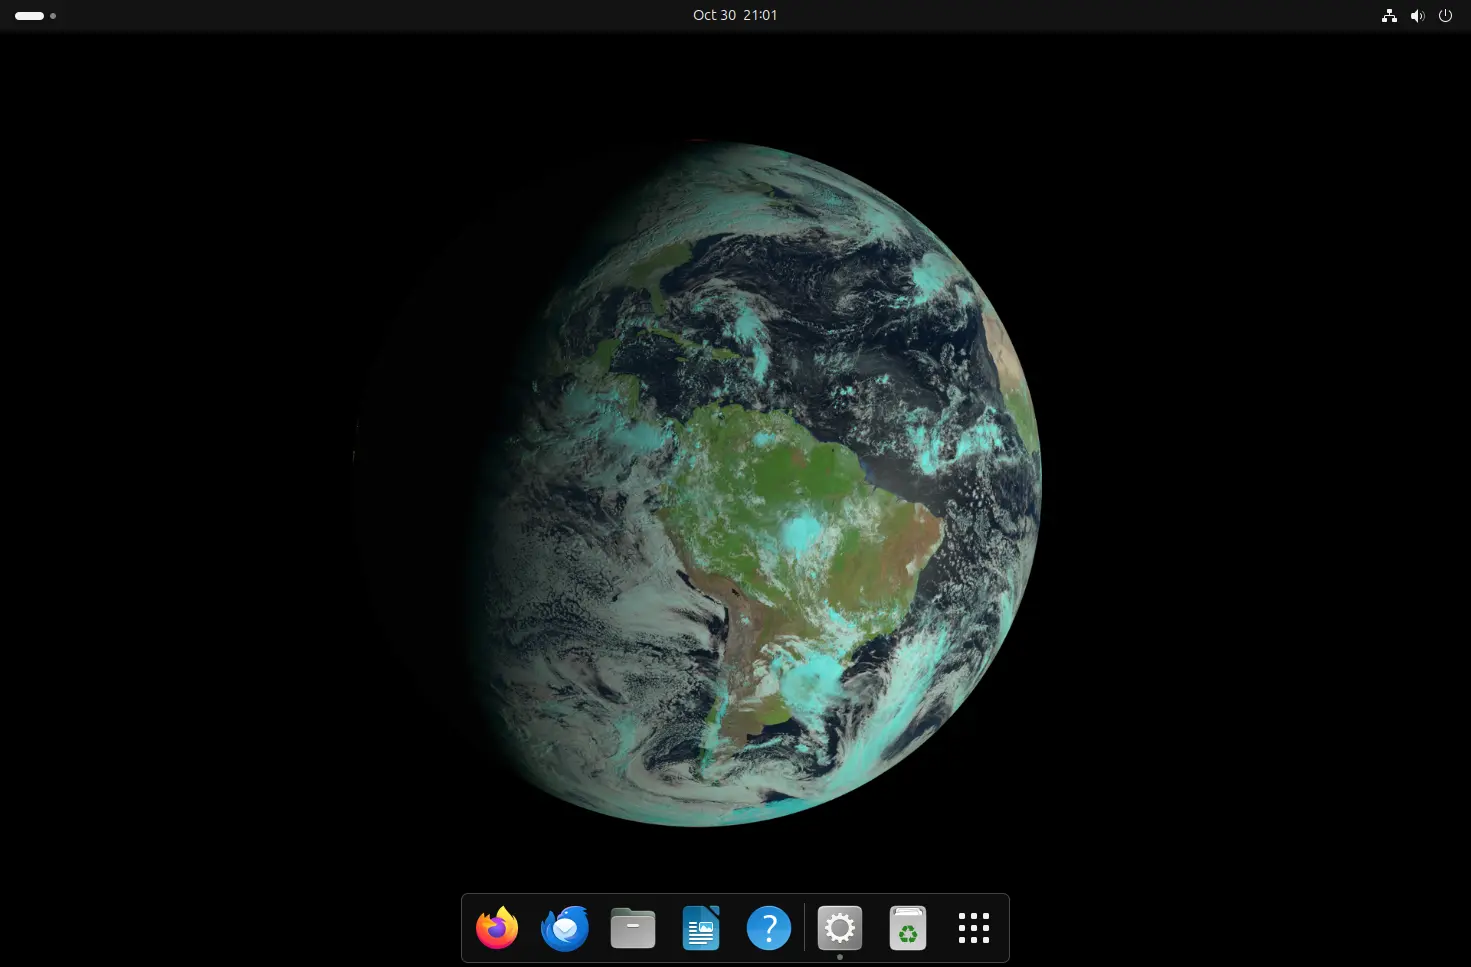
It’s liewa (Live Earth Wallpapers), that supports all known geostationary satellites for the high resolution sentinel images, Nasa Solar Dynamics Observatory images and NASA astronomy picture of the day (Apod)!
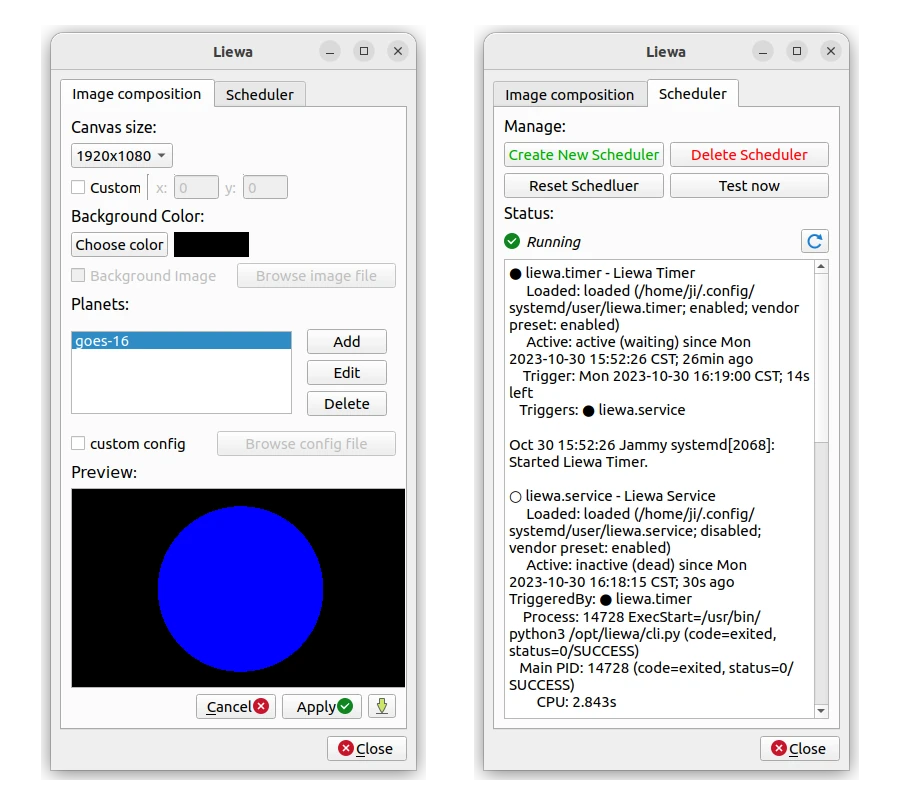
By default, it uses GEOS-16 satellite for the earth image, that display a small earth in center of your screen. Though, the app has setting options to add or edit satellites.
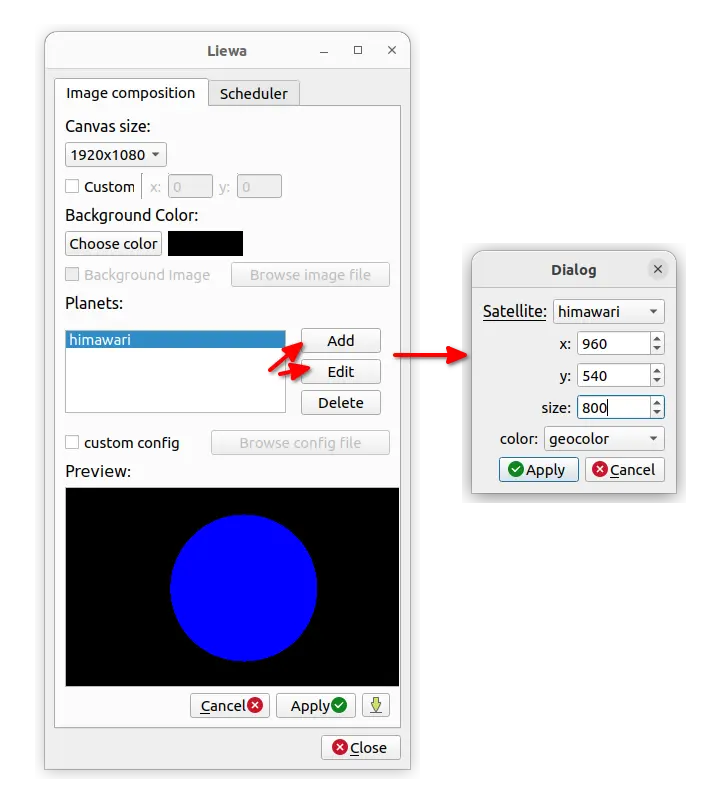
Add, configure satellites
So, you can have more than one real-time images of the earth from different satellites displayed on your screen at the same time, in different size, with either natural color or geocolor.
How to Install Live Earth Wallpapers (Liewa)
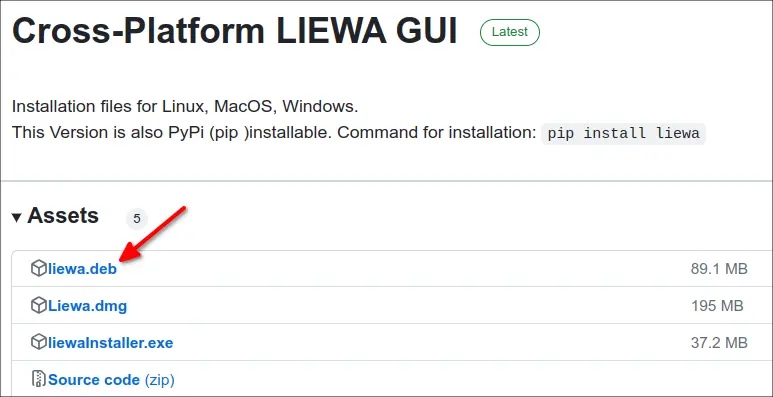
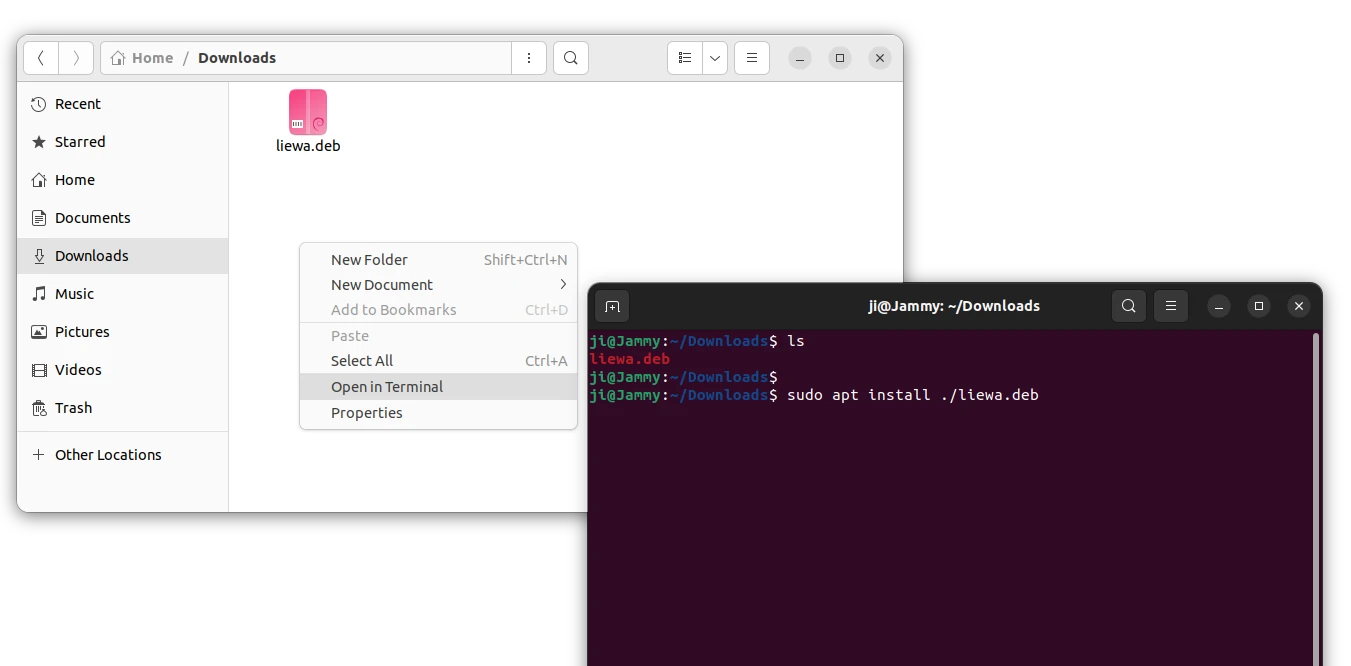
The tool provides .deb package for downloading in its Github releases page:
After downloaded the .deb package, right-click on ‘Downloads’ folder and select “Open in Terminal”. Finally, run command to install it in pop-up terminal window:
sudo apt install ./liewa.deb
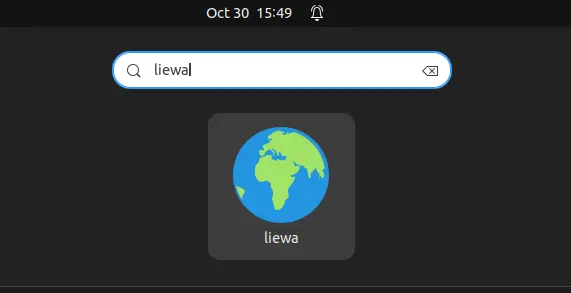
Finally, launch it from either start/applications menu or the overview screen depends on your desktop environment.
When the app window opens, configure canvas size, satellites, etc in first tab, then click on “Create New Scheduler” in Scheduler tab should start the live earth wallpaper.
Though, it takes quite a few seconds to apply, waiting for automatically start the service. If you can’t wait, try to open terminal (Ctrl+Alt+T) and run command to manually start the service:
systemctl status --user liewa
Uninstall:
You can stop the live earth wallpaper by clicking on “Delete Scheduler” button in app window, then set another wallpaper via ‘Background’ settings.
To remove the software, simply open terminal (Ctrl+Alt+T) and run command: