![]()
This simple tutorial shows how to install and setup Gerbera home media server in all current Ubuntu and Debian releases.
Gerbera is a free and open-source UPnP media server for Linux, BSD, and Mac OS. With it, you can stream audio and/or video files over home network, and play on any device with a media player with UPnP support, e.g., VLC.
How to Gerbera in Ubuntu / Debian via its official repository
Gerbera is available in Ubuntu repositories but always old. It’s however quite easy to install the latest version since it offers an official apt repository. And so far, it supports for Ubuntu 18.04, Ubuntu 20.04, Ubuntu 21.04, Debian Buster & Bullseye.
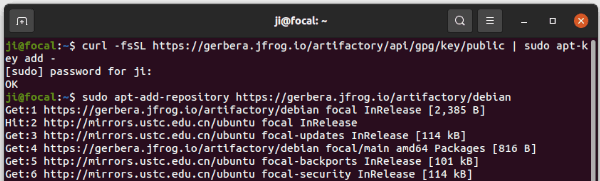
1.) Firstly open terminal from start menu. Then paste the command below and hit run to install the key:
curl -fsSL https://gerbera.jfrog.io/artifactory/api/gpg/key/public | sudo apt-key add -
Install curl via sudo apt install curl if you don’t have it. Type user password when it asks (no asterisk feedback) and hit Enter.
2.) Next add the apt repository by running command in terminal:
sudo apt-add-repository https://gerbera.jfrog.io/artifactory/debian
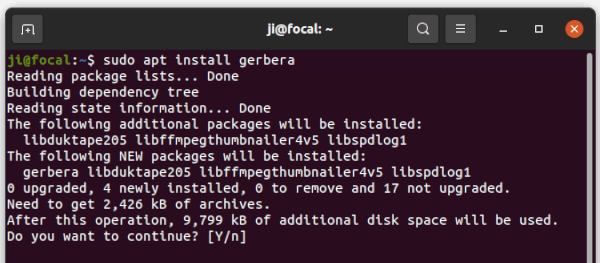
3.) Adding repository should automatically update the package information. If not, run it manually via command:
sudo apt update
4.) You can finally install the latest Gerbera package via command:
sudo apt install gerbera
Set up Gerbera Media Server:
The media server is now simple to use since user and permission are well configured during installing process.
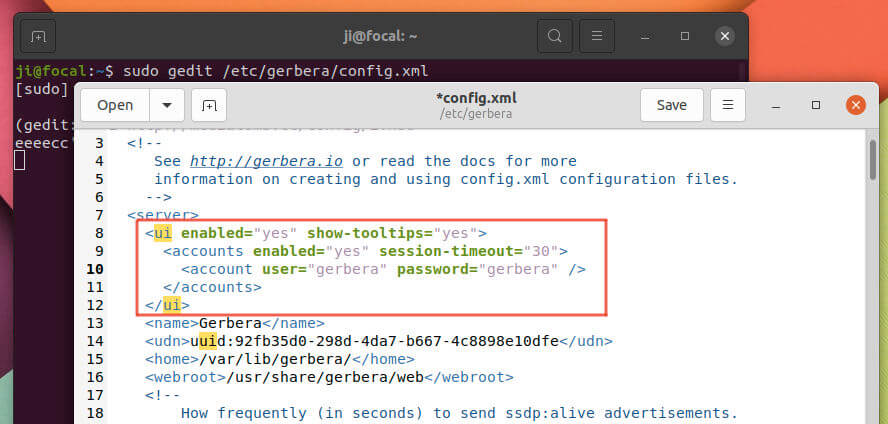
1.) Set user and password for Web UI.
You can skip this step, so anyone in home network can access the server configuration page via Web UI without authentication.
Firstly, open terminal and run command to edit the config file:
sudo gedit /etc/gerbera/config.xml
When files opens, go to UI section. Enable account login and set username and password as you prefer.
2.) Run Gerbera service:
Next, run command to start the media server service:
systemctl start gerbera
And check the server status via command:
systemctl status gerbera
If it’s running successfully, it will output the IP address and listening port for the web UI page.
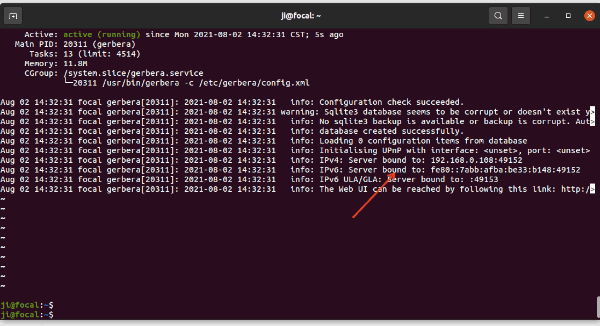
NOTE: to make the service start automatically at login, run systemctl enable gerbera.
3.) Paste the address in web browser, http://192.168.0.108:49152 in my case, and hit Enter. Then login with the user and password you set in step 1.).

You can finally, click “Add some files” to steam your media files, and manage them as well as clients via next two buttons.
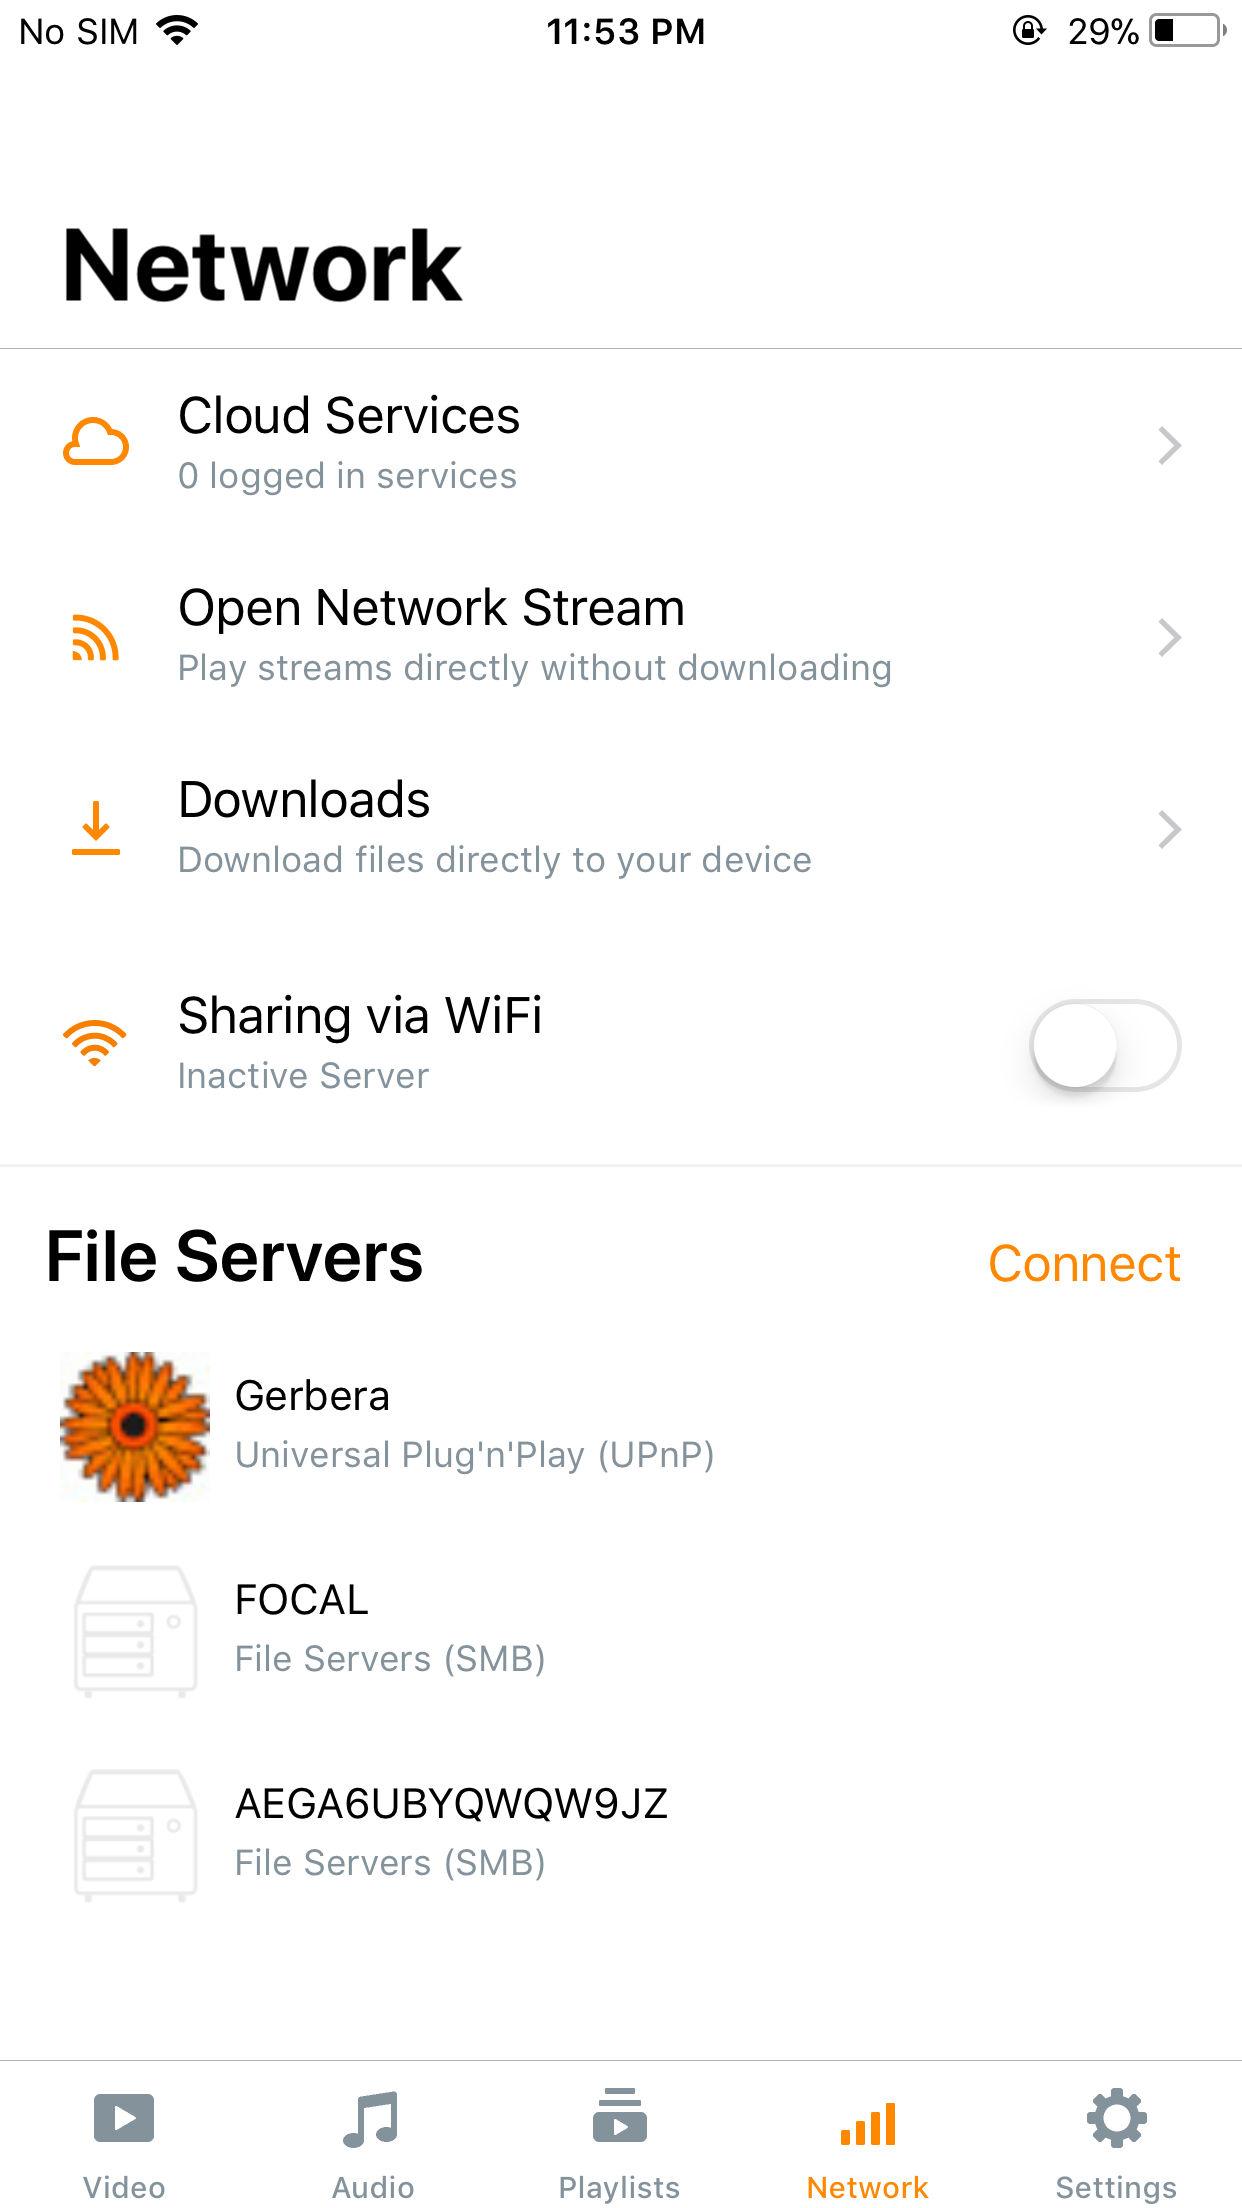
OK, you can now enjoy the music or movie in any device with UPnP client, for example VLC on iOS: