![]()
This simple tutorial shows how to install the fastest terminal emulator, Alacritty, in Ubuntu 20.04, Linux Mint 20 via PPA. UPDATED: Ubuntu 22.04 & Linux Mint 21 also supported.
Alacritty is a cross-platform, GPU-accelerated terminal emulator works on macOS, Linux, BSD, and Windows. It’s free and open-source software that strongly focus on simplicity and performance. And it features Vi mode, search, Vi search etc.
To install the software, there’s a PPA repository contains the latest packages for Ubuntu 20.04 and Ubuntu 22.04. Also an old version is available for Ubuntu 18.04.
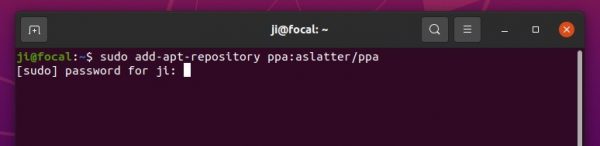
1. Open terminal from your system application launcher. When it opens, run command to add the PPA:
sudo add-apt-repository ppa:aslatter/ppa
Type user password (no asterisk feedback) for sudo prompts and hit Enter to continue.
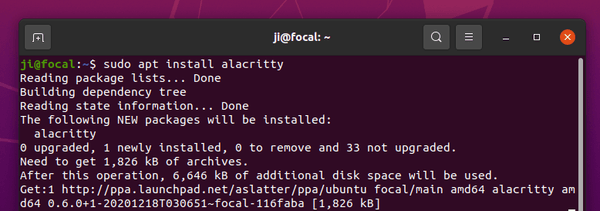
2. While adding the PPA will also automatically refresh system package cache, run apt command to install the terminal emulator:
sudo apt install alacritty
Once installed, either open it either from system application launcher or by pressing Ctrl+Alt+T on keyboard.
Uninstall Alacritty:
To remove the terminal emulator, run command:
sudo apt remove --auto-remove alacritty
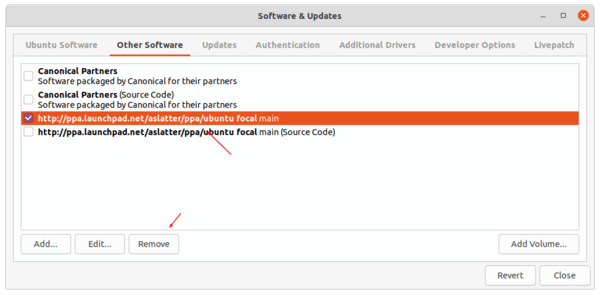
To remove the Ubuntu PPA, either run command in terminal:
sudo add-apt-repository --remove ppa:aslatter/ppa
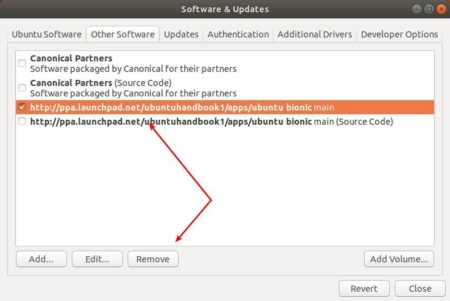
or open Software & Updates and remove the repository line under Other Software tab.


 [/ac-box]