![]()
NVIDIA announced 545.29.02 graphics driver for Linux yesterday, as a new release series for its New Feature Branch Version.
For Ubuntu 22.04 + and Fedora Workstation with default GNOME on Wayland, as well as KDE on Wayland, the new driver adds support for the CTM, DEGAMMA_LUT, and GAMMA_LUT DRM-KMS CRTC properties, which, finally make the ‘Night Light’ and ‘Night Color’ feature work for NVIDIA users.
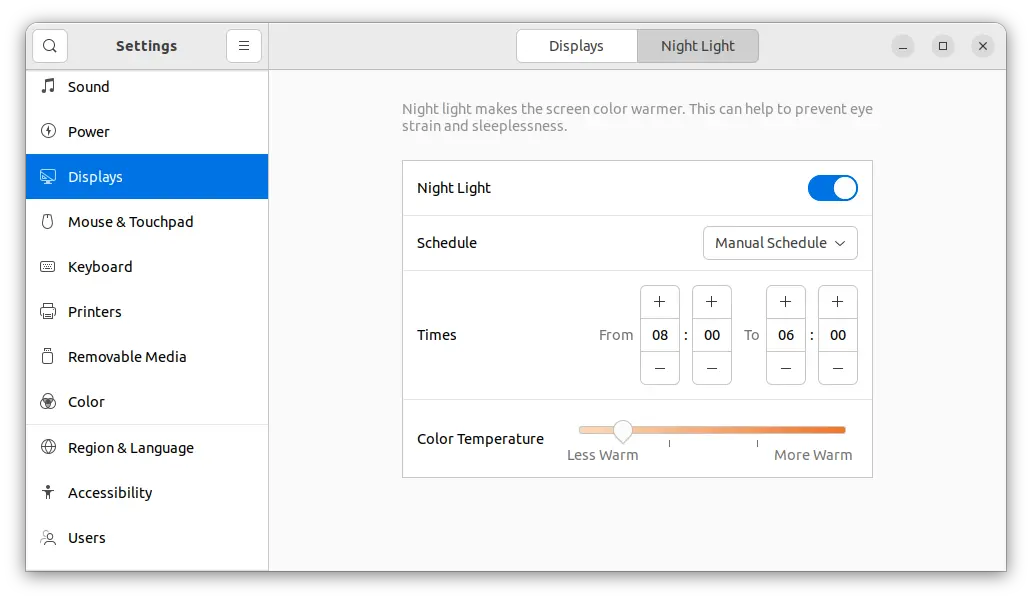
Night Light finally works on Wayland with NVIDIA driver
For desktop GPUs, the release adds initial experimental support for runtime D3 (RTD3) power saving mode. When all the PCI functions are idle, and all required conditions are satisfied, your GPU will go to the lowest power state resulting into maximum power savings.
The new driver also added experimental support for framebuffer consoles. On kernels with implement features, nvidia-drm will install a framebuffer console when loaded with both modeset=1 and fbdev=1 kernel parameters. Though, when an nvidia-drm framebuffer console is enabled, unloading nvidia-drm will cause the screen to turn off.
Other changes in NVIDIA 545.29.02 include:
- Experimental HDMI 10 bits per component support
- Support for virtual reality displays
- CERTIFIED-quality support for GeForce and Workstation GPUs to open kernelmodules.
- Support for PRIME render offload to Vulkan Wayland WSI
- Support for HDR signaling
- Add support to NVIDIA VDPAU driver for running in Xwayland
- Support EGL_ANDROID_native_fence_sync EGL extension.
- Support VK_EXTERNAL_SEMAPHORE_HANDLE_TYPE_SYNC_FD_BIT
- Support VK_EXTERNAL_FENCE_HANDLE_TYPE_SYNC_FD_BIT
For more about the new driver, see the official release note.
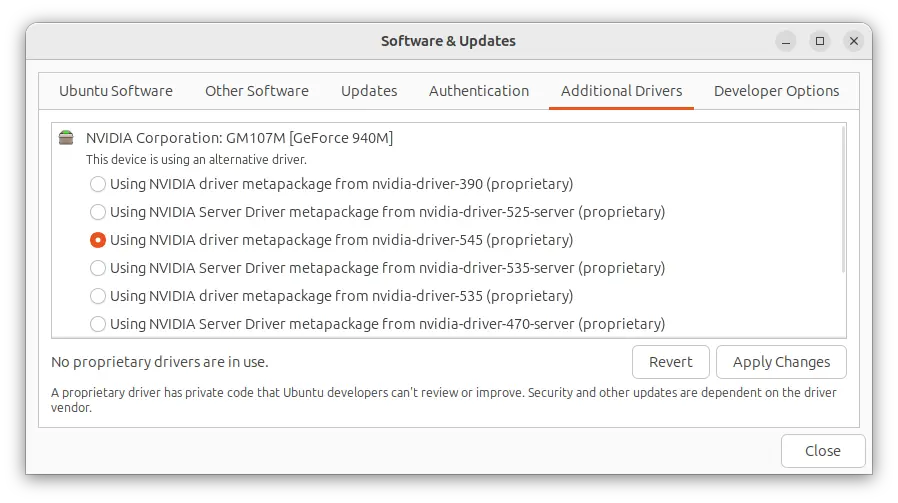
How to Install NVIDIA 545 Driver
Ubuntu will build the new driver series and publish through official system repositories. So, just wait! It will be available in “Additional Drivers” utility when it’s ready.
For those who can’t wait, the “Graphics Drivers” team PPA has made the driver package for Ubuntu 20.04, Ubuntu 22.04, and higher.
Simply, press Ctrl+Alt+T on keyboard to open terminal. Then, run command to add the PPA:
sudo add-apt-repository ppa:graphics-drivers/ppa
Finally, launch the ‘Additional Drivers’ utility for installing the new driver.