Mozilla Firefox 73.0 was released today. The new release features new global zoom level setting and High Contrast Mode improvement.
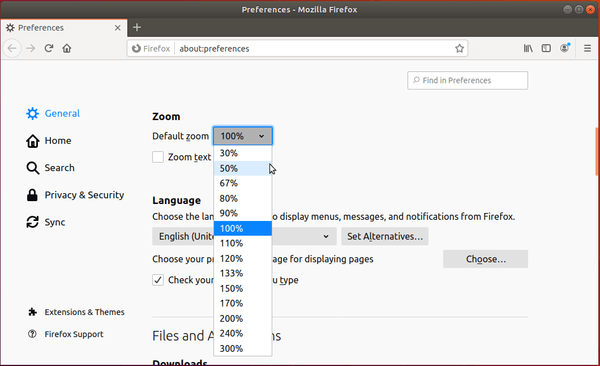
While per-site zoom is still available, Firefox 73.0 adds a new global default zoom level setting, which is available in about:preferences under ‘Language and Appearance’.
For user with low vision rely on Windows’ High Contrast Mode, without disabling background images websites in High Contrast Mode are now more readable.
Firefox 73.0 release highlights:
- New global zoom level setting.
- High Contrast Mode improvement.
- Audio playback improvement
- WebRender will roll out to laptops with Nvidia with drives newer than 432.00 and smaller than 1920X1200 screen resolution.
- Various security fixes.

Download / Install Firefox in Ubuntu:
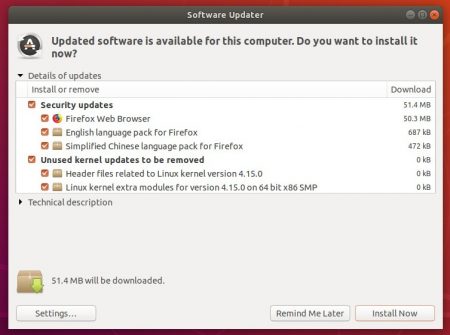
While Ubuntu 20.04 already contained the new Firefox package in the main repository, Firefox 73.0 will be available to upgrade via Software Updater utility in a few days for Ubuntu 16.04, Ubuntu 18.04, and Ubuntu 19.10. Check HERE.

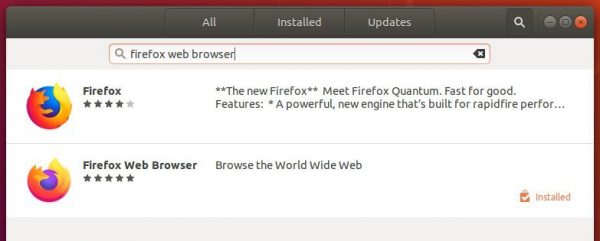
Or you can install the Firefox 72 Snap package (runs in sandbox) simply from Ubuntu Software. It can be installed alongside the pre-installed Firefox, and will be automatically update to the latest.

Also Mozilla Firefox website offers non-install (extract and run the executable) tarball for all Linux desktop.