![]()

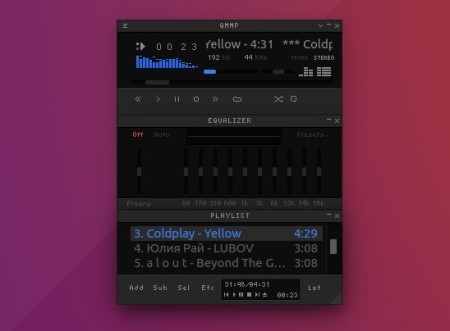
Qmmp, Qt-based multimedia player, released version 1.3.0 with many new features, improvements, and bug-fixes.
Qmmp 1.3.0 release highlights:
- Add history plugin.
- Add mono to stereo converter
- Add mpg123-based decoder
- Add PulseAudio volume control
- Add cover edition feature
- Add playlist reading/writing optimization
- Add TAK support
- Add feature to send listened tracks to ListenBrainz
- Improvements to skinned plugin, qsui plugin, http plugin, stream browser.
- Removed mpris1 support, and various other changes.

How to Install Qmmp 1.3.0 in Ubuntu:
Qmmp 1.3.0 is available to install via its official PPA, for Ubuntu 16.04, Ubuntu 18.04, Ubuntu 18.10, Linux Mint 18.x and 19.x.
1. Open terminal via Ctrl+Alt+T or from app launcher, and then run command to add the PPA:
sudo add-apt-repository ppa:forkotov02/ppa
Input your password (no asterisks feedback while typing) and hit Enter to continue.


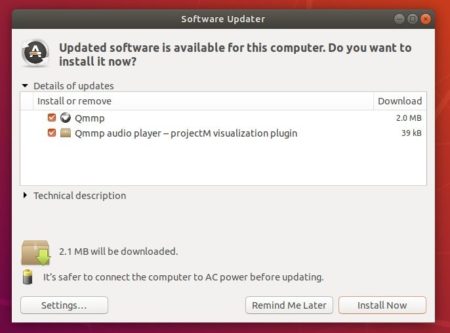
2. If a previous version exists, upgrade Qmmp using Software Updater:

Or run commands to install or upgrade Qmmp and its plugins:
sudo apt-get update

sudo apt-get install qmmp qmmp-plugin-pack
For qt4 version, use qmmp-qt4 and qmmp-plugin-pack-qt4 instead in the last command.
Uninstall:
You can manage the PPA repository via Software & Updates utility, under Other Software tab.
To remove Qmmp music player, either use your system package manager or run command:
sudo apt-get remove --autoremove qmmp qmmp-*