![]()
User of Google Chrome or Chromium based web browser? Here are the workarounds if you found that double-clicking does not work for maximizing/restoring app window in Ubuntu Linux.
When double-clicking on the header bar of any app window, it should maximize or restore the application. However, it just changes the cursor to drag arrow and back then, nothing else happens in Ubuntu 22.04 with Chrome/Chromium.
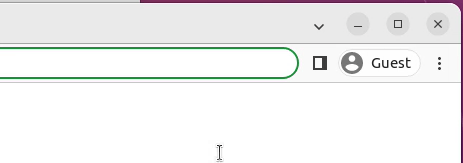
Double click does not maximize Chrome
This should be a compatibility issue between the browser and GNOME Wayland. Someone has reported the same issue that happened in Fedora 34.
It’s not a big deal if you OK to triple click or use title-bar button to do maximize/restore action. But if you want, there are a few workarounds until Google or GNOME fixed the issue.
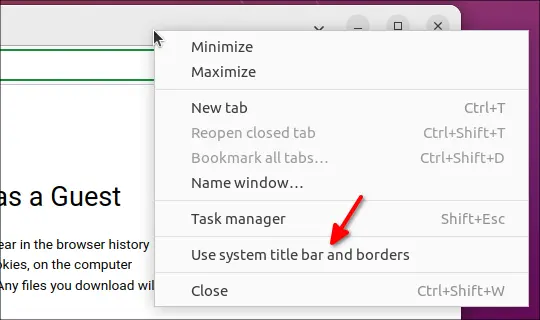
Workaround 1: Use system title bar
Just right-click on browser header bar, then select “Use system title bar and borders” in pop-up menu option.
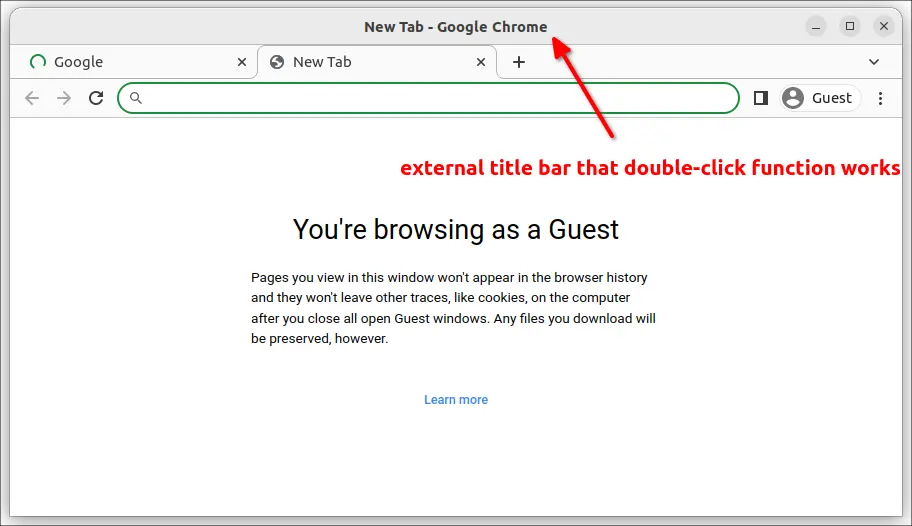
An external title bar will appear on top of the browser. The double click function works well in this case, though it takes a bit more screen space and looks not so good in Linux today.
To restore the change, right-click on tab bar to get the previous menu and un-tick the menu option.
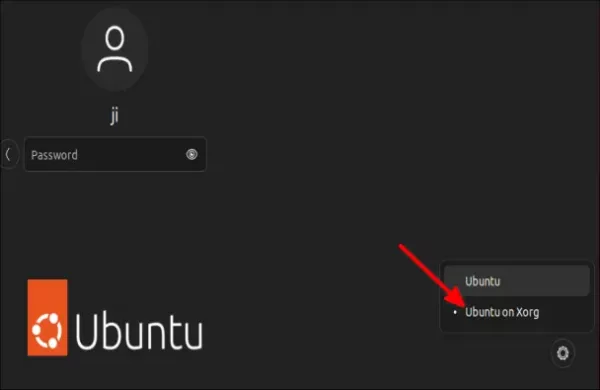
Workaround 2: Switch back Xorg session
As mentioned above, this issue only happens in Wayland session. User may switch back the classic Xorg session to workaround it as well as many legacy applications (e.g., Peek, Shutter) that are not properly working issue.
To do so, log out current session (save your work first!) and click your username in login screen. Then click the bottom right gear button and select “Ubuntu on Xorg“. Finally, type password to login.
To verify your session, either open “System Settings -> About -> Check ‘Windowing System'”, or run the command below in terminal:
echo $XDG_SESSION_TYPE
Workaround 3: Disable touchpad tap and drag
The Xorg session is the good choice except for those using touchpad tap clicking to simulate double-click action.
If you use touchpad for the most time like me, and there are physical left/right buttons, then disable tap and drag feature will make double tapping work for maximizing Chrome/Chromium browser.
To do so, either press Ctrl+Alt+T on keyboard to open terminal and run the single command:
gsettings set org.gnome.desktop.peripherals.touchpad tap-and-drag false
Or install ‘Dconf Editor’ from Ubuntu Software. Open it, and navigate to ‘org.gnome.desktop.peripherals.touchpad’. And, finally turn off the key for ‘tap-and-drag’.

That’s all. Enjoy!