
![]()

This tutorial is going to show you how to install and setup Universal Media Server in Ubuntu 20.04 Desktop and Server.
Universal Media Server, UMS in short, is a DLNA-compliant UPnP media server allows streaming media files to a wide range of devices including video game consoles, smart TVs, smartphones, and Blu-ray players.
1. Install required libraries:
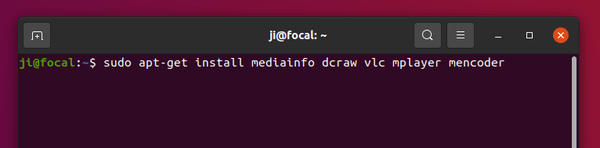
Media transcoding is accomplished through packages from AviSynth, FFMpeg, MEncoder, and VLC, you have to first open terminal and run command to make sure these packages installed:
sudo apt install mediainfo dcraw vlc mplayer mencoder

2. Download Universal Media Server:
The latest tarballs are available to download at github project page. Select download (run uname -m to tell system type):
- x86 package for old 32-bit machines.
- x86_64 package for 64-bit machines.
- arm64 / armhf for Rasperry Pi devices.
At the moment, the latest release is version 10.0.1. If you’re running Ubuntu Server, use this command to download it (replace URL in the command if a newer version is available):
wget -c https://github.com/UniversalMediaServer/UniversalMediaServer/releases/download/10.0.1/UMS-10.0.1-x86_64.tgz
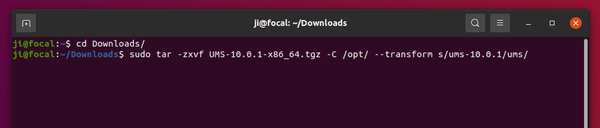
3. Decompress the tarball
Run following 2 commands will navigate to user’s Downloads folder, then extract the UMS package /opt, and finally rename result folder from ‘ums-10.0.1‘ to ‘ums‘.
cd Downloads
sudo tar -zxvf UMS-10.0.1-x86_64.tgz -C /opt/ --transform s/ums-10.0.1/ums/
Skip cd Downloads if it was downloaded via wget command.
And replace “UMS-10.0.1-x86_64.tgz” if a newer version was downloaded, also do change version number in “ums-10.0.1“.

4. Run UMS as system service
If everything goes well, you should be able to run the Universal Media Server via command:
/opt/ums/UMS.sh
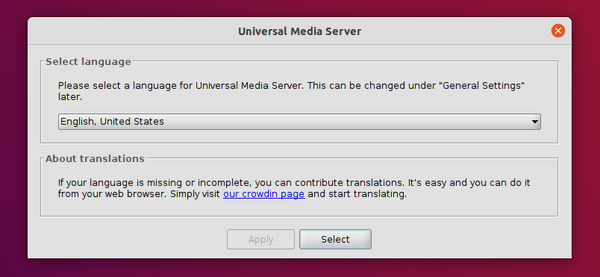
For Ubuntu Desktop, it brings up a setup dialog to choose language, start minimized or not, choose network, and media folder etc.

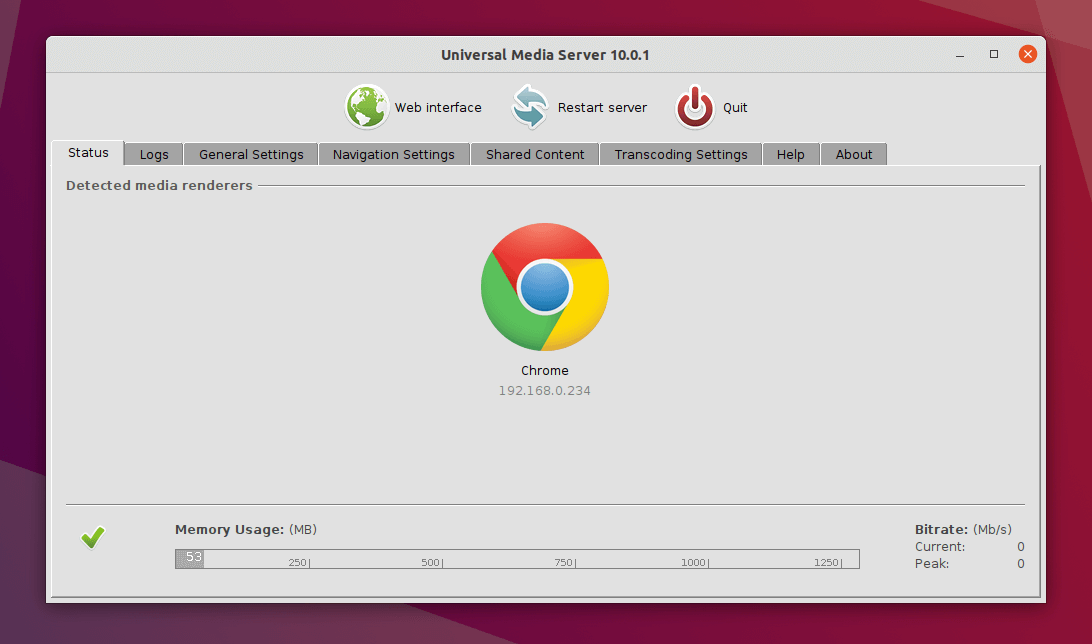
Then it offers an user interface with more configurations, log view, and more.
For Ubuntu Server without UI, edit the .config/UMS/UMS.conf file for configurations. By default, it steams all files under user home. You can add “folder = /PATH/TO/MEDIA1,/PATH/TO/MEDIA2” to set media folder. For more, read the UMS.conf file under source tarball.
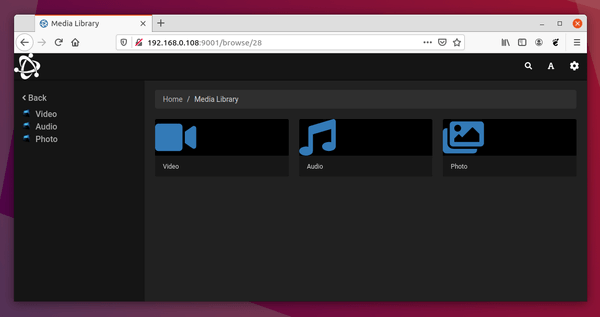
After starting the server go to http://server_ip:9001 in your web browser to check out if the server is working.

To make it run as systemd service, open terminal and run command:
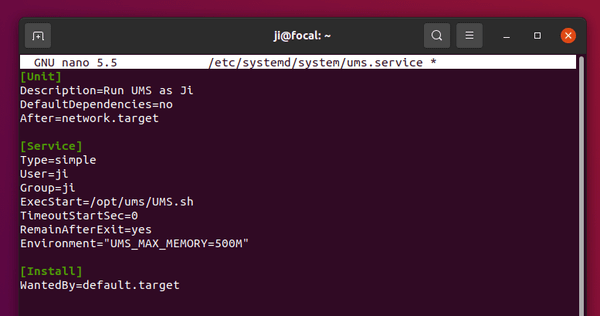
sudo nano /etc/systemd/system/ums.service
It will create an empty file and open with nano command line text editor. Paste (Ctrl+Shift+V) following lines and change ji to your user name. Also change memory limit from 500M to another value if you want.
[Unit]
Description=Run UMS as Ji
DefaultDependencies=no
After=network.target

[Service]
Type=simple
User=ji
Group=ji
ExecStart=/opt/ums/UMS.sh
TimeoutStartSec=0
RemainAfterExit=yes
Environment="UMS_MAX_MEMORY=500M"

[Install]
WantedBy=default.target

Save changes by pressing Ctrl+X, follow with Y, and hit Enter.
Finally run commands to reload systemd daemon, enable and start UMS service.
sudo systemctl daemon-reload
sudo systemctl enable ums.service
sudo systemctl start ums.service
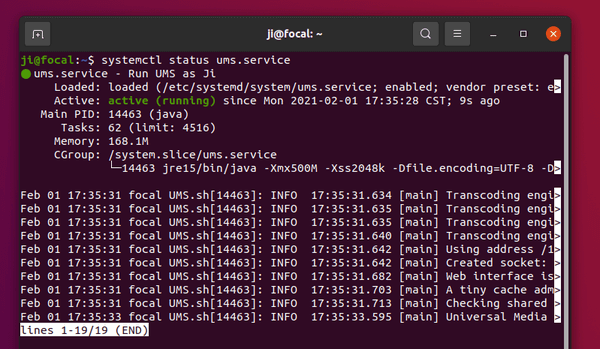
And check the service status via command:
sudo systemctl status ums.service


Good install process, one beer for you.
Clear explanation, good manual
I changed the ‘After’ target to ‘network-online.target’, because otherwise my TV would not find the server. Waiting for the network to be truly online did the trick.
Greetings Ji!
Very nice work you have created. It is very well done, however I have a question whose answer eludes me.
When you are creating the ums.service file in the example you provide, the enviroment maximum file size is established as:
Environment=”UMS_MAX_MEMORY=500M”
Just a bit further on in your tutorial, you state that this 500M value may be changed if the reader so chooses. I understand English is not your native language, but may I ask you to please try and explain (as simply as you can!) what exactly does this value of 500M limit and why would someone wish to change it (although I suspect that the answer to the first part of my question may well explain the second part)!
Although I eagerly await your reply, please take the time you feel you need! After all, I lived as long as I have not knowing! :)
UMS_MAX_MEMORY will just limit amount of memory allowed to UMS, with more memory allowed UMS will handle faster some requests or more smoothly.
If you have plenty of GB of ram available you may increase this value, on my PC I have only 4GB so I will keep this value because I don’t need UMS be faster,
Hey there!
I found your guide while looking for help in setting a media server and let me tell you this guide made it super easy for me.
Everything is working as I intended and according to my setup:
– an apple tv with VLC client
– Ubuntu 20.04 home server
Thanks!