

This tutorial shows how to set custom screen resolution in current Ubuntu releases, including Ubuntu 20.04, Ubuntu 22.04, and Ubuntu 24.04, on either Wayland or Xorg session.
So this tutorial is going to show you another way to add your favorite screen resolution if it’s not available in Display settings.
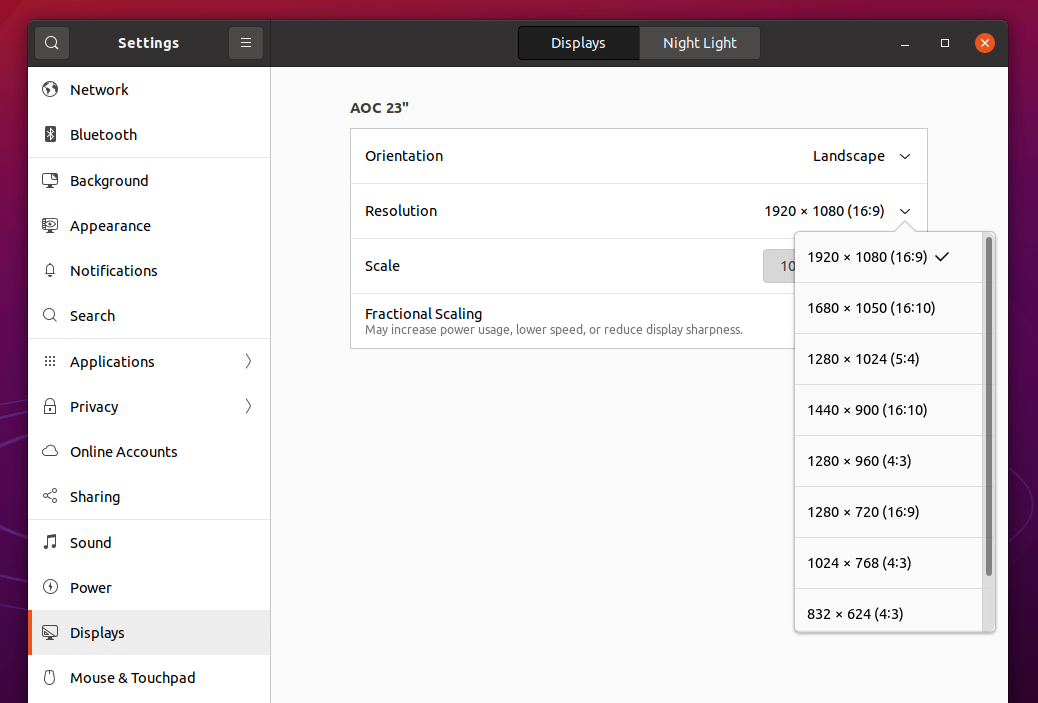
In the case, I’ve the default 1920X1080 (16:9) resolution. However, I prefer 1600X900 (16:9) a little more which is not available in settings.
Before getting started:
In this tutorial I’m going to add video mode option as Kernel parameter. The good side is that it works on both Wayland and Xorg.
Downsides includes:
- You can’t set custom resolution higher than the maximum one in Display settings. In my case (see the picture above), X resolution must be less than 1920, and Y resolution have to less than 1080.
- If you have dual-boot or multi-boot systems, below steps may not work for “other Linux” in Grub boot menu. For instance, I’ve Ubuntu 21.04 and Ubuntu 20.04 dual-boot in my laptop, the startup boot menu is handled by Grub for Ubuntu 21.04. It lists Ubuntu 21.04 as the first menu entry, custom Kernel parameter does not work for Ubuntu 20.04 in my case.
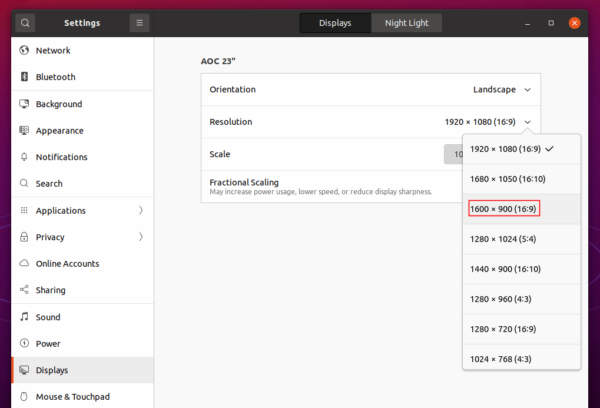
And after adding the parameter, the custom resolution should appear in Display settings, 1600×900 for instance:
How to Tell the Display Device Name in Ubuntu:
Firstly, you have to find out the current Display name. To do so, open terminal from the system application launcher:


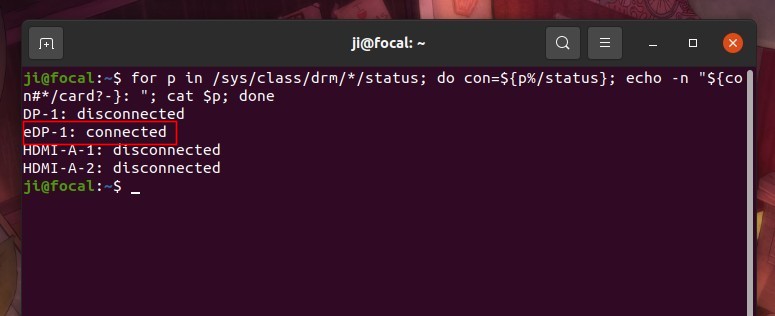
When terminal opens, run command:
for p in /sys/class/drm/*/status; do con=${p%/status}; \

echo -n "${con#*/card?-}: "; cat $p; done
This is a single command separated into 2 lines. It checks all the sub-folders under ‘/sys/class/drm‘ directory. For the sub-folder includes ‘status‘ file with ‘connected‘ as content, the folder name exclude ‘card?-‘ part is the device name we need.
As the picture shows, it’s eDP-1 in my case.
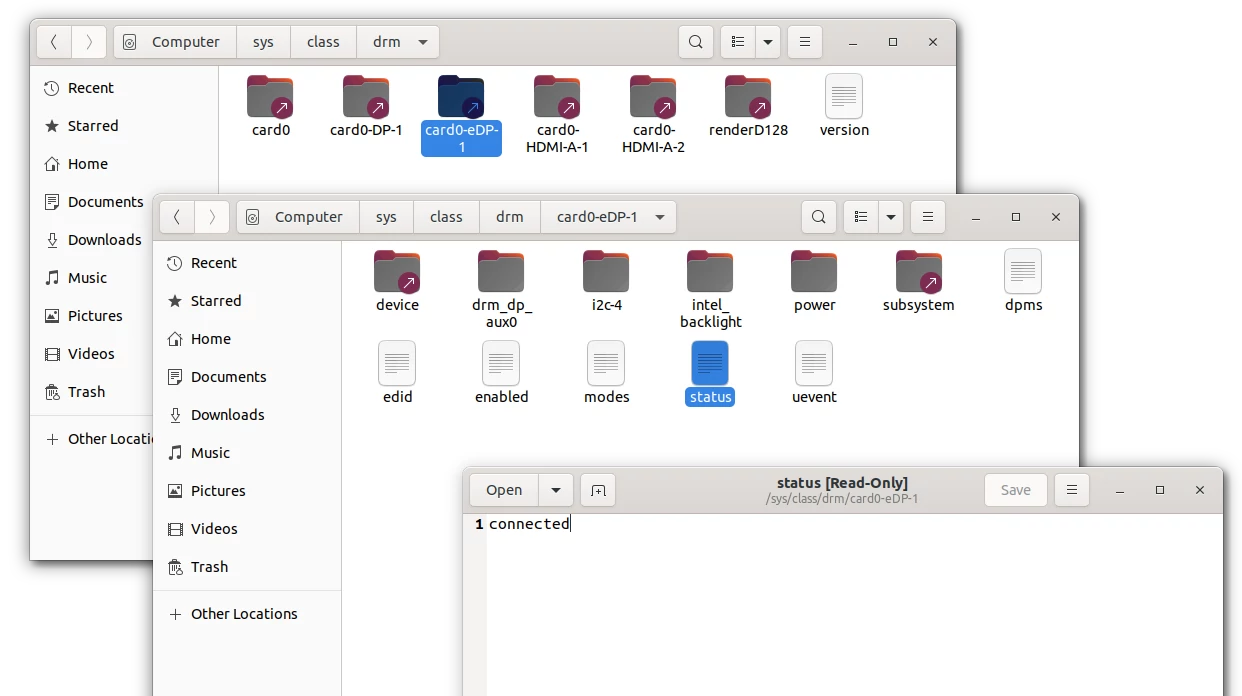
DON”T edit the files
How to add video mode kernel parameter:
Option 1.) edit Grub configuration file.
a.) Open terminal from system app launcher. When it opens, run command to edit the config file:
sudo gnome-text-editor /etc/default/grub
Replace gnome-text-editor depends on your DE or Ubuntu edition, such as gedit for Ubuntu 22.04 and earlier, or nano command line text editor for most desktops.
When it opens, add video=eDP-1:1600×900@60, in my case, as value for “GRUB_CMDLINE_LINUX_DEFAULT”.
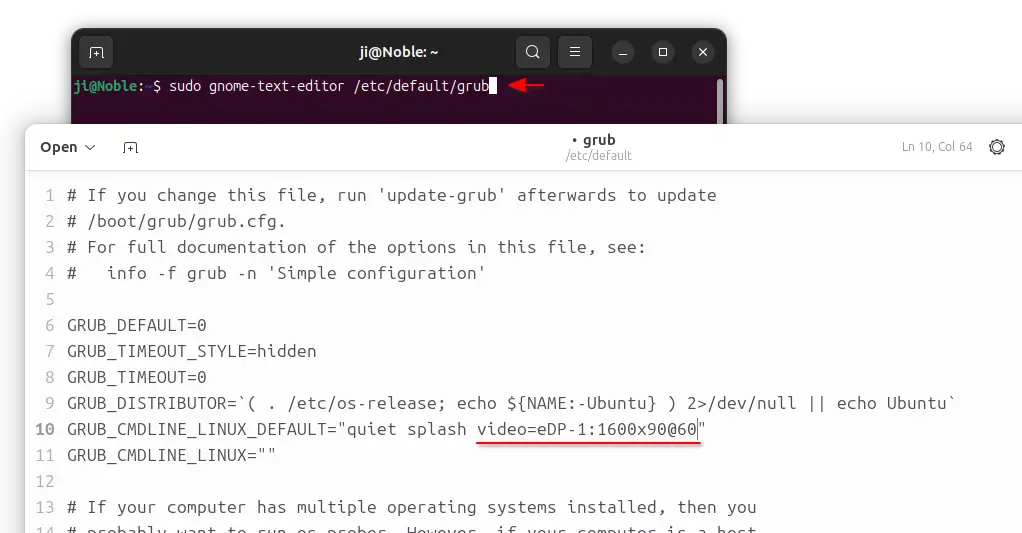
IMPORTANT: you have replace video=eDP-1:1600×900@60:
- eDP-1 is the Display Device Name, you can find it in previous step.
- 1600×900 is the desired screen resolution. Replace it with yours.
- 60 is the refresh rate. It’s OK to skip it, so it will be video=eDP-1:1600×900
There are more flags for the video mode kernel parameter. See the documentation for detail.
b.) After saving the changes (for nano, press Ctrl+S, then Ctrl+X.) Finally apply changes by running command:
sudo update-grub
And reboot.
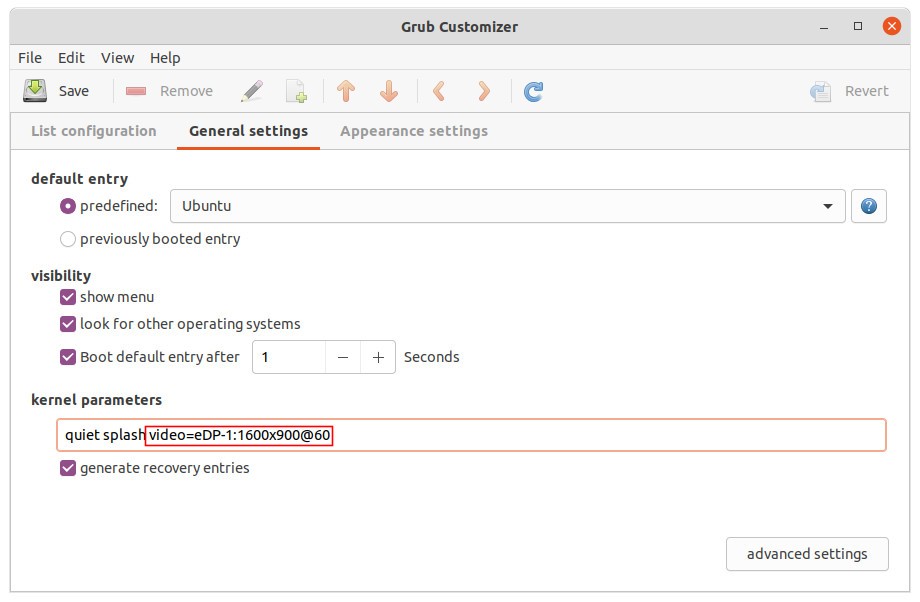
Option 2.) use Grub Customizer:
Grub-Customizer, the popular graphical tool offers an option to add the Kernel parameter.
Install it from Ubuntu Software if you don’t have it. Then launch it and navigate to General Settings tab. Finally add the value and click on Save button.
Set Custom Resolution for Multiple Displays:
If you have multiple monitors connected to your Ubuntu machine. It’s OK to set one screen resolution for all displays, or use more “video=” parameter for each display.
a.) To set one screen resolution for all displays, just skip the device name. For instance:
video=1600x900@60
It will add 1600×900 screen resolution with 60 Hz refresh rate for all the connected displays.
b.) To add more “video=” parameter. For instance, I have two displays: eDP-1 and DP-1 connected. And to add 1360×700 for eDP-1 and 1600×900 for DP-1, use:
video=eDP-1:1360x700@60 video=DP-1:1600x900@60

That’s all. Enjoy!


you are a life saver
thank you for your post, help me soo much.
“You can’t set custom resolution higher than the maximum one in Display settings.” Pretty much breaks my heart because I have a 21:9 display with a 2560 x 1080 resolution.
same here! how can i fix this? you ever fix yours?
Hai, many thanks, using your tutorial work twice. after first time follow your setting using xrandr and now when i upgrade to 21.04 i got problem so i found your tutorial again, now my problem fixed, thank you so much.
If you don’t mind i want to put your tutorial in my website cybersoftmedia. Thank You.
Hello and thank you for this tutorial:
For the copy-paste champions, the command need to be fixed. Use this one below (from the author screenshot):
for p in /sys/class/drm/*/status;do con=${p%/status}; echo -n "${con#*/card?-}: "; cat $p; donefor p in /sys/class/drm/*/status; do con=${p%/status}; echo -n “${con#*/card?}: “; cat $p; done
I don’t understand how to do the first command.
Only the second option is working for two displays. Thanks, I got it!
for p in /sys/class/drmcard?-}: “; cat $p; done
gives
bash: syntax error near unexpected token `cat’
no matter how precise i type it!!
Typos in command insert, but the correct syntax is in the screen image below it
Thank you Bob. Not sure if it’s the preformatted tag issue of the wordpress theme. Please try out the updated command with code tag, and please tell me what’s the point. I’m trying to fix the problem.
“`for p in /sys/class/drm/*/status;do con=${p%/status}; echo -n “${con#*/card?-}: “; cat $p; done“`
use this..
Hello
Thanks for the detailed tutorial! I have to questions that I haven’t seen answered anywhere, maybe someone here knows:
– Can I add a smaller resolution that doesn’t stretch to the full monitor but displays black bars or black space around it? For example, I want to show a 1920×1080 resolution on a 1920×1200 monitor, leaving black bars above and below. I could do that with xrandr like this: xrandr –output DisplayPort-0 –mode 1920×1080 –set ‘scaling mode’ ‘Center’
– After I add the new screen resolution this way, is there a way to call that specific resolution via command line so I can create a specific shortcut for it?
1. Seems no ‘scaling mode’, but it supports ‘margin_top’, ‘margin_bottom’, ‘margin_left’, and ‘margin_right’ (see the documentation link in the post) though margins does not working good in my case.
2. Don’t know any other command except xrandr.
Thanks for the reply!
I’ll look into the margin thing. Too bad there’s no command line utility for this.
That command doesn’t work for me either as others have reported.
Thank you very much, man! You’ve save my neurons. I was so stupfied, then you came with the help. I’m Grateful!
https://unix.stackexchange.com/a/655074/309381
Thank you for the information!!! Your instructions are very useful and they worked! Not only for one but for two monitors with different resolution :)
There’s typos in the code segments. This should be it typed manually from the screenshot…
for p in /sys/class/drm/*/status; do con=${p%/status}; echo -n “${con#*/card?-}: “; cat $p; done
this is the command to copy paste fron screenshot:
for p in /sys/class/drm/*/status; do con=${p%/status};echo -n “${con#*/card?-}: “; cat $p; done
Great tutorial. Thank you very much.
I tried this on a fresh install of Ubuntu 22.04 on Aug 22, 2022: Did not work.
I have Ubuntu 22.04.
I ran some commands as suggested:
1. cat /sys/class/drm/card0-VGA-1/status
connected
2. cat /etc/default/grub
#GRUB_CMDLINE_LINUX_DEFAULT=”quiet splash”
GRUB_CMDLINE_LINUX_DEFAULT=”card0-VGA-1:1920×1080@60″
This is not showing up in display.
You should remove “card0-” section. Try:
GRUB_CMDLINE_LINUX_DEFAULT=”VGA-1:1920×1080@60″you mean this:
for p in /sys/class/drm/*/status; do con=${p%/status}; echo -n “${con#*/card?-}: “; cat $p; done
Right?
the command(extracted from the picture) is:
for p in /sys/class/drm/*/status; do con=${p%/status};echo -n “${con#*/card?-}: “; cat $p; done
Nice method, but for dual monitors, it completely breaks the work of HygraPaper, making it impossible to set different wallpapers for two monitors. Unfortunately!
for p in /sys/class/drm\/*/status; do con=${p%/status}; echo -n “${con#*/card?-}: “; cat $p; done