


This tutorial shows how to mount the VirtualBox virtual disk image in Ubuntu, so you can access the Guest OS file system with read and write permission, if it does not boot.
After misconfigured my VirtualBox Guest OS, it does not longer work. I know how to correct the issue to make it boot again, but firstly accessing to the file system is required!
Since the VBox user manual does not work, here’s what I did in Ubuntu 20.04 host with VirtualBox 6.1.x:
1.) Firstly open terminal from system application launcher. When it opens, run command:
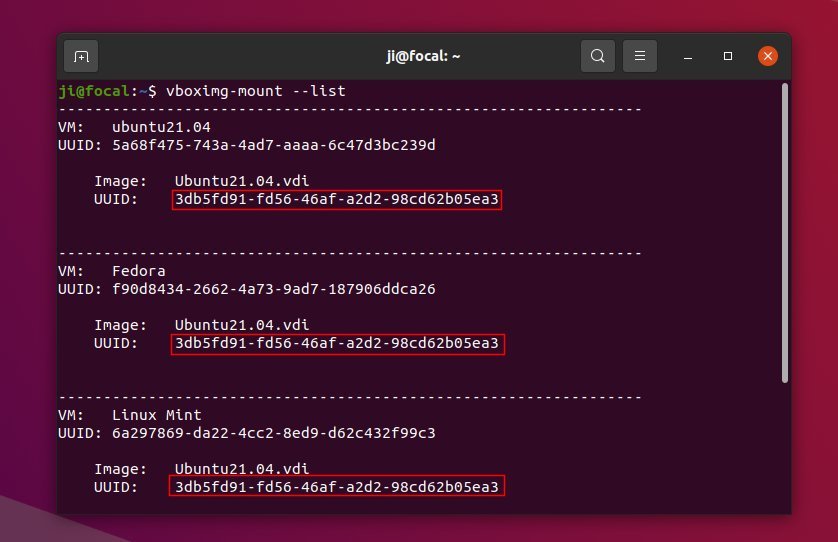
vboximg-mount --list
vboximg-mount is a utility to make VBox disk images available to the host. With --list, it list all Disk Images as well as the UUID.
In the case, I have all Guest OSes on single Disk Image (.vdi). And the uuid is: “3db5fd91-fd56-46af-a2d2-98cd62b05ea3”
2.) Next perform a FUSE mount of the virtual disk image:
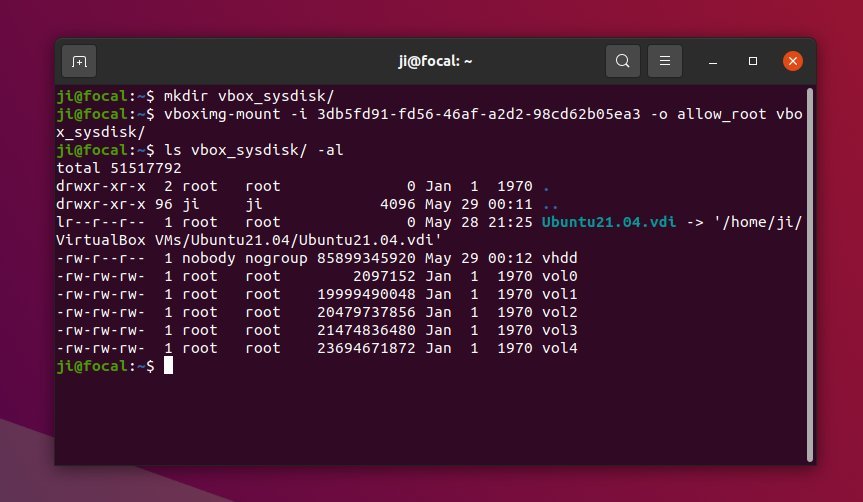
- First create a folder as mount point, vbox_sysdisk for instance:
mkdir vbox_sysdisk
- Then mount it via command (remember to change the UUID to yours):
vboximg-mount -i 3db5fd91-fd56-46af-a2d2-98cd62b05ea3 -o allow_root vbox_sysdisk
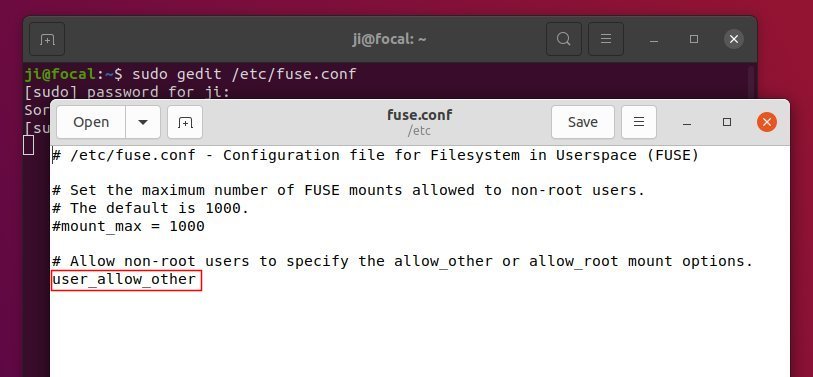
NOTE: You may need to edit the “/etc/fuse.conf” to make the -o allow_root flag work. To do so, run command sudo gedit /etc/fuse.conf and enable (remove # at its beginning) “user_allow_other” line.
3.) As the previous picture shows, I have 5 disk partitions: vol0, vol1, …, vol4. Now mount either partition (vol4 for instance) to /mnt via command:
sudo mount vbox_sysdis/vol4 /mnt
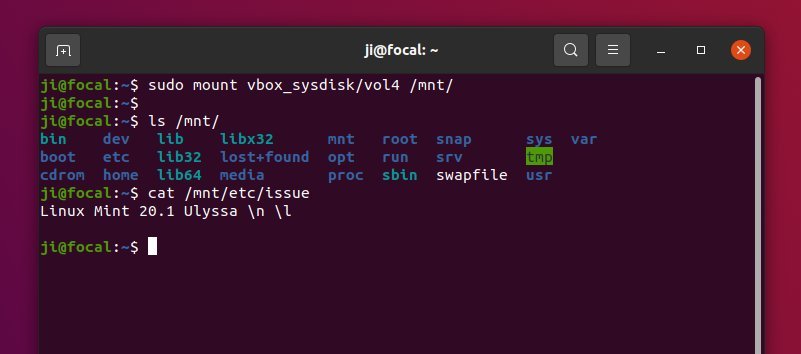
Finally go to /mnt directory and there you are.
Unmount:
To un-mount the guest os file system, run command:
sudo umount /mnt
To un-mount the VBox disk image, run command:
umount ~/vbox_sysdisk
And you may finally remove that folder either from file manager or by running command in terminal:
rm -r ~/vbox_sysdisk


Alright but I guess using guestmounts/.vhd instead of vboximg-mount/.vdi maybe less fiddly.
Nie działa
vboximg-mount –list
vboximg-mount: nie znaleziono polecenia
You should have started the post explaining how to create the image by command line before mounting it. Because as you explain it it does not work
Thanks for sharing. But must advise that mounting like this is not the same as editing. If you use vmbox-mount and make-changes, it wont affect the vdi file. Just the mounted folder.
To mount read/write, add –rw option (needs VB 6.1.36 at least)
Thank you, Ji m!
The instructions work like a charm on Ubuntu 22.04.2 LTS.
Problem: after installing the VirtualBox 7.0.8 r156879 extension pack on a XP machine, it would start-up only with black/blank display; i.e. unusable. To fall back to a back-up vdi, I needed a few (newer) data files from the unusable vdi.
Thomas
Here, by the way, is my own summary of this EXCELLENT article.
– – –
1. shut down the guest OS
2. open terminal
3. list all disk images and their UUID”s:
vboximg-mount --list4. ensure that user_allow_other in /etc/fuse.conf is not commented out
5. create a mount point folder:
mkdirexample: mkdir vbox_sysdisk
6. mount the vdi
vboximg-mount -i -o allow_rootexample: vboximg-mount -i 3db5fd91-fd56-46af-a2d2-98cd62b05ea3 -o allow_root vbox_sysdisk
7. list the contents of the mount point folder:
ls / -alexample: ls vbox_sysdisk/ -al
8. mount the root volume of interest
sudo mount / /mntexample: sudo mount vbox_sysdisk/vol0 /mnt
– –
9. The VDI drive will show up on the desktop. Modify contents as desired, carefully of course
– –
10. to thoroughly unmount: first, unmount the guest os file system
sudo umount /mnt11. unmount the vbox disk image:
umount ~/example: umount ~/vbox_sysdisk
12. remove the mount point folder
rm -r ~/example: rm -r ~/vbox_sysdisk
– – –
Your work is just extraordinary, Ji m. I’m a bit tight on $$ right now, but I’ve made a small donation, and shall give more in the future. Thanks SO very much.
auuggghhh. this commenting system is causing those errors in step 8, turning verbiage into a single slash. So, just don’t approve my summary.
Sorry for the poor comment system. Try adding “code” or “pre” tag to the commands.