
![]()
For those having Ubuntu or other Linux server (e.g., Debian, CentOS and Fedora) remotely, here’s how to login without password using SSH key authentication.
Compare to user password login, SSH key authentication is more secure because only the person who has the key allows to connect, and the keys are well encrypted by different algorithms. It also make SSH connection simple by login without password.
1. Enable SSH Service (Do it in server side):
In case you don’t have enabled the SSH service in remote server. You need to first connect to the server, and run command to install openssh:
sudo apt install openssh-server
For CentOS and Fedora server, use sudo dnf install openssh-server command instead.
After installation, enable and start the service via command:
sudo systemctl enable ssh && sudo systemctl start ssh
And finally verify the SSH service status by running command:
sudo system status ssh
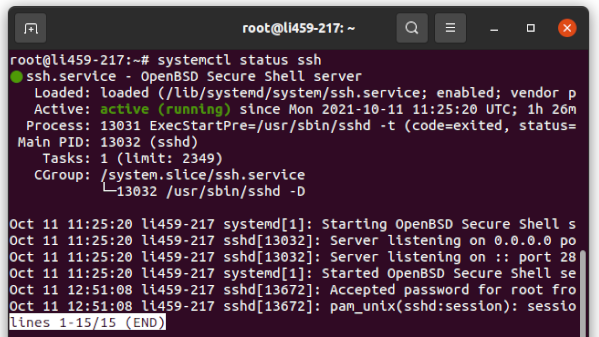
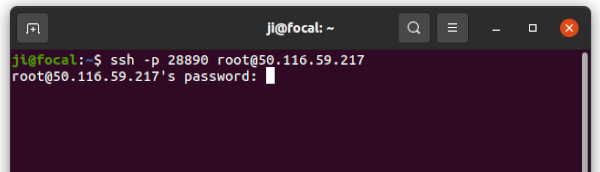
If you see the service is active and running, you may start connecting the server via SSH remotely using the command below in local computer:
ssh user@server_ip
Replace user and server_ip. And use -p port_number to specify the port number if it’s not the default 22.
2. Enable SSH Key Authentication (Run commands in local PC):
The authentication keys are generated in local computers. They are usually consists of private key and public key. By uploading the public key into remote Linux server, you’ll be able to SSH login using the private key in local machine.
NOTE: this tutorial is tested on Ubuntu local computer, though it should work on most Linux, including Debian, Fedora, CentOS, and Arch Linux.
1. Install OpenSSH Client:
The OpenSSH client is installed out-of-the-box mostly. In case you don’t have it, run this command in local computer to install it:
sudo apt install openssh-client
For CentOS and Fedora, use sudo dnf install openssh openssh-clients instead.
2. Generate SSH Key Pair:
The ssh-keygen command allows to generate a SSH key pair via RSA, ECDSA, and ED25519 algorithms. While RSA is widely used and best supported, ED25519 offers better security and good performance.
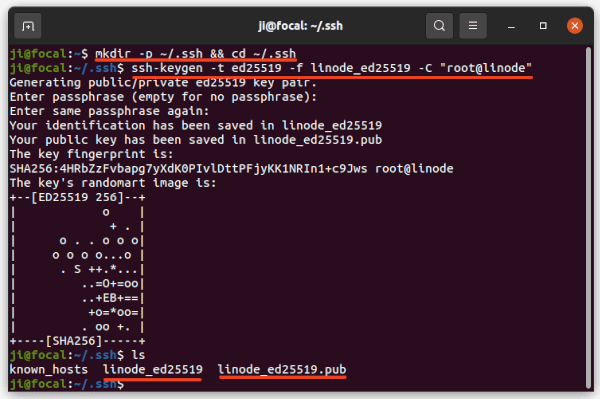
a.) Firstly, create and navigate to the .ssh directory in local computer terminal window:
mkdir -p ~/.ssh && cd ~/.ssh
b.) Next, run command to generate a key pair:
ssh-keygen -t ed25519 -f linode_ed25519 -C "root@linode"
In the code, you may replace “ed25519” with your prefer encryption algorithm. And “-f linode_ed25519” specifies the key name, “-C “root@linode”” is the optional comment.
c.) For security reason, it’s highly recommended to set none permission (even not readable) for other users except for yourself:
chmod 600 ~/.ssh/linode_ed25519*
Change “linode_ed25519” to the key name you set in last step. And there’s an asterisk “*” in the end so it also applies to the “linode_ed25519.pub” file.
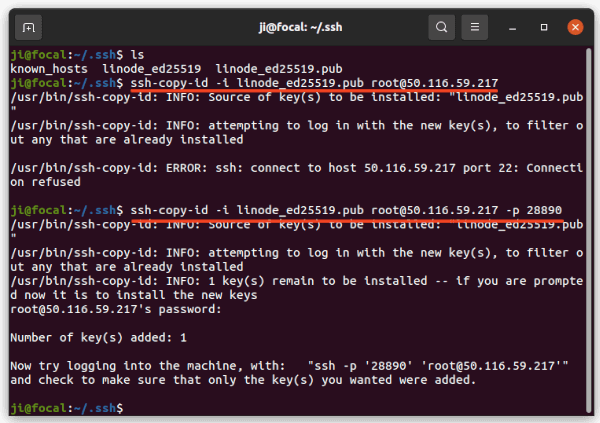
3. Upload the public key to host server (Do in local PC):
Now upload the public key (“linode_ed25519.pub” in my case) from local computer to remote server, using command:
cd ~/.ssh && ssh-copy-id -i linode_ed25519.pub user@server_ip
Don’t remember to add ‘-p number‘ if the listening port is not default 22. And you need to type remote user password for uploading the key.
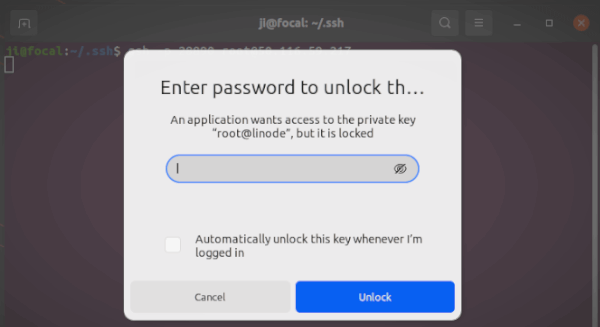
After that, try SSH login again in local computer will ask for the key password you set in b.):
ssh user@server_ip
If you select Cancel, it will instead ask for user password authentication.
4. Enable No Password SSH Key Login (Do in local PC):
You can tick ‘Automatically unlock this key whenever I’m logged in‘ and type the password only for one time in the last screenshot. However, some desktop environments may not provide this friendly feature. So ‘ssh-agent’, OpenSSH authentication agent, is present to do the job for your.
Firstly run ‘ssh-agent’ via shell command:
eval 'ssh-agent'
Next, add the SSH key to the agent:
ssh-add linode_ed25519
After that, SSH command will login without typing the authentication key password.
5. Disable SSH user password login (Do in server side):
After successfully setup the key authentication, you may disable the user password login, so no one else can access the server!
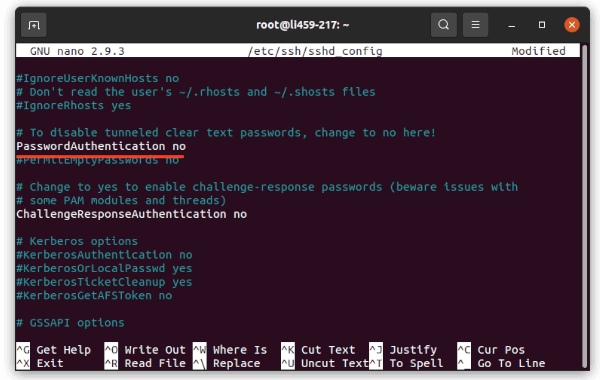
Firstly, connect to the remote server and run command to edit the ssh daemon config file:
sudo nano /etc/ssh/sshd_config
Next, un-comment the “#PasswordAuthentication yes” line and set its value to no, so it will be:
PasswordAuthentication no
And then press Ctrl+X, type y and hit Enter to save the file.
Finally reload SSH via
sudo systemctl reload ssh
command and enjoy!


