
![]()
This simple tutorial shows how to change the computer name (aka hostname) in your Ubuntu (Ubuntu 24.04 Noble Numbat updated) without a system restart.
The methods here are universal ways that works in not only default Ubuntu release but also its flavors (e.g., KUbuntu, XUbuntu), and even other Linux.
NOTE: A hostname can be a single word or phrase, including letters, number, periods, or hyphen with 253 characters length limit, with NO space.
Change Computer Name for Temporary Use
If possible to change the name for temporary use. So, the new name will work until you restart the system.
- To do so, simply open terminal or connect to command console and run command:
sudo hostname NEW_NAME_HERE
Replace ‘NEW_NAME_HERE’ and type user password (no asterisk feedback) to authenticate. And, you may need to restart terminal or console to see effect.
Change Computer Name by Editing Config file
The classic way to permanently change your system hostname is just edit the configuration file!
So, here I’m going to use the universal nano command line text editor to open the configuration file.
- To do so, open terminal and run command:
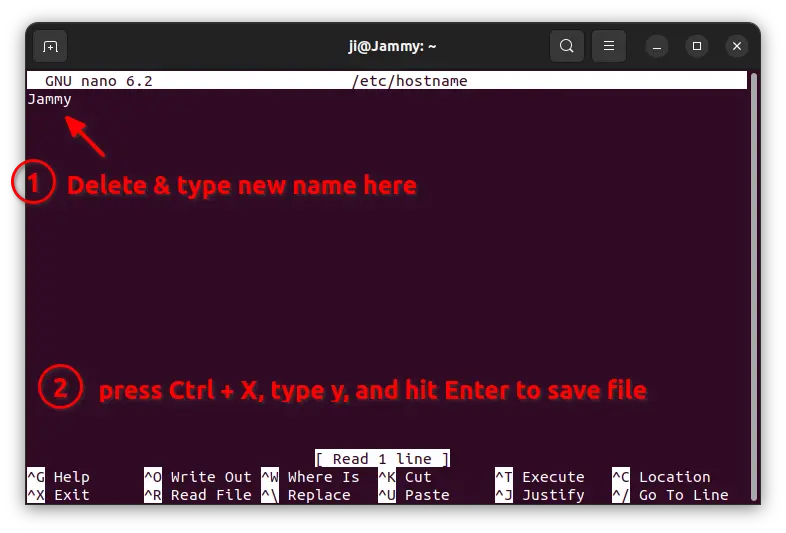
sudo nano /etc/hostname
When file opens in terminal, delete the old name and type a new one. Finally, press Ctrl+X, type y and hit Enter to save change.
This method however need a system restart if you’re running with default Wayland session. If you switched back Xorg session, run the command below to make it work without restart.
sudo systemctl restart systemd-logind.service
Use ‘hostnamectl’ to change computer name
The hostnamectl command is a good choice today to permanently change your computer name without system start.
- As easy as the first method, just run command in command/console:
hostnamectl hostname NEW_NAME_HERE
The change takes effect immediately, though you may need to restart terminal window.
Use new name in ‘/etc/hosts’
To avoid network issues, it’s HIGHLY recommend to also edit ‘/etc/hosts’ and replace all old names with new ones.
- Open terminal and run command to edit the file:
sudo nano /etc/hosts
When file opens in terminal, delete all the old hostname and insert the new name you set. Also, press Ctrl+X, type y and hit Enter to save change.


Ubuntu server 23.04
Used every command on your article here, but after reboot the old name is back no matter what, the same thing was happening with the /etc/hosts file, edited it and after reboot all my edits were gone. Found that they are using templates, but there is none for the hostname file.
Thank you…