
![]()
This is a step by step beginners guide shows how to install Ruby and setup local programming environment in Ubuntu 24.04 LTS.
Ruby is an interpreted, high-level programming language designed with an emphasis on programming productivity and simplicity. It was first released 29 years ago in 1995, by Yukihiro Matsumoto in Japan.
Ruby is available to install in Ubuntu in a few different ways, they include:
- Snap package.
- Deb package in system repository.
- Third-party manager with multiple version support.
- Build from source.
And, here’s how to install them in Ubuntu step by step.
Method 1: Ruby Snap package
Snap package is always the easiest way to install and keep an app up-to-date in Ubuntu, however, it runs in sandbox.
Ruby snap is available for amd64 (modern Intel/AMD), and arm64/armhf (Apple Silicon and Raspberry Pi, etc) devices.
For Ubuntu 24.04, simply launch App Center, then search & install ruby.
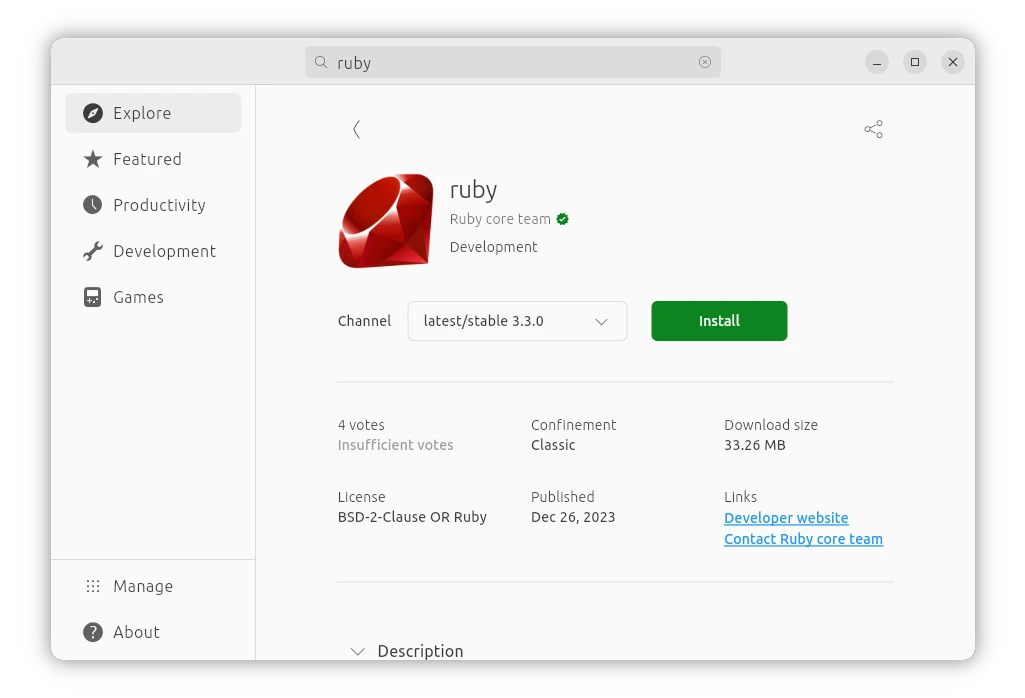
Ruby in App Center
Or, press Ctrl+Alt+T on keyboard to open terminal, and run command to install it:
snap install ruby --classic
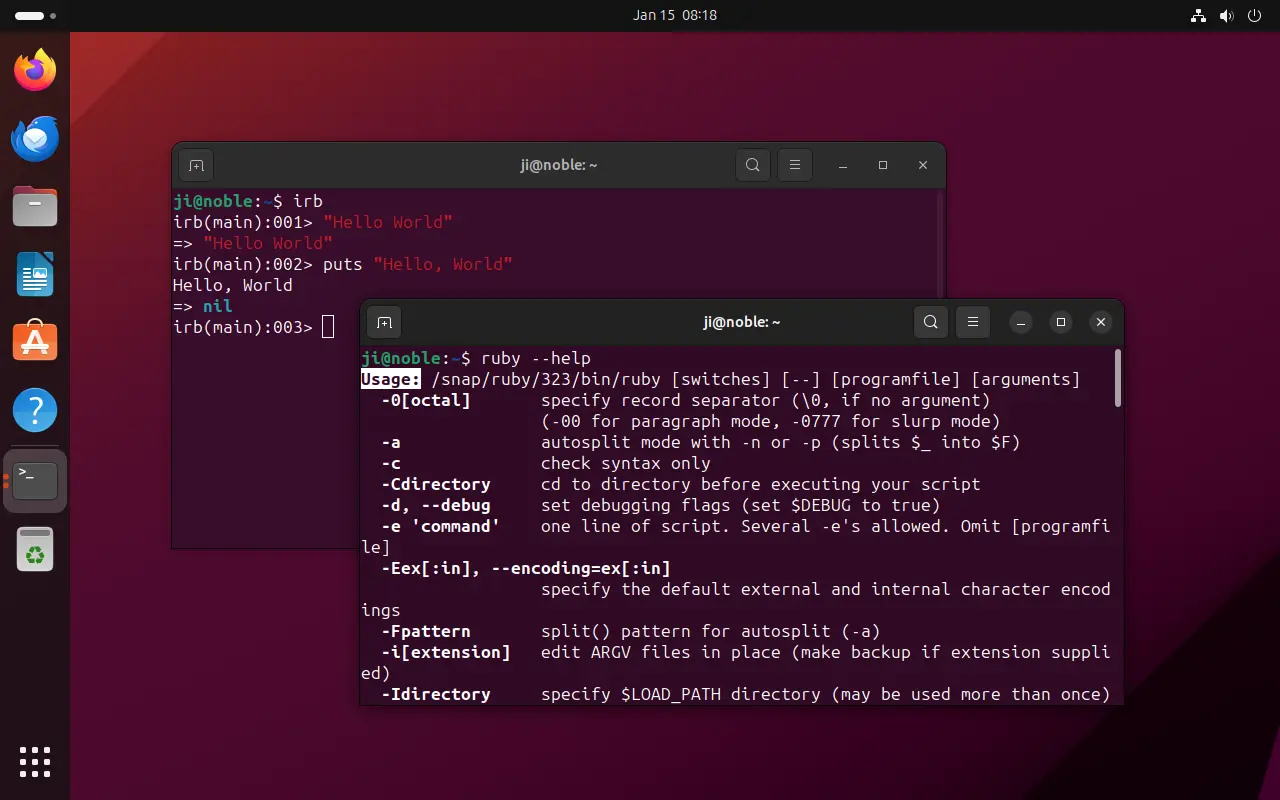
Once installed, run ruby --version to verify, and ruby --help to get help. Or, run irb to enter interactive session to play with it. For more, see the official Quick Start wiki.
Uninstall Ruby Snap package
To remove the package, also use App Center or run command in terminal:
snap remove --purge ruby
Method 2: Ruby in system repository
Ruby is also available Ubuntu system repository. Though, always old!
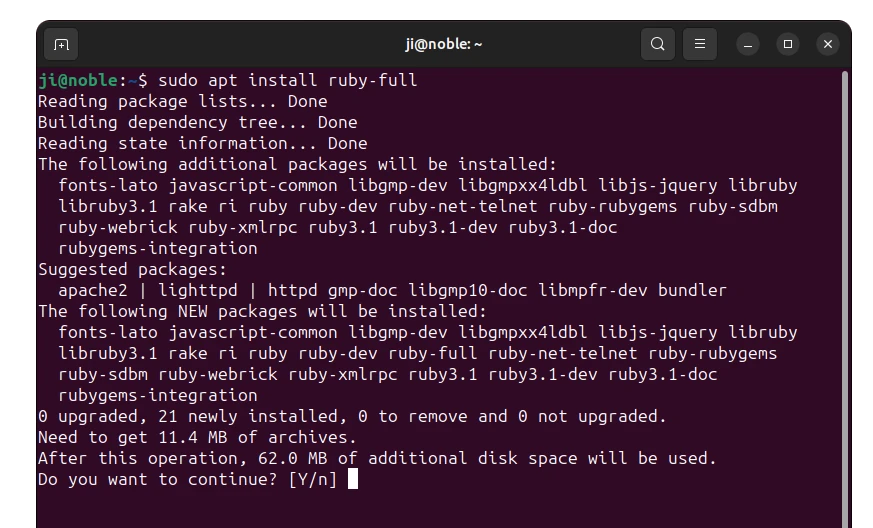
If you’re OK with Ruby 3.1, simply press Ctrl+Alt+T on keyboard to open terminal, and run command to install it:
sudo apt install ruby-full
(Optional) To uninstall, run command:
sudo apt remove --autoremove ruby ruby-full
Method 3: Install Ruby via 3rd party package management system
If you want to work with multiple version of Ruby, then Ruby website refers to rbenv and RVM package manager.
Option 1: Install Ruby via rbenv
rbenv is a one of the most popular way to manage Ruby environment.
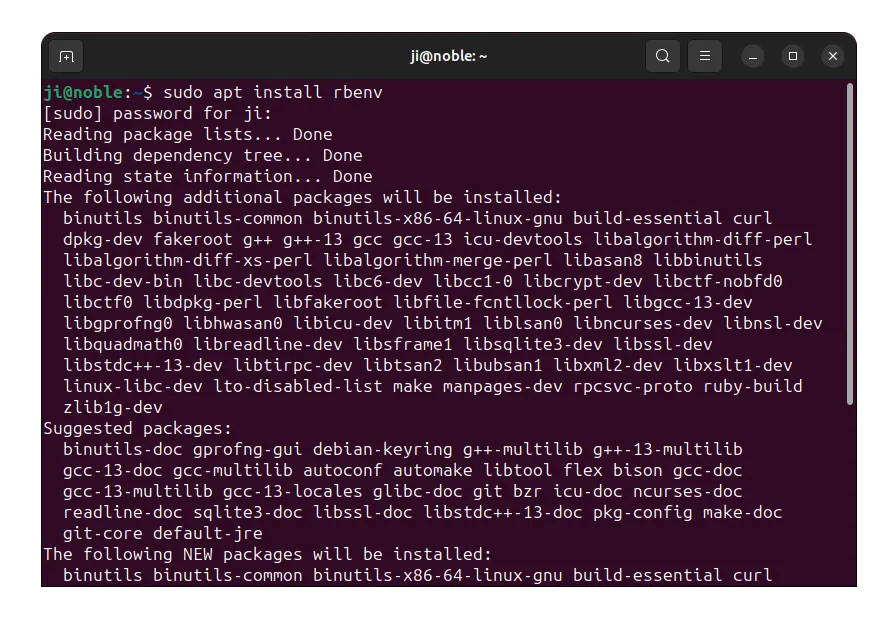
1. First, press Ctrl+Alt+T on keyboard to open terminal. Then, run command to install rbenv:
sudo apt install rbenv
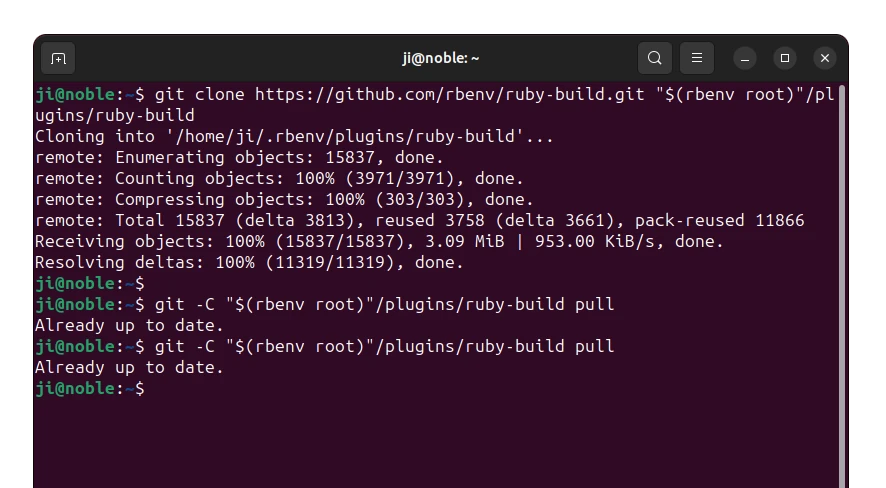
2. For being able to install the most recent Ruby packages, you have to upgrade the ruby-build plugin to the latest.
- First, run command in terminal to remove the old one:
sudo apt remove ruby-build
- Then, run command to download the latest one by cloning from Github:
git clone https://github.com/rbenv/ruby-build.git "$(rbenv root)"/plugins/ruby-build
Run
sudo apt install gitif the git command not found. - Finally, upgrade the
ruby-buildplugin for rbenv:git -C "$(rbenv root)"/plugins/ruby-build pull
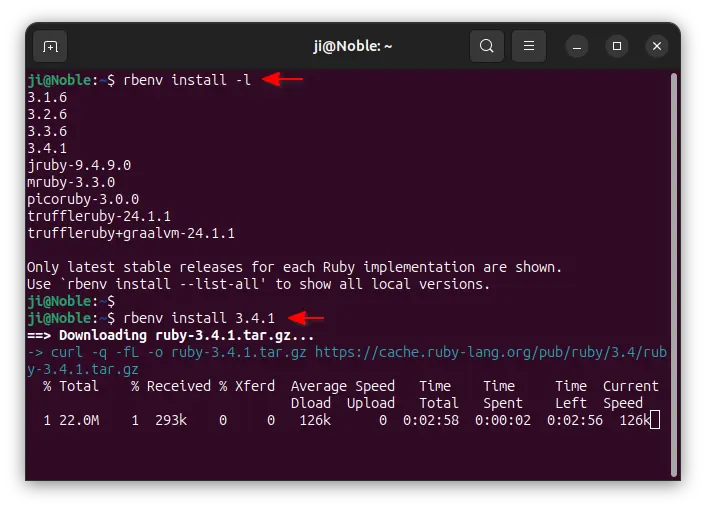
3. After installed rbenv and updated the ruby-build plugin, you may list all stable Ruby versions by running command:
rbenv install -l
Or, run rbenv install -L to list old and dev versions.
4. To install a Ruby version, 3.4.1 for example, simply run:
rbenv install 3.4.1
Then command will automatically download the source tarball, compile and install it into your system under ~/.rbenv/versions/ directory.
For choice, you may re-run the last command by replacing 3.4.1 with another version number to install multi-versions of Ruby lang in your system.
5. Finally, you may run rbenv versions to list all installed Ruby versions.
And, to set Ruby environment for certain project folder, just run command:
cd myproject && rbenv local 3.4.1
Or, set global Ruby version for the system via command:
rbenv global 3.4.1
For Ruby gems, run command to install it after setting Ruby version for your project:
gem install bundler
Uninstall rbenv
To uninstall Ruby versions installed via rbenv, first list all installed:
rbenv versions
Then, uninstall a Ruby version (e.g., 3.4.1):
rbenv uninstall 3.4.1
To remove rbenv package itself, run command:
sudo apt remove --autoremove rbenv
Option 2: Install Ruby via RVM
RVM is another popular way to install and setup Ruby environment between multiple versions. However, it’s not available in Ubuntu system repository.
1. To install RVM, you need to first open terminal (Ctrl+Alt+T) and run commands:
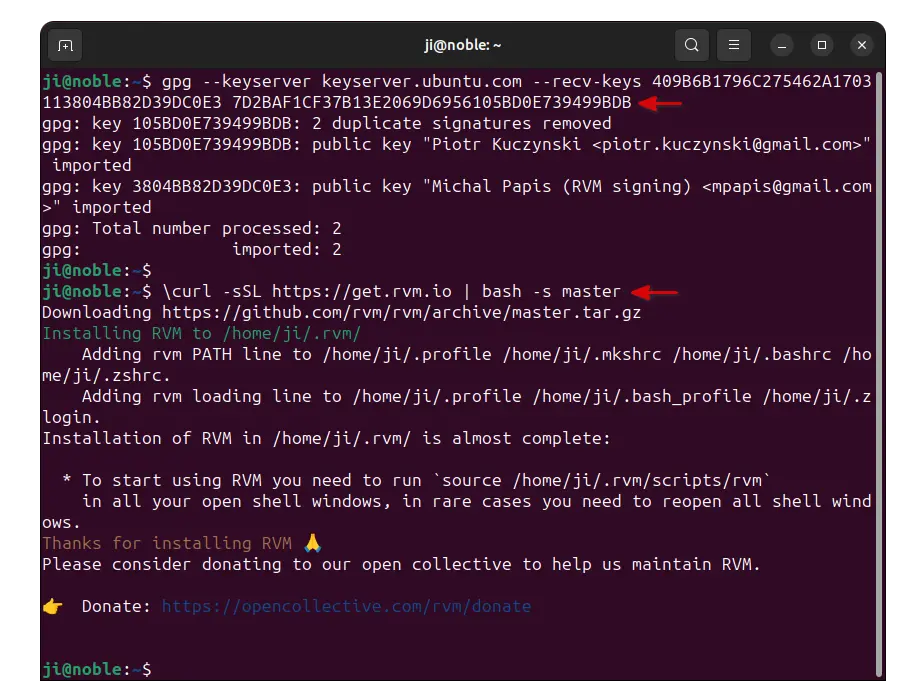
- First, run command to grab the key:
gpg --keyserver keyserver.ubuntu.com --recv-keys 409B6B1796C275462A1703113804BB82D39DC0E3 7D2BAF1CF37B13E2069D6956105BD0E739499BDB
- Then, download the official script and run to install RVM:
\curl -sSL https://get.rvm.io | bash -s master
Run
sudo apt install curlto install curl if command not found. And, runrvm get masterfor updating rvm package
2. After installed RVM, you need to log out and back in to apply the PATH variable for it.
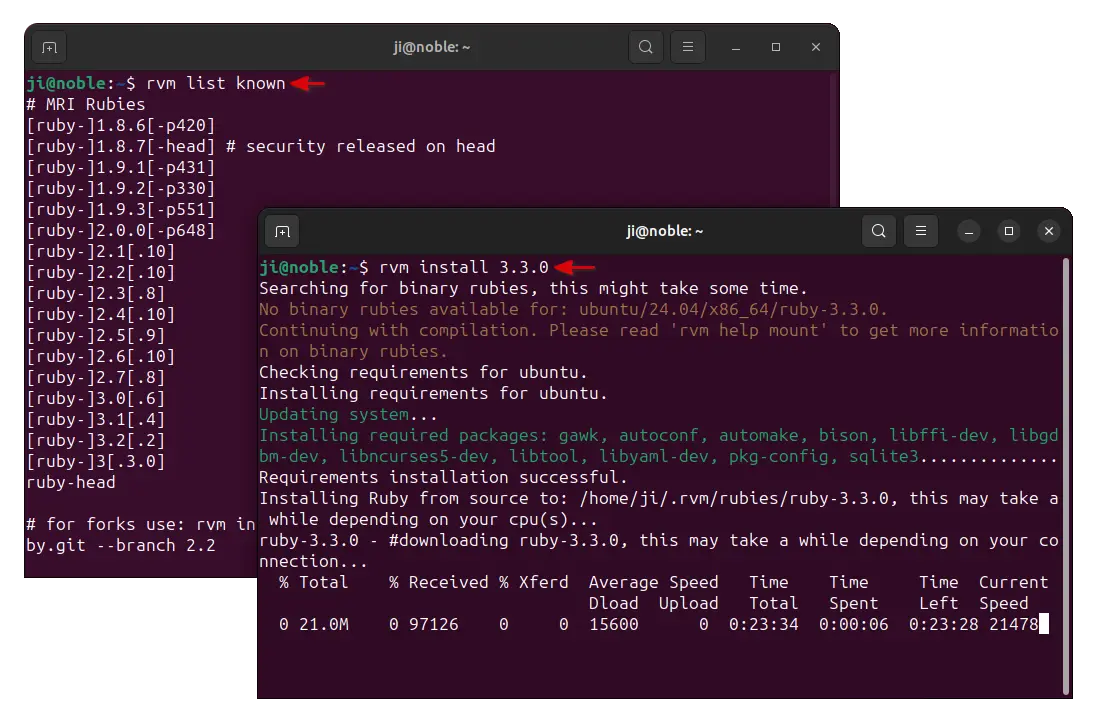
Then, run command to list all available Ruby versions:
rvm list known
And, install one Ruby version, 3.3.0 for example, by running command:
rvm install ruby-3.3.0
Or skip the INTERPRETER, and use rvm install 3.3.0 instead. It will first try to find the package from system repository, if not found, then download & build from the source automatically.
Also, run rvm install multiple times if you want to install different versions.
3. Finally, run rvm list to get a list of all installed Ruby versions.
To set system default Ruby environment, run:
rvm 3.3.0 --default
Or, navigate to your project folder, and run command to set for current only:
rvm use ruby-3.3.0
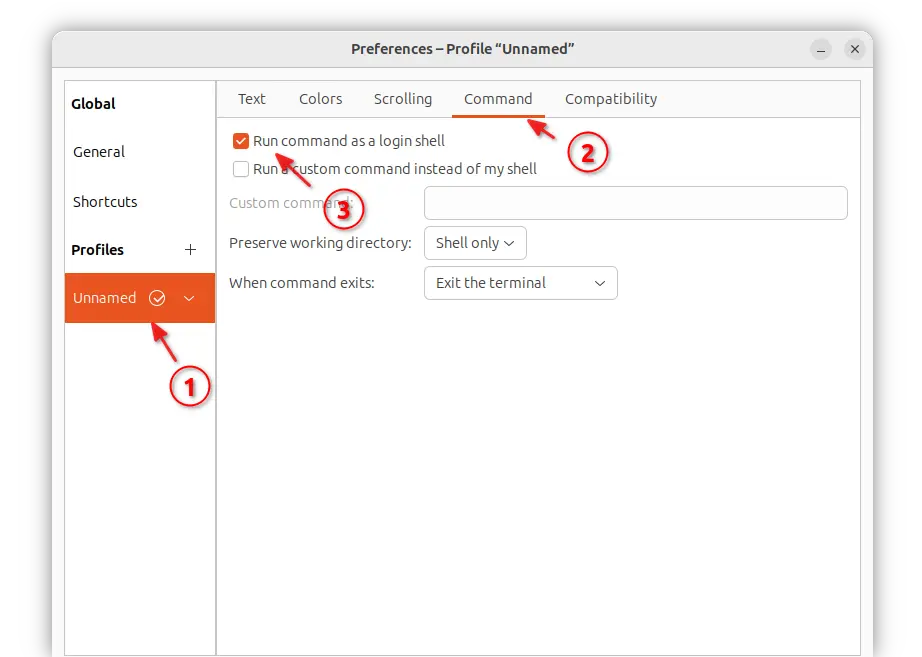
NOTE: You have to enable “Run command as login shell” option in terminal ‘Preferences’ dialog (usually under Unnamed profile -> Command tab). Or, it will output error “RVM is not a function, selecting rubies with ‘rvm use …’ will not work.”
Uninstall RVM
To remove Ruby via RVM, first list all installed via command:
rvm list
Then, remove one (3.3.0 for example) either with remove (also delete source) or uninstall option:
rvm uninstall 3.3.0
To remove rvm itself, just delete the installation folder by running command:
rm -R ~/.rvm
Also, delete the GPG keys by running 2 commands below:
gpg --delete-keys Michal Papis
gpg --delete-keys Piotr Kuczynski
Method 4: Compile Ruby from source tarball
For choice, you may also build Ruby from the source tarball.
1. First, select download desired Ruby version from the link below:
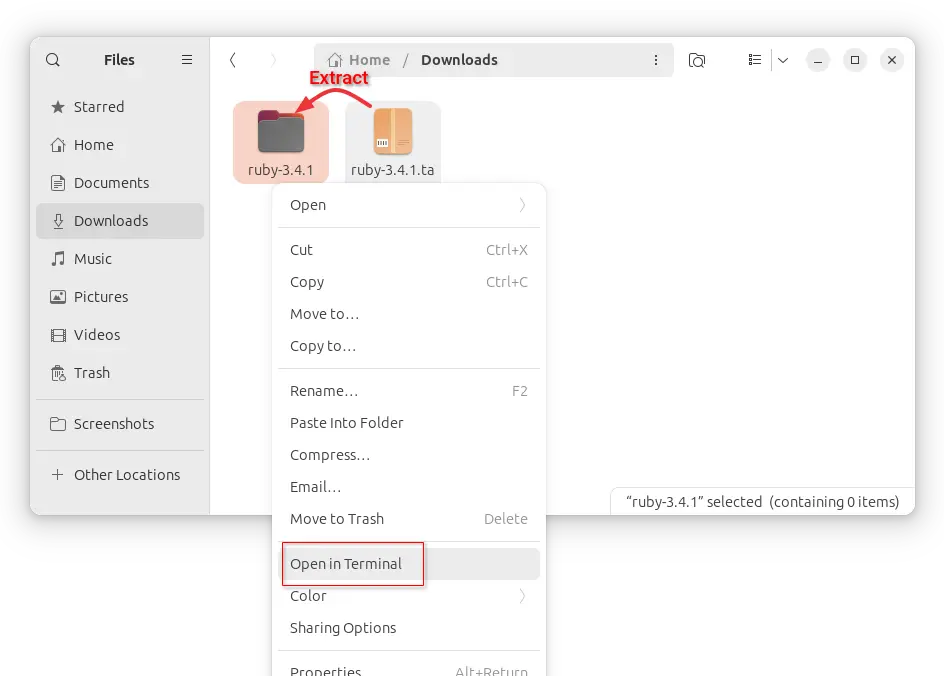
Then, extract the downloaded source tarball, right-click on source folder and select “Open in Terminal“.
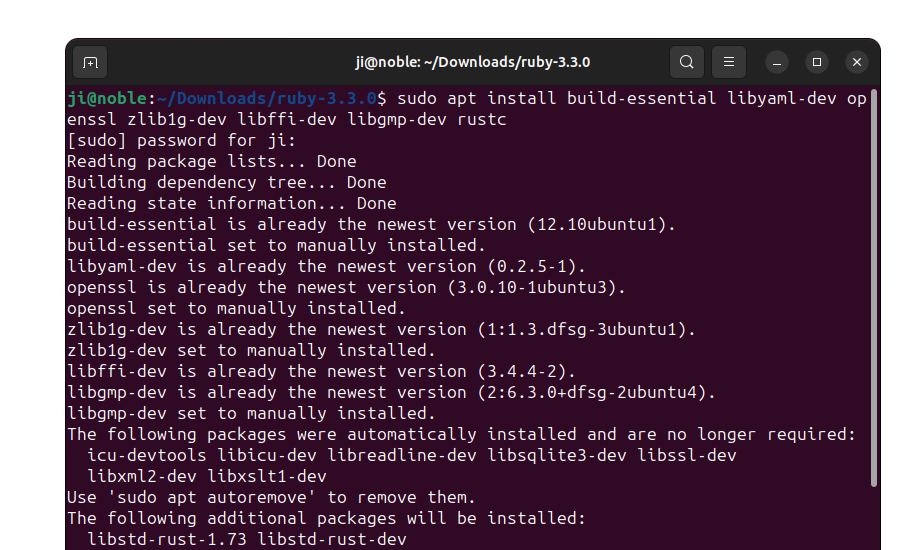
2. In pop-up terminal window, first run command to install dependency libraries:
sudo apt install build-essential libyaml-dev openssl zlib1g-dev libffi-dev libgmp-dev rustc
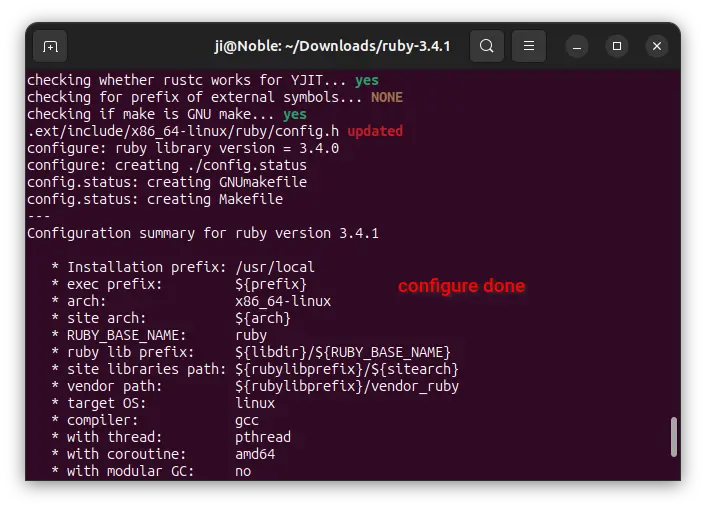
3. Then, configure the source.
If you want to configure it with all default options, just run:
./configure
Or, run ./configure --help to list all available optional features. Then, run command below instead to enable/disable some specific features.
For example, set installation directory to user local folder with --prefix=$HOME/.local (by default /usr/local), enable development build --enable-devel, disable PIE feature --disable-pie via command:
./configure --prefix=$HOME/.local --enable-devel --disable-pie
Add or Remove configure options in the command as you prefer!
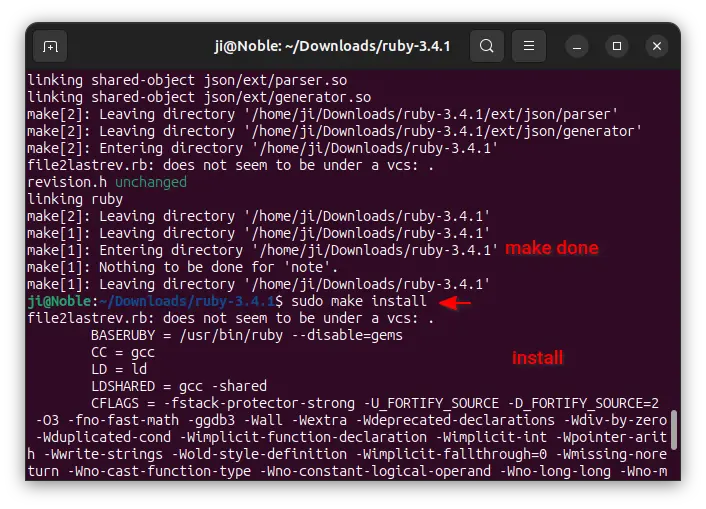
4. If no error in last command output, then you can make & install Ruby from source by running following 2 commands one by one:
make -j4
sudo make install
Here, -j4 start 4 threads in parallel to speed up the process. sudo is not required if you set --prefer to a sub-folder of $HOME.
Uninstall Ruby build from source
Until you removed the source folder, you can easily uninstall Ruby, by running the command below after opening source folder in terminal:
sudo make uninstall
If you already removed the source folder, then you have to manually delete all the installed files.
Summary:
In this tutorial, I’ve shown you how to install and setup Ruby programming environment in Ubuntu 24.04 in few different ways.
In general, Snap and .deb package in system repository is the most easy way to get it. However, 3rd party manager are good choice to manage multiple Ruby environments. For specific features, it’s also easy to build it from the source tarball.


Nice tutorial pal