![]()
Want to check your laptop battery status in Ubuntu or other Linux? There’s a small indicator applet that can do the job in GNOME desktop.
“Battery Status” is the free and open-source indicator applet developed by Lorenzo Carbonell, a software developer behind touchpad-indicator and my weather indicator.
It displays an icon on GNOME top bar in system tray area, along with the battery remaining time. By clicking on the applet, it shows battery percentage based on both current and original maximum capacities.
As well, it shows battery health via current and original maximum capacities, and the original and current Voltages.
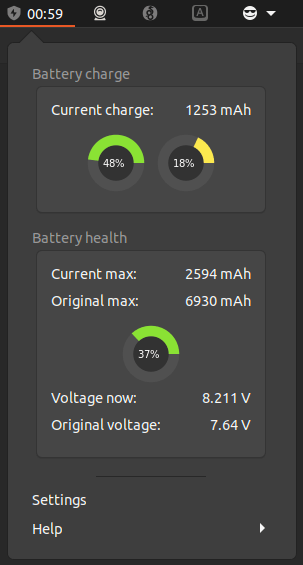
Battery Health
A setting dialog is also available to configure the refresh time, warning, and colors, etc.
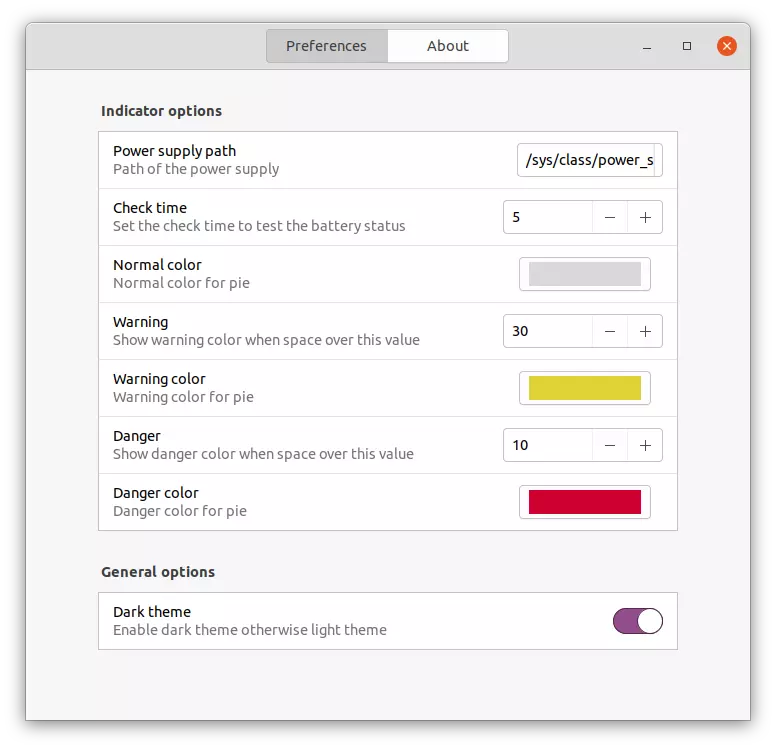
Battery Status Settings
How to Install ‘Battery Status’ in Ubuntu:
The app is available to install as GNOME Extension. At the moment, it supports for Gnome 3.36 and Gnome 40. Which means, user may install it in Ubuntu 20.04 and Ubuntu 21.10 via following steps.
1. Install ‘chrome-gnome-shell’:
Firstly, press Ctrl+Alt+T on keyboard to open terminal. When it opens, run command to install the ‘chrome-gnome-shell’ package if you don’t have it:
sudo apt install chrome-gnome-shell
This package enables ability to install Gnome Extensions via a web browser.

2. Install the Extension:
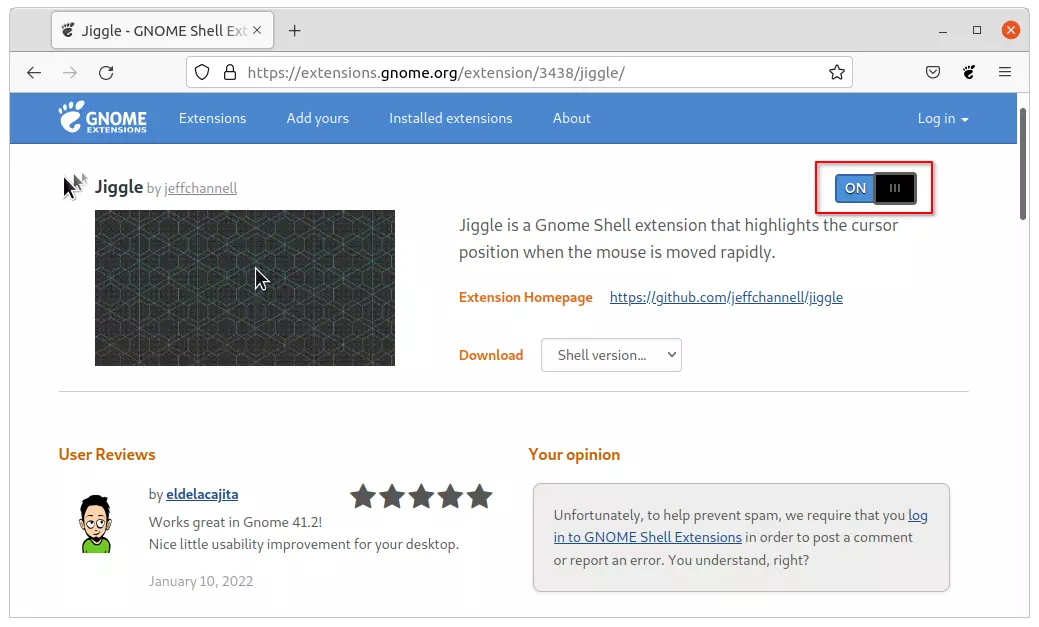
Next, click the link button below to go to the extension web page and turn on the slider icon to install it:
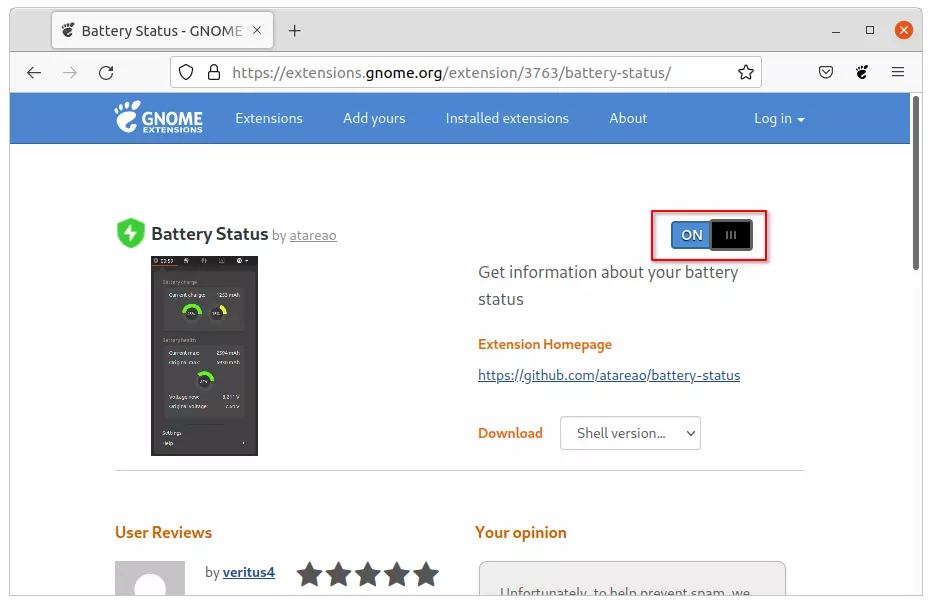
If you don’t see the toggle icon, install the browser extension via the link in that page and refresh it.

NOTE: The pre-installed Firefox in Ubuntu 21.10 is a Snap package that does NOT support for installing Gnome Extensions so far. Use another browser or install Firefox as deb.
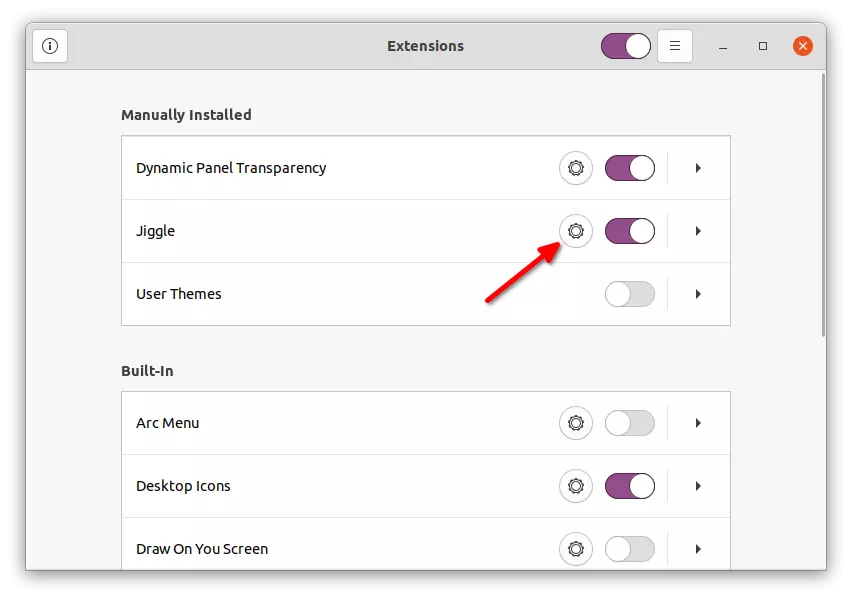
The indicator should appear immediately after installation. If not, try to enable it via “Gnome Extensions” app, which can be installed via command:
sudo apt install gnome-shell-extension-prefs
That’s all. Enjoy!