HPLIP, HP developed printer and scanner drivers for Linux, released version 3.21.2 with new Linux distributions and devices support.
According to the release note, HPLIP 3.21.2 add following new Distro’s support:
- Fedora 33
- Manjaro 20.2
- Debian 10.7
- RHEL 8.3
- RHEL 7.7
- RHEL 7.8
- RHEL 7.9
The new release also added a lot of new printers support:
- HP LaserJet Enterprise M406dn, M407dn
- HP LaserJet Enterprise MFP M430f, MFP M431f
- HP LaserJet Managed E40040dn
- HP LaserJet Managed MFP E42540f
- HP Color LaserJet Enterprise M455dn
- HP Color LaserJet Managed E45028dn
- HP Color LaserJet Enterprise MFP M480f
- HP Color LaserJet Managed MFP E47528f
- HP PageWide XL 3920 MFP
- HP PageWide XL 4200 Printer
- HP PageWide XL 4200 Multifunction Printer
- HP PageWide XL 4700 Printer
- HP PageWide XL 4700 Multifunction Printer
- HP PageWide XL 5200 Printer
- HP PageWide XL 5200 Multifunction Printer
- HP PageWide XL 8200 Printer
- HP Laserjet M207d, M208d, M209d, M210d, M212d, M211d, M209dw, M209dwe, M210dw, M210dwe, M212dw, M212dwe, M208dw, M207dw, M211dw
- HP LaserJet MFP M234dw, MFP M234dwe, MFP M233d, MFP M232d, MFP M235d
- HP LaserJet MFP M237d, MFP M236d, MFP M232dw, MFP M232dwc, MFP M233dw
- HP LaserJet MFP M236dw, MFP M235dw, MFP M235dwe, MFP M237dwe, MFP M237dw
- HP LaserJet MFP M232sdn, MFP M233sdn, MFP M236sdn, MFP M234sdn
- HP LaserJet MFP M234sdne, MFP M235sdn, MFP M235sdne, MFP M237sdne, MFP M237sdn
- HP LaserJet MFP M232sdw, MFP M233sdw, MFP M236sdw, MFP M234sdw
- HP LaserJet MFP M234sdwe, MFP M235sdw, MFP M235sdwe, MFP M237sdwe, MFP M237sdw
How to Install HPLIP 3.21.2 in Ubuntu:
1. To install the software, download the package “hplip-3.21.2.run” from the link below:
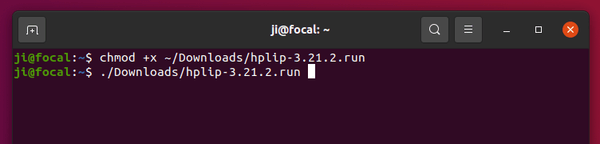
2. Then open terminal either via Ctrl+Alt+T or by searching for “terminal” from app launcher. When it opens, run command to give executable permission:
chmod +x ~/Downloads/hplip-3.21.2.run
3. Finally run command to start installing the driver:
./Downloads/hplip-3.21.2.run

Follow the terminal output and answer the questions. If everything goes OK, plug or re-plug your HP devices and enjoy!