Need the most recent HPLIP to get your HP printer or scanner working in Ubuntu? Here’s how to install guide as well as workaround to fix the python-pyqt5 dependency issue.
HPLIP is an open-source Linux drivers for HP’s inkjet and laser printers. The project is initiated and led by HP Inc. While the package in Ubuntu repositories is always old, you can install the official binary to get new devices support.
However, the most recent releases refuse to install in my Ubuntu 20.04 due to python-pyqt5 dependency issue. If you’re facing with the similar issue, then this tutorial may help!
Download & Install HPLIP in Ubuntu 20.04
1.) Firstly, download the latest binary from the link below. It’s ‘hplip-3.21.10.run‘ at the moment.
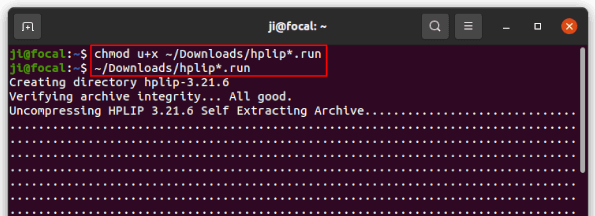
2.) Next, add executable permission by pressing Ctrl+Alt+T on keyboard to open terminal. Then run command:
chmod u+x ~/Downloads/hplip*.run
And try to install it via command:
~/Downloads/hplip*.run
Follow the terminal output and answer some questions to start installing the driver.
3.) Fix python-pyqt5 dependency issue.
As I said, it refuse to install in Ubuntu 20.04 because it tries to install old Python 2 binding for Qt5 as dependency in my case.
Thanks to Christoph Mueller, I found it has something to do with python symbolic links.
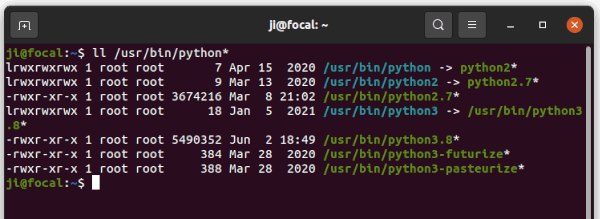
As you may know, python2 and python3 in /usr/bin are symbolic links. While python2 is python2.7, python3 links to python3.8 (or 3.9 depends on Ubuntu edition), python is not exist out-of-the-box. However, it will be created in some cases and links to either python2 or python3.
And the point is when Python links to Python2, HPLIP will mistakenly try to install Python 2 libraries as dependency.
Until HPLIP fixed the issue, the solution is either remove /usr/bin/python if you don’t need it or make it link to Python3.
Make Python to be Python3:
There are two choices to create symlink for python: install python-is-python3 or use update-alternatives command.
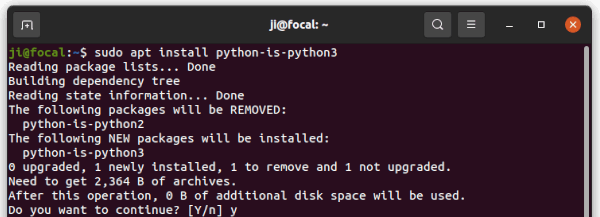
Option 1. Open terminal and run command to install ‘python-is-python3’:
sudo apt install python-is-python3
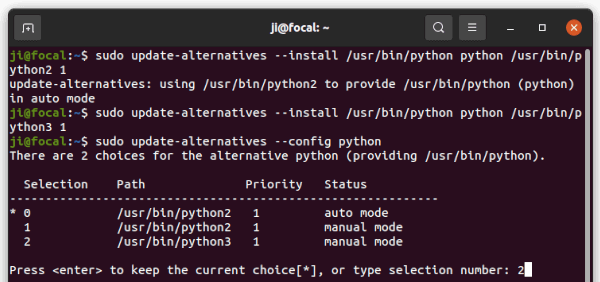
Option 2. Use ‘update-alternatives’ to choose which to link to. Firstly, add both python2 and python3 as alternatives:
sudo update-alternatives --install /usr/bin/python python /usr/bin/python2 1
sudo update-alternatives --install /usr/bin/python python /usr/bin/python3 2
You can then choose which to use anytime via command:
sudo update-alternatives --config python
Finally, re-do step 2.) to install the HPLIP-*.run file.
4.) Fix make command failed issue:
This seems to be HPLIP 3.21.6 only issue, that it outputs ‘error: make command failed with status code 2‘.
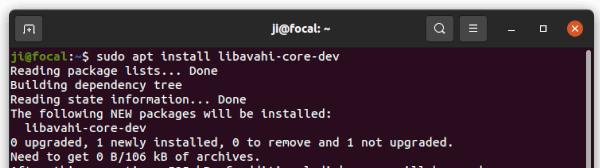
By re-running ‘make’ command from the source folder (see Uninstall section), it tells that “/usr/bin/ld: cannot find -lavahi-core”.
And it can be fixed by installing libavahi-core-dev package via command:
sudo apt install libavahi-core-dev
How to Remove HPLIP from Ubuntu:
While installing HPLIP via step 2.), it extracts the .run package into the source folder. And you can find it in Downloads folder.
NOTE: HPLIP 3.21.10 somehow does not create source folder. Run ~/Downloads/hplip*.run --target ~/Downloads/hplip to generate it manually if required.
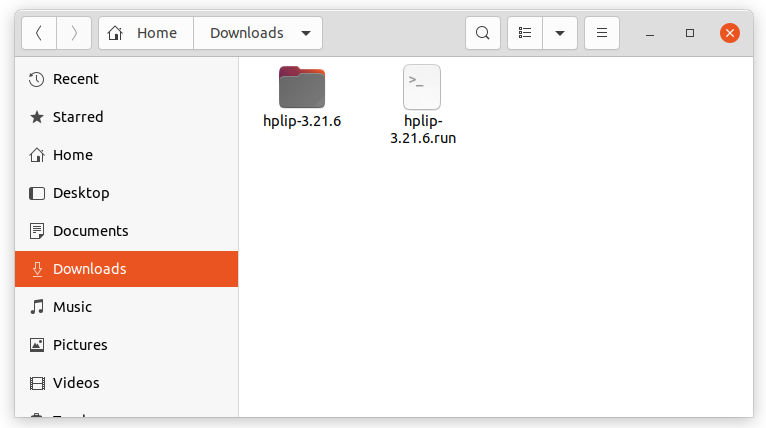
The folder contains an uninstall script allows to remove HPLIP from your computer.
To do so, go to the source folder, right-click on blank area and select ‘Open in Terminal’.

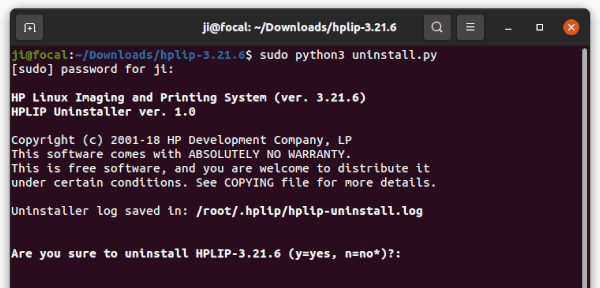
Finally, run the uninstall script in pop-up terminal window:
sudo python3 uninstall.py
That’s all.