QuickWall is a free and open-source tool to grab the latest wallpapers from Unsplash and set as your desktop background.
It works with nitrogen, feh background setter as well as Xfce, KDE, Gnome, Unity. Besides setting wallpapers from Unsplash, it can also change your theme (seems only for terminal theme) based on the wallpapers.
How to Install QuickWall in Ubuntu:
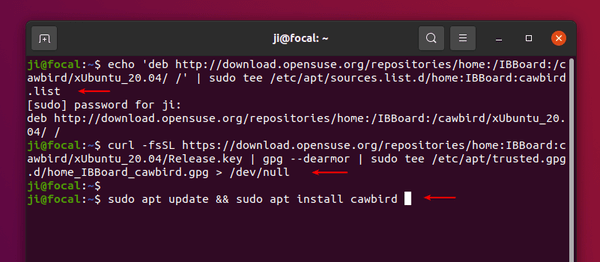
1.) Open terminal from system application menu, and run command to install the Python package installer:
sudo apt install python3-pip
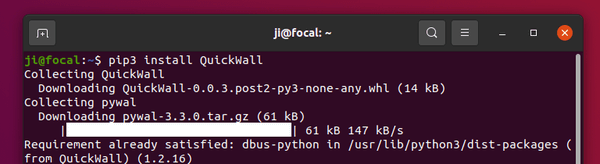
2.) Then install the software via command:
pip3 install QuickWall
For Ubuntu 24.04, use pip3 install QuickWall --break-system-packages instead.

How to Use QuickWall:
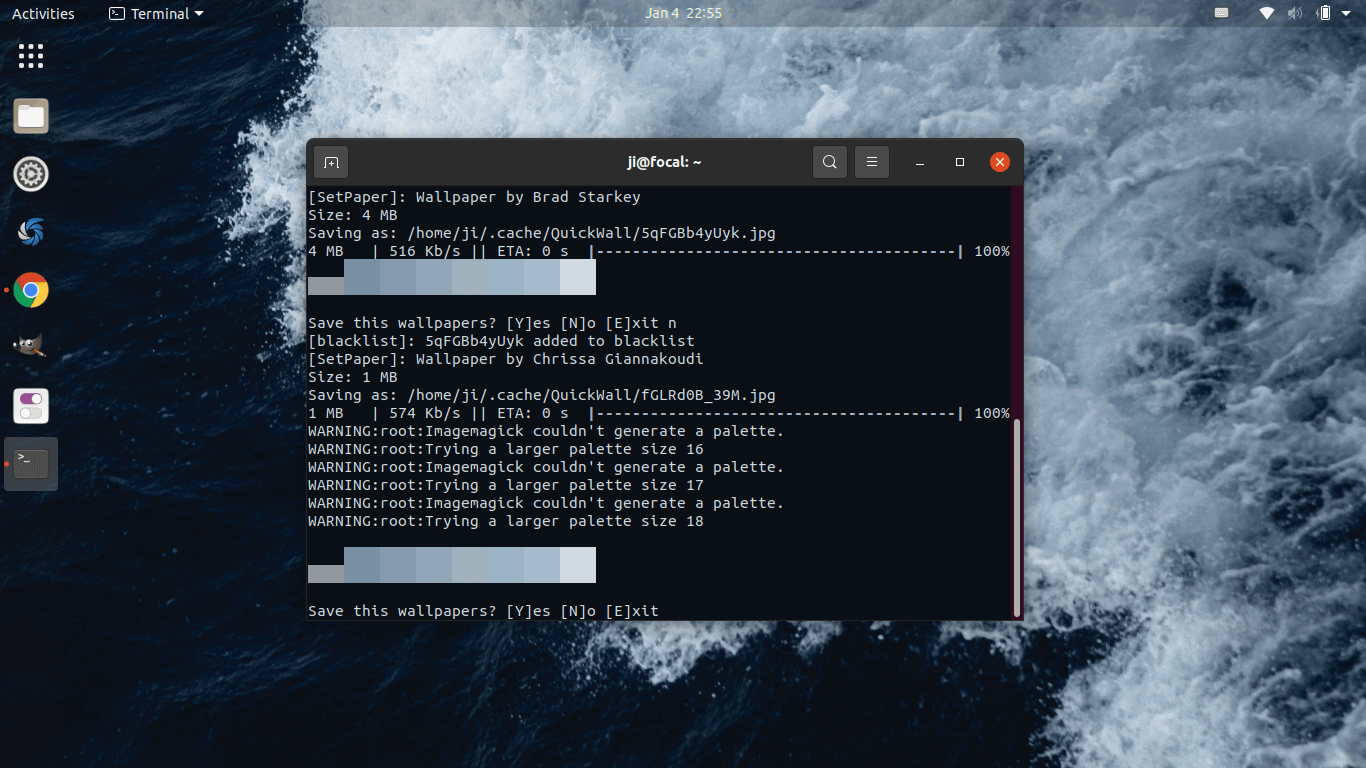
It’s easy to user the tool though it’s running in command line. For Ubuntu with default Gnome desktop, you can get it work with one of following commands:
QuickWall --setter gnome
QuickWall --random --setter gnome
QuickWall --search "SEARCH_TERM" --setter gnome
The wallpaper are default saved to user’s .cache/QuickWall folder. You can change the location by adding --dir flag in command:
QuickWall --dir ~/Downloads --setter gnome
For more command usage:
usage: QuickWall [-h] [--version] [--clear-cache] [--setter SETTER] [-d]
                 [--remove-id ID] [--dir DIR] [--id ID] [--random]
                 [--search TERM] [--migrate] [--set-lockscreen]

QuickWall - Quickly set latest wallpapers from Unsplash directly from
the commandline.

optional arguments:
  -h, --help            show this help message and exit
  --version             show the program version number and exit
  --clear-cache         Clear the cache from the cache folder
                        (~/.cache/QuickWall)
  --setter SETTER       Wallpaper setter to be used. Currently supported
                        ones: nitrogen, feh, xfce, kde, gnome, unity
                        (default: nitrogen)
  -d, --disable-blacklist
                        Disable adding the image to blacklisted ones.
  --remove-id ID        Remove the passed ID from the blacklist.
  --dir DIR             Directory to download the wallpapers
  --id ID               Get a photo by its ID.
  --random              Get random wallpapers.
  --search TERM         Show wallpapers based on the passed term
  --migrate             ONLY FOR EARLY USERS. Move the files from
                        ~/.QuickWall to ~/.cache/QuickWall.
  --set-lockscreen      Set lockscreen wallpaper (currently for KDE)
Uninstall QuickWall:
To remove the software, simply run command:
pip3 uninstall QuickWall