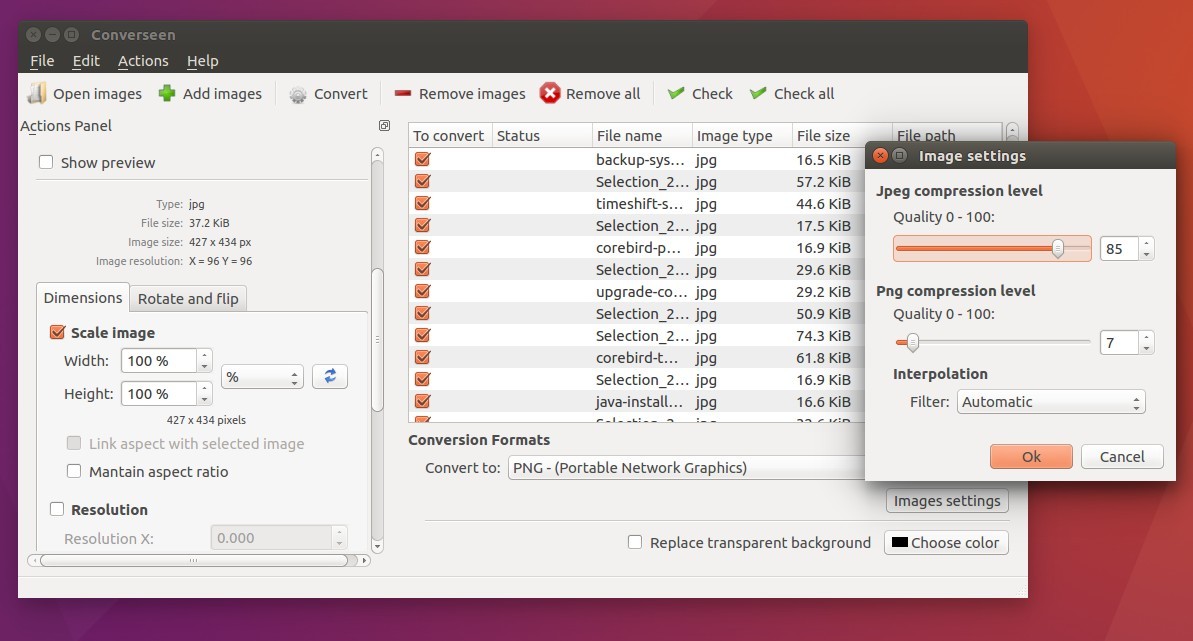
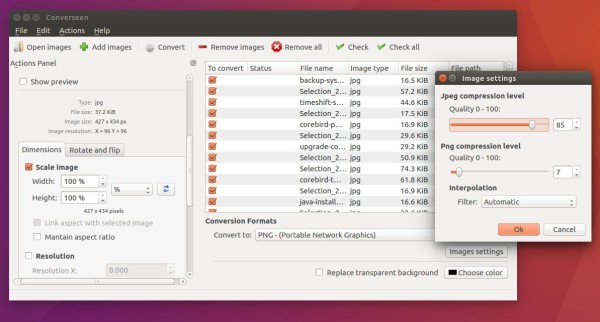
Converseen is a free open-source application, allows you to convert, resize, rotate and flip an infinite number of images with a mouse click. As well, it supports for transforming an entire PDF file into a bunch of images with the characteristics you prefer.
Converseen is written in C++ with Qt5 libraries. Thanks to Magick++ it supports more than 100 image formats.
With converseen, you can:
- Carry out a single or a multiple conversion.
- Resize one or multiple images.
- Compress images for your web pages.
How to install the new Converseen in Ubuntu
The image converter is available to install in different package formats: AppImage, Snap, Flatpak, and Deb. Choose either one that you prefer.
1. AppImage
The software website provides the universal AppImage for downloading via the link button below:
It’s a non-install package. Just grab it, right-click and go to ‘Properties’ dialog to add executable permission. Finally, click run the AppImage will launch the tool.
NOTE: Ubuntu 22.04 and higher does not support AppImage out-of-the-box. You need to open terminal (Ctrl+Alt+T) and run command to install the required library to make AppImage works.
sudo apt install libfuse2
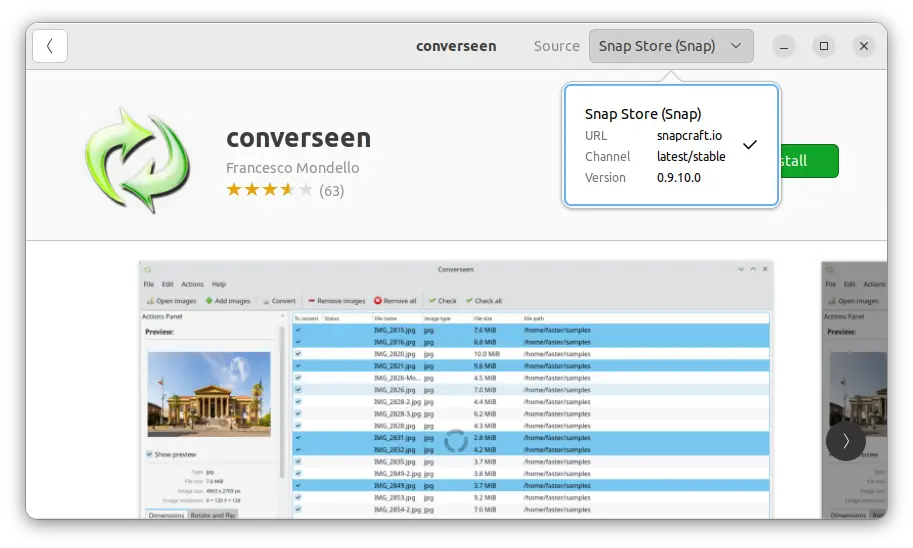
2. Snap
For Ubuntu 20.04+, the snap package is the easiest way to get converseen, though it runs in sandbox. Just open Ubuntu Software, search for and install the package marked as ‘Snap Store (snap)’.

3. Flatpak package
Converseen now is also available to install as Flatpak package, that works in most Linux through a sandbox environment.
To install the Flatpak package, first open terminal (Ctrl+Alt+T) and run command to install the daemon:
sudo apt install flatpak
Then, use the command below to install the package from Flathub repository:
flatpak install https://dl.flathub.org/repo/appstream/net.fasterland.converseen.flatpakref
If this is the first time you installing a Flatpak package, then you may need a log out and back in to make app icon visible. Or, run the command below instead to start it from terminal:
flatpak run net.fasterland.converseen
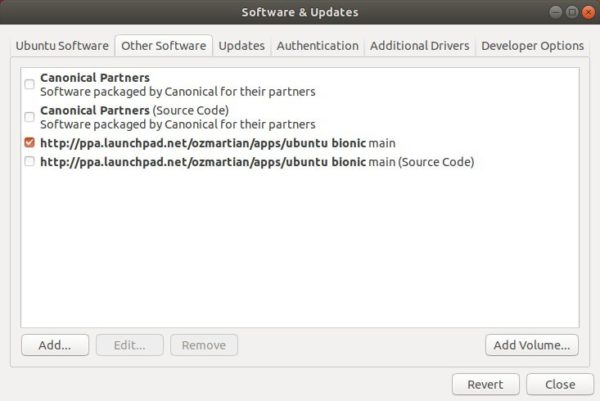
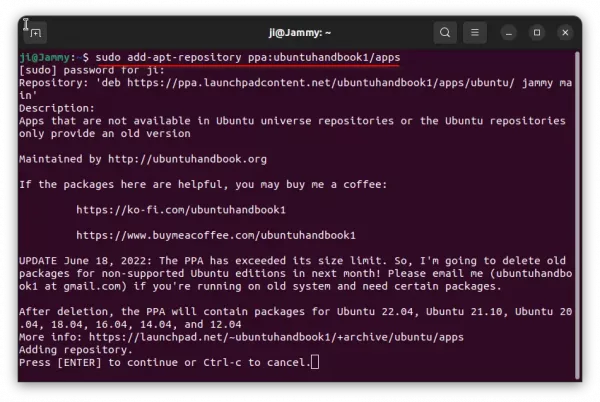
4. Ubuntu PPA (.deb)
For those who prefer the classic .deb package format, there’s unofficial PPA that contains the package for Ubuntu 20.04, Ubuntu 22.04, Ubuntu 24.04, and Ubuntu 24.10.
1. First, press Ctrl+Alt+T on keyboard to open terminal. When it opens, run command to add the PPA:
sudo add-apt-repository ppa:ubuntuhandbook1/apps
Type user password (no asterisk feedback) and hit Enter to continue.
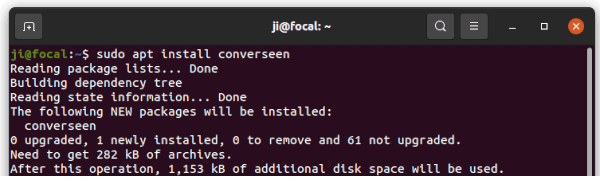
2. Then, install the software package by running command:
sudo apt install converseen
Linux Mint user may have to run sudo apt update first to update cache.
Uninstall:
The PPA also contains some other software packages, so you may remove it immediately after installed Liferea.
To do so, either run the command below in terminal, or remove the source line under “Other Software” tab in Software & Updates tool.
sudo add-apt-repository --remove ppa:ubuntuhandbook1/apps
To remove the feed reader package, simply run command:
sudo apt remove converseen
To remove the Flatpak package, run command:
flatpak uninstall --delete-data net.fasterland.converseen