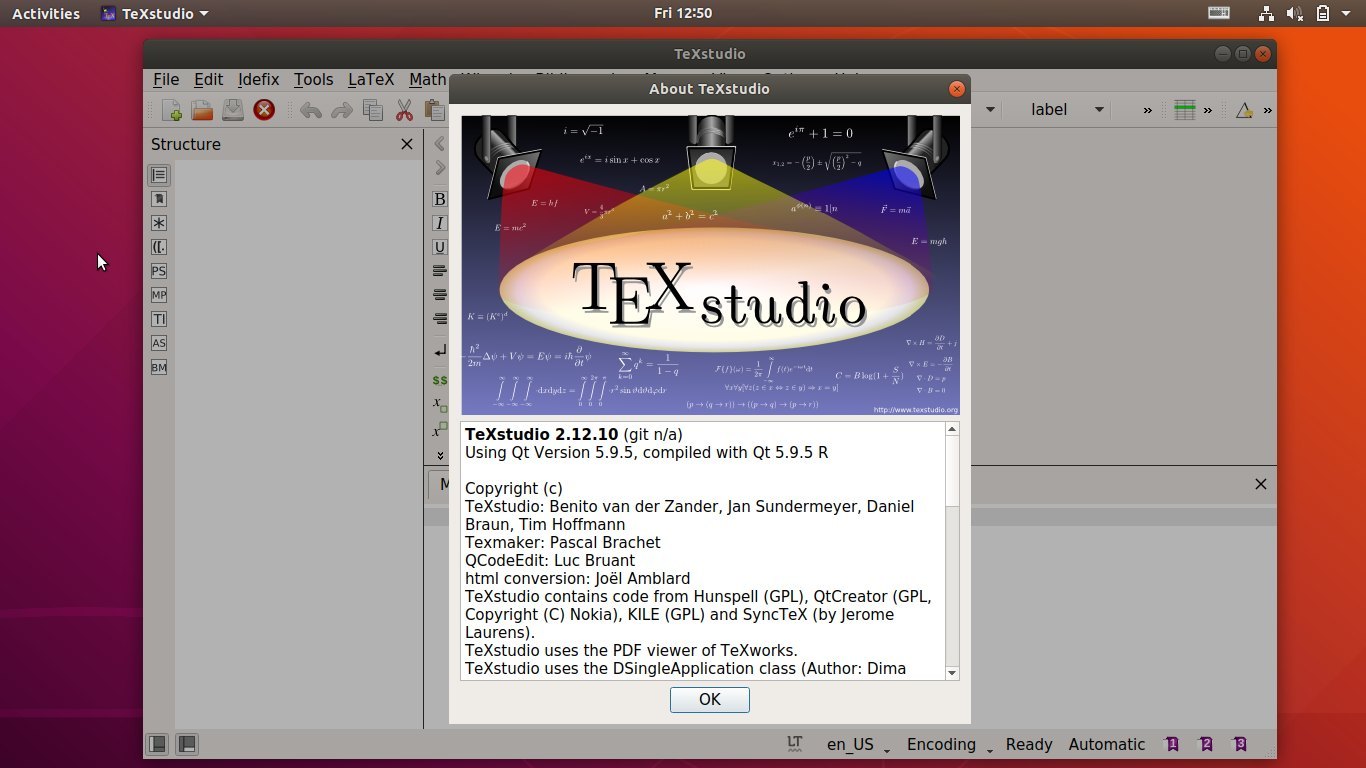
Archives For jimingkui

mkvtoolnix-icon

MKVToolNix, the free and open source Matroska libraries and tools, has reached the 9.9.0 release a few days ago. Here’s how to install it via PPA in Ubuntu 16.04, Ubuntu 16.10, and Linux Mint 18.

MKVToolNix 9.9.0 release highlights:

  • chapter editor: added a character set selection in the preferences for text files.
  • multiplexer: added a column “character set” to the “tracks, chapters and tags” list view showing the currently selected character set for that track.
  • mkvmerge: added an –engage option “all_i_slices_are_key_frames”
  • mkvmerge: MP4 reader: “ctts” version 1 atoms are now supported.
  • DVB subtitle tracks whose CodecPrivate data now is up to the proper five bytes long
  • Various MP4 input module fixes and other fixes.

How to Install MKVToolNix 9.9.0 via PPA:

The new release is available in its official Linux repository for Ubuntu 16.04, and Ubuntu 16.10.

1. Open terminal from your app launcher or via Ctrl+Alt+T shortcut key. When it opens, run command to add the key:

wget -q -O - https://mkvtoolnix.download/gpg-pub-moritzbunkus.txt | sudo apt-key add -

Type in your password (no visual feedback), and hit enter

2. Then go to System Settings -> Software & Updates -> Other Software tab, click Add and paste following line to add the official repository:

deb http://mkvtoolnix.download/ubuntu/ xenial main

replace xenial (16.04) with yakkety for Ubuntu 16.10.

3. Finally you’re able to upgrade MKVToolNix from previous release via Software Updater

Or install it via commands:

sudo apt update

sudo apt install mkvtoolnix mkvtoolnix-gui

How to Install Kernel 4.10 in Ubuntu / Linux Mint

Last updated: February 21, 2017

Linus Torvalds announced the final release of Kernel 4.10 days ago. He wrote on lkml.org:

So there it is, the final 4.10 release. It’s been quiet since rc8, but we did end up fixing several small issues, so the extra week was all
good.

On the whole, 4.10 didn’t end up as small as it initially looked. After the huge release that was 4.9, I expected things to be pretty
quiet, but it ended up very much a fairly average release by modern kernel standards. So we have about 13,000 commits (not counting merges – that would be another 1200+ commits if you count those). The work is all over, obviously – the shortlog below is just the changes in the
last week, since rc8.

Linux Kernel 4.10 release highlights:

  • Initial mainline GVT-g graphics virtualization support
  • Intel Turbo Boost Max 3.0 support.
  • EXT4 DAX iomap support and XFS iomap support.
  • Better Microsoft Surface 3/4 support. Wacom MobileStudio Pro class of drawing tablets support
  • Nouveau Boost support
  • More ARM platform support, better Raspberry Pi 3 support.
  • and many other changes.

How to Install Kernel 4.10 in Ubuntu:

The Ubuntu Kernel Team has made the DEB packages for the new kernel, available for download at the link below:

NOTE that Canonical does not support these Kernel packages. They are not appropriate for production use.

For the Desktop users, you can also use Ukuu a simple graphical tool to install the latest kernels.

For Ubuntu Server or those who prefer the command line, install them via following commands:

For 64-bit system:


cd /tmp/

wget http://kernel.ubuntu.com/~kernel-ppa/mainline/v4.10/linux-headers-4.10.0-041000_4.10.0-041000.201702191831_all.deb

wget http://kernel.ubuntu.com/~kernel-ppa/mainline/v4.10/linux-headers-4.10.0-041000-generic_4.10.0-041000.201702191831_amd64.deb

wget http://kernel.ubuntu.com/~kernel-ppa/mainline/v4.10/linux-image-4.10.0-041000-generic_4.10.0-041000.201702191831_amd64.deb

sudo dpkg -i *.deb

For 32-bit system:


cd /tmp/

wget http://kernel.ubuntu.com/~kernel-ppa/mainline/v4.10/linux-headers-4.10.0-041000_4.10.0-041000.201702191831_all.deb

wget http://kernel.ubuntu.com/~kernel-ppa/mainline/v4.10/linux-headers-4.10.0-041000-generic_4.10.0-041000.201702191831_i386.deb

wget http://kernel.ubuntu.com/~kernel-ppa/mainline/v4.10/linux-image-4.10.0-041000-generic_4.10.0-041000.201702191831_i386.deb

sudo dpkg -i *.deb

After installed these debs, restart and enjoy!

Uninstall:

To remove Linux Kernel 4.10, you may first restart and select boot with previous kernel (from Grub boot-loader -> Advanced Options) and then run command:

sudo apt-get remove linux-headers-4.10* linux-image-4.10*

Ubuntu 16.04.2 LTS was released 2 days ago with security updates, corrections for high-impact bugs, and hardware enablement stacks for use on newer hardware.

The LTS enablement stacks provide Linux Kernel 4.8 and newer X support, and they are included in the Ubuntu 16.04.2 desktop ISO images.

For original Ubuntu 16.04, and Ubuntu 16.04.1 users, you have to manually install the HWE stacks. And below will tell you how:

How to Install Hardware Enablement Stacks:

Open terminal from app launcher or via Ctrl+Alt+T shortcut key. When it opens, run command:

sudo apt-get install --install-recommends xserver-xorg-hwe-16.04

Type in your password (no visual feedback) and hit Enter.

After installation, reboot your computer.

How to Uninstall:

1. I don’t like the new X stack in my laptop, so I removed it via commands:

sudo apt remove xserver-xorg-core-hwe-16.04 xserver-xorg-input-all-hwe-16.04 linux-generic-hwe-16.04 xserver-xorg-video-all-hwe-16.04

You’ll see the command also removes the ubuntu-desktop package. Don’t worry. The following commands will install it back.

2. Then install back the original xserver-xorg via commands:

sudo apt install xserver-xorg-core

sudo apt install ubuntu-desktop xserver-xorg xserver-xorg-video-all xserver-xorg-input-all libgl1-mesa-dri:i386 libgl1-mesa-glx:i386

If you want to remove the new kernel 4.8, reboot and select boot with old 4.4 kernel (grub -> Advanced Options), then see this how to tutorial.

i2pd (I2P Daemon) is a full-featured C++ implementation of I2P client.

I2P (Invisible Internet Protocol) is a universal anonymous network layer. All communications over I2P are anonymous and end-to-end encrypted, participants don’t reveal their real IP addresses.

I2P client is a software used for building and using anonymous I2P networks. Such networks are commonly used for anonymous peer-to-peer applications (filesharing, cryptocurrencies) and anonymous client-server applications (websites, instant messengers, chat-servers).

I2P allows people from all around the world to communicate and share information without restrictions.

Features:

  • Distributed anonymous networking framework
  • End-to-end encrypted communications
  • Small footprint, simple dependencies, fast performance
  • Rich set of APIs for developers of secure applications

So far the latest version is ip2d 2.12 with following changes:

  • Additional HTTP and SOCKS proxy tunnels
  • Reseed from ZIP archive
  • ‘X’ bandwidth code
  • OpenSSL 1.1 for Android and Mac OS X
  • Some stats in a main window for Windows version
  • Fixed clock skew for Windows XP
  • New logo for Android
  • Reduced memory and file descriptors usage

How to Install i2pd via PPA in Ubuntu / Linux Mint:

The project offers DEB binaries for download in its release page.

For those who want to keep it up-to-date, install i2pd using the PPA repository via following steps:

1. Open terminal (Ctrl+Alt+T) and run command to add the PPA:

sudo add-apt-repository ppa:purplei2p/i2pd

Type in password (no visual feedback) when it asks and hit Enter.

2. Then update package caches and install i2pd:

sudo apt update

sudo apt install i2pd

When a new release is out, simply launch Software Updater and upgrade it along with other system updates.

Uninstall:

You can remove the PPA anytime using Software & Updates utility under Other Software tab, and i2pd can be removed via command:

sudo apt remove i2pd && sudo apt autoremove

For router setup, tunnel configuration and other documentations, go to the wiki page.

NVIDIA Linux driver 375.39 and 378.13, the latest long-lived and short-lived branch versions, were both released yesterday.

Both drivers add support Quadro GP100, P4000, P2000, P1000, P600. P400, M1200, M2200 GPUs support. NVIDIA 378.13 also supports Quadro P3000.

Besides adding new GPUs support, Nvidia 375.39 only brings fixes to hot-plugging displays and resuming from suspend issues.

Nvidia 378.13 adds support for viewing configured PRIME displays in nvidia-settings, support for X.Org xserver ABI 23, and various other changes and fixes. See HERE for details.

Download & Install Nvidia 375.39 / 378.13:

Besides using the official installers from the NVIDIA website, the “Graphics Driver” team has made the new releases into PPA, available for Ubuntu 17.04, Ubuntu 16.04, Ubuntu 16.10.

1. To add the PPA, open terminal from app launcher or via Ctrl+Alt+T key and run command:

sudo add-apt-repository ppa:graphics-drivers/ppa

2. Then update your system package index via command:

sudo apt update

3. Both drivers will finally available for install in Additional Drivers utility.

Select the one you want to install and click Apply Changes button will automatically download and install the driver into your system. Restart your computer once done.

Parole, a modern simple media player for the Xfce desktop, has now reached the 0.9.0 release with a fresh set of features and fixes.

What’s new in Parole 0.9.0:

  • New “mini mode”, activated from the right-click menu.
  • New play and replay icons in the player content area. Clicking on these will play or replay your media (finally)!
  • Most deprecated API calls have been dropped or replaced. We’re not dropping GtkStatusIcon yet, the notification area lives on in Xfce!
  • Double buffering with the X11/XV video outputs has been reenabled. Ubuntu has been carrying this patch for a while now.
  • The window title and content title are now set to the playing filename if no ID3 tags are found.
  • Plugins can now be loaded by name instead of full path (plugin-name.so).
  • The desktop file and related AppStream have been updated to the now-standard “reverse-DNS” convention (org.xfce.Parole)
  • Translation updates.

How to Install Parole 0.9 in Ubuntu / Linux Mint:

Besides building from the Parole source tarball, Ubuntu 14.04, Ubuntu 16.04, Ubuntu 16.10, Ubuntu 17.04, users can install the 0.9.0 release from PPA repository (unofficial):

1. Open terminal (Ctrl+Alt+T) and run command to add PPA:

sudo add-apt-repository ppa:ubuntuhandbook1/apps

2. Then upgrade the software via Software Updater (Update Manager) if a previous release is installed:

For those who don’t want to add PPA, grab the DEB package directly from THIS PAGE.

Uninstall:

For any reason you can easily restore Parole media player to the original version available in Ubuntu Software App, by running command in terminal:

sudo apt install ppa-purge && sudo ppa-purge ppa:ubuntuhandbook1/apps

Blender 2.78b Releaesed! How to Install in Ubuntu

Last updated: February 11, 2017

Blender 2.78b, a 2.78a release-compatible update was announced yesterday with important speedups, especially in Cycles and for Dependency graph.

BLender 2.78b comes with Cycles Speedups that were announced last month. Most notable will be faster rendering of Motion blur with hair, which has a 5-10 time speedup – important for production rendering. Also there are various bug-fixes.

How to Install Blender 2.78b in Ubuntu:

Blender is now available as SNAP package, first install snapd via command sudo apt install snapd in terminal, then you’re able to search for and install blender-tpaw in Ubuntu Software.

For those who don’t like the SNAP version, Blender 2.78b is also available in Thomas Schiex’s PPA, supports for Ubuntu 14.04, Ubuntu 16.04, Ubuntu 16.10, and derivatives.

1. Open terminal (Ctrl+Alt+T) and run command to add the PPA:

sudo add-apt-repository ppa:thomas-schiex/blender

Type in your password (no visual feedback) when it prompts and hit enter.

2. Then you can upgrade Blender from an existing version via Software Updater (or Update Manager) after checking for updates.

Or install blender package either via Synaptic Package Manager or via commands:

sudo apt-get update

sudo apt-get install blender

Uninstall:

If you installed blender from PPA repository, run the following command in terminal to remove the PPA and downgrade Blender to the stock version available in Ubuntu main repositories.

sudo apt-get install ppa-purge && sudo ppa-purge ppa:thomas-schiex/blender

For those who want to test the latest Linux kernels, Ukuu (Ubuntu Kernel Upgrade Utility) offers a simple interface with list of the “mainline” Kernels and allow user to one-click download and install a selected kernel release.

Ukuu features:

  • Fetches list of kernels from kernel.ubuntu.com
  • Displays notifications when a new kernel update is available.
  • Downloads and installs packages automatically

How to Install Ukuu in Ubuntu / Linux Mint:

For Ubuntu 14.04, Ubuntu 16.04, Ubuntu 16.10, Linux Mint 17 & 18, and based systems, you can install the tool from the developer’s PPA.

Just open terminal via Ctrl+Alt+T keyboard shortcut, and run the commands below one by one:

sudo add-apt-repository ppa:teejee2008/ppa

sudo apt-get update

sudo apt-get install ukuu

For those don’t want to add PPA, grab the DEB package from HERE.

Uninstall:

To remove the utility, simply run apt-get command with remove flag in terminal:

sudo apt-get remove ukuu

And you can remove the PPA via the Software & Updates utility under Other Software tab.

In addition, if the new kernels do not work properly on your machine, you can easily go back to the old (stable) kernel by:

  • reboot your computer.
  • go to Grub boot-loader (press & hold Shift key while booting if don’t see the menu)
  • in Grub menu, select Advanced Options and select boot the old stable kernel.
  • finally use Ukuu to remove mainline kernels.

GIMP image editor 2.8.20 stable was released one week ago. Now it’s finally available in PPA repository for Ubuntu 16.10, Ubuntu 16.04, Ubuntu 14.04, Ubuntu 12.04, and their derivatives.

GIMP 2.8.20 fixed the weird initial user interface language selection on mac OS. For Windows, an annoying oscillating switching between different input devices has been fixed.

  • Avoid D-Bus error message when built without D-Bus support
  • fix OS X min required conditional in gimpimagewindow.c
  • Saving to existing .xcf.bz and .xcf.gz files didn’t truncate them and could lead to unnecessarily large files
  • Text layer created by gimp-text-fontname doesn’t respect border when resized
  • Flow on Paint Dynamics editor dialog: the ‘y’ axis is indicating ‘Rate’ instead ‘Flow’
  • Vertical ruler shows artifacts if the status bar isn’t showing
  • Tablet stylus misbehaves when crossing the edge of a dock in multi-window-mode
  • Disable the new “automatic window tabbing” feature introduced on mac OS Sierra
  • Improve the visiblity of slider handles with dark themes
  • Make it harder to switch to renaming if selecting already selected items in resource lists
  • make toggling to color picker mode of paint tools more robust
  • call gimp_file_entry_set_filename() with filename encoding

How to Install GIMP 2.8.20 in Ubuntu / Linux Mint:

The new release has been made into the PPA repository, available for all current Ubuntu releases and derivatives.

1. To add the PPA, open terminal (Ctrl+Alt+T) and run command:

sudo add-apt-repository ppa:otto-kesselgulasch/gimp

2. You can then upgrade the editor from a previous release via Software Updater utility:

Or install GIMP either via Synaptic Package Manager or command:

sudo apt-get update

sudo apt-get install gimp

Uninstall:

To restore GIMP to the stock versions available in Ubuntu main repositories, open terminal and purge the PPA via ppa-purge tool:

sudo apt-get ppa-purge && sudo ppa-purge ppa:otto-kesselgulasch/gimp

Kodi, formerly known as XBMC, finally reached the new stable 17.0 release. Here’s how to install it in Ubuntu via PPA.

Kodi 17.0, code-name “Krypton”, brings updated default UI, better organisation of settings, and many under-the-hood changes on Video Player, Music Library, PVR, audio on Android, and thousands of small bug-fixes and improvements to stability.

Kodi 17.0 features:

  • New default skins “Estuary” for TV, and “Estouchy” for touchscreen devices.
  • New default web interface
  • New inputstream add-ons with more protocols support.
  • hardware-accelerated DVD playback
  • Numerous improvements to Live TV and PVR functionality
  • Android implementation, and a wide variety of other changes.

How to Install Kodi 17 in Ubuntu / Linux Mint:

The Kodi Team announced that the official PPA will be updated soon with the new packages, available for Ubuntu 16.10, Ubuntu 16.04, Ubuntu 14.04, and Linux Mint 17 & 18.

At that time, you can follow the step below to install Kodi 17:

1. Open terminal from app launcher or via Ctrl+Alt+T shortcut key, when it opens, run command:

sudo add-apt-repository ppa:team-xbmc/ppa

Type in your password (no visual feedback) when it asks and hit Enter.

2. Then you can upgrade Kodi Media Center from an existing version, by launching Software Updater:

Or install it via following commands in terminal:

sudo apt update

sudo apt install kodi

Once installed, you can either launch Kodi from app launcher or log with Kodi session when you’re in login screen.

Uninstall:

To uninstall Kodi 17 and restore to the stock version in your Ubuntu repository, purge the PPA via ppa-purge tool via command:

sudo apt install ppa-purge && sudo ppa-purge ppa:team-xbmc/ppa