Want to change the color of your folders in Nautilus file browser to get a better visual layout? Well, there’s a small extension for Nautilus can do the job in Ubuntu 14.04 Trusty, Ubuntu 13.10 Saucy and Ubuntu 12.04 Precise.
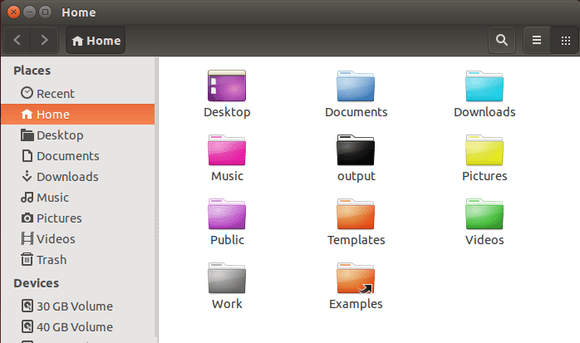
See my file browser:
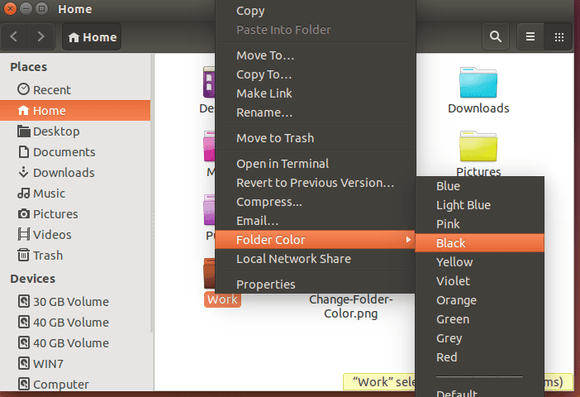
So far, the tool support following colors: Blue, Light Blue, Pink, Black, Yellow, Violet, Orange (Ubuntu’s default), Green, Gray, Red. Also there’s an option to reset to default.
To install this simple tool, Press Ctrl+Alt+T on keyboard to open the terminal. When it opens, run the commands below one by one:
Already installed LEMP or LAMP on your Ubuntu server? Well, now it’s time to install wordpress CMS and get your site running!
As you may know, wordPress is a popular blogging tool and a content management system (CMS) based on PHP and MySQL. It’s free and open-source. In the steps below the lines that the user needs to enter or customize will be in red in this tutorial!
1. Setup Mysql Database for WordPress
For LEMP (Ubuntu, Nginx, Mysql, Php) without phpmyadmin installed:
Database name: wordpress_db; user name: ubuntuhandbook; password: 12345678; Change them in the code below.
Step 1 – Run command in Ubuntu Server to log into MySQL Shell with MySQL root password:
mysql -u root -p
Step 2 – Create database, here I named it wordpress_db:
CREATE DATABASE wordpress_db;
Step 3 – Create a new user named ubuntuhandbook:
CREATE USER ubuntuhandbook@localhost;
Step 4 – Set a password for this user:
SET PASSWORD FOR ubuntuhandbook@localhost= PASSWORD("12345678");
Step 5 – Grant all privileges to the new user:
GRANT ALL PRIVILEGES ON wordpress_db.* TO ubuntuhandbook@localhost IDENTIFIED BY '12345678';
Step 6 – Refresh MySQL:
FLUSH PRIVILEGES;
Exit MySQL shell:
exit
For LAMP (Apache2, Mysql, Php, Ubuntu Linux):
If you’ve installed LEMP and want to use PhpMyadmin to manage database, click the link in the top of this tutorial.
1. Install Phpmyadmin:
sudo apt-get install phpmyadmin
Choose apache2 webserver during the installing process and say NO to “Configure database for phpmyadmin with dbconfig-common?”
Once installed, run commands below to get it working:
sudo sh -c 'echo "Include /etc/phpmyadmin/apache.conf" >> /etc/apache2/apache2.conf' && sudo service apache2 restart
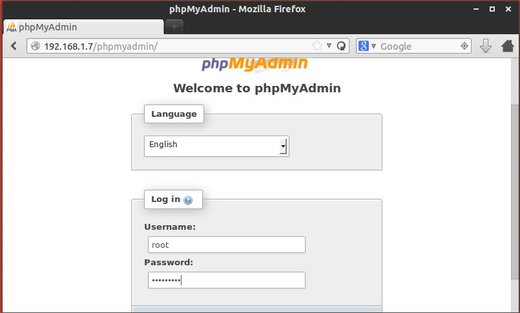
Now, go to http://UBUNTUSERVERIP/phpmyadmin/ in your client’s browser and type in root and the password you set when MySQL was installed to login.
phpmyadmin login
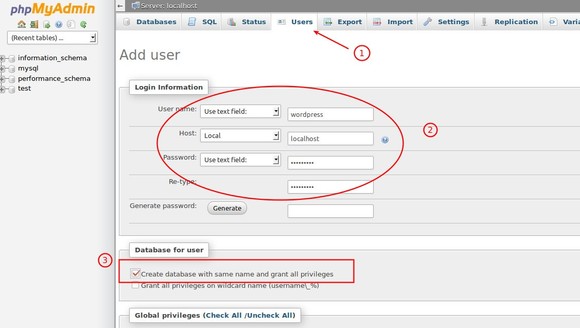
2. Follow the below steps to create database and user with same name.
Step 1 – Click on Users then click Add User.
Step 2 – Type in your desired User name (wordpress is a good one) and ensure Use text field is selected. Ensure Host is set to Local from the drop down list and the text box will change to localhost and enter a Password and then confirm it in the Re-type box. Ensure the Password Use text field is also selected.
Step 3 – Check the box that says Create database with same name and grant all priviliges.
Step 4 – Click on Go.
phpmyadmin create user and database
2. Download & Config WordPress:
Download the latest wordpress from its official website:
cd && wget http://wordpress.org/latest.tar.gz
Decompress the package:
tar -xzvf latest.tar.gz
Go to the result folder and create the configuration file by copying the sample file:
cd wordpress/ && cp wp-config-sample.php wp-config.php
Edit the wordpress configuration file via vi editor:
vi wp-config.php
Find the section that contains the field below and substitute in the correct name for your database, username, and password:
// ** MySQL settings – You can get this info from your web host ** //
/** The name of the database for WordPress */
define(‘DB_NAME’, ‘DATABASE_NAME_HERE‘);
/** MySQL database username */
define(‘DB_USER’, ‘USER_NAME_HERE‘);
/** MySQL database password */
define(‘DB_PASSWORD’, ‘PASSWORD_HERE‘);
Press i to start editing, and Esc to end editing. Finally press Shift+: followed by wq and Enter to save and exit the file.
3. Copy Files and Set Ownership:
Now move WordPress files to webserver root directory:
For LAMP:
cd && sudo rsync -avP wordpress/ /var/www/
For LNMP:
cd && sudo rsync -avP wordpress/ /usr/share/nginx/html/
Set ownership of the root directory:
cd /var/www/  ###For nginx: cd /usr/share/nginx/html/

sudo chown www-data:www-data * -R

sudo usermod -a -G www-data www-data
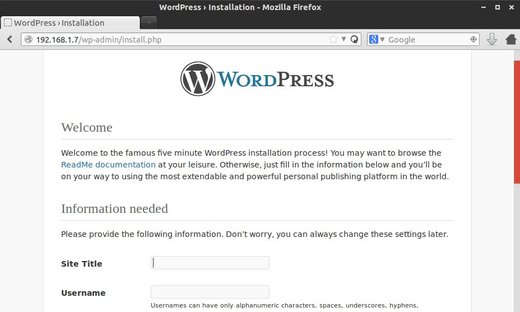
4. Install WordPress:
Finally in your client’s web browser go to http://UBUNTUSERVERIP/wp-admin/install.php and install your wordpress site:
installing wordpress
Once done, if you still get “It Works!” Apache page. Run command below to edit dir.conf:
sudo vi /etc/apache2/mods-enabled/dir.conf
You will see a line of index files (index.html, index.php, index.cgi, etc) under the DirectoryIndex setting. Add index.php as the first item in the list.
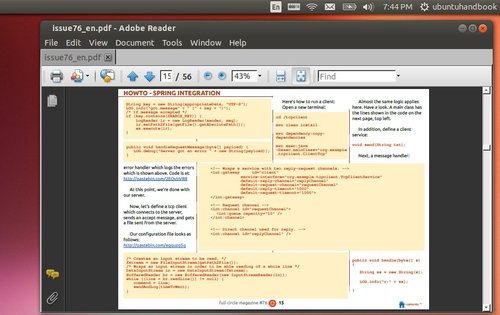
Adobe Reader was available in Canonical Partners repository then dropped since Ubuntu 13.10 Saucy. This tutorial will show you how to install Adobe PDF Reader in Ubuntu 14.04 LTS from the official package.
UPDATE 2024: This tutorial is outdated! For all current Ubuntu releases, see this one instead!
Want to build a website on your Ubuntu Server? Well, LEMP may be a good choice and here’s how to install and set it up.
LEMP stands for Linux, Nginx (pronounced “engine x”), MySQL and PHP. The nginx project started with a strong focus on high concurrency, high performance and low memory usage. So it’s a good alternative to Apache webserver for building websites on low memory hosts.
To get started, log in your Ubuntu Server and follow the steps below:
1. Install MySQL
MySQL is a database management system which stores and organizes references to the information the webserver needs.
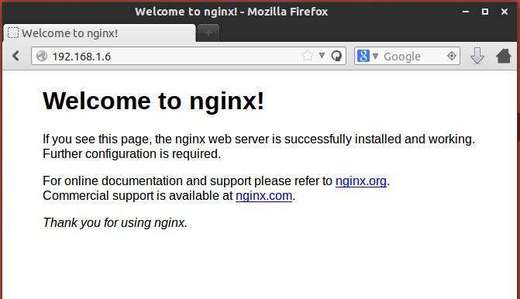
And check out if it is working by going to http://serverip
nginx is working ubuntu 14.04
3. Install PHP5
PHP is a reflective programming language, which makes it possible for all these different parts to work together.
We can make PHP5 work in nginx through PHP-FPM, which is an alternative PHP FastCGI implementation with some additional features useful for sites of any size, especially busier sites.
Run command below to install php5-fpm:
sudo apt-get install php5-fpm
4. Setup Nginx
The nginx configuration files are available in /etc/nginx/nginx.conf, read this configuration example.
To modify the default site example:
sudo vi /etc/nginx/sites-available/default
Here you can define the root directory (to put WordPress files there), your site domain name, as well as other settings. See the example below:
server {
	listen 80 default_server;
	listen [::]:80 default_server ipv6only=on;

	root /usr/share/nginx/html;
	index index.php index.html index.htm;

	# Make site accessible from http://localhost/
	server_name localhost;

	location / {

		try_files $uri $uri/ /index.php;

	}

	location /doc/ {
		alias /usr/share/doc/;
		autoindex on;
		allow 127.0.0.1;
		allow ::1;
		deny all;
	}

	#
	error_page 500 502 503 504 /50x.html;
	location = /50x.html {
		root /usr/share/nginx/html;
	}

	location ~ \.php$ {

		# With php5-fpm:
                try_files $uri =404;
		fastcgi_pass unix:/var/run/php5-fpm.sock;
		fastcgi_index index.php;
		include fastcgi_params;
	}

	# deny access to .htaccess files, if Apache's document root
	# concurs with nginx's one
	#
	location ~ /\.ht {
		deny all;
	}
}
Remember to restart the web service to apply changes:
sudo service nginx reload
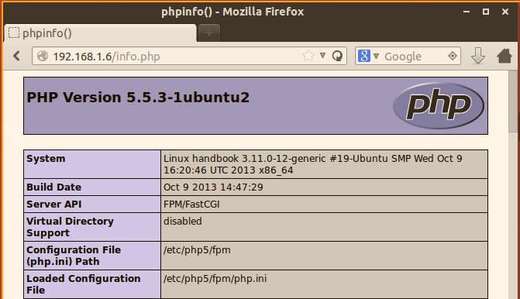
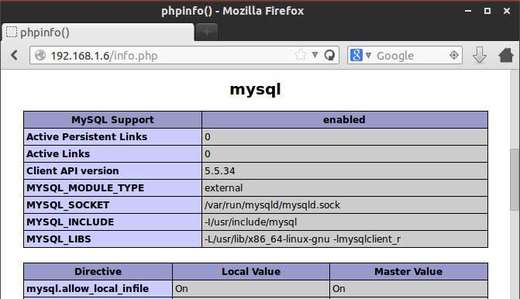
5. Check if PHP is working
Create the test file:
sudo vi /usr/share/nginx/html/info.php
Add following lines and save the file:
<?php
phpinfo();
?>
Go to http://serverip/info.php in client’s web browser and you’ll see:
php is working
6 Get MySQL working with PHP: Install Xcache (list of PHP accelerators), a free and open PHP opcode cacher for caching and optimizing PHP intermediate code, as well as other PHP modules:
This simple tutorial will show you how to add ‘Open As Root’ or ‘Open As Administrator’ option to context menu so that you can easily edit / open file folders as super user privilege within Nautilus file browser.
To get started:
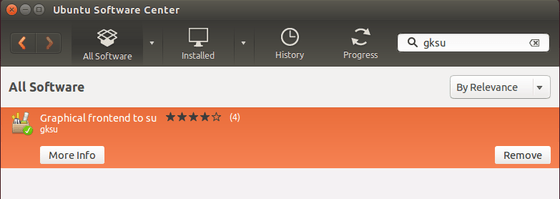
1. Open Ubuntu Software Center. Search for and make sure the package gksu is installed. gksu allows graphical programs to ask a user’s password to run program as root / administrator.
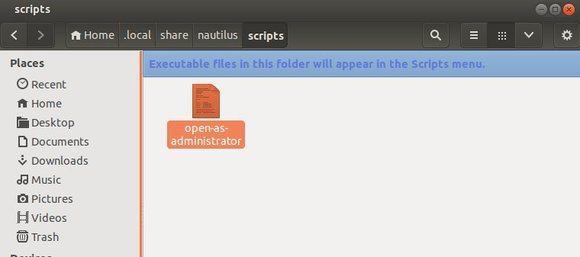
2. Open Nautilus file browser, press Ctrl+H to view hidden files & folders. Navigate to USER Home -> .local -> share -> nautilus -> scripts.
Create an empty document under this directory named ‘open-as-administrator’ or ‘open-as-root’
3. Edit and paste following lines into the file
#!/bin/bash

#

# this code will determine exactly the path and the type of object,

# then it will decide use gedit or nautilus to open it by ROOT permission

#

# Determine the path

if [ -e -n $1 ]; then

obj="$NAUTILUS_SCRIPT_SELECTED_FILE_PATHS"

else

base="`echo $NAUTILUS_SCRIPT_CURRENT_URI | cut -d'/' -f3- | sed 's/%20/ /g'`"

obj="$base/${1##*/}"

fi

# Determine the type and run as ROOT

if [ -f "$obj" ]; then

gksu gedit "$obj"

elif [ -d "$obj" ]; then

gksu nautilus "$obj"

fi
exit 0
4. Press Ctrl+Alt+T to open the terminal. When it opens, run the command below to make executable:
cd .local/share/nautilus/scripts/ && chmod 0755 open-as-administrator
5. Finally restart Nautilus via command nautilus -q, or just log out and back in.
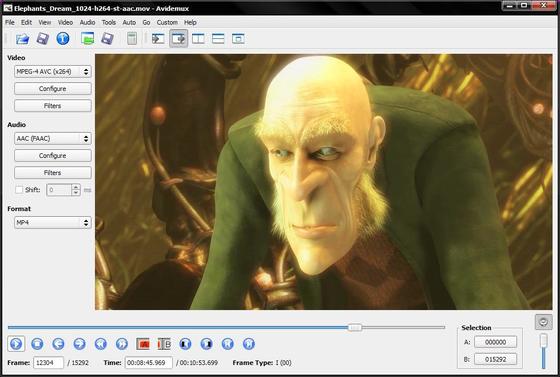
Avidemux is a free video editor designed for simple cutting, filtering and encoding tasks. While Ubuntu repositories still have version 2.5.x, this tutorial will show you how to install the latest release Avidemux 2.6.8 in Ubuntu 14.04 Trusty Tahr.
First see changes in v2.6.8:
Image/export: Proper initialization of Qz for jpeg export
UI : Add an override menu to force language
tinypy : Add support for os.environ
x264 : Improved settings (tobias)
Win32 : Fix crash when having an audio problem
Win32 : Re-add mp4v2 to installer files
Audio/FAAC : Fix channel mapping when source is mono
Audio/AMR : Re-enabled AMR
Audio/lavc : Fixed encoding for codec not supporting planar (MP2)
Audio : Fixed importing MP2 audio detected as MP3
Editor : Fix deleting chunks of the video leading to seek errors
Editor : Initial copy/paste support
Editor/audio: Fix issue when source has more than 4 tracks
Editor : Better detection of double fps input files
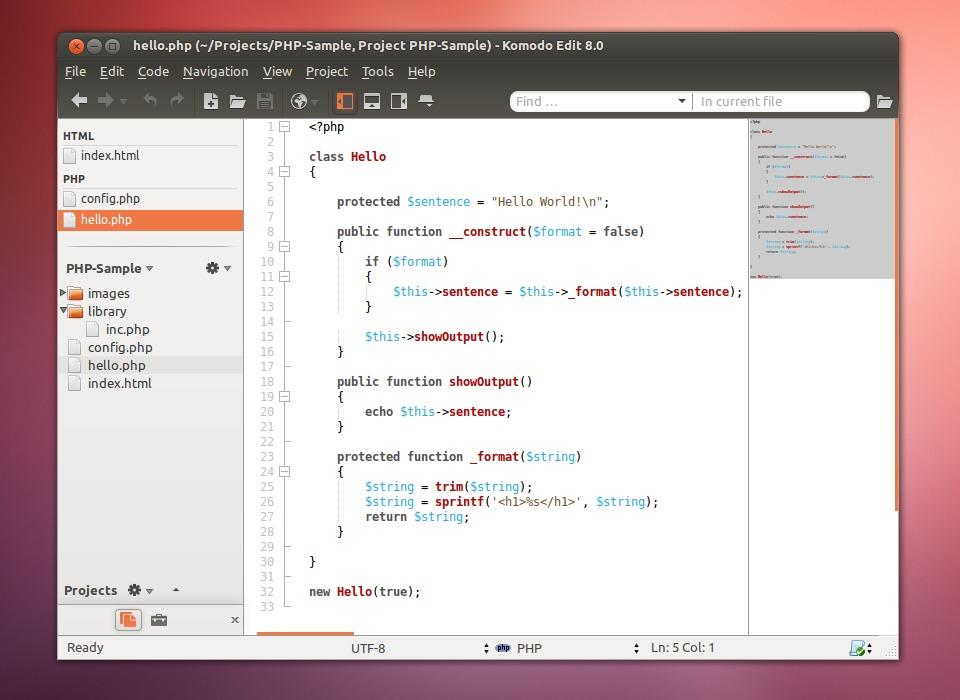
This simple tutorial shows you how to install Komodo Edit, the free and Open-Source counterpart of Komodo IDE, in Ubuntu 14.04 Trusty Tahr via PPA.
Komodo Edit offers sophisticated support for all major scripting languages, including in-depth autocomplete and calltips, multi-language file support, syntax coloring and syntax checking, Vi emulation, Emacs key bindings. It provides dynamic language expertise for Perl, PHP, Python, Ruby, and Tcl, plus JavaScript, CSS, HTML, and XML, and template languages like RHTML, Template-Toolkit, HTML-Smarty and Django.
Install Komodo Edit:
Because the editor is available in Launchpad PPA, you can easily install it by running the commands below one by one in a terminal window (Press Ctrl+Alt+T to open the terminal):
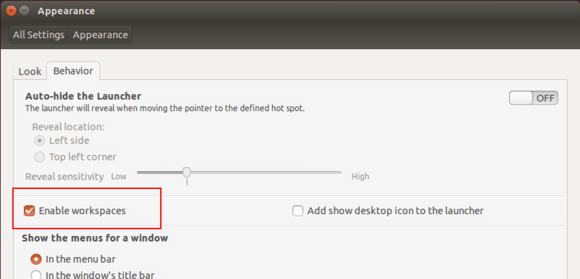
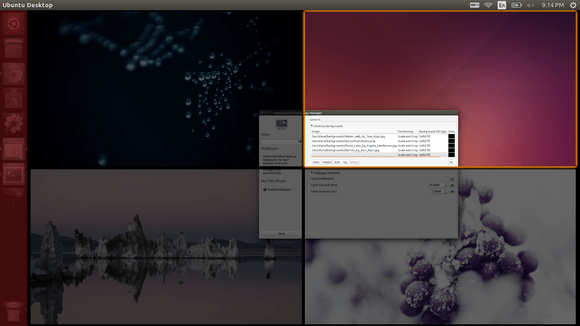
This simple tutorial is going to show you how to set a different desktop wallpaper for each workspace in Ubuntu 14.04 Unity.
Only have one desktop? Well, you may first enable workspaces by going to System Settings -> Appearance -> Behavior and check the box as the below picture shows.
Now click the new icon on Unity Launcher and you’re able to switch between workspaces.
To set different wallpapers:
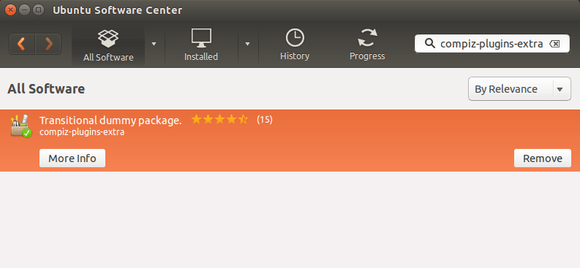
1. Open Ubuntu Software Center, search for and install both the Compizconfig Settings Manager and compiz-plugins-extra
The package “compiz-plugins-extra” contains the plugin Wallpaper which allows you to assign multiple wallpapers to your workspaces, with the added bonuses of proper transparency handling and desktop icons (with patches to Nautilus, etc).
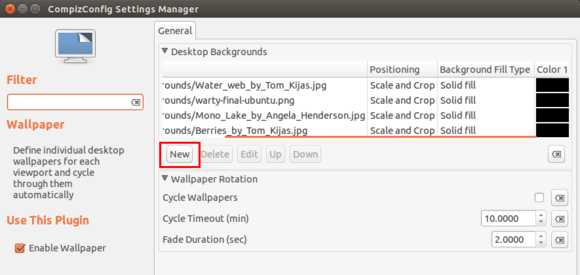
2. Open CCSM (CompizConfig Settings Manager) from Unity Dash. Enable Wallpaper plugin and click to go into its settings page.
3. Click the New button and add some wallpapers. Enable Images plugin when it prompts.
Want to remove the white dots and set your log-in screen background image different to your desktop wallpaper? Well, this simple tutorial will show you how.
Below steps will give lightdm user access to the X-Server and open dconf-Editor to change the settings of Unity Greeter.
1. Press Ctrl+Alt+T on keyboard to open the terminal. When it opens, run the command below to install dconf-editor:
sudo apt-get install dconf-editor
2. Run command to get the root user privilege:
sudo -i
3. Allow user lightdm to create a connection to the X server:
xhost +SI:localuser:lightdm
4. Switch to user lightdm in this terminal window.
su lightdm -s /bin/bash
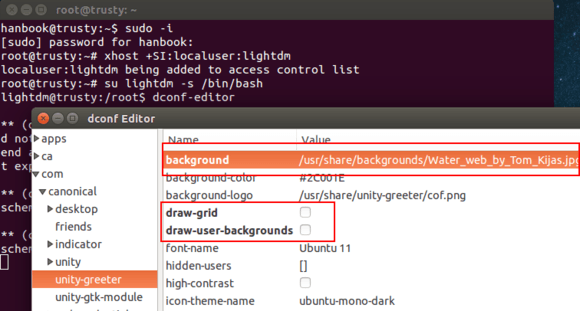
5. Now you can start the dconf-editor via this user by running:
dconf-editor
When the tool opens, navigate to com –> canonical –> unity-greeter. Then change the background value to your custom image and disable both draw-grid and draw-user-backgrounds
After all, restart your computer and enjoy!
UPDATE: To revert the settings, re-do previous steps and click “Set to Default” after highlighting the key values in step 5.
For those who get blank screen issue, switch to command console (Ctrl+Alt+F1 ~ F6), re-do step 2, 3, 4, and finally reset the changes via: