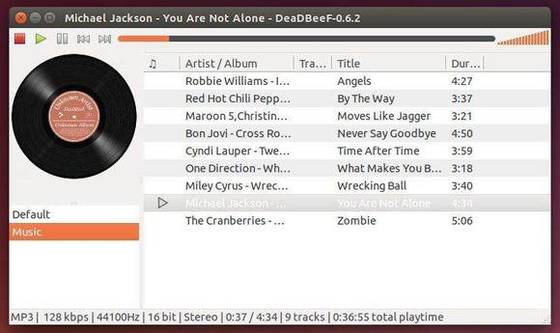
HPLIP, an HP-developed solution for printing, scanning, and faxing with HP inkjet and laser based printers in Linux now is at version 3.14.1. This release mainly fixed two security fixes and added digital signature validation in upgrade feature.
As you may know, HPLIP is free, open source software distributed under the MIT, BSD, and GPL license. provides printing support for 2,295 printer models, including Deskjet, Officejet, Photosmart, PSC (Print Scan Copy), Business Inkjet, LaserJet, Edgeline MFP, and LaserJet MFP. (Note: Not all models are currently supported. See Supported Printers for more information.)
HPLIP 3.14.1 fixed below issues:
CVE-2013-6427: hplip: insecure auto update feature
CVE-2013-6402: hplip: insecure temporary file handling in pkit.py
The Long Term Support Linux Kernel 3.10 series now is at the 26th update. Greg Kroah-Hartman announced this release on January 9 and urged users of this Kernel series to upgrade as soon as possible.
The Kernel 3.10.26 brings various improvements to ARM, PowerPC and x86 architectures, several improvements to the EXT4, GFS2, Ceph and JBD filesystems, and updated drivers, including USB, wireless, i915, Radeon. See the Changelog
Install / Upgrade Kernel 3.10.26:
The Ubuntu Kernel Team has made the Deb packages which are available in this page. If you’re comfortable with command line, follow the below steps to download & install them.
1. Press Ctrl+Alt+T on keyboard to open terminal and run commands below one by one to download Kernel Debs:
For 32 bit system:
cd /tmp/ && wget http://kernel.ubuntu.com/~kernel-ppa/mainline/v3.10.26-saucy/linux-headers-3.10.26-031026-generic_3.10.26-031026.201401091635_i386.deb
wget http://kernel.ubuntu.com/~kernel-ppa/mainline/v3.10.26-saucy/linux-headers-3.10.26-031026_3.10.26-031026.201401091635_all.deb
wget http://kernel.ubuntu.com/~kernel-ppa/mainline/v3.10.26-saucy/linux-image-3.10.26-031026-generic_3.10.26-031026.201401091635_i386.deb
For 64 bit system:
cd /tmp/ && wget http://kernel.ubuntu.com/~kernel-ppa/mainline/v3.10.26-saucy/linux-headers-3.10.26-031026-generic_3.10.26-031026.201401091635_amd64.deb
wget http://kernel.ubuntu.com/~kernel-ppa/mainline/v3.10.26-saucy/linux-headers-3.10.26-031026_3.10.26-031026.201401091635_all.deb
wget http://kernel.ubuntu.com/~kernel-ppa/mainline/v3.10.26-saucy/linux-image-3.10.26-031026-generic_3.10.26-031026.201401091635_amd64.deb
2. Install the Kernel:
cd /tmp/ && sudo dpkg -i linux-headers-3.10.26-*.deb linux-image-3.10.26-*.deb
Restart your computer and done.
If you’re using a proprietary video driver, you may need to re-build or re-install to get it work with the new kernel.
If for some reason this kernel release doesn’t work properly for you, reboot into previous kernel (Grub -> Advanced -> select previous kernel) and run commands to remove Linux Kernel 3.10.26:
The latest Linux Kernel 3.12.7 has been announced a few hours ago. According the to changlog, Kernel 3.12.7 brings various improvements to ARM, PowerPC and x86 architectures, several improvements to the EXT4, GFS2, Ceph, JBD and CIFS filesystems, some sound and core enhancements, as well as numerous updated drivers, including USB, wireless, i915, Radeon, and more. See the changelog
This simple tutorial is going to show you how to install or upgrade to this kernel release in Ubuntu 13.10, Ubuntu 13.04, Ubuntu 12.10, Ubuntu 12.04, Linux Mint and their derivatives.
Install / Upgrade Kernel 3.12.7:
Ubuntu Kernel Team has made the DEB packages available in this page. If you’re comfortable with command line, follow below steps to download & install them.
1. Download the Kernel Debs:
For 32 bit system, open terminal by Ctrl+Alt+T and run below commands:
cd /tmp/ && wget http://kernel.ubuntu.com/~kernel-ppa/mainline/v3.12.7-trusty/linux-headers-3.12.7-031207-generic_3.12.7-031207.201401091657_i386.deb
wget http://kernel.ubuntu.com/~kernel-ppa/mainline/v3.12.7-trusty/linux-headers-3.12.7-031207_3.12.7-031207.201401091657_all.deb
wget http://kernel.ubuntu.com/~kernel-ppa/mainline/v3.12.7-trusty/linux-image-3.12.7-031207-generic_3.12.7-031207.201401091657_i386.deb
For 64 bit system:
cd /tmp/ && wget http://kernel.ubuntu.com/~kernel-ppa/mainline/v3.12.7-trusty/linux-headers-3.12.7-031207-generic_3.12.7-031207.201401091657_amd64.deb
wget http://kernel.ubuntu.com/~kernel-ppa/mainline/v3.12.7-trusty/linux-headers-3.12.7-031207_3.12.7-031207.201401091657_all.deb
wget http://kernel.ubuntu.com/~kernel-ppa/mainline/v3.12.7-trusty/linux-image-3.12.7-031207-generic_3.12.7-031207.201401091657_amd64.deb
2. Install the DEBs:
cd /tmp/ && sudo dpkg -i linux-headers-3.12.7-*.deb linux-image-3.12.7-*.deb
Restart your computer and done.
If you’re using a proprietary video driver, you may need to re-build or re-install to get it work with the new kernel.
If for some reason this kernel release doesn’t work properly for you, reboot into previous kernel (Grub -> Advanced -> select previous kernel) and run commands to remove Linux Kernel 3.12.7:
Light Table IDE 0.6.0 has been announced recently with the exciting news that Light Table is now Open Source. All the code is now on Github.
Today Light Table is taking a huge step forward – every bit of its code is now on Github and along side of that, we’re releasing Light Table 0.6.0, which includes all the infrastructure to write and use plugins. If you haven’t been following the 0.5.* releases, this latest update also brings a tremendous amount of stability, performance, and clean up to the party. All of this together means that Light Table is now the open source developer tool platform that we’ve been working towards.
What’s New in Light Table 0.6.0:
ADDED: Light Table is now open source
ADDED: Plugins!
ADDED: Plugin manager via Plugins: Show plugin manager
ADDED: Plugins: Submit a plugin command
ADDED: Split all the languages into separate plugins
ADDED: Beautiful new default theme
ADDED: All user settings/plugins are now stored in user data
ADDED: Performance tweaks that should make everything faster
ADDED: Editor: Jump to definition at cursor command
ADDED: Editor: Jump back to where you jumped from command
ADDED: Editor: On change execute command behavior
ADDED: Editor: Set CodeMirror flags behavior
ADDED: Editor: Disconnect clients attached to editor command
ADDED: Editor: Open current file in browser command #956
ADDED: You can now drop folder/files onto the workspace tree
ADDED: a popup asking if you want to update when one is available
ADDED: the statusbar is now in it’s own container with find on top of it.
ADDED: more hints for the starting state of no workspace
ADDED: Jump to definition, and syntax aware autocomplete for Clojure and ClojureScript
ADDED: Style: Provide editor theme and Style: Provide skin behaviors so that theming can be done via plugin
ADDED: all editors are now backed by first class documents
mac: ~/Library/Application Support/LightTable
linux: ~/.config/LightTable
windows: %APPDATALOCAL%/LightTable
CHANGE: All behaviors that were previously lt.objs.langs.* are now lt.plugins.*
CHANGE: lt.objs.langs.clj is now lt.plugins.clojure
CHANGE: Emacs and Vim are now both plugins to be downloaded via the plugin manager
FIX: better LT stacktraces
FIX: multiple popups won’t drop focus as they’re closed now
FIX: Highlight line is now much faster
FIX: scrolling in the command and navigate panes should be orders of magnitude faster.
FIX: Auto-complete is now significantly faster
FIX: \r\r\n at the end of files on windows #912
FIX: :searcher.replace/:searcher.replace-all are missing #949
FIX: Light Table won’t open files if editor’s for removed files remain #941
FIX: Console sized to zero #932
FIX: cljs connection broken with latest CLJS #932
FIX: html eval isn’t refreshing the browser #929
FIX: Wrap resets after changing tab #905
FIX: can’t connect to nrepl in android project #902
This simple tutorial is going to show you how to install Jolla’s Sailfish OS SDK on Ubuntu and other Linux Distributions.
Jolla has announced a graphical installer for Windows, Linux and Mac OS. It’s easy to install it on Linux systems, all you need to do is download the installer and start it in terminal.
Common pre-requisites:
1. Make sure you have Oracle VirtualBox 4.1.18+ installed. Ubuntu 13.04 and higher can installed it from Ubuntu Software Center. For Ubuntu 12.04, please download the latest version from virtualbox.org.
Audacious, the default audio player in Lubuntu and in Ubuntu Studio now is at version 3.4.3, which brings two important bug fixes and translation updates.
As you may know Audacious is an advanced music player with a focus on low resource usage, high audio quality, and support for a wide range of audio formats.
Audacious has below features (more about audacious at wikipedia):
built-in gapless playback
support for a wide range of audio formats
various plugins
support for Winamp 2 skins
accepts connections from client software, such as Conky.
The new release Audacious 3.4.3 mainly fixed below bugs:
Opus files are missed when opening folder (#364)
Exporting as cue-file produces segmentation fault (#371)
Install Audacious:
For Ubuntu and its derivatives, we can install audacious from PPA. Supports Ubuntu 14.04, Ubuntu 13.10, Ubuntu 13.04, Ubuntu 12.10, Ubuntu 12.04.
To get started, press Ctrl+Alt+T on keyboard to open terminal. When it opens, run commands below one by one:
Don’t use the “Memory Test”, “Recovery Mode”, “Advanced Options” entries in your Grub bootloader? Well, you may remove them to make your Grub Menu clean.
It’s hard to do this thing by editing the config files. Fortunately, there’s a simple graphical tool that helps you manage Grub2 on Ubuntu and its derivatives.
To install the tool – grub customizer – press Ctrl+Alt+T on keyboard to open terminal. When it opens, run below commands one by one:
iTALC is a free and open-source classroom management tool for teachers. It lets you view and control other computers in your network in several ways. It supports Linux and Windows and it even can be used transparently in mixed environments!
iTALC has been designed for usage in school. Therefore it offers a lot of possibilities to teachers, such as
see what’s going on in computer-labs by using overview mode and make snapshots
remote control computers to support and help other people
show a demo (either in fullscreen or in a window) – the teacher’s screen is shown on all student’s computers in realtime
lock workstations for moving undivided attention to teacher
send text messages to students
powering on/off and rebooting computers per remote
remote logon and logoff and remote execution of arbitrary commands/scripts
home schooling – iTALC’s network-technology is not restricted to a subnet and therefore students at home can join lessons via VPN-connections just by installing iTALC client
Install iTALC:
The default version in Ubuntu repository is old. I’ve upload the latest iTALC 2.0.1 packages into PPA for Ubuntu 13.10, Ubuntu 13.04, Ubuntu 12.10, Ubuntu 12.04 (Debian package belongs to Mike Gabriel).
1. To get started installing it, press Ctrl+Alt+T to open terminal and run command to add the PPA:
sudo add-apt-repository ppa:ubuntuhandbook1/apps
After that, install the client and master after checking for updates:
For student, just install italc-client. For Ubuntu 14.04, you can directly install the latest packages from Ubuntu Software Center.
2. The installation process should create the authentication key pairs. If not, you can generate them on teacher’s machine manually by running below command:
ica -role teacher -createkeypair
This will create the private & public folder under /etc/italc/keys directory.
3. The public folder need to be sent to the students machines.
a.) For a student machine running with Ubuntu (ssh enabled), run below command in teacher’s machine to copy & paste the key pairs:
scp -r /etc/italc/keys USERNAME@IP_ADDRESS:/tmp
Then in the student machine, run below commands to move the keys to proper location:
b.) For a student machine running with Windows, copy the keys folder to Windows client and do:
Open the keys folder that was copied to the Windows client and navigate to keys/public/teacher.
In the keys/public/teacher folder, there will be a file called key. Rename that file to italc_dsa_key.key.txt.
Go to Start -> Search & open iTALC Management Console -> Authentication tab -> click the Launch key file assistant
When prompted, select Import Public Key Of Master Computer, navigate to the file where the italc_dsa_key.key.txt file is housed, click Next, and finish the wizard.
4. Finally start iTALC GUI in teacher’s machine, create classroom and add computer… For more, see the documentation
Photivo is a free and open source photo processor for RAW and bitmap images with 16 bit precision. Photivo tries to give the user as much control as possible to express his creativity and to allow flexible adjustments for the various needs in photography.
Photivo photo processor has below features:
16-bit internal processing, color managed with LCMS2.
Gimp workflow integration (import and export)
Works with RAWs and Bitmaps (8 bit bitmaps are transformed and processed with 16 bit, which usually gives better results).
CA correction, Green equilibration, line denoise, badpixel reduction, wavelet denoise, median filters on RAW data.
Perspective correction (tilt and turn), distorsion and geometry (also defish) correction
Denoise, seperately on Luminance and Color (Edge avoiding wavelets, GreyCStoration, Wavelet, Masked bilateral, Pyramid) and via a hue or luminance sensitive denoise curve.
Adaptive saturation.
Film grain simulation.
Black and white conversion.
(Split) Toning.
Cross processing.
Gradual overlay (like Cokin(R) GND filters).
Vignetting.
Softglow / Orton.
Texture overlay (external texture)
Fake tilt/shift, toy effect
Batch mode
Translations: Dutch, French, German, Italian and Russian.
Dariusz Duma has made this app into launchpad PPA, so we can easily install it in Ubuntu 13.10 Saucy, Ubuntu 13.04 Raring, Ubuntu 12.10 Quantal, Ubuntu 12.04 Precise, Linux Mint and their derivatives via 3 commands in terminal.
To open terminal, press Ctrl+Alt+T on keyboard. Then run: