HPLIP, the free open-source HP developed Linux driver for HP inkjet and laser based printers, released version 3.24.4 today!
The development of HPLIP seems lagging behind. Rather than supporting for current Ubuntu 24.04, the new release adds installer support for Ubuntu 23.10, which will reach end of life next month.
It also added support for Debian 12 and Fedora 39, both of which were released in last year.
Besides new Linux Distributions support, HPLIP 3.24.4 also added new printers support! They include:
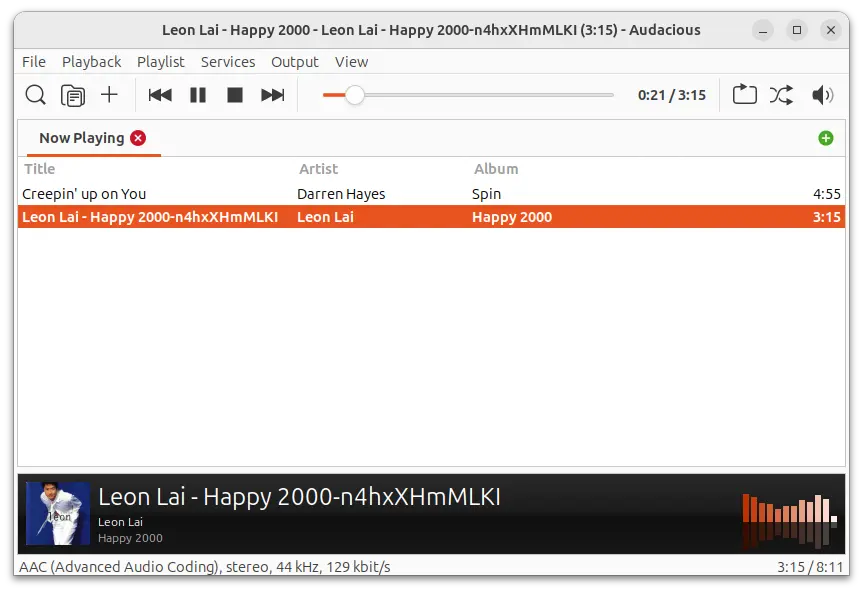
Audacious, the popular lightweight audio player, released new 4.4 version this Wednesday!
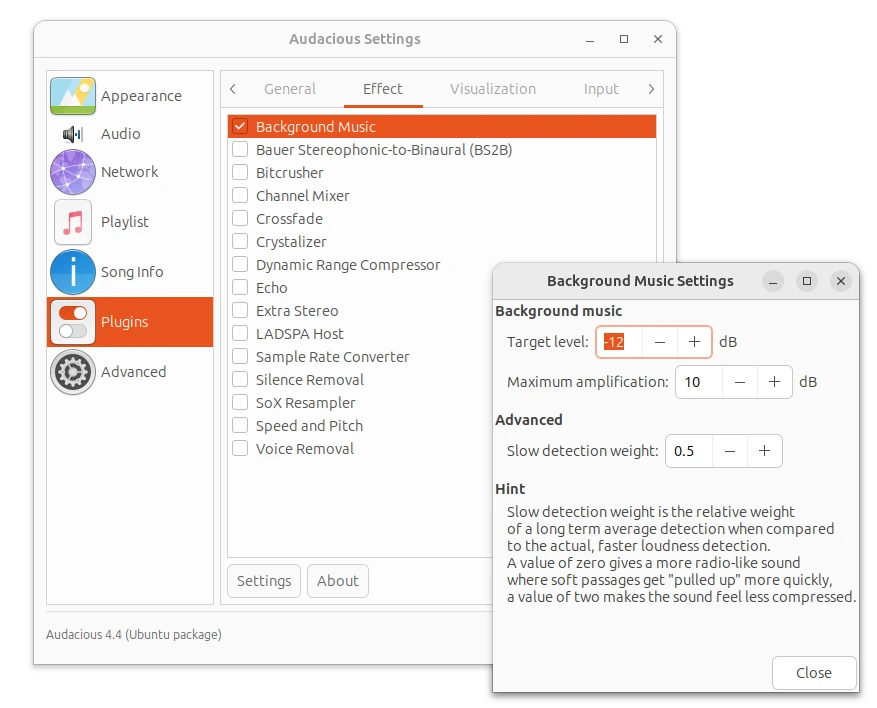
The new release of this free open-source music player restores Lyrics plugin for GTK interface, and adds new provider chartlyrics.com. Thanks to Michel Fleur, there’s now “Background Music” plugin, under “Effect” tab in the Plugin page, allows to make the sound equally loud within and between tracks.
The Scrobbler (Last.fm) plugin now also works on macOS and Windows. And, the Song Change plugin now allows to run custom command when a song is stopped.
Audacious 4.4 now defaults to GTK3 + Qt6, though Qt5 and GTK2 are still supported. It improved Wayland support for GTK interface, but the classic Winamp interface does NOT work properly on Wayland, thus users are recommended to run Audacious via XWayland (default behavior if available) therefore.
Other changes in Audacious 4.4 include:
Add Disc Number support
Read ReplayGain values in Opus files from R128 tags
For Ubuntu users, it’s available to install via Ubuntu PPA (native .deb package), Snap package, or Flatpak package (runs in sandbox environment).
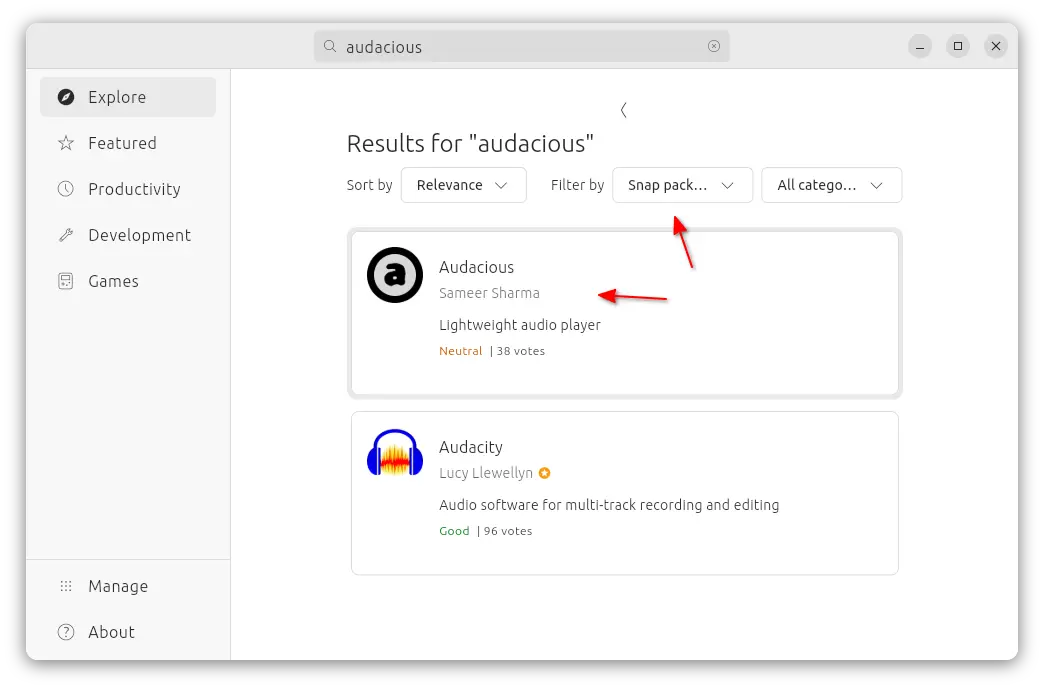
Method 1: Audacious Snap package
If you’re OK running the audio player in sandbox environment, then Audacious is easy to install through Ubuntu Software (or App Center) as Snap package.
Method 2. Install Audacious via Flatpak
Most Linux can install the audio player as Flatpak package, that runs in sandbox. So far, it supports amd64 and arm64 platforms.
All current Ubuntu user can press Ctrl+Alt+T on keyboard to open terminal and run the 2 commands below one by one to get it.
After installation, search for and launch it from start menu or Gnome overview. Log out and back in if app icon not visible.
Method 3. Install Audacious from Ubuntu PPA
For Ubuntu 18.04, Ubuntu 20.04, Ubuntu 22.04, Ubuntu 23.10, and Ubuntu 24.04 users, I’ve uploaded the new release package into PPA for amd64 and arm64/armhf machines.
Changes in the PPA package:
Packages for Ubuntu 18.04 and Ubuntu 20.04 are built with Qt5 + GTK3, since Qt6 is NOT available.
Qt6 + GTK3 for Ubuntu 22.04 and higher.
The dependency library name changes that follow upstream policy in Ubuntu 24.04:
libaudcore5 -> libaudcore5t64
libaudgui5 -> libaudgui5t64
libaudqt2 -> libaudqt2t64
libaudtag3 -> libaudtag3t64
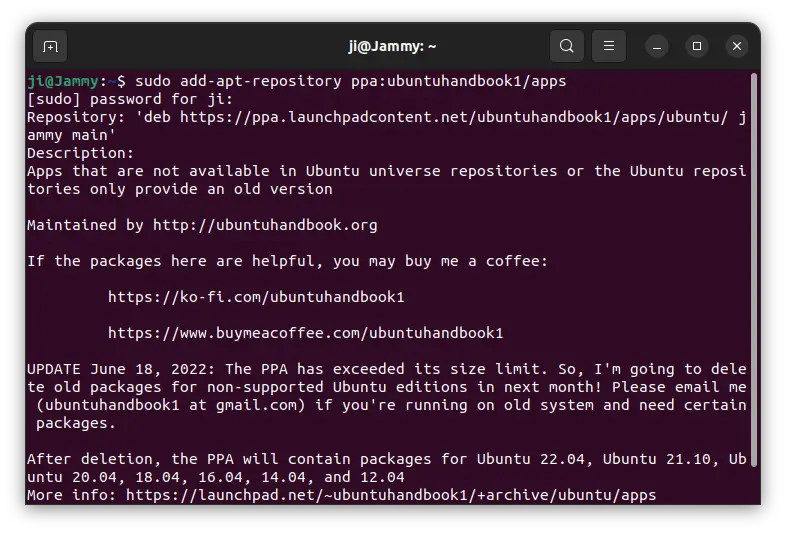
1. First, press Ctrl+Alt+T on keyboard to open terminal. When it opens, run command to add the PPA:
sudo add-apt-repository ppa:ubuntuhandbook1/apps
Type user password (no visual feedback, just type in mind) when it asks and hit Enter to continue.
2. Then, update system package cache:
sudo apt update
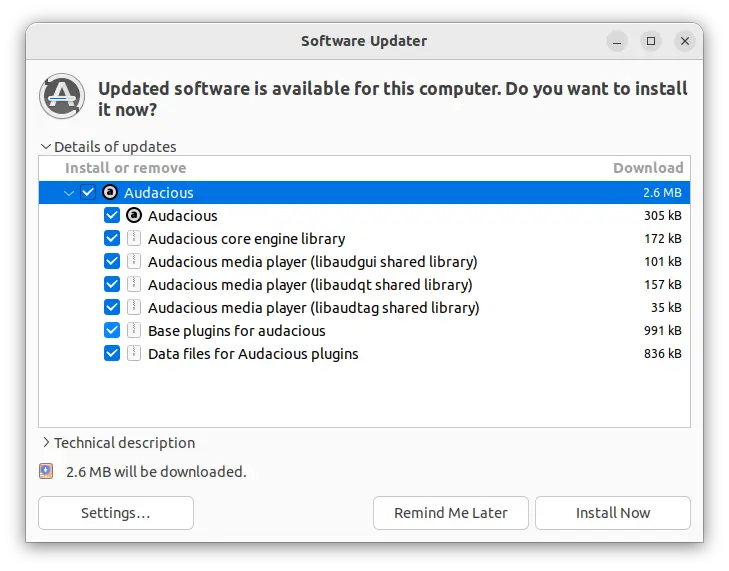
3. If you have an old version of the music player installed, you can now update the package to the latest using “Software Updater” utility.
Or, run the command below in terminal to install or upgrade the package:
sudo apt install audacious audacious-plugins
NOTE: For Ubuntu 22.04 runs into “Error opening output stream” issue, open “Settings” and set audio output plugin to “PulseAudio” output.
Uninstall Audacious
To remove the audio player installed as Flatpak, open terminal (Ctrl+Alt+T) and use command:
Also clean up runtime library via flatpak uninstall --unused.
If you want to restore the music player to the stock version available in system repository. Run command below to purge PPA as well as downgrade installed packages:
This is a step by step beginner’s guide shows how to install and set up a lightweight Socks5 proxy server in Ubuntu or Debian.
Due to poor network connection, I decided to set up a proxy server on my remote VPS for playing an online game. However, the tutorials on the web are mostly using Dante, which consumes too much RAM, and makes my cheap VPS server frequently run out of memory.
After digging around, I found a lightweight socks5 proxy server called Microsocks. And, here’s how to install & use it in Debian & Ubuntu.
Looking for lightweight Linux Distributions that play smoothly on old PC or laptop with low end specs? Here are some of them for you!
Advanced users can always install and set up a lightweight desktop environment manually on top of current OS. However, for beginners and those who don’t want to take time customizing the desktop, then a ready to use distribution is a better choice.
In Linux world, XFCE, MATE, LXQt/LXDE are commonly used desktop environments for lightweight distributions, though there are also many others for choice. And, here are 9 of them for beginners.
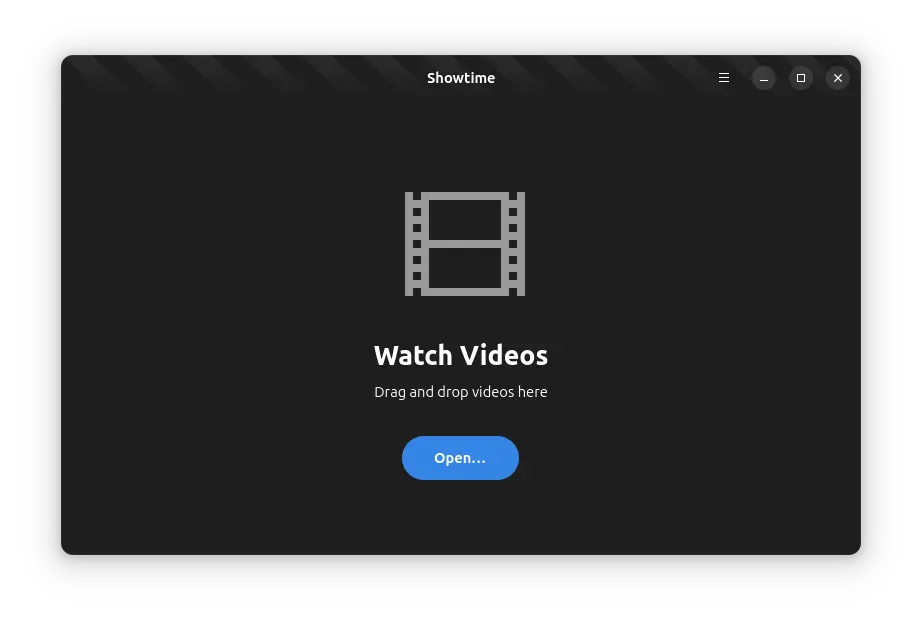
GNOME, the default desktop for Ubuntu, expects to replace its core Totem video player with ‘Showtime’, which is still in development stage.
Due to switch to GTK4, GNOME has replaced some of the core apps, including image viewer, text editor, camera app, and terminal emulator. And, Decibels is proposed as core app for playing audio files.
As the current Totem video player has not been maintained for nearly a year and sticks to GTK3, Showtime is submitted and accepted into the GNOME Incubator, which will be the core app if it reaches the required maturity.
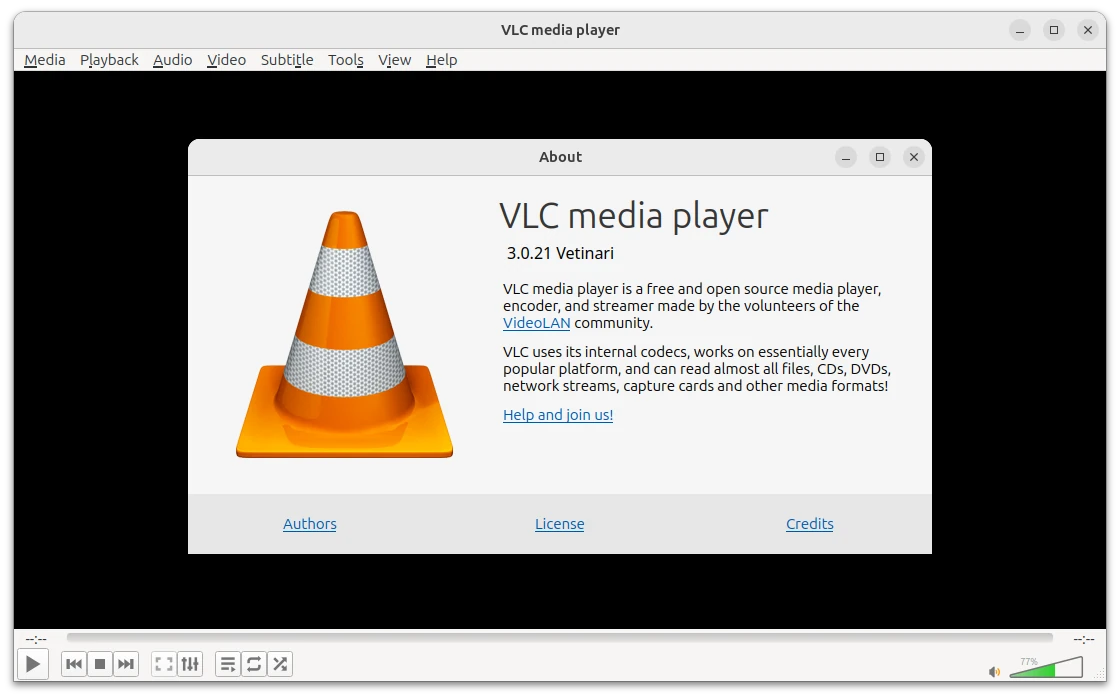
VLC, the popular free open-source media player, released version 3.0.21 after more than half a year of development.
The release introduced AMD HQ Scaler support for Super Resolution scaling with AMD GPUs. Meaning, user can now use this AI-assisted feature to improve the quality and sharpness of playback with NVIDIA RTX series (and more listed in this page), AMD Radeon™ RX 5000 Series Graphics and newer, and Intel Arc, Xe-LP GPUs.
If you have a compatible GPU, then you can enable this feature in Preferences dialog, under Video -> Output modules section.
This tutorial shows how to enable (or improve) touchpad gestures in Ubuntu 24.04, Ubuntu 22.04. Not only for the default GNOME (both X & Wayland), but also for XFCE, MATE, and other desktop environments.
GNOME introduced multi-touch gestures support since v40, however, it only works on the default Wayland session, and supports only 3 finger swipe gestures. For more gestures, GNOME on Xorg, and other desktop environments, you can choose either option below:
Gesture Improvements extension (GNOME only) – enable 4-finger swipe and pinch gestures, support both Xorg and Wayland.
Touchegg – for all desktop environments on X, including GNOME on Xorg, but not for Wayland.
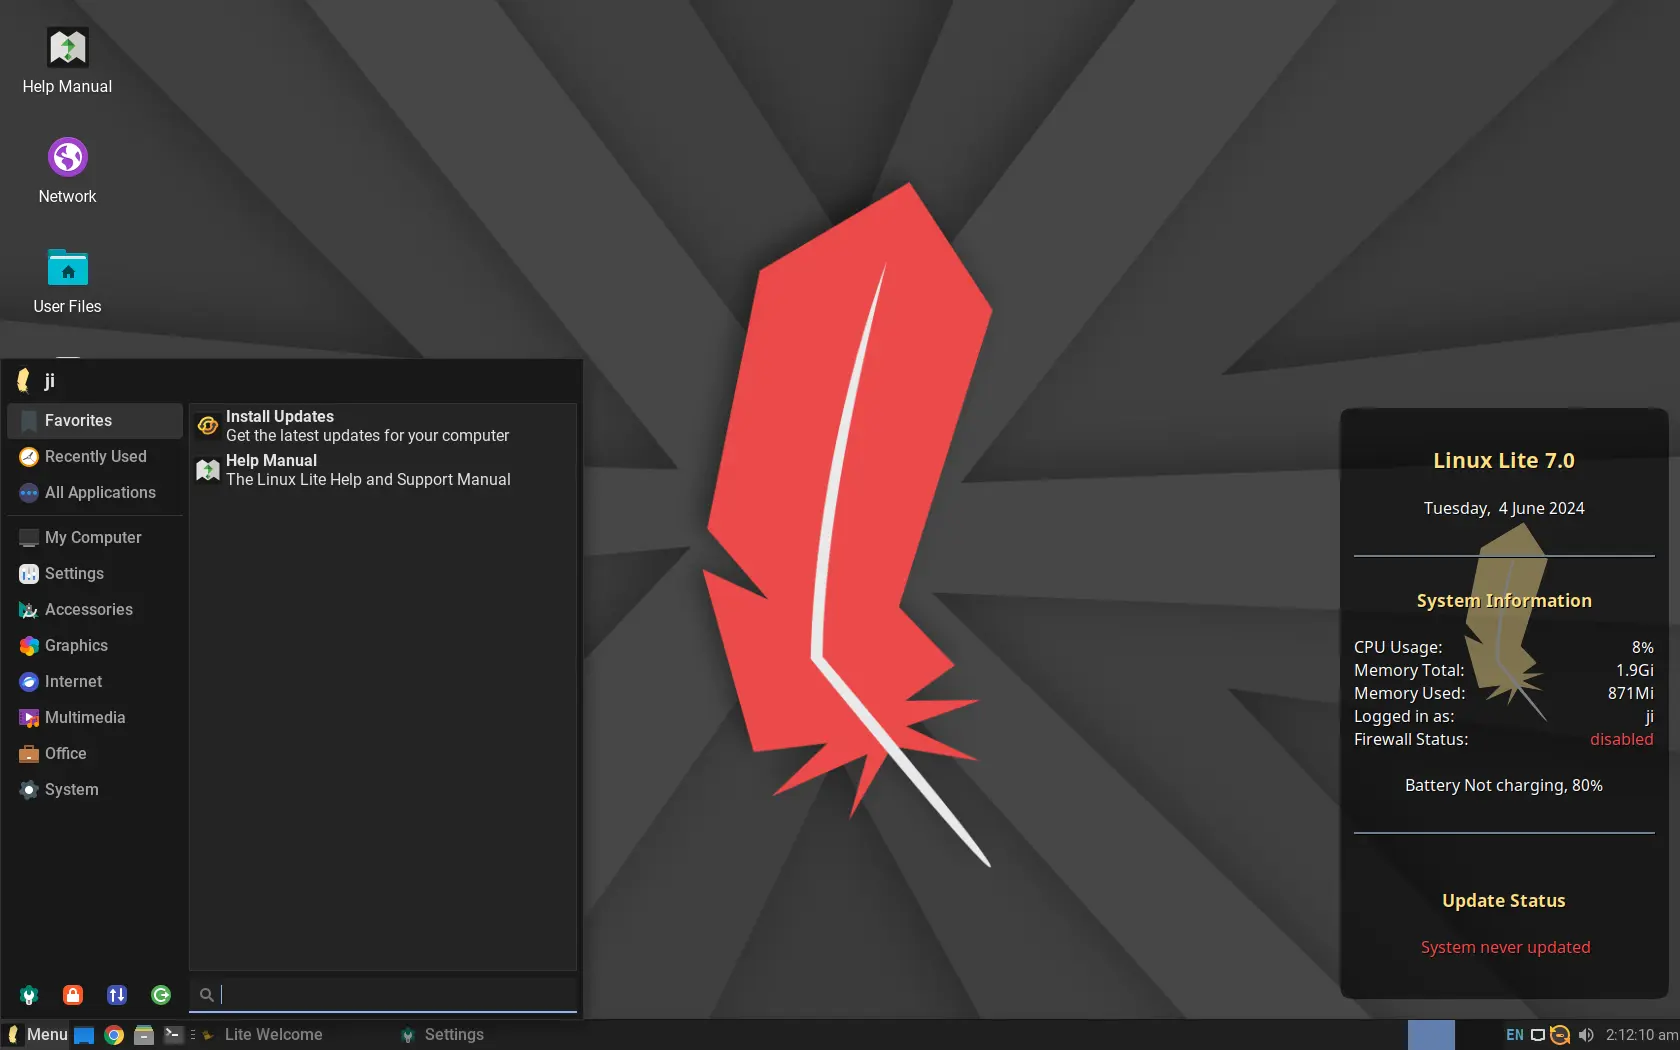
Linux Lite, the lightweight and beginner friendly Linux Distribution, released version 7.0 few days ago.
Linux Lite is a free open-source (partly closed-source due to built-in proprietary apps, such as chrome) Distro based on Ubuntu LTS. It features customized XFCE Desktop environment that is lightweight for low end PCs.
Compare to XUbuntu and Linux Mint (Xfce edition), the lightweight system has a better look and feel due to the default themes, that seem to be also in use for Manjaro Linux.
The Distro aims to appeal to Linux beginners and Windows users, by trying to make the transition from Windows to Linux as smooth as possible. And, there’s NO Snap, NO Flatpak out-of-the-box.
This tutorial shows how to enable some cool animations, when moving, opening, closing, minimizing and restoring app windows in Ubuntu with default GNOME Desktop.
All the animations here are handled by GNOME shell extensions, meaning they will also work in Fedora Workstation, RHEL 9, and other Linux with GNOME desktop.
NOTE: These animations will consume more energy and system resources. It’s NOT recommended for laptop running without power supply, and lower end PC with very old CPU and low memory. Continue Reading…