This is a step by step beginner’s guide shows how to install VS-Codium IDE in Ubuntu, using 4 different ways.
VSCodium is a free and open-source software binaries of VS Code. It’s NOT a fork, but a community-driven, freely-licensed binary distribution of Microsoft’s editor VS Code.
The VSCodium project was born due to:
Microsoft’s vscode source code is open source (MIT-licensed), but the product available for download (Visual Studio Code) is licensed under this not-FLOSS license and contains telemetry/tracking.
It’s a good choice as a telemetry-less version of VS Code without rebuilding by programmers themselves.
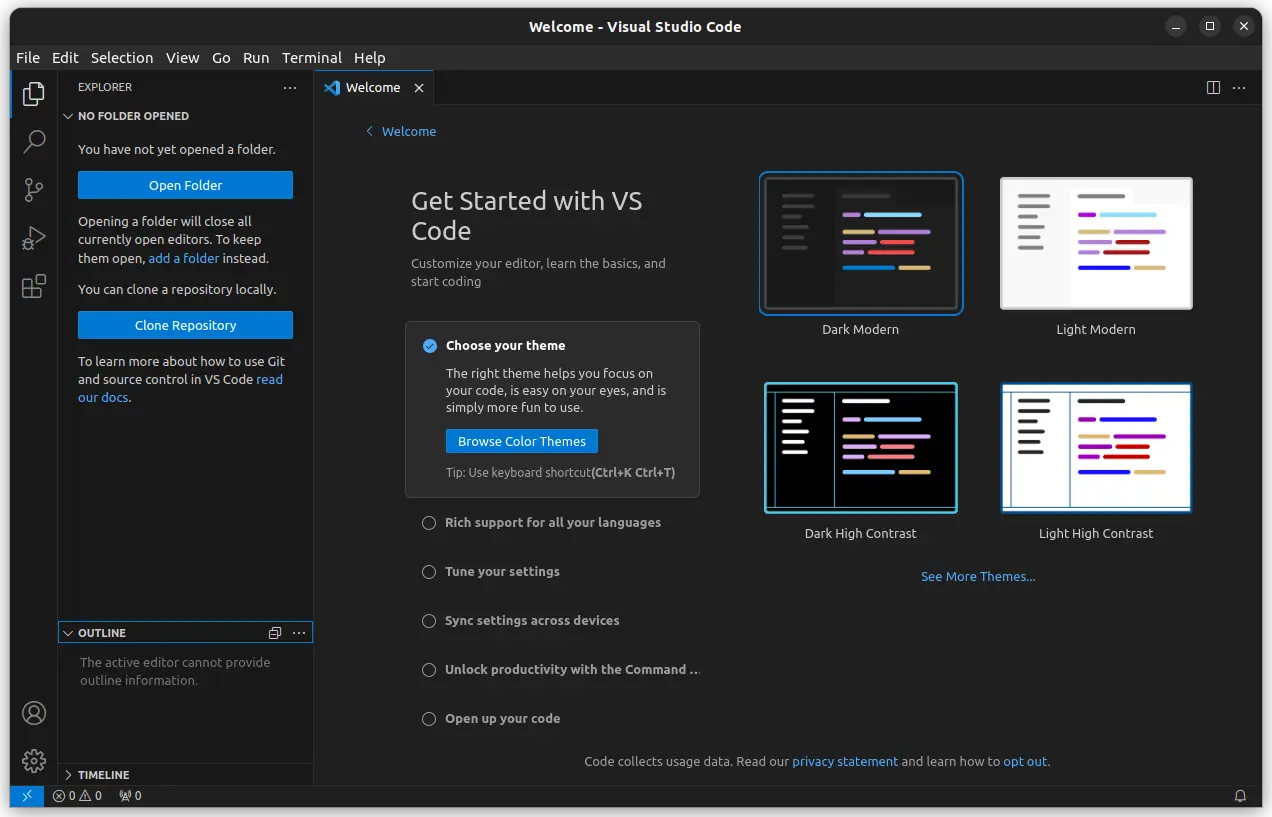
This is a step by step beginner’s guide shows how to install VS Code IDE and keep it up-to-date in Ubuntu 22.04, Ubuntu 24.04, Ubuntu 25.04 using 3 different ways.
Microsoft provides official code packages for Linux through native .deb (for Debian/Ubuntu), .rpm (for Fedora/SUSE), and universal Snap package run in sandbox.
For choice, there’s also a community maintained Flatpak package which also runs in sandbox.
So, there are 3 common ways to install this IDE in your Ubuntu Desktop!
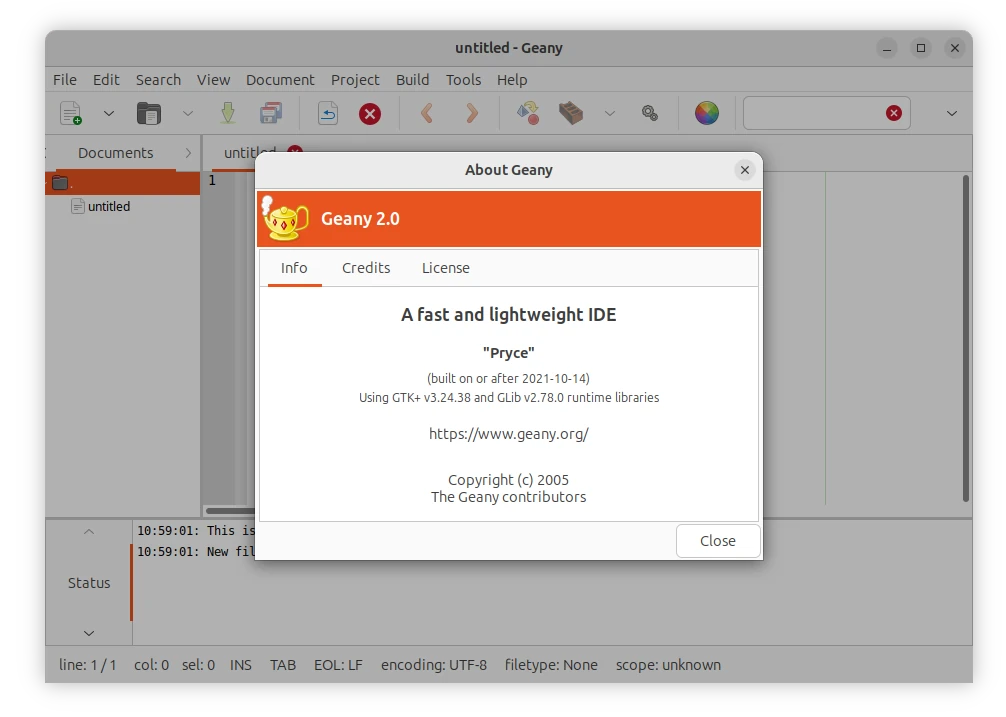
Geany, the small and fast IDE, released version 2.0 hours ago! Here are the new features as well as how to install guide for Ubuntu users.
Changes in Geany 2.0 according to the official release note:
Split “session data” into session.conf, preferences are written to and read from geany.conf.
Re-add ability to scroll over document tabs.
Use new tree view as default for the document list in the sidebar.
Dark-theme friendly colors for compiler messages
Confirm dialog on search & replace for the whole session.
Filter entry for symbol tree.
Simplify project creation from existing directories with sources.
Add option to show symbols in symbol tree without category groups.
Add option to only show line endings if they differ from file default.
Make tab label length and window title length configurable.
Make Go to Symbol commands show signature list.
Scintilla 5.3.7 and Lexilla 5.2.7
Add “Change history” feature (disabled by default)
Sync many parsers from the Universal Ctags project
Improved support for the ctags file format
Update Kotlin, Nim, PHP, Python filetype config
Apply Markdown header style to the complete header
Add AutoIt, GDScript filetype
Remove Ferite filetype
Enable local variables and improve autocompletion for C/C++ and some other languages
Use “Prof-Gnome” GTK theme and GTK dialogs on Windows.
How to Install Geany 2.0 in Ubuntu:
Geany does not provide official packages for Linux. Besides building from source code, user can choose to use the universal Flatpak package or an unofficial Ubuntu PPA.
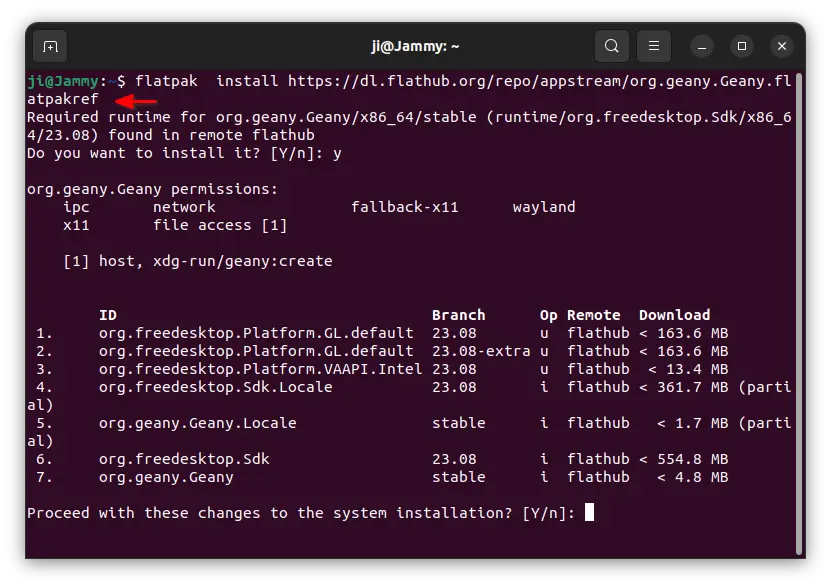
Option 1: Flatpak package
The Flatpak package is an universal package format can be installed in most Linux, however it runs in sandbox.
To install Geany as Flatpak package, press Ctrl+Alt+T on keyboard to open terminal. Then, run the 2 commands one by one:
First, install Flatpak daemon in case you don’t have it:
After installation, search for and launch Geany from either overview screen or start/application menu depends on your desktop environment.
NOTE: For first time installing Flatpak app, needs a log out and back in to make app icon visible.
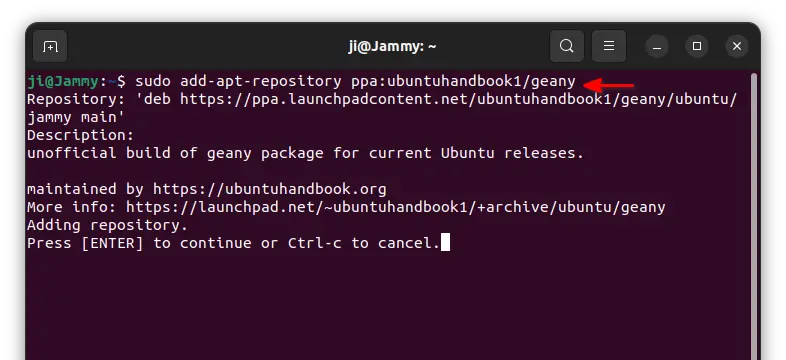
Option 2: Ubuntu PPA
For those who hate running app in sandbox, I’ve uploaded the package into this unofficial PPA. So far, it supports for Ubuntu 20.04, Ubuntu 22.04, Ubuntu 23.04, and Ubuntu 23.10 on x86_64, arm64/armhf CPU architecture types.
1. First, press Ctrl+Alt+T on keyboard to open terminal. When terminal opens, run command to add the PPA:
sudo add-apt-repository ppa:ubuntuhandbook1/geany
Type user password (no asterisk feedback) when it asks and hit Enter to continue.
2. Linux Mint users may need to manually refresh system package cache after adding PPA, though it’s done automatically in Ubuntu 20.04 and higher.
To do so, run command:
sudo apt update
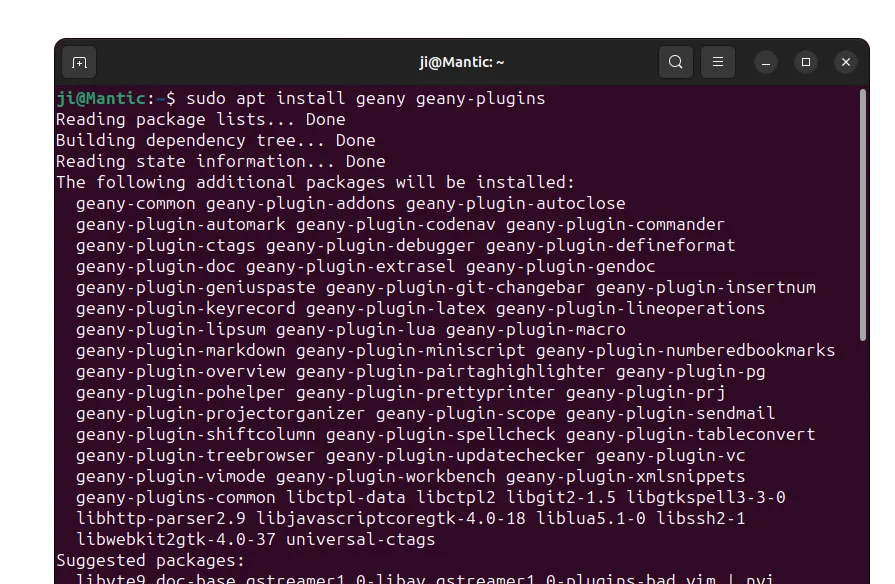
3. Finally, install Geany 2.0 as well as plugins by running command:
sudo apt install geany geany-plugins
After successfully installed the packages, search for and launch the IDE from overview or application menu and enjoy!
Uninstall Geany 2.0
For Geany IDE installed as Flatpak package, just run the command below to remove it:
flatpak uninstall --delete-data org.geany.Geany
Also, run flatpak uninstall --unused to clear useless run-time libraries.
For the IDE installed from Ubuntu PPA, remove it by running command in terminal (Ctrl+Alt+T):
Unify Community and Professional Editions with single product.
New default theme, and new welcome screen.
Claude AI support.
Use uv as default environment manager if available.
New LSP tools, e.g., ty, Pyright, and Pyrefly.
New dedicated Python Process Output tool window
Support the asdf runtime version manager.
Support for PEP 765 (Python 3.14+).
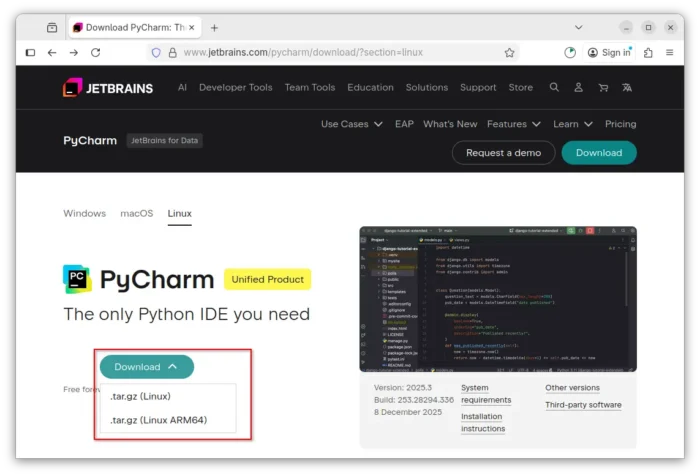
The new release is available to install in Ubuntu via different ways. They include Snap, Flatpak, official tarball, and Ubuntu PPA. Choose either one that you prefer.
Method 1: Install PyCharm via Snap package
JetBrains provides official Linux package through both Snap and tarball. Which is super easy to install for Ubuntu users.
The Snap package Features:
Official package by JetBrains.
Run in sandbox environment.
amd64 (x86_64) and arm64 (aarch64) platforms support.
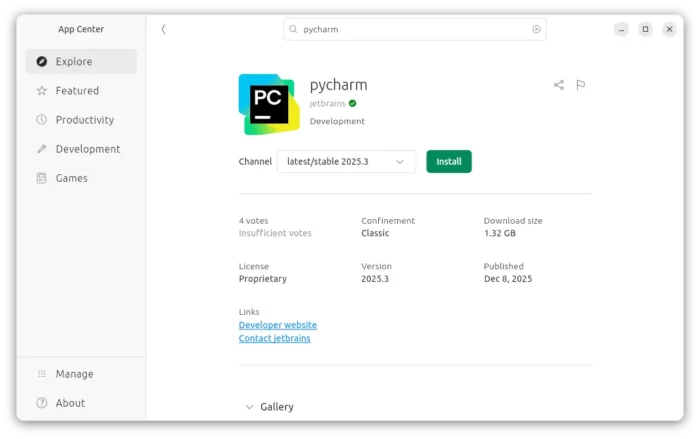
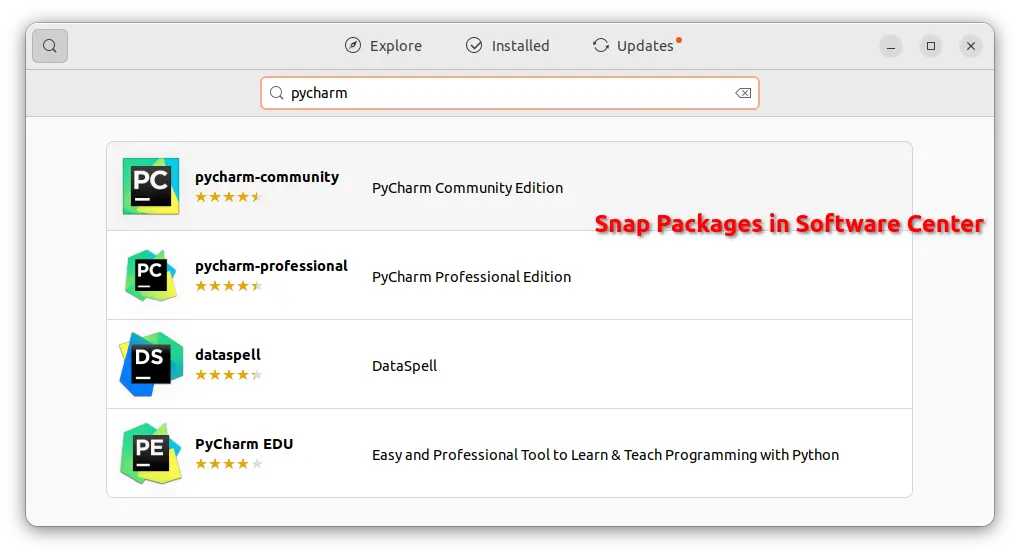
For all current Ubuntu releases, just launch Ubuntu Software (or App Center), then search and install pycharm.
Or, run command below in a terminal window (Ctrl+Alt+T) instead to install the package:
snap install pycharm --classic
The snap package installs updates automatically. To manually check (and install if any) updates, use command:
snap refresh pycharm
Method 2: Install PyCharm via Flatpak (Unofficial)
Another easy way to install PyCharm is using Flatpak package. Which works in most Linux, though also run in sandbox environment.
The Flatpak package Features:
Community maintained.
Run in sandbox environment.
amd64 (x86_64) and arm64 (aarch64) support.
Ubuntu users just need to press Ctrl+Alt+T on keyboard to open terminal. Then run the 2 commands below one by one to install the package.
First, run command to install the Flatpak daemon:
sudo apt install flatpak
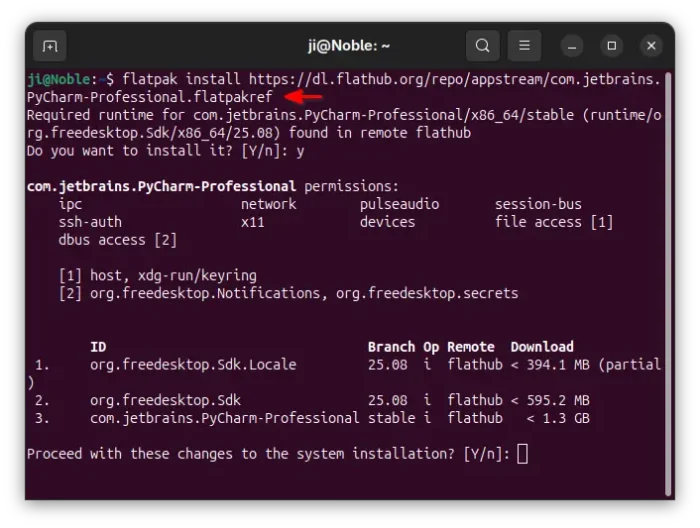
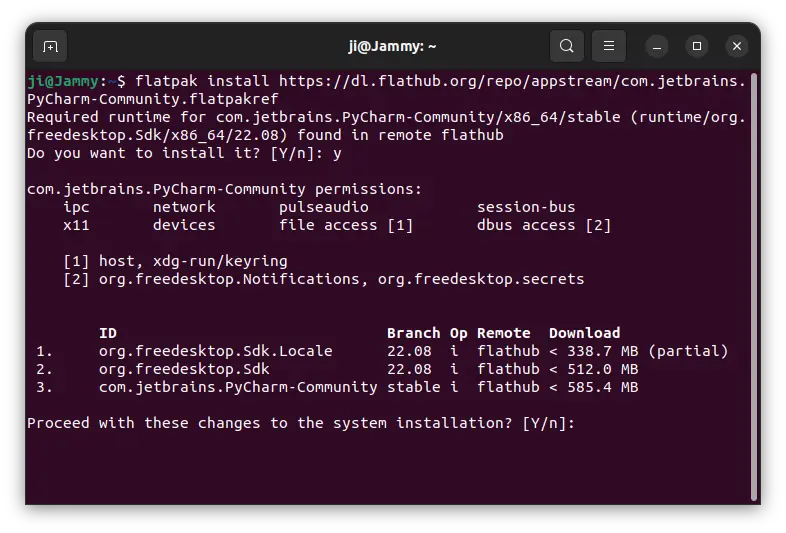
Then, run the command below to install PyCharm as Flatpak:
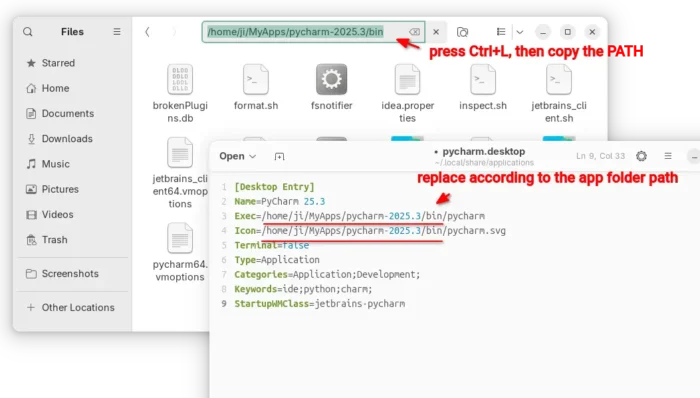
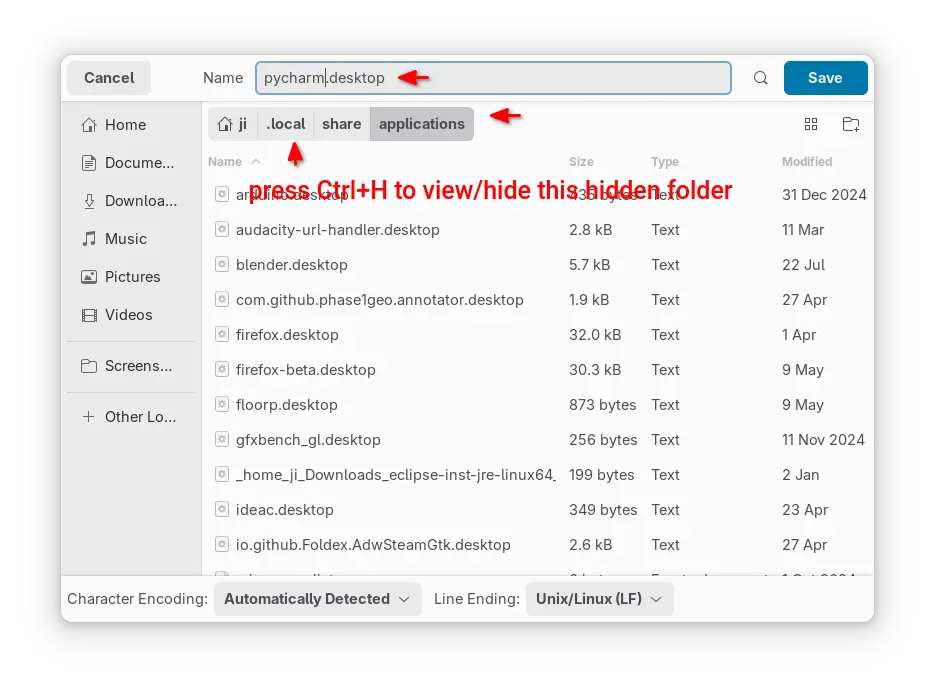
Here, replace the values of ‘Exec‘ and ‘Icon‘ according where you put the source folder. And, change ‘Name’ value for Professional edition.
Finally, save the document as (Ctrl+Shift+S) ‘pycharm.desktop‘ into .local/share/applications directory. Here, .local is hidden by default, press Ctrl+H to view/hide in file/folder chooser dialog.
If everything’s done correctly, you can then search for and launch PyCharm from app launcher or the overview screen depends on your DE a few moments later:
Method 4: Install PyCharm .deb package via unofficial Ubuntu PPA
Another choice to avoid Snap and Flatpak, is using an Ubuntu PPA. However, there are only third-party maintained PPAs.
The PPA package is still at v2025.2.5 at the moment:
Third-party maintained.
PyCharm Community only so far.
amd64 (x86_64) only so far.
supports Ubuntu 24.04, Ubuntu 25.04 only so far.
As far as I know, the xtradeb PPA is keeping updated with the most recent packages including PyCharm Community.
To install PyCharm from the PPA, press Ctrl+Alt+T on keyboard to open terminal. And, run commands below one by one:
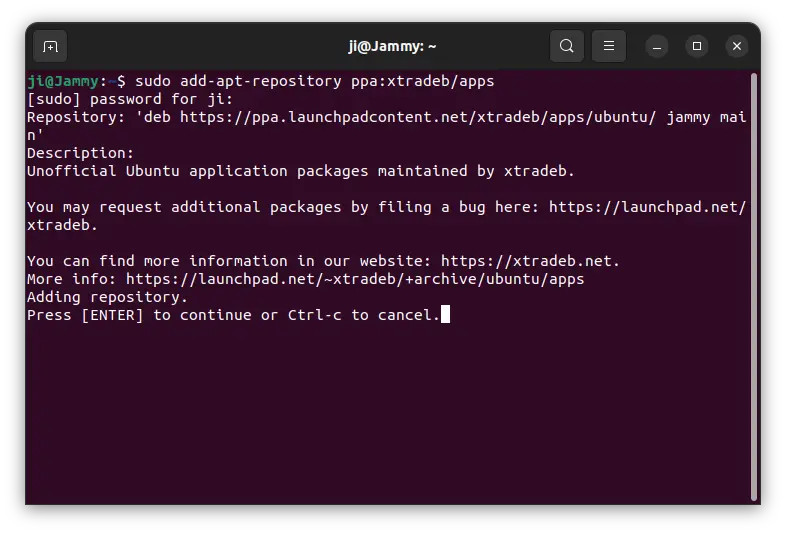
Add the PPA by running command:
sudo add-apt-repository ppa:xtradeb/apps
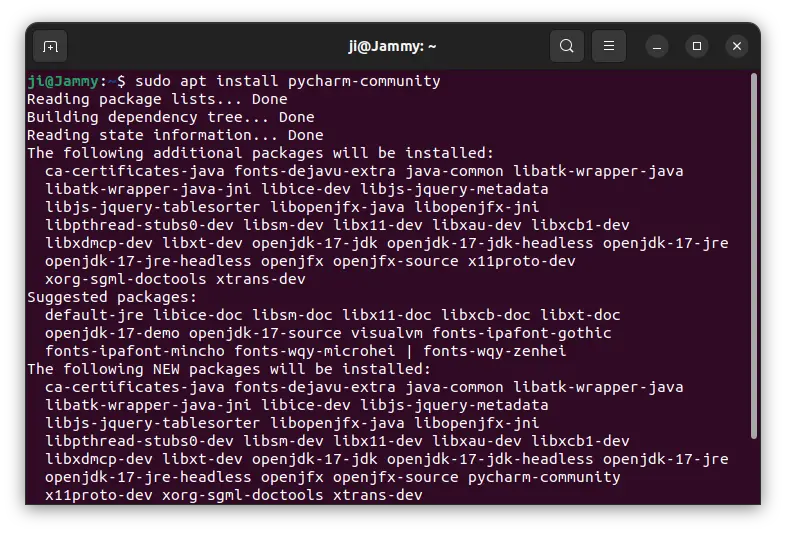
Then install the IDE:
sudo apt install pycharm-community
NOTE: Linux Mint user needs to run sudo apt update after adding PPA to manually refresh system package cache.
Uninstall PyCharm
For the Snap package, just remove it from Ubuntu Software or App Center, or use command:
snap remove --purge pycharm
For the Flatpak package, open terminal (Ctrl+Alt+T) and run command to remove it:
Intellij IDEA is available to install in Ubuntu via different ways. They include:
Snap,
Flatpak,
official tarball,
and Ubuntu PPA.
Choose either one that you prefer.
Method 1: Install Intellij IDEA via Snap package
JetBrains provides official Linux package through both Snap and tarball. Which is super easy to install for Ubuntu users.
The Snap package Features:
Official package by JetBrains.
Run in sandbox environment.
amd64 (x86_64) only.
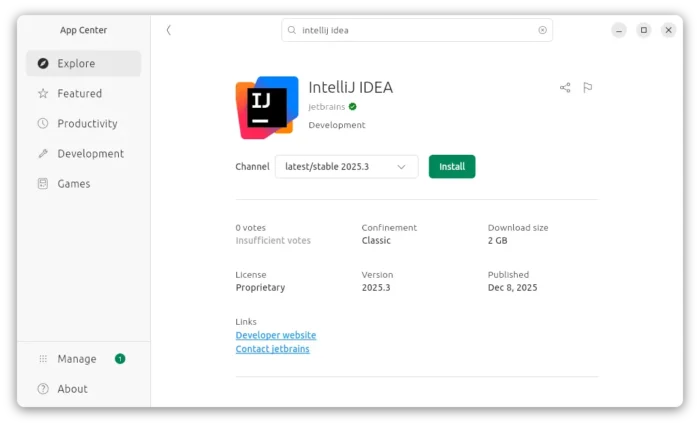
For all current Ubuntu releases, just launch Ubuntu Software (or App Center), then search and install ‘Intellij IDEA’.
For choice, you may press Ctrl+Alt+T on keyboard to open terminal, and run command instead the install the Snap package:
snap install intellij-idea --classic
The snap package installs updates automatically. You can check (and install if any) updates manually by running command:
snap refresh intellij-idea
Method 2: Install Intellij IDEA via Flatpak package (Unofficial)
Another easy way to install the IDE is using Flatpak package. Which works in most Linux, though also run in sandbox environment. The Flatpak package Features:
Community maintained.
Run in sandbox.
amd64 (x86_64) and arm64 support.
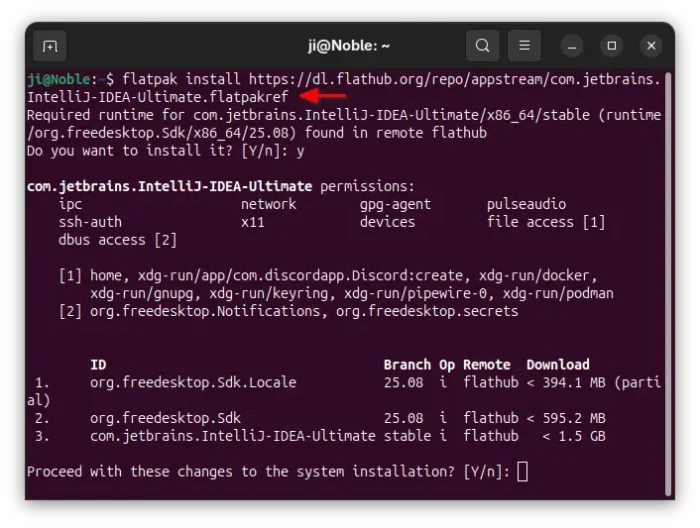
Ubuntu users just need to press Ctrl+Alt+T on keyboard to open terminal. Then run the 2 commands below one by one to install the package.
First, run command to install the Flatpak daemon:
sudo apt install flatpak
Then, run the command below to install IDEA as Flatpak:
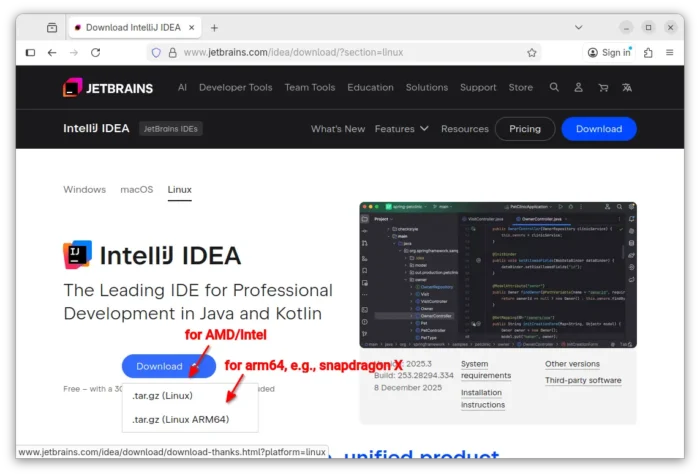
Depends on your CPU architecture type, download either “.tar.gz (Linux)” for AMD/Intel processors, or “.tar.gz (Linux ARM64)” for RasPi or SnapdragonX etc arm64 processors.
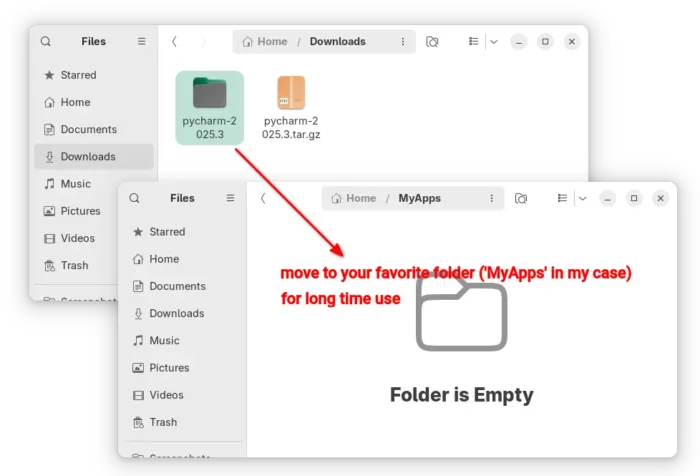
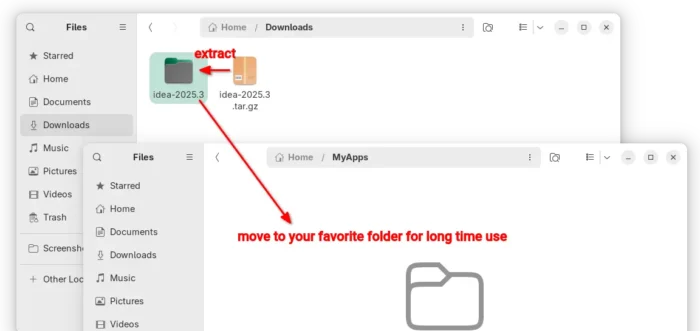
2. After downloaded the tarball, just extract and move the source folder to any location that you want for long time use.
In my case, I created a “MyApps” folder in user home, and put IDEA source folder into it as sub-directory.
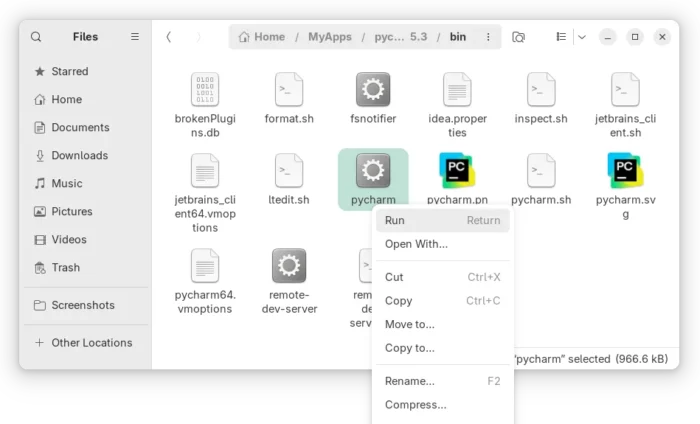
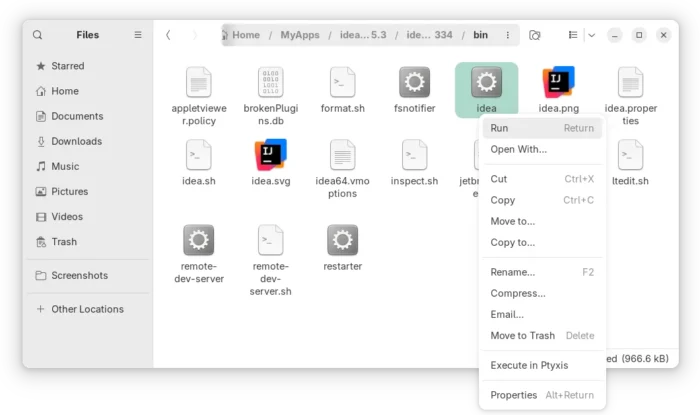
3. Without installation, you can now go to the ‘bin‘ sub-folder, right-click on “idea” and select “Run” to launch the IDE.
4. Create app shortcut, so to launch the IDE from start/application menu.
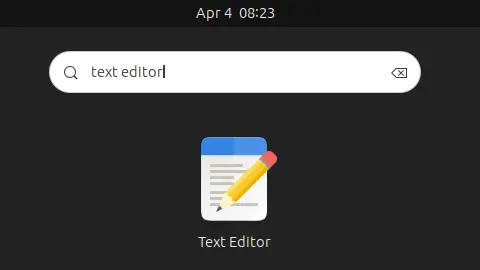
First, launch text editor and create an empty document.
Then, paste the following lines, and replace “/PATH/TO/IDEA” according to where you put the app folder.
[Desktop Entry]
Version=1.0
Type=Application
Name=IntelliJ IDEA
Comment=Develop with pleasure!
Exec=/PATH/TO/IDEA/bin/idea
Icon=/PATH/TO/IDEA/bin/idea.svg
Terminal=false
StartupNotify=true
StartupWMClass=jetbrains-idea
Categories=Development;IDE;Java;
Tips: you may navigate to the ‘bin’ sub-folder of the IDE folder, then press Ctrl+L and copy the path!
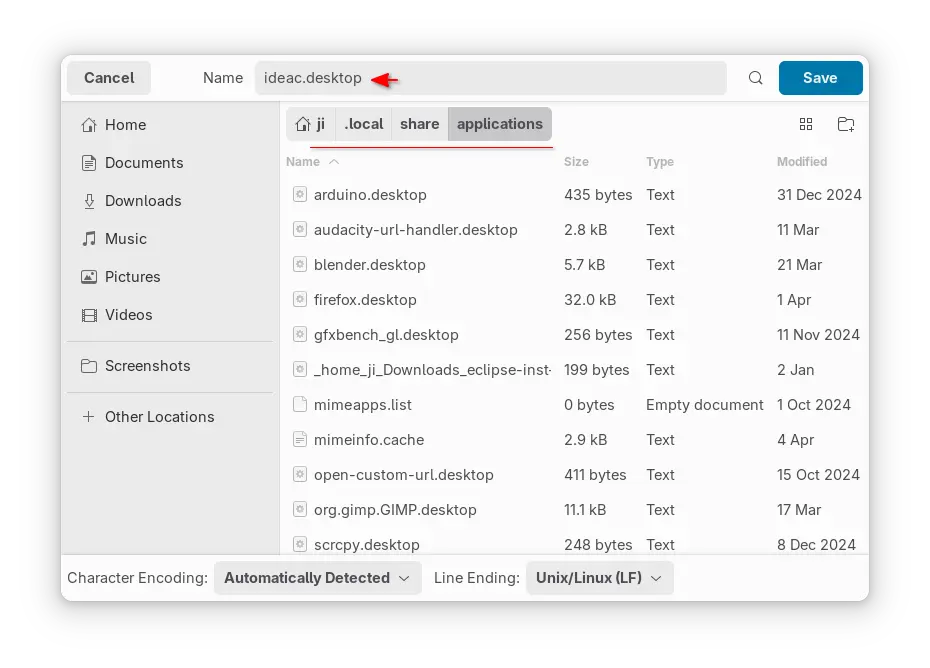
Finally, save the file as custom_file_name.desktop under .local/share/applications directory. NOTE: .local is hidden by default, press Ctrl+H to show it.
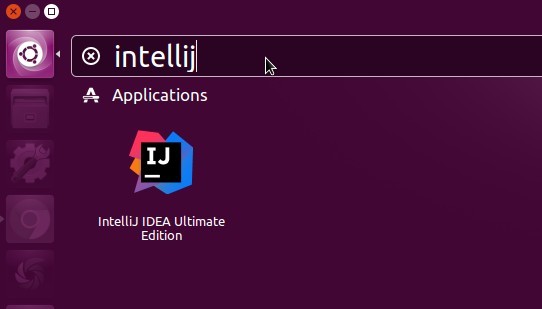
If everything’s done correctly, you can now search for and launch the IDE from app launcher or the overview screen depends on your DE a few moments later:
Method 4: Install IntelliJ IDEA via Ubuntu PPA
NOTE: The PPA package is still at v2025.2 at the moment of writing!
Another choice to avoid Snap and Flatpak, is using an Ubuntu PPA. However, there are only third-party maintained PPAs.
For the xtradeb PPA, so far only support the Community Edition for Ubuntu 24.04 and Ubuntu 25.04 on both amd64 and arm64, use command:
sudo add-apt-repository ppa:xtradeb/apps
For Marcel Kapfer’s PPA, that supports both Community and Ultimate editions for Ubuntu 14.04, 16.04, 18.04, 20.04, 22.04, 24.04, 24.10 on amd64, use command:
sudo add-apt-repository ppa:mmk2410/intellij-idea
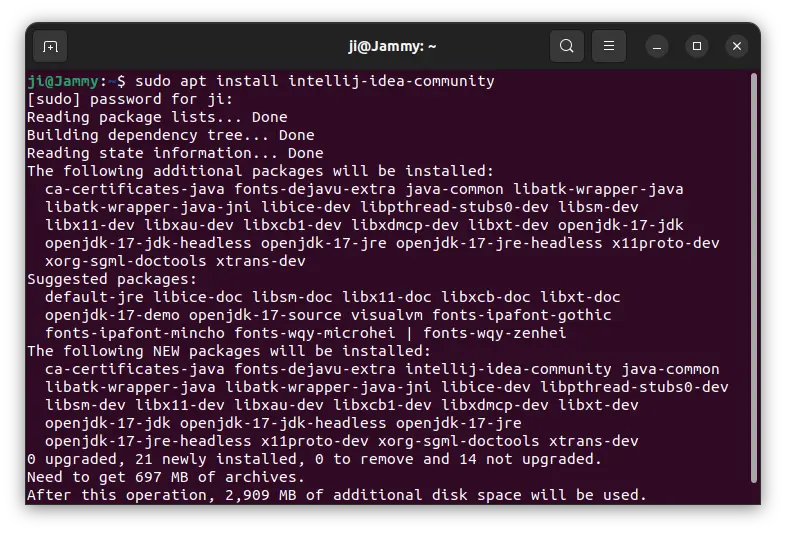
2. Then install the IDE by running command ():
sudo apt install intellij-idea-community
NOTE: Linux Mint user needs to run sudo apt update after adding PPA to manually refresh system package cache.
Uninstall IntelliJ IDEA
For the Snap package, just remove it from Ubuntu Software or App Center.
For the Flatpak package, open terminal (Ctrl+Alt+T) and run command to remove it:
The Bluefish text editor just got a new bug-fix release today!
It’s Bluefish 2.2.14, that fixed crashes when deleting backup files on close, when closing some of the dialogs in flatpak app, and when the CSS language file was loaded on a 32-bit system.
Furthermore, the release fixed zencoding functionality with python3, added option to store the scope of the search dialog to the session or project which was removed in 2.2.12 release. Also, it improves the speed of the bookmarks code.
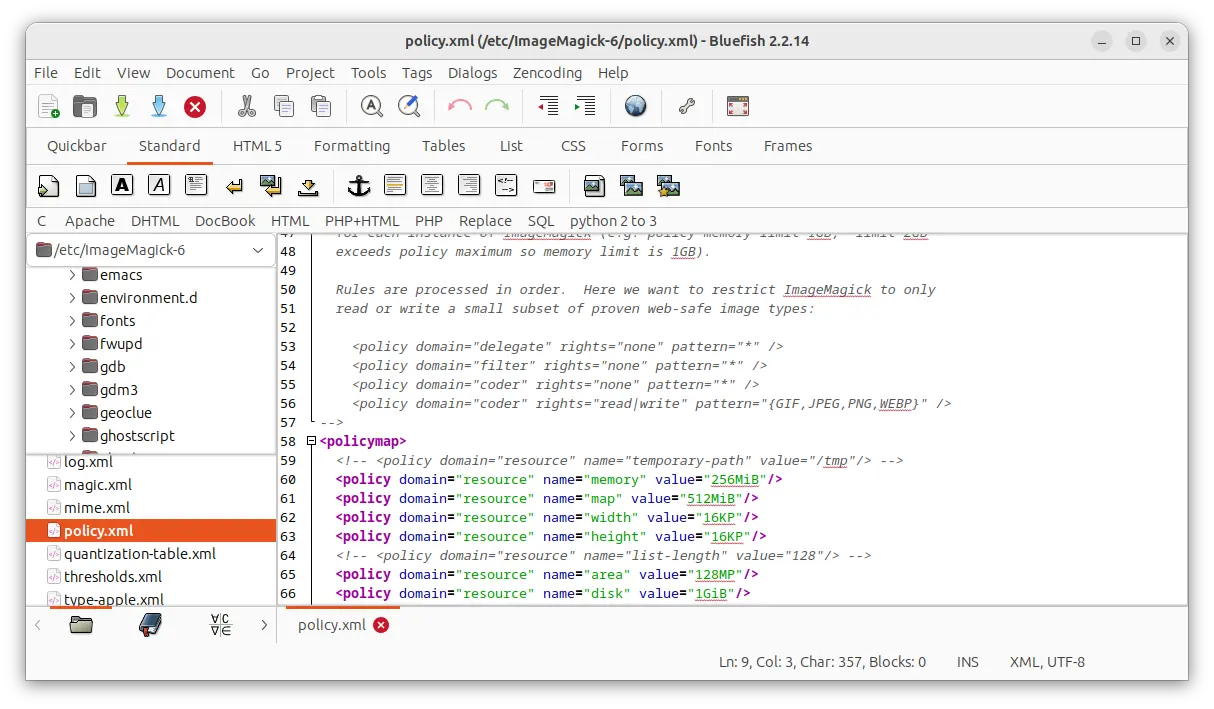
Bluefish 2.2.14
How to Install Bluefish in Ubuntu
Bluefish is available in Ubuntu repository, but always old. For the most recent releases, either use the official Flatpak package, third-party PPA, or build it from source by yourself.
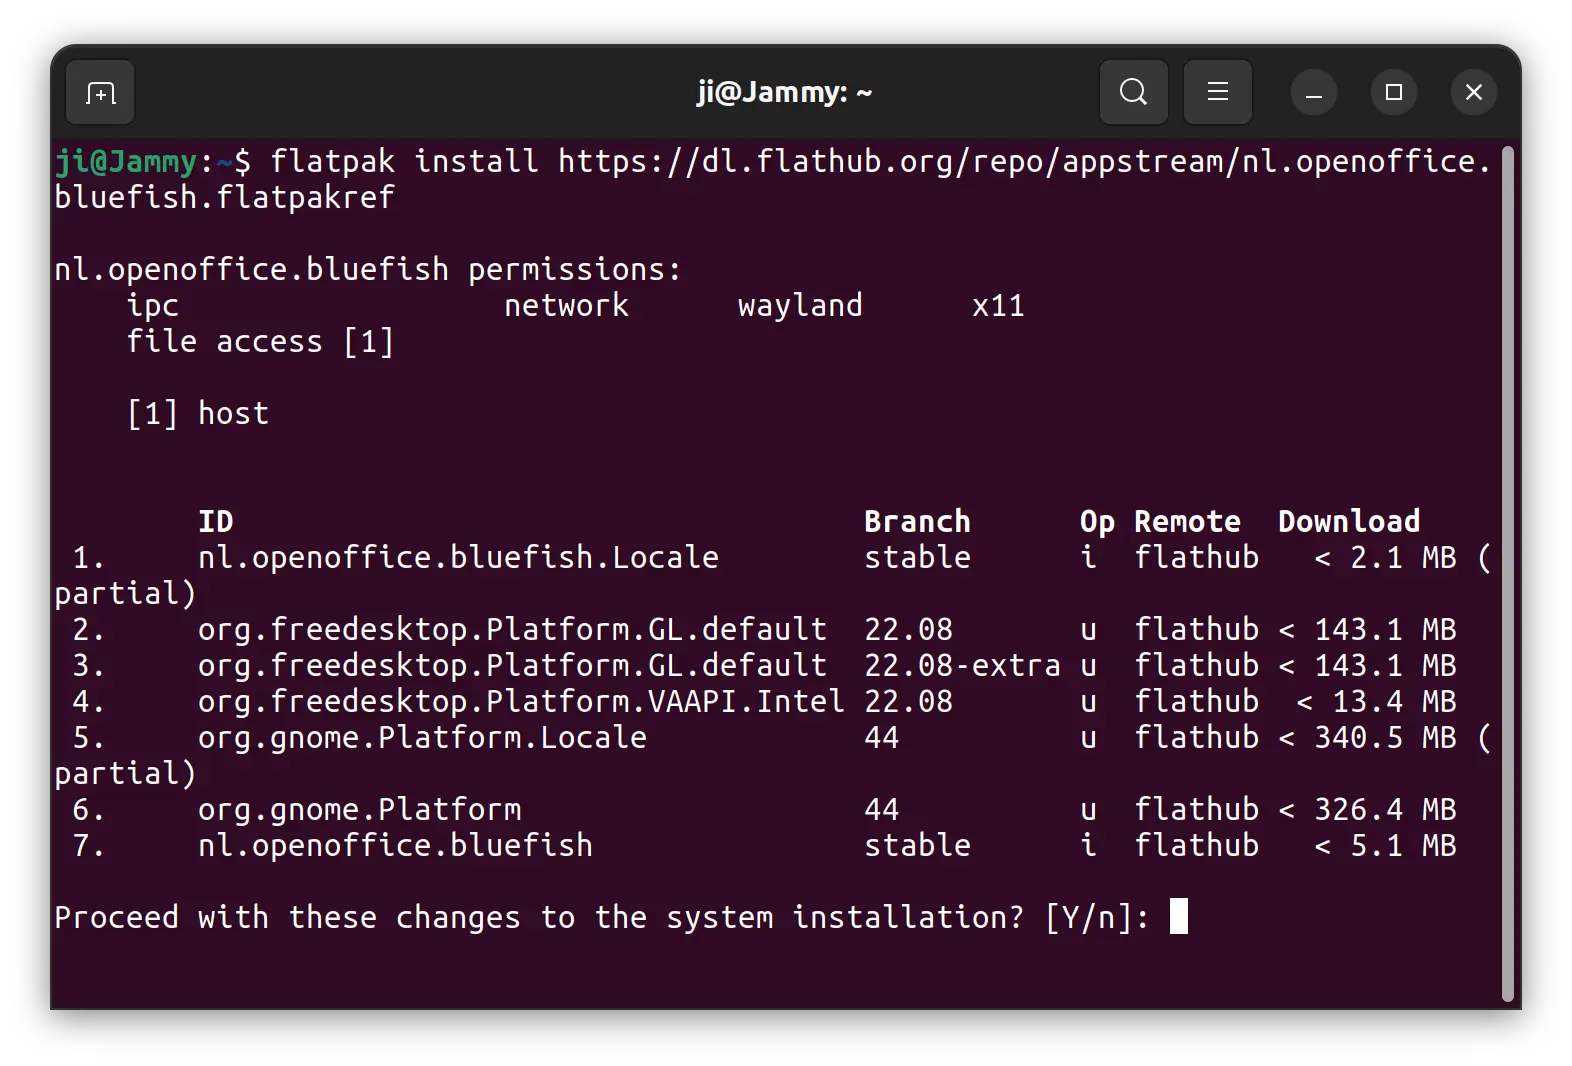
Option 1: Flatpak package
Bluefish provides official package through Flatpak that works in most Linux but runs in sandbox.
Ubuntu user can press Ctrl+Alt+T on keyboard to open terminal, and run the commands below one by one to install the package:
At the moment of writing, the Flatpak package is still v2.2.13. You can run flatpak update nl.openoffice.bluefish to update it when the new package is published.
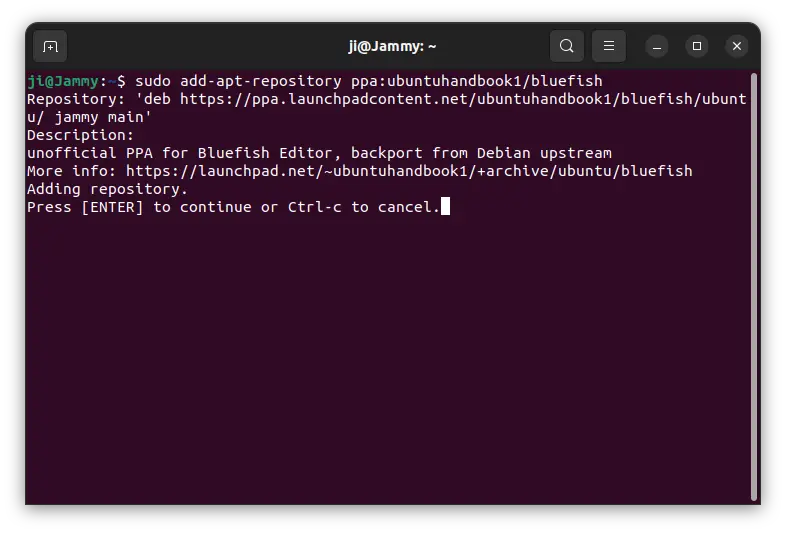
Option 2: Ubuntu PPA (unofficial)
As you can see in the screenshot above, the Flatpak package will install hundred MB of run-time libraries. So, this unofficial PPA is here for choice.
The PPA supports Ubuntu 18.04, Ubuntu 20.04, Ubuntu 22.04, Ubuntu 22.10, Ubuntu 23.04, and their based systems with both x86_64 and arm64/armhf CPU architecture types.
1. First, press Ctrl+Alt+T on keyboard to open terminal. When it opens, run command to add the PPA:
Type user password (no visual feedback) when it asks and hit Enter to continue.
2. For the old Ubuntu 18.04 and Linux Mint users, manually refresh the system package cache by running command:
sudo apt update
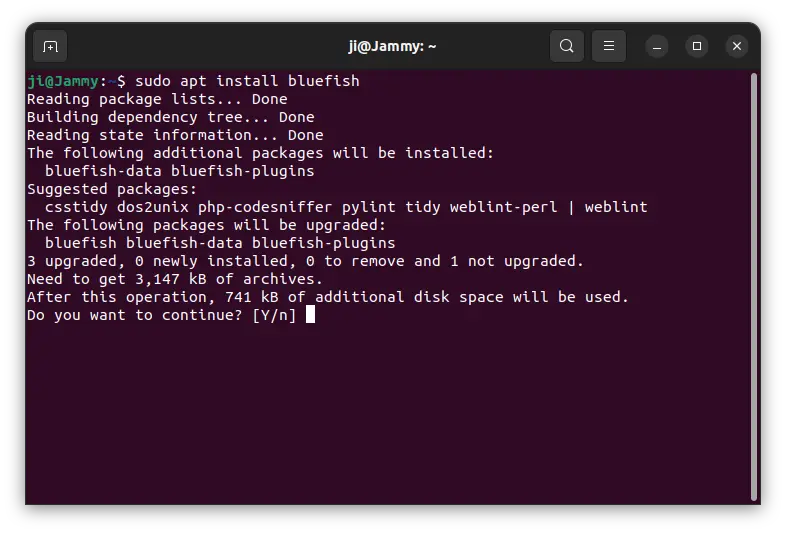
3. Finally, either run command to install the text editor:
sudo apt install bluefish
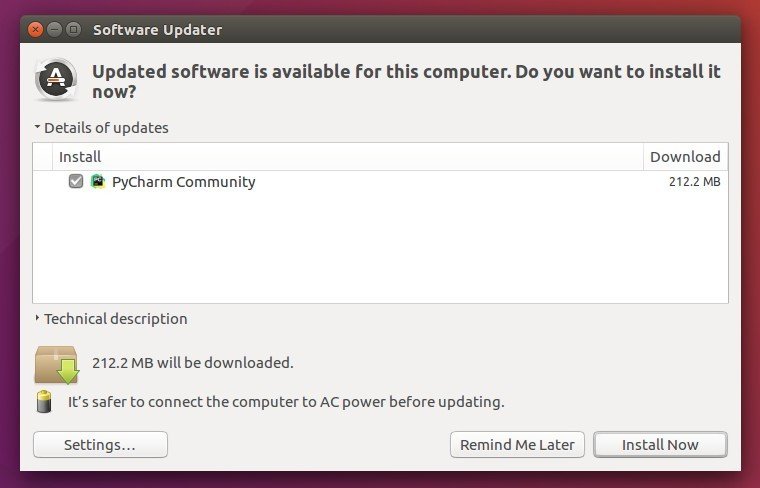
Or, open “Software Updater” and use the tool to upgrade the previous Bluefish package to the latest.
Option 3: Build Bluefish text editor from source
For those who can’t wait, it’s not hard to compile the package from source tarball. And, following steps are tested and work in my case in Ubuntu 23.04.
1. First, open terminal (Ctrl+Alt+T) and run command to install the dependency libraries:
Ability to search, install, and delete Conda packages through the Python Packages tool window
New Settings Sync plugin
export DataFrames in various formats (for professional only)
The Quick Documentation popup now displays the Attributes section of the class docstrings
Support await keyword in the built-in Python Console.
Experimental asyncio support for the debugger.
Vitest support (for professional only)
New project templates for Next.js and Vite (for professional only)
Redis support (for professional only)
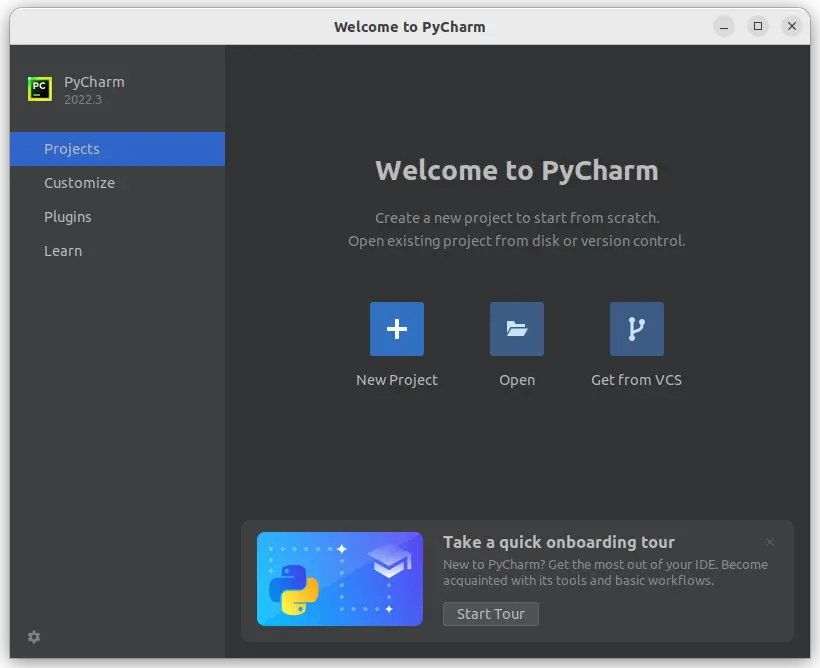
How to Install PyCharm 2022.3 in Ubuntu Linux
There are 3 ways to install the Python IDE in Ubuntu and other Linux: Snap, Flatpak, and portable tarball. Just choose the one that you prefer.
Option 1: PyCharm Snap package
The easiest way to get the IDE is using the official Snap package. It is a containerized software package that run in sandbox, and updates automatically.
For Ubuntu 20.04, Ubuntu 22.04 and higher, simply search for ‘PyCharm’ then install either community or professional edition from Ubuntu Software.
Or, run command in terminal to install the Snap package:
sudo snap install pycharm-community --classic
Replace pycharm-community with pycharm-professional for the professional edition.
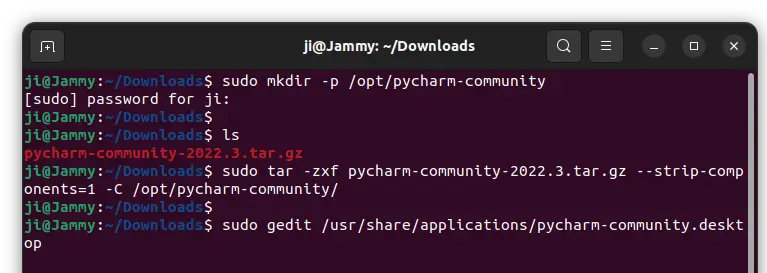
Option 2: PyCharm Portable package (tar.gz)
The website also provides official tar.gz package for downloading at the link below:
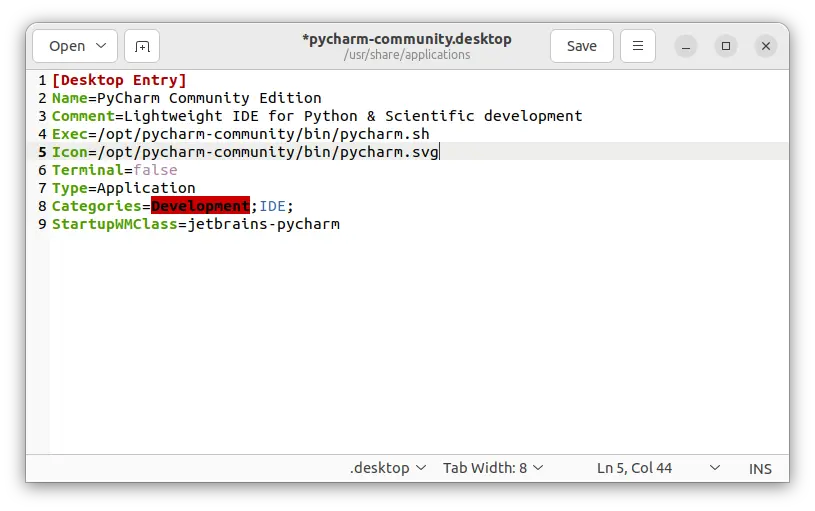
The last command should open an empty text editor window. There paste the lines below and save it.
[Desktop Entry]
Name=PyCharm Community Edition
Comment=Lightweight IDE for Python & Scientific development
Exec=/opt/pycharm-community/bin/pycharm.sh
Icon=/opt/pycharm-community/bin/pycharm.svg
Terminal=false
Type=Application
Categories=Development;IDE;
StartupWMClass=jetbrains-pycharm
After saving the file, you should be able to search for and launch PyCharm IDE from start menu or ‘Activities’ overview, depends on your desktop environment.
Option 3: PyCharm Flatpak
The open-source community also maintains the PyCharm packages as Flatpak package, which is also containerized package runs in sandbox.
First, open terminal by pressing Ctrl+Alt+T keys on keyboard. When it opens, run command to install the daemon package:
sudo apt install flatpak
Next, run command to install PyCharm Community as Flatpak:
This is a step by step guide shows how to install the Lazarus IDE in Ubuntu 18.04, Ubuntu 20.04, Ubuntu 22.04 and their derivatives, e.g., Linux Mint, Elementary OS and more.
Lazarus is a free Delphi compatible cross-platform IDE for rapid application development using the Free Pascal compiler. User may install the project either from Ubuntu repository or by using the official DEB packages.
Lazarus IDE in Ubuntu
Option 1: Install Lazarus via Ubuntu repository:
Ubuntu includes Lazarus in its own repositories, but it does not provide updates for the package. So the package will always be old, though Ubuntu 21.10 has v2.0.12, most recent release at the moment.
The good side is that user may install the package on 64-bit modern PC, old 32-bit PC on Ubuntu 18.04, and/or arm64/armhf devices (e.g., Apple silicon and Raspberry Pi).
To install the package, press Ctrl+Alt+T on keyboard to open terminal. When it opens, paste the command below and hit Enter:
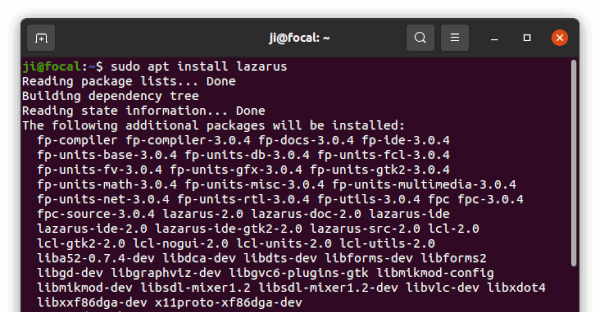
sudo apt install lazarus
This command will install Lazarus, fpc compiler, as well as all other required packages:
Once installed, search for and open the IDE from activities overview and enjoy!
Option 2: Install Lazarus via its official DEB packages:
The IDE provides official Linux packages available to download at the sourceforge.net. You can always get the latest version from the link button below, though it’s only provides packages for modern 64-bit and old 32-bit PC.
fpc-laz – the Compiler, some command line tools, base units and non visual components like database access
fpc-src – the sources of fpc and its packages, needed for code browsing
lazarus-project – the IDE, visual components and help files
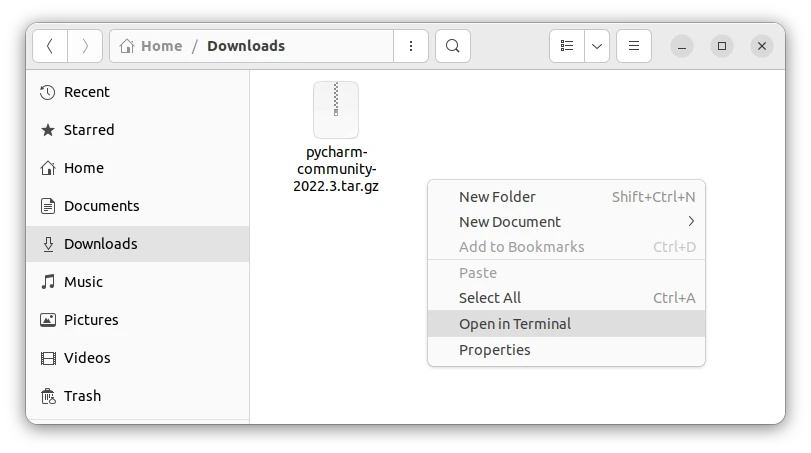
Grab all the 3 packages. Then, open file manager and go to ‘Downloads‘ folder, right-click and choose ‘Open in Terminal‘ to open terminal with that folder as working directory. Finally, run command to install them:
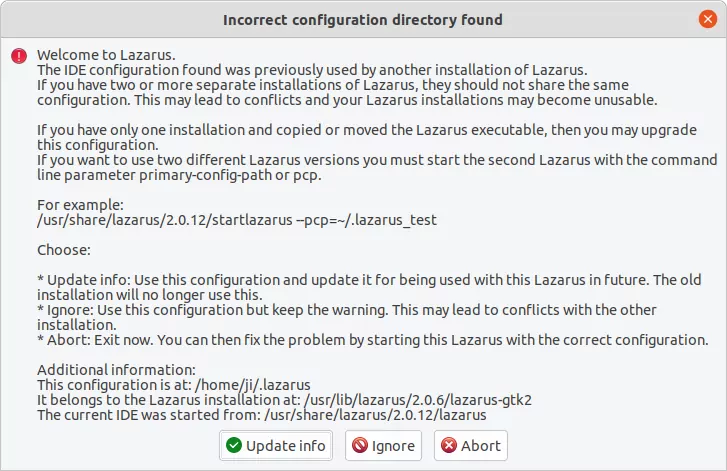
NOTE: the official package conflicts with the one in Ubuntu own repository. Though the IDE supports for having multiple package versions in same system, installing Lazarus via either way in this tutorial will remove another (if any) automatically.
And it will prompt to either upgrade or downgrade configuration when switching between different app versions on first startup.
Uninstall Lazarus:
To remove the Lazarus IDE, run command below in terminal will do the trick for the software installed via both methods.
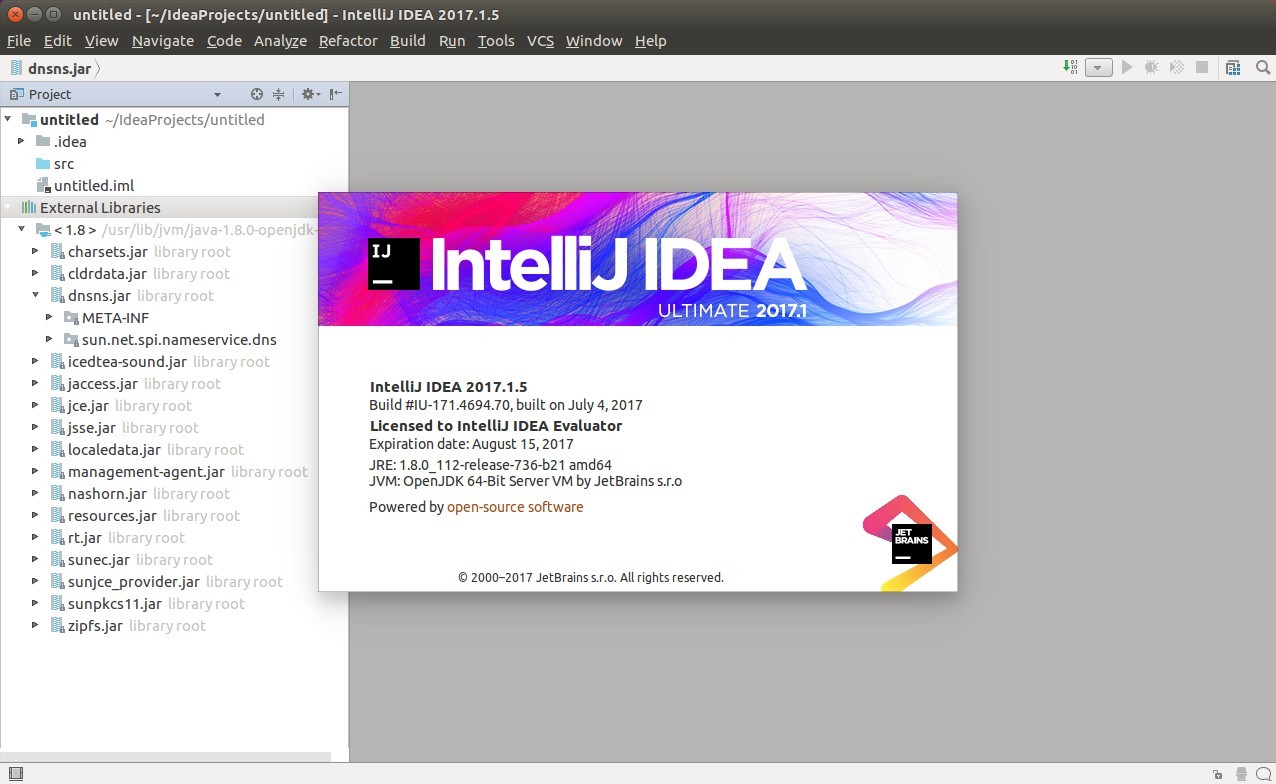
This quick tutorial is going to show you how to install the IntelliJ IDEA IDE, both community and ultimate editions, via PPA in all current Ubuntu releases.
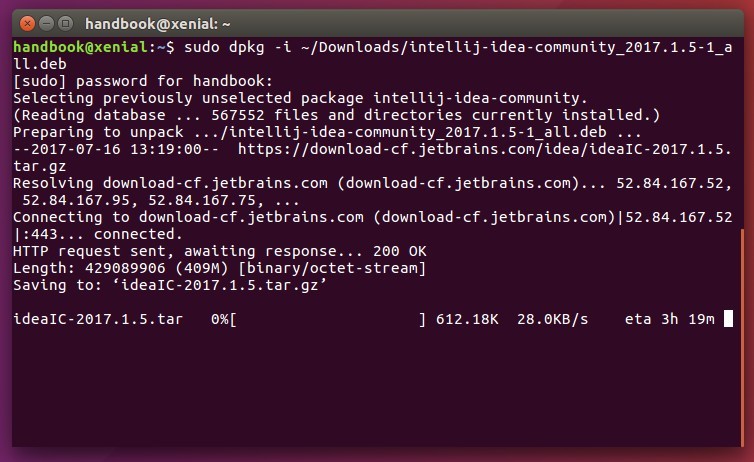
IntelliJ IDEA is a Java IDE developed by JetBrains. So far the latest is version 2017.1.5 that was released more than a week ago with some bug-fixes and performance updates.
While the official Linux binaries lack application launcher integration, Marcel Kapfer made an installer script that automatically downloads the source tarball from JetBrains server, installs it to /opt/, and finally creates an app launcher.
Install the script:
For all current Ubuntu releases, including Ubuntu 14.04, Ubuntu 16.04, Ubuntu 16.10, Ubuntu 17.04, and derivatives, I’ve made the new script into PPA since the original maintainer does not update the latest release at the moment.
The PyCharm Team announced the release of PyCharm 2016.2.2 on August 25. Now it’s available in PPA for upgrade in Ubuntu 16.04, Ubuntu 14.04, Ubuntu 12.04, and derivatives.
The new release fixed several major problems in the debugger and in the code analysis subsystem. It updates bundled JSHint version to 2.9.2, provides better exclude rules for indexing for Node.js, usability, UI, editing performance improvements, and various bug fixes. See the release note for details.
How to install PyCharm 2016.2.2 in Ubuntu / Linux Mint:
Both the professional and community version with Unity menu-bar integration are available in Mystic Mirage’s PPA for Ubuntu 16.04, Ubuntu 14.04, Ubuntu 12.04, and the old Ubuntu 15.10, 15.04.
1. Add the PPA
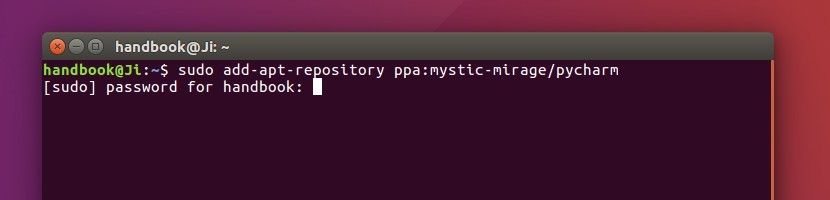
Open terminal (Ctrl+Alt+T) and run command:
sudo add-apt-repository ppa:mystic-mirage/pycharm
2. For those who have a previous release installed, launch Software Updater and upgrade the IDE:
Or install the PyCharm IDE professional via command in terminal:
sudo apt update && sudo apt install pycharm
Replace pycharm with pycharm-community in the code to install the community version.
3. (Optional) To remove PyCharm IDE, simply run command:
sudo apt remove pycharm pycharm-community
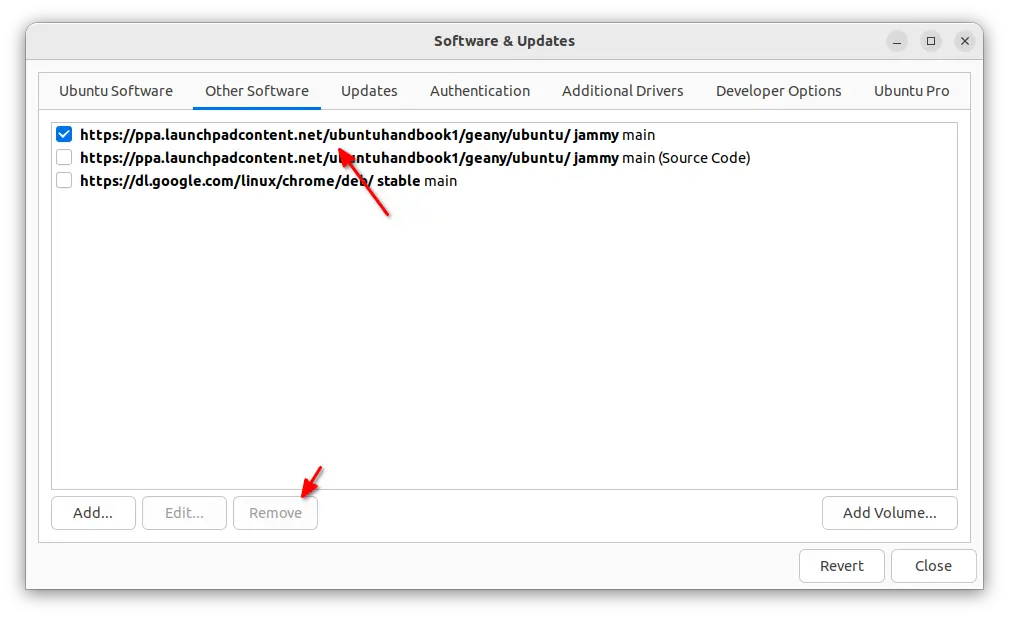
And the PPA repository can be removed via Software & Updates utility (Other Software tab).