![]()

Audacity audio editor and recording tool announced the new major 3.4.0 release after almost 2 weeks of beta testing.
The new release features Beats and measures grid, allows to easily align audio clips to the musical tempo and rhythm. It shows you the subdivisions of each measure depending on zoom level, and you can snap clips to the nearest beat.
It also features new time stretching algorithm, allows to change the duration of your audio clips without affecting their pitch non-destructively. Just hold “Alt” (macOS: Option) while hovering over the top third of a clip edge to stretch it.
The 3.4.0 also features a new export dialog with easier access to options such as sample rate and custom mapping (for 5.1 or 7.1 audio). Additionally, the “Browse” button uses the native file browser now!
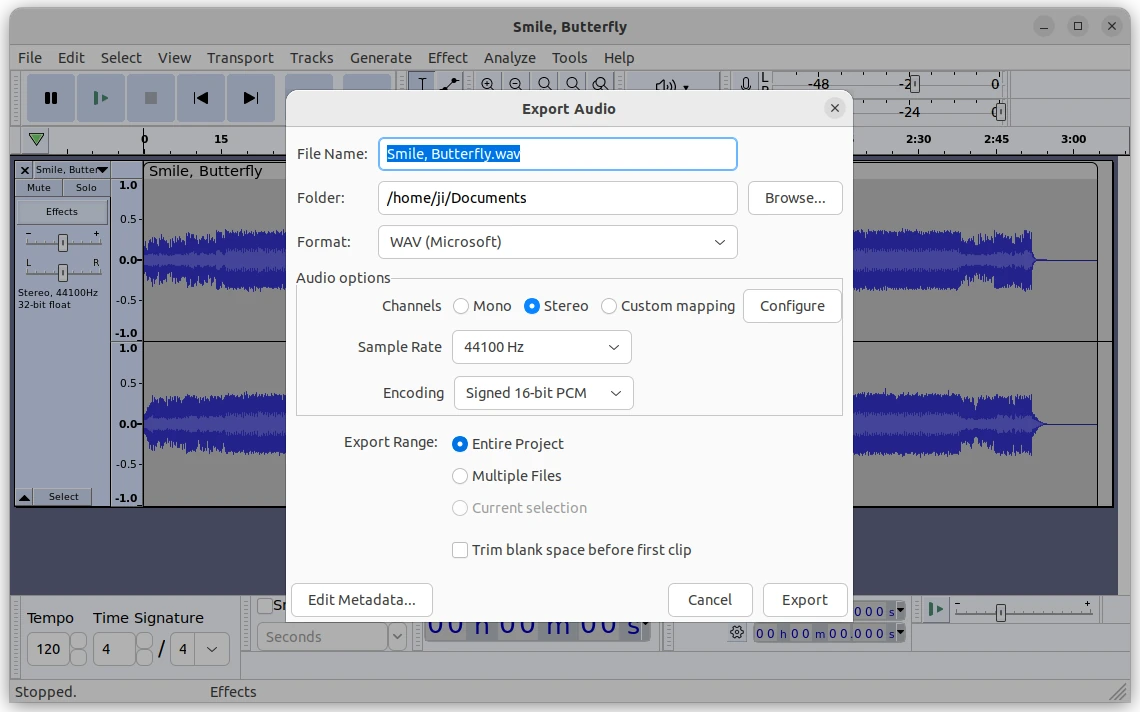
New Export dialog
Other changes include:
- always uses Joint Stereo mode for MP3.
- Simplified pasting logic, and stereo tracks.
- uses Conan 2.
- Built-in Opus support.
- And stability fixes.
- See change-log for more details
How to Install Audacity 3.4.0:
Option 1: AppImage (official)
It provides official macOS .dmg, Windows .exe, and Linux .AppImage packages available to download at the link below:
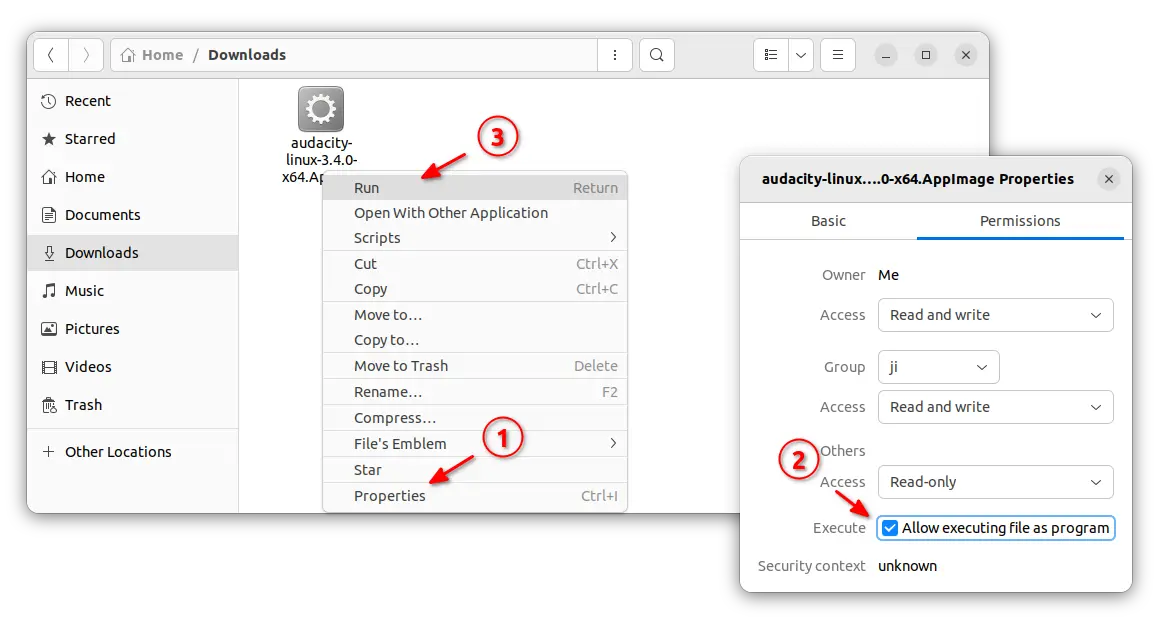
For Linux, click expand the “Assets” section and choose download the .AppImage package.
Then, right-click on the .AppImage file and go to its ‘Properties’ dialog. Add executable permission by enable ‘allow executing file as program‘. Finally, right-click on it and select “Run” to launch Audacity.
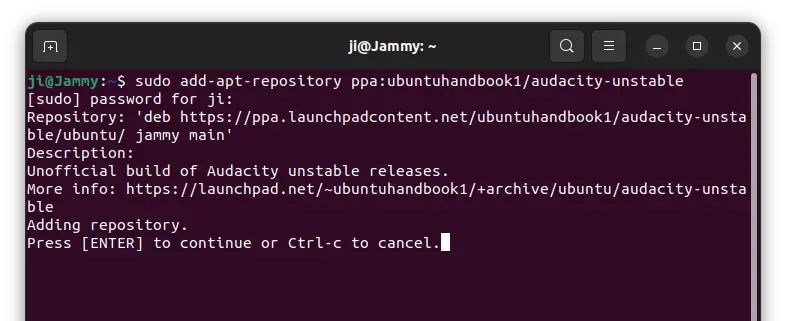
Option 2: Ubuntu PPA
For choice, I’ve uploaded the new release package into unofficial PPA for Ubuntu 22.04, 23.04, and Ubuntu 23.10.
NOTE: Due to bug, arm64 and armhf packages are excluded in the PPA until the bug-fix due in next point release.
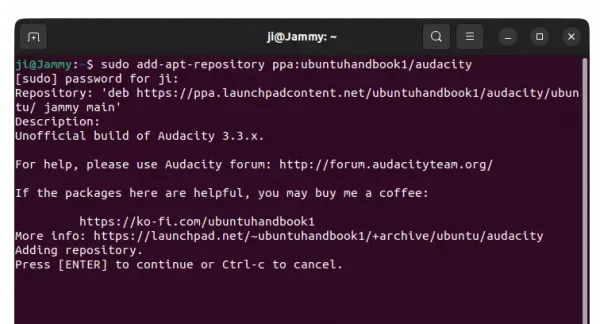
1. First, press Ctrl+Alt+T on keyboard to open terminal. When terminal opens, run command to add the PPA:
sudo add-apt-repository ppa:ubuntuhandbook1/audacity
Type user password (no asterisk feedback) when it asks and hit Enter to continue.

2. For Linux Mint users, you may manually update system package cache by running command:
sudo apt update
3. Finally, install Audacity 3.4.0 either by running the command below in terminal:
sudo apt install audacity audacity-data
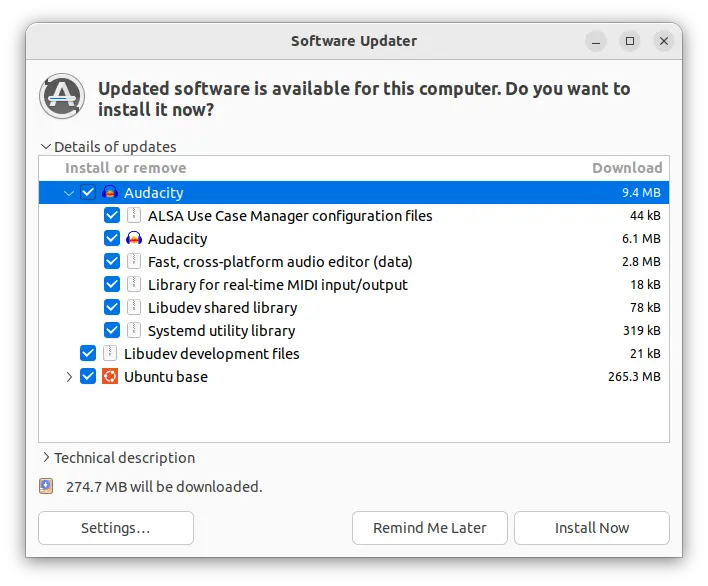
Or, launch ‘Software Updater’ to update from an existing version:
Option 3: AppImage
Audacity is also available to install as universal Flatpak package, that run in sandbox.
However, it’s not updated to v3.4.0 at the moment of writing, see this page for details.
Uninstall:
To uninstall Audacity 3.4.0, you have 2 choices:
- Purge the Ubuntu PPA, which also downgrade the installed packages to the stock versions in your system:
sudo apt install ppa-purge && sudo ppa-purge ppa:ubuntuhandbook1/audacity
- Or, remove Audacity package by running command:
sudo apt remove --autoremove audacity audacity-data
Then, remove the Ubuntu PPA via command:
sudo add-apt-repository --remove ppa:ubuntuhandbook1/audacity