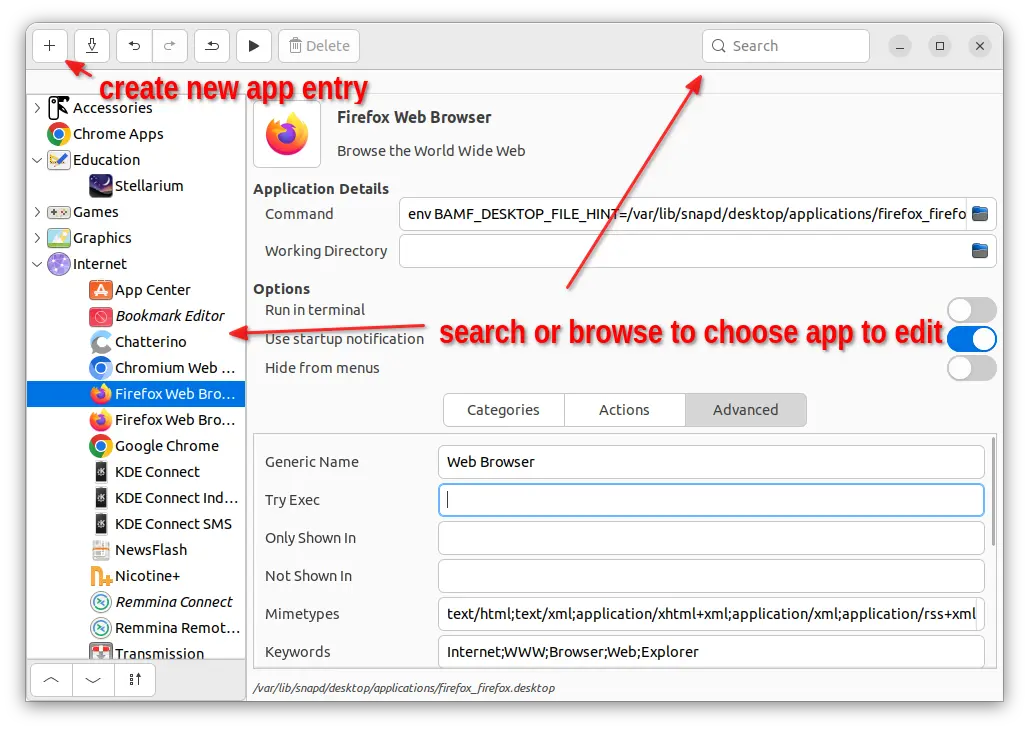
Need a tool to edit your apps in the start menu, main menu, or Gnome overview search results? Try MenuLibre!
In most Linux, all app icons you see in start menu, dock launcher, and the desktop, are handled by .desktop config files. By editing the file, you can change the app icon, name, hide the app, add right-click menu option, and choose which file types to be associated with.
For graphical ways, there are quite a few apps to do the job, and here are 3 of them:
Arronax – well known, but seems not being updated. Though, it’s still working.
AppEditor – Elementary OS style tool to edit desktop menu entries. However, lacks pre-build packages.
MenuLibre – the one I’m going to introduce in this tutorial.
MenuLibre is an advanced tool written in Python and GTK3 toolkit. With it, user can get started by either searching or browsing in left to select app to edit, or click “+” in top left to create new menu entry for your app.
Don’t remember how many tools, I’ve written about, for monitoring CPU, RAM, Network, and other system resources usage in Ubuntu. But, there’s a brand-new for GNOME, the default desktop environment.
It’s Astra Monitor, a free open-source tool provides highly customizable interface on Gnome top-panel, to monitor CPU, GPU, RAM memory, disk storage, network usage, as well as hardware temperature, voltage, and fan speed.
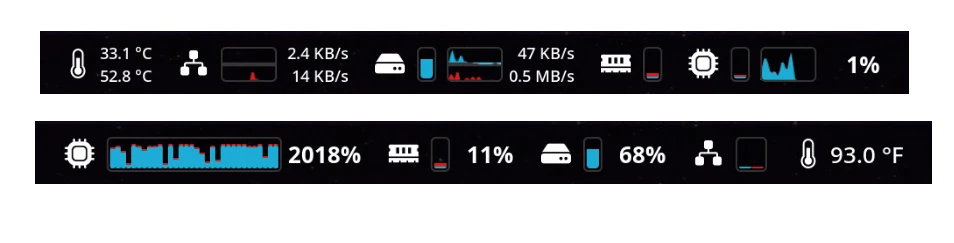
It supports displaying the data in real-time bar, history graph, percentage number, with user selected order, in left, center, or right corner of panel.
Aster Monitor on GNOME Panel
Besides having quick glance at system resource usage, user can also click on the indicator icon to pop-up a rich drop-down menu with detailed information. By moving cursor over the menu can also display even more about the hardware, resource load, processes, and so forth. Continue Reading…
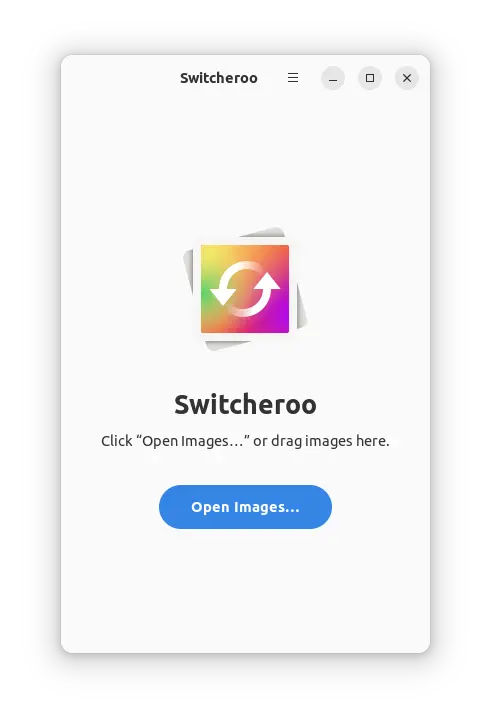
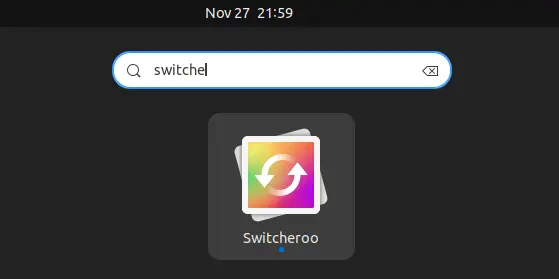
Looking for app to convert your photo images into other formats? Try Switcheroo.
For batch image processing, I’d recommend to use Converseen. However, stupid simple applications are always good choices for beginners.
And, Switcheroo is one stupid simple app for converting photo images, while having modern look and feel in today’s Linux desktop.
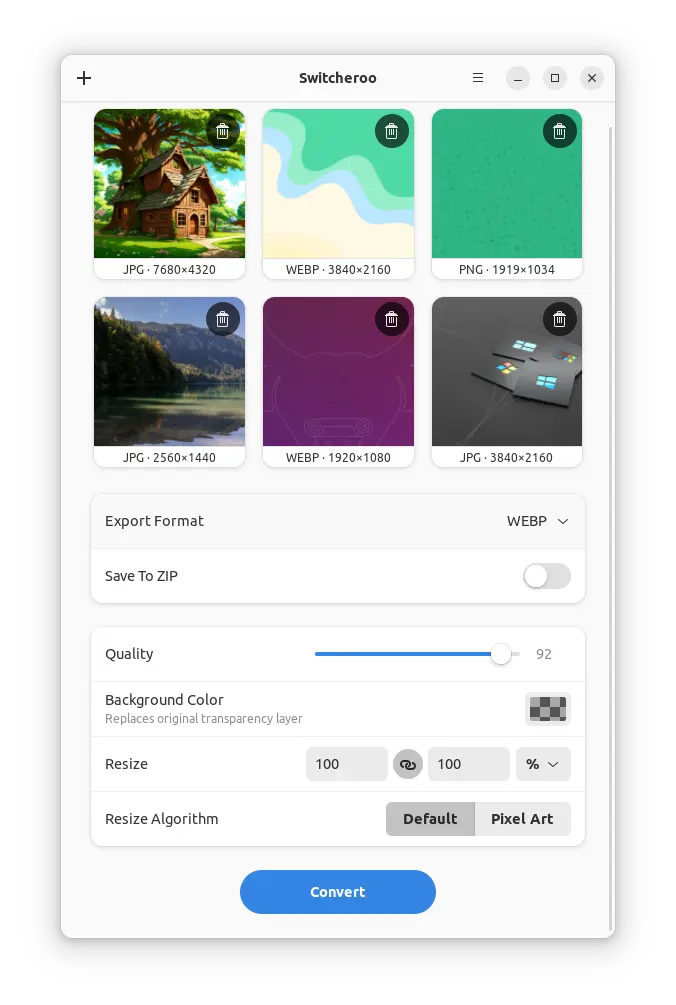
Click ‘Open Images’ or drag’n’drop files into app window
With it, just click “Open Images” button and choose your image file/files, or drag and drop files into the app window to open them.
It shows thumbnail preview of all opened images, along with delete buttons in top-right for each images.
By using top-left ‘+’ button, user can add more images (Tips: hold Ctrl or Shift can select multiple files). And, ‘≡’ menu even provides an option to paste images from clipboard.
After opening all your photo images, click the drop-down box in the right of “Export Format” to select which file format to convert to.
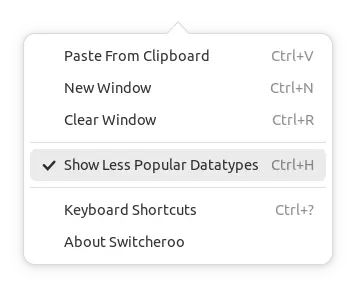
At the moment of writing, it support converting image to PNG, JPG, WEBP, HEIF, HEIC, BMP, AVIF, JXL, TIFF, PDF, GIF. Though, you have to either use top-right hamburger menu or press Ctrl + H to show less popular file types.
The app’s hamburger menu
Before clicking ‘Convert’, it provides few more options, such as set background color, resize with or without aspect ratio, and change image quality. There’s also “Save To Zip” to directly output images into ZIP archive.
Instead of providing an in-app option, it pops-up file chooser dialog asks to choose where to save output images or ZIP archive, once clicking “Convert” button.
How to Install Switcheroo Image Converter
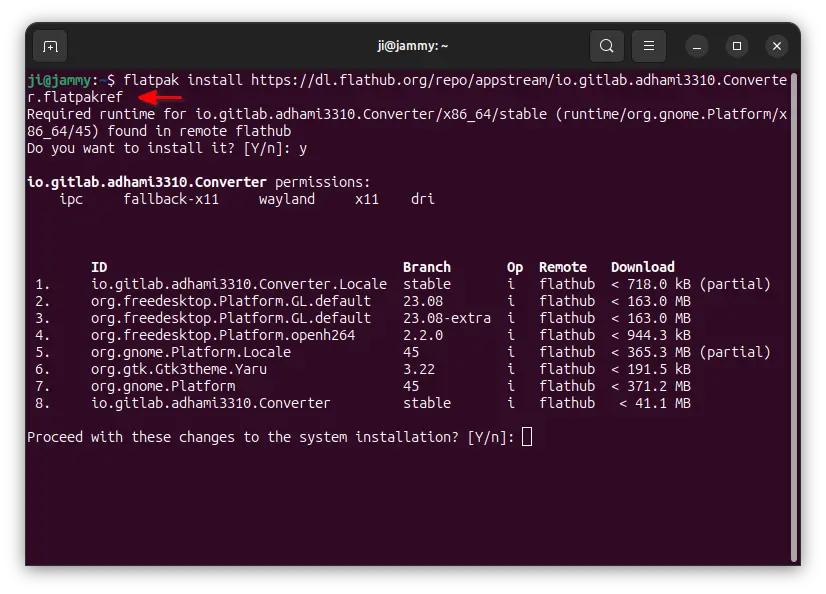
The app is available as universal Flatpak package, that can be installed in Ubuntu, Debian, Fedora, Arch, Chrome OS, and most other Linux, even including the mobile device, such as PinePhone.
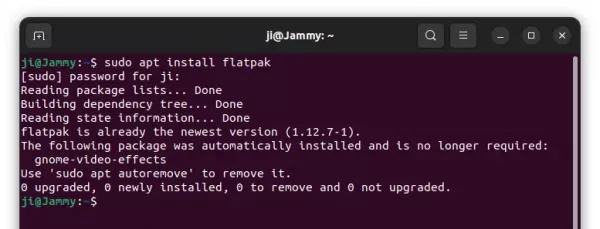
1. First, press Ctrl+Alt+T on keyboard to open terminal. When it opens, run command to install the Flatpak daemon:
sudo apt install flatpak
Other Linux can follow the official setup guide to get Flatpak support.
2. Then, run command to install the app as flatpak:
As you see in the screenshot, the downside is that a small app can have 1 GB downloading due to run-time libraries (though shared).
3. Once installed, search for and launch it from your system application launcher, start menu, or ‘Activities’ overview depends on desktop environment.
First time installing Flatpak app needs a log out and back in, to make app icon visible.
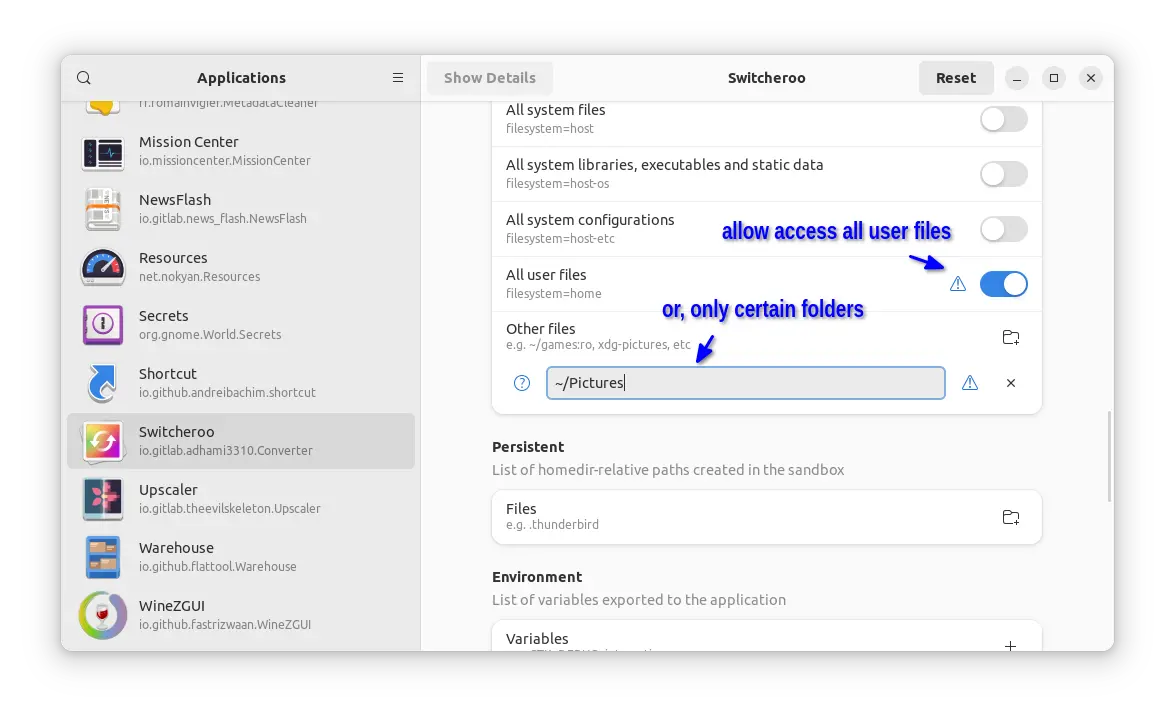
4. To enable drag’n’drop support, you need to grant access permission to the folders that contain the photo images.
To do so, install Flatseal, then use it to allow access either all user files or certain folders (by adding Other files).
Uninstall Switcheroo
To uninstall the image converting application, also open terminal (Ctrl+Alt+T), then run command:
For Linux desktop user who want to access German-language public broadcasting live streams and archives, this can do the job for you.
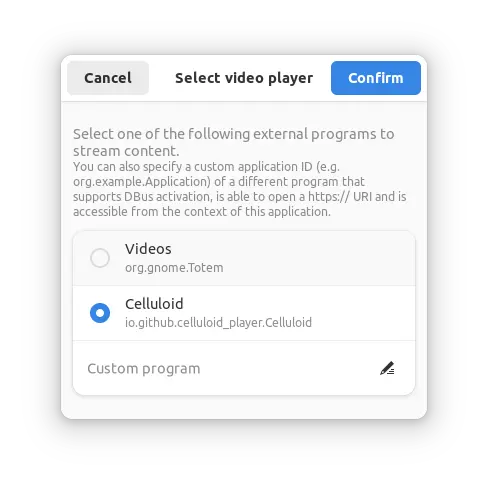
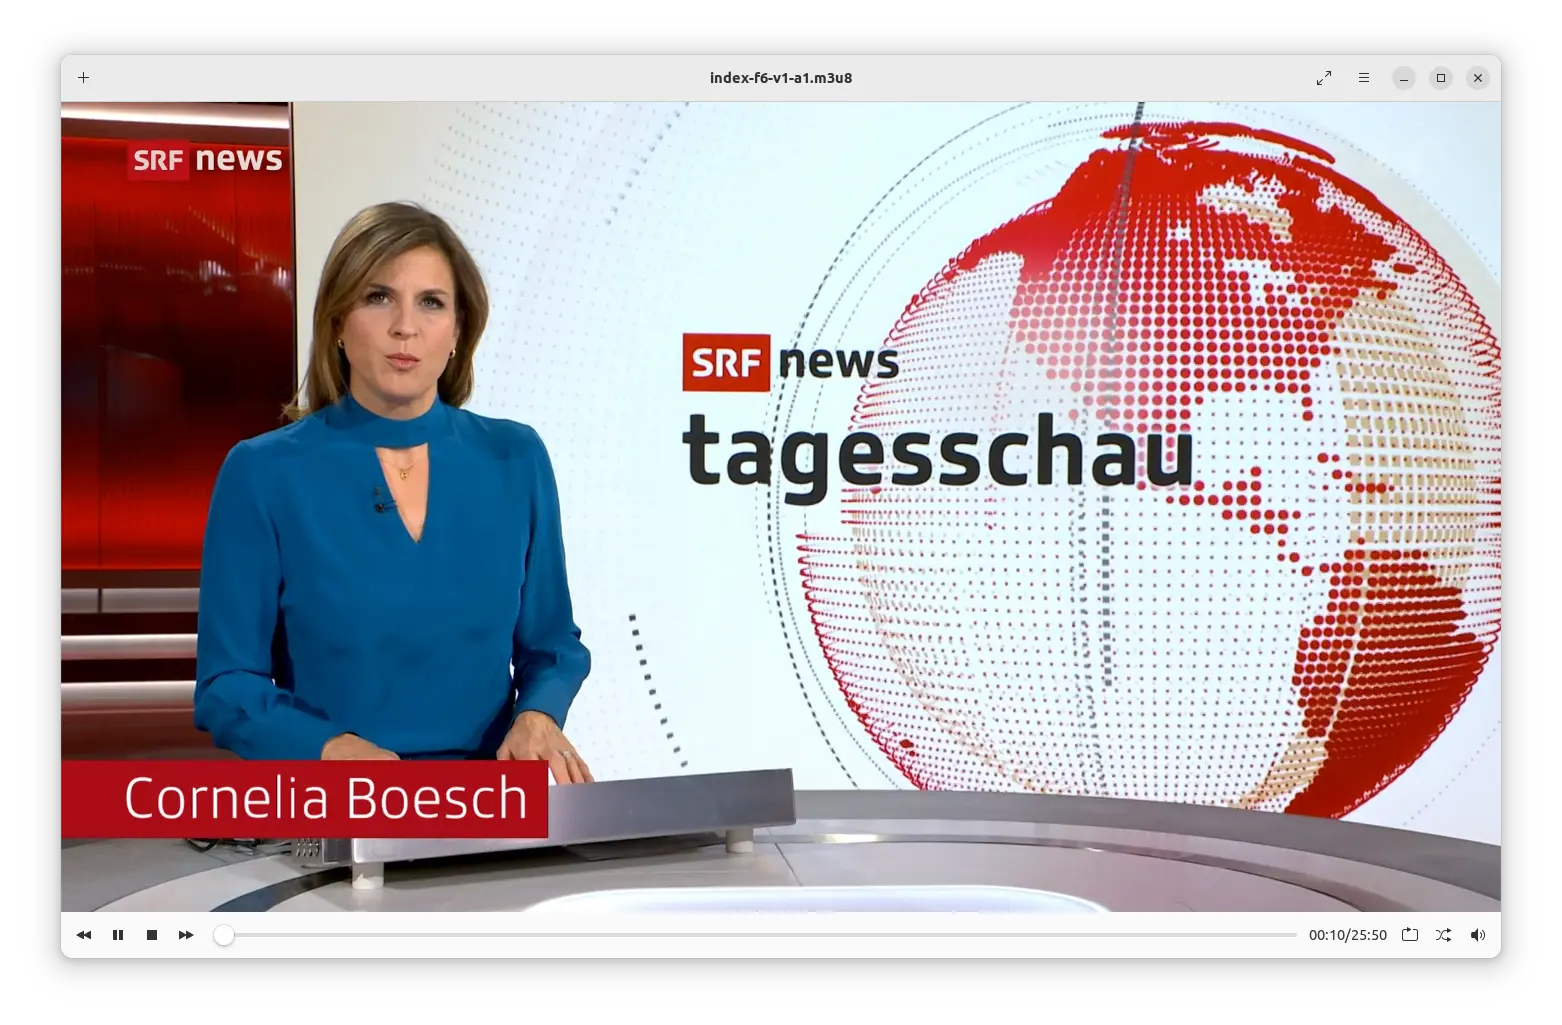
It’s televido (“Television” in Esperanto), a free and open-source tool, allowing to livestream, search, play and download media from German-language public television services. Though, ORF (Austrian TV) & SRF (Swiss TV) are also supported.
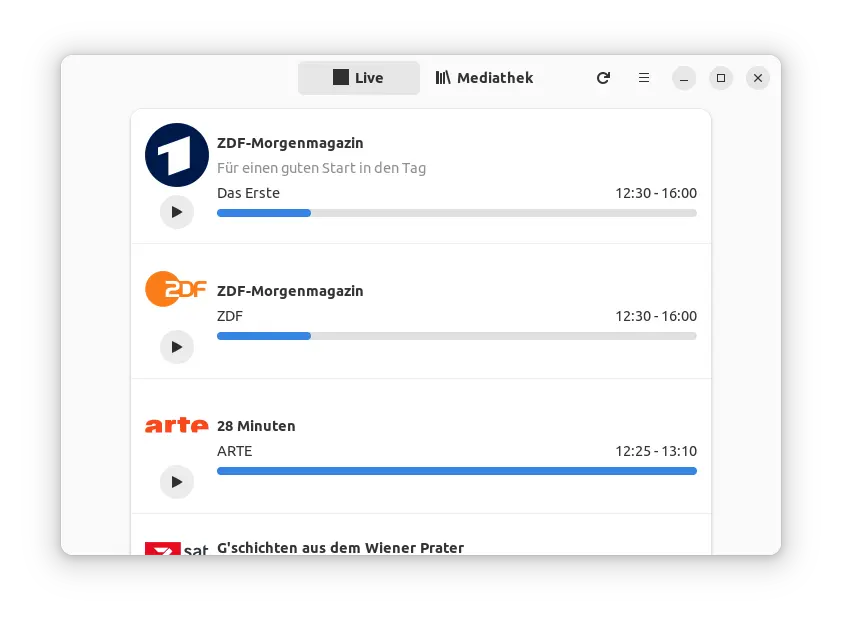
The app is written in Rust programming language, and use GTK4 for its modern user interface. It has ‘Live’ tab for live TV shows, such as ZDF-Morgenmagazin, 28 Minuten, and more.
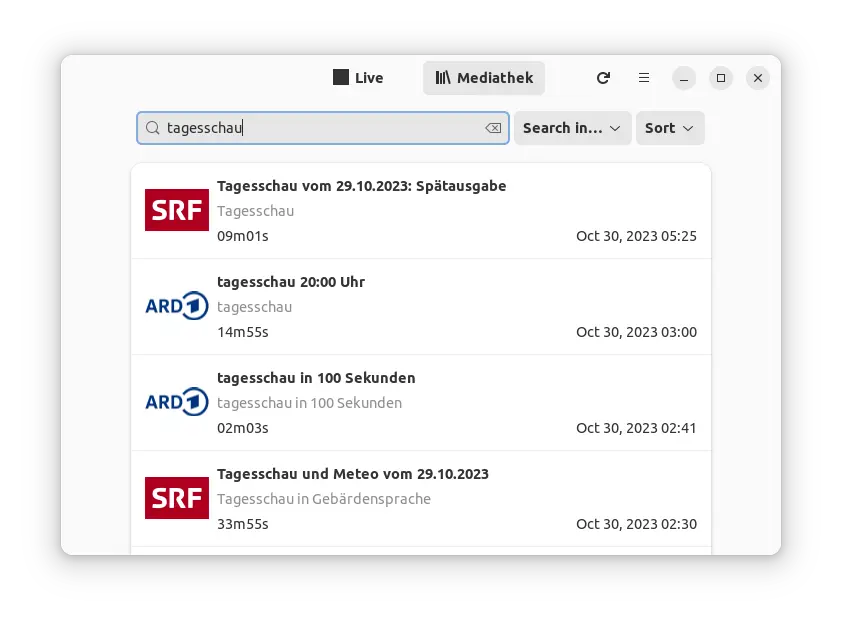
And, allows to search, play, and download media via ‘Mediathek’ tab.
The application only find and access TV shows with the power of MediathekViewWeb’s API and the Zapp backend API. The media playback is done by external video players installed on your system. So far, it supports GNOME Videos (Totem), Celluloid, Clapper, Daikhan.
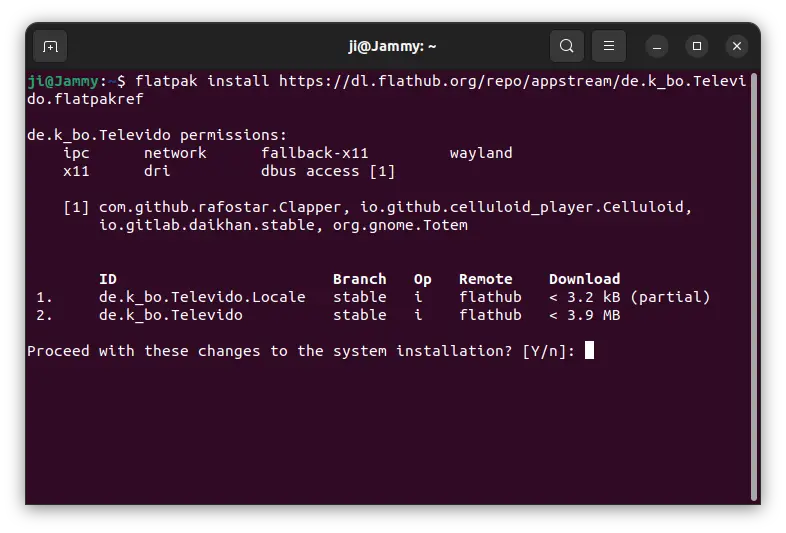
How to install Televido in Ubuntu & Other Linux
Televido is easy to install in most Linux desktop through the Flatpak package.
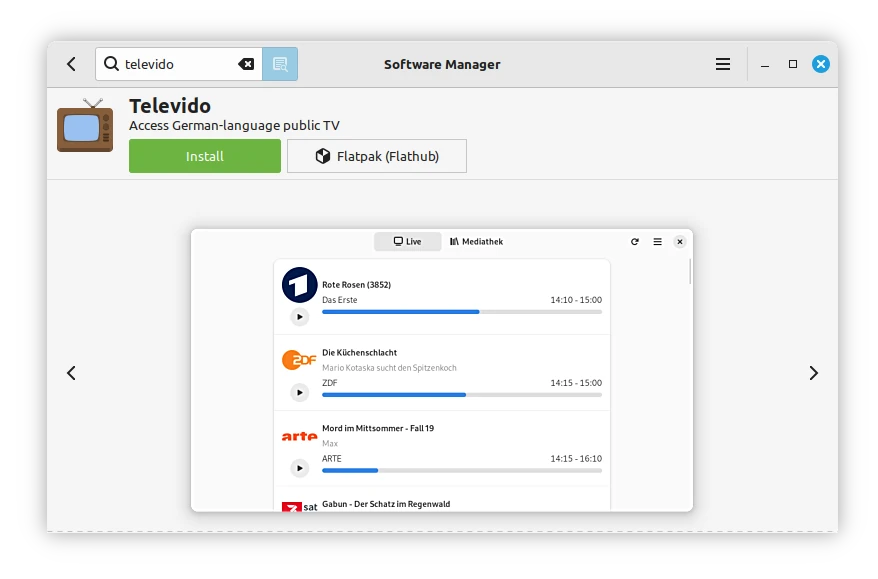
For Linux Mint 21 and Fedora 38 + (with 3rd party repositories enabled), simply search for and install it directly from either Software Manager or Gnome Software.
Install Televido from Linux Mint software manager
For other Linux, follow the steps below one by one to install the app as Flatpak package:
First, launch terminal from start menu or ‘Activities’ overview depends on your desktop environment.
Then, follow the setup guide to enable Flatpak support.
For Debian and Ubuntu based systems, just run command:
sudo apt install flatpak
Finally, install the app as Flatpak package by running the command below in terminal:
Tips: First time installing Flatpak app may have lots of download for run-time libraries, and user needs to log out and back in to make app icon visible.
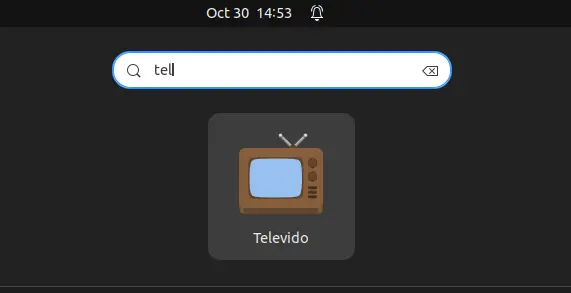
Once installed, search for and launch the app either from start menu or ‘Activities’ overview depends on your desktop environment.
Uninstall
To remove the software package, also launch terminal and run command:
flatpak uninstall --delete-data de.k_bo.Televido
Also run flatpak uninstall --unused to remove useless run-times to free up some disk spaces.
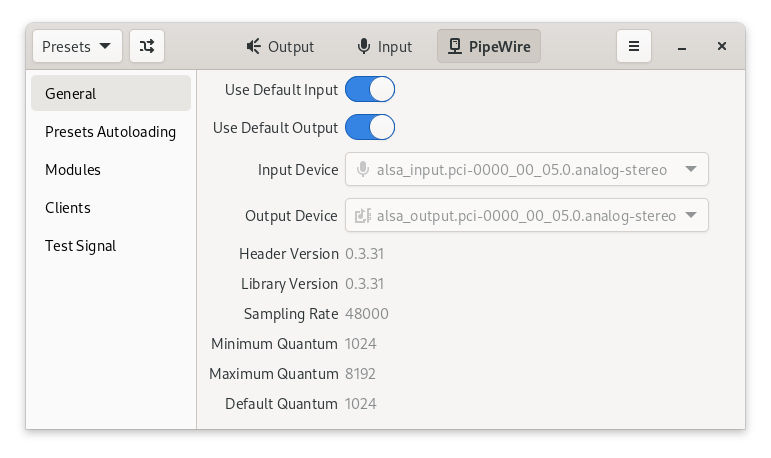
The popular audio manipulation tool, PulseEffects, finally adds supports for PipeWire sound server by re-naming to EasyEffects.
EasyEffects is a GTK4 (switched to Qt since version 8.0) app designed for only PipeWire sound server. For PulseAudio, default sound service in current Ubuntu releases, PulseEffects is still available.
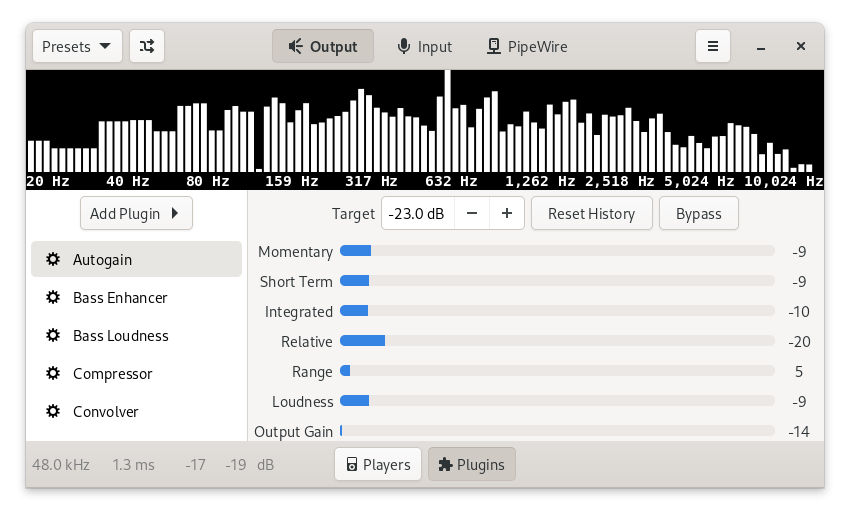
The UI looks almost same as before, and it may apply effects including Auto gain, Bass enhancer, Bass loudness, Compressor, Convolver, Crossfeed, Crystalizer, De-esser, Echo Canceller, Equalizer, Exciter, Expander, Filter, Gate, Limiter, Loudness, Maximizer, Multiband compressor, Multiband gate, Noise reduction, Pitch, Reverberation, Stereo tools.
Besides manipulating sound output, it may also apply effects to an input device, such as a microphone. This is, for example, useful in audio recording, but it also works well during voice conversations.
The PipeWire tab contains the options to select input & output devices, edit presets, and test signal.
How to Install EasyEffects in Ubuntu Linux:
The tool has been made into official repositories for Arch Linux, Gentoo, openSUSE and NixOS. Since Ubuntu sticks to PulseAudio, you install EasyEffects only when PipeWire is present as sound server (Read this tutorial for more).
UPDATE July 2023: For Ubuntu 23.04 +, EasyEffects has been made into the official repositories. So, either search for and install it from Ubuntu Software.
or press ‘Ctrl+Alt+T’ to open terminal and run command below to install it:
sudo apt install easyeffects
For Ubuntu 20.04 and Ubuntu 22.04, do following steps to install the app as Flatpak package:
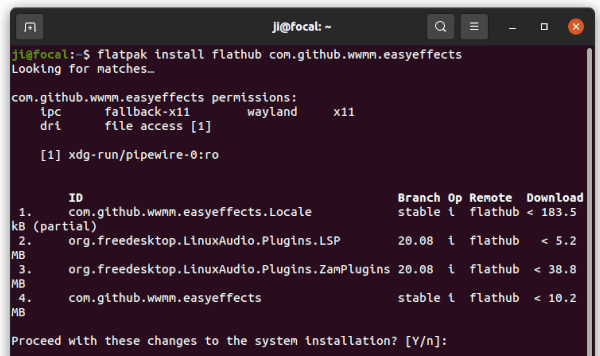
1.) EasyEffects so far is only available as Flatpak package. Firstly, search for and open terminal either from the Activities overview screen or by pressing Ctrl+Alt+T on keyboard. When it opens, run command to install the flatpak daemon first if you don’t have it:
sudo apt install flatpak
2.) Next add the flathub.org repository, the place hosts a large amount of Flatpak apps by running command in terminal:
If everything goes well, you may either launch it by searching for and opening from the overview screen, or run flatpak run com.github.wwmm.easyeffects command to start it from terminal.
Uninstall EasyEffects:
To remove the tool, open terminal, copy and paste the single command below and hit run:
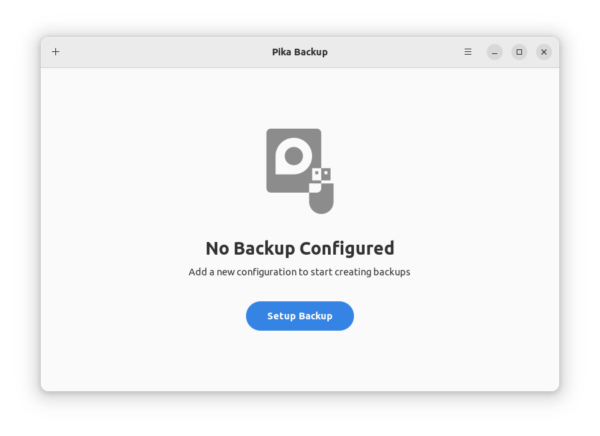
Looking for a personal data backup program? Pika Backup is a good choice for Ubuntu, Fedora, and other Linux with GNOME desktop.
Pika Backup is free open-source tool to backup your personal data into either local disk (e.g., an USB stick) or remote server using secure shell or sftp. It’s a modern GTK4 + libadwaita app that offers a stylish and easy to use user interface.
The utility is based on BorgBackup (aka Borg), features data de-duplication technique to save time and disk space since only changes are stored for daily backups. With the power of authenticated encryption technique, it also supports password protect for your data.
The app starts in a clean UI with a “Configure Backup” button to get started creating repositories to store backups. The top-left ‘+‘ icon is also present to do the same job.
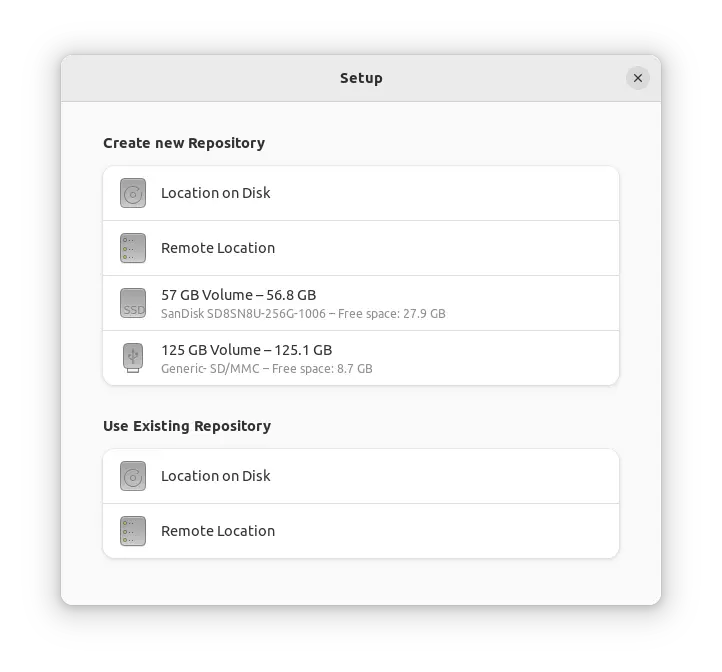
Once click on “+” icon, it will ask you to create a new repository or select an existing repository to use in next dialog.
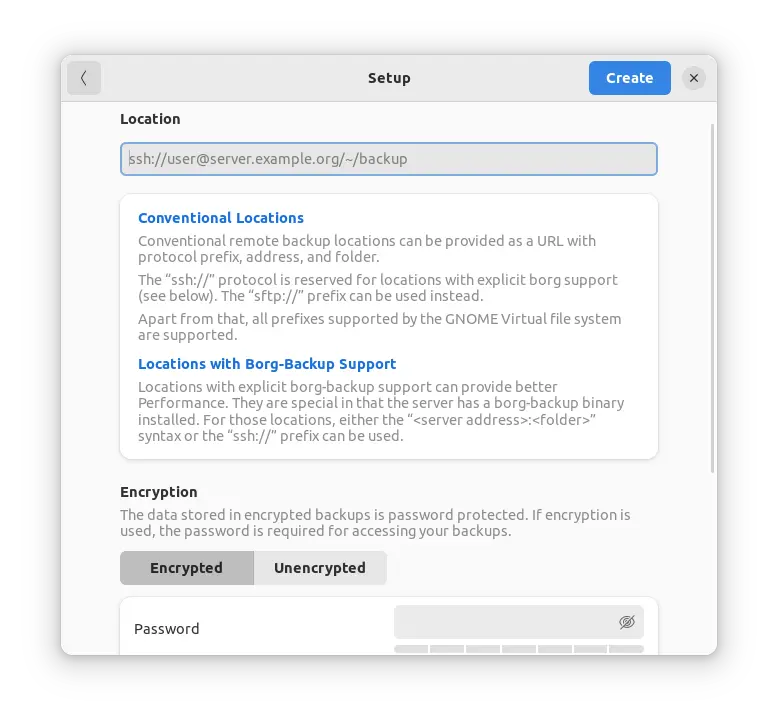
You may select to back your data into a remote server via ssh remote file transfer by specifying URL, e.g., “ssh://user@server.example.org/~/backup“, however borg need to be installed in the server side. For choice, the “sftp://” prefix can be used without borg.
Remote Location
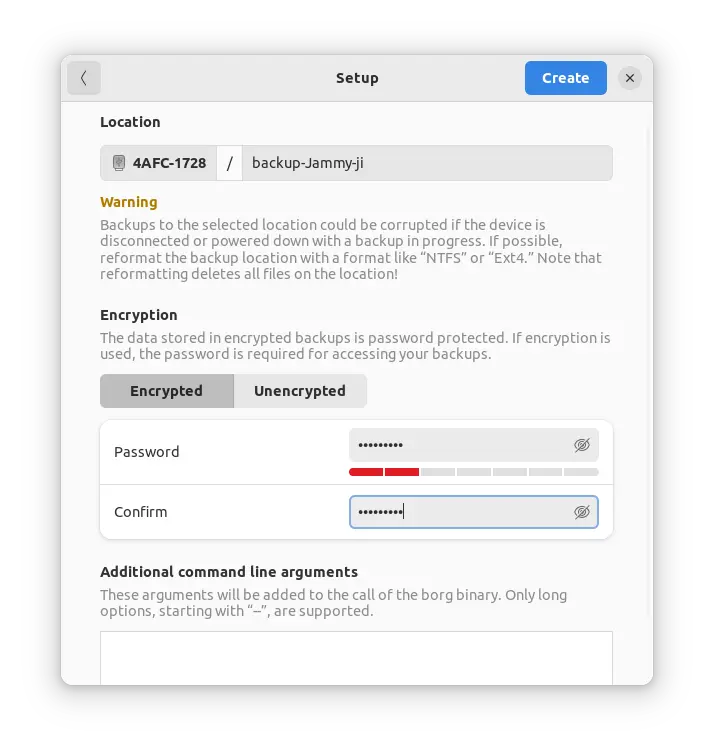
Data can also be saved in local folder or removable devices, such as an USB drive. It will create a sub-folder in selected directory or device and save backup either encrypted or not depends on your selection.
After creation, it will recognize the USB repository automatically once you plug it in, allows you to either edit or select use the repository.
Local repository (USB Stick)
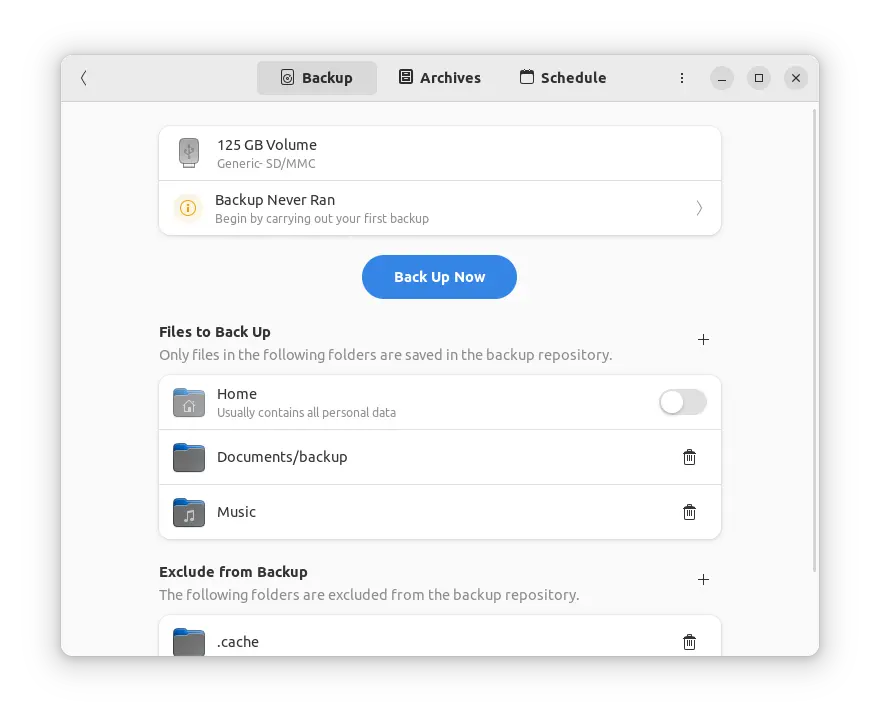
After creating / choosing the backup repository, it brings you to the file selecting screen. There you can choose any file folders, and exclude any for the backup. When you done data selection, click the green “Back Up Now” button to start. It indicates the process with how many percentage finished and how much time left.
setup backup
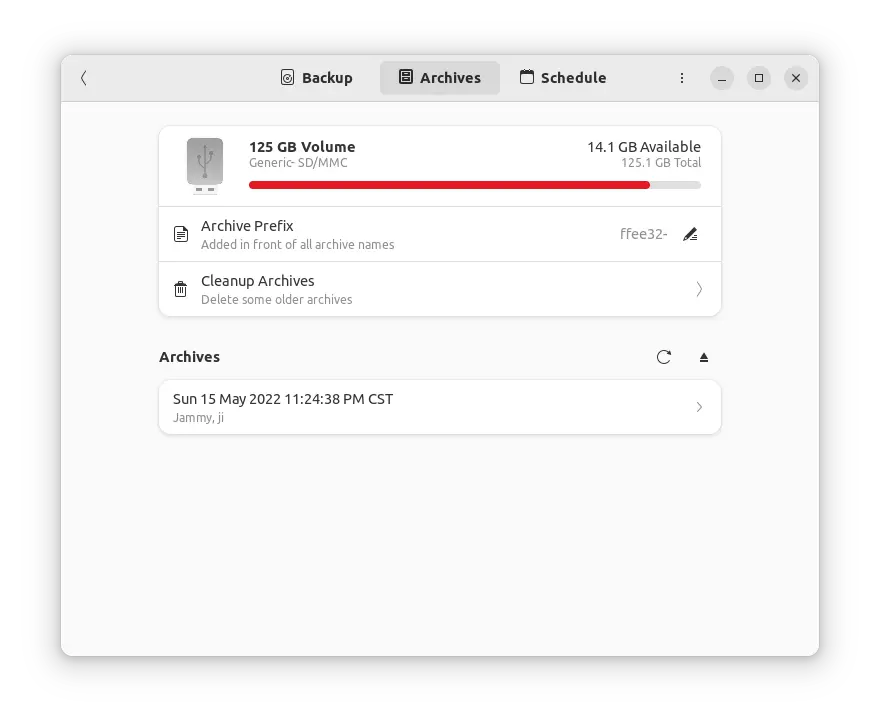
Backups are stored in unreadable files. You have to open the Pika Backup tool to mount the backups using “Browse saved files” under Archives tab. Then recover files or folder via opened file manager using copy & paste actions. This is not friendly in my opinion since no recover option present.
Archives tab to browser and manage your backups
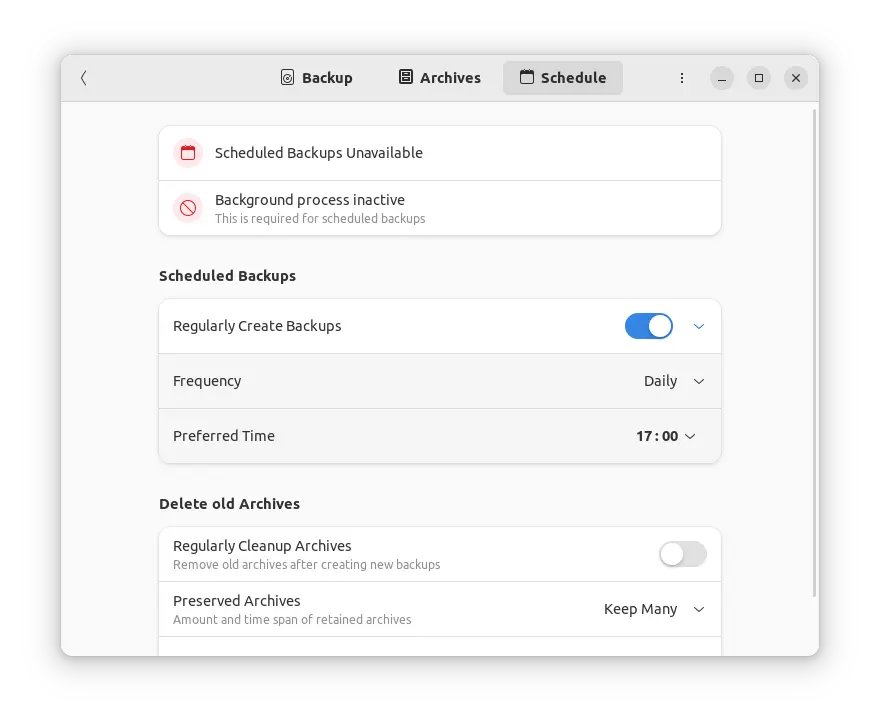
Scheduled backups are not supported so far, and excluding files from a backup via regular expressions and alike is not implemented yet. Start in v0.4.0, it supports for schedule backup hourly, daily, weekly, or monthly with given time or day. It can also delete old archives automatically by keeping user selected number of last backups.
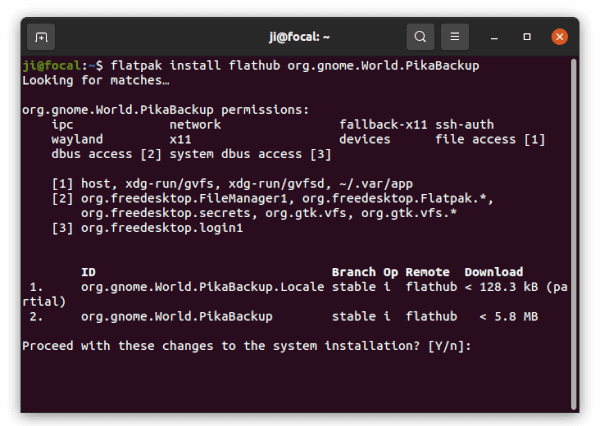
Install Pika Backup in Ubuntu Linux:
The Pika Backup software is available for most Linux via the universal Flatpak package.
Open terminal either via Ctrl+Alt+T keyboard shortcut or by searching for and opening it from ‘Activities’ overview screen. When it opens, run following commands one by one:
1.) Install flatpak daemon, if you don’t have it, by running command:
sudo apt install flatpak
For Ubuntu 18.04, users have to add the Flatpak PPA first.
2.) Next add the flathub repository, considered as official place hosts flatpak packages:
YOGA Image Optimizer is a graphical tool to batch convert photos into JPEG, PNG and WEBP, and compress file sizes while having equivalent quality.
It’s a free and open-source tool based on YOGA command line tool, which can also convert and optimize 3D models from various formats to glTF and GLB.
YOGA:
The YOGA backend uses Python Pillow library to convert images into PNG, JPEG, or WebP as you prefer. And it uses Google’s Guetzli library to generate JPEG that are typically 20-30% smaller than libjpeg while having some quality. Google’s Zopflipng and libwebp libraries are in use for optimizing other two image formats.
The command line tool also support converting and optimizing 3D models using the Open Asset Import Library (Assimp).
YOGA Image Optimizer:
The official front-end for YOGA provides an easy to use graphical interface to do converting and optimizing process in Linux and Windows.
Simply open a batch of photo images (press Shift or Ctrl while choosing files), it shows the thumbnails, input file name and size, as well as output name and file format.
Before you clicking “Optimize”, you can choose output format and set compress level for each or a selection of images.
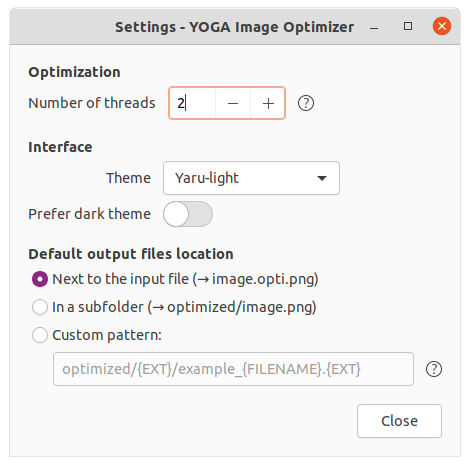
Multi-thread support. You can set how many CPU cores to use.
GTK theme support. It allows to choose between all installed GTK theme for the app only.
Dark Mode.
Custom output pattern.
Install YOGA Image Optimizer in Ubuntu Linux:
For Linux, the software can be installed either via universal Flatpak package or using pip (Python Package Installer).
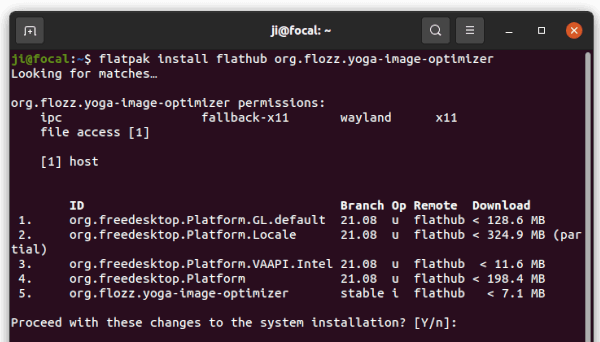
1. Flatpak Package
Open terminal by pressing Ctrl+Alt+T on keyboard, you can then run following commands one by one to get the software via Flatpak in Ubuntu 20.04 and higher. For Ubuntu 18.04, you need to add this PPA before getting started.
a. ) Install the flatpak daemon if you don’t have it:
sudo apt install flatpak
b.) Add the Flathub the preferred repository hosting Flatpak package:
For those don’t like the Flatpak package, use the Python pip3 package installer. It however does NOT create app shortcut for launching it from the ‘Show Applications’ start menu.
a.) Firstly, open terminal and run command to install required libraries:
The pip package does not has app shortcut, you need to either run yoga-image-optimizer command to start it from terminal and create a .desktop file manually.
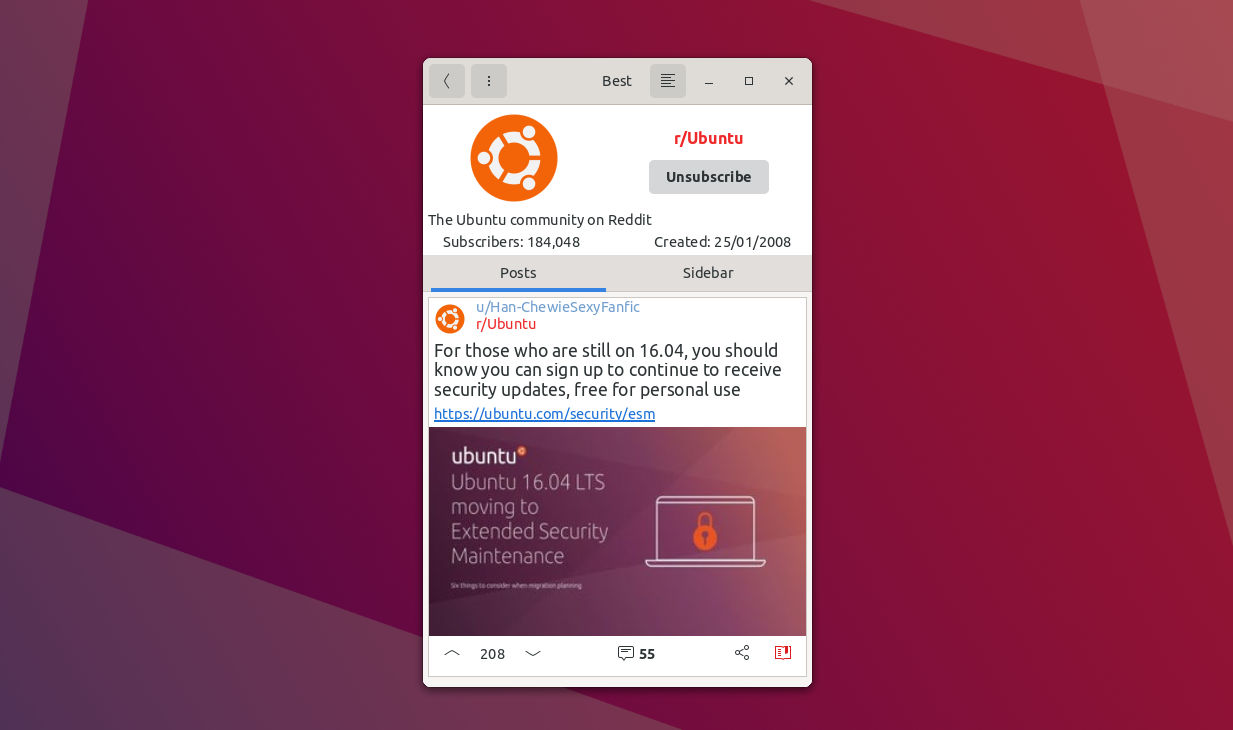
For Reddit users, Gtkeddit is another GTK app for Linux desktop and mobile.
It’s a free and open-source app written in C++. With the libadwaita library (formerly libhandy), it has an adaptive UI that works on Linux phones such as the Pinephone.
The software has dark mode for working at night, though I don’t find how to enable it in Ubuntu using the Flatpak package. And it allows you to browser without an account.
Compare to Giara, another Reddit App written in Python with GTK4, the UI navigation feels good and smoother in Gtkeddit. Though it freezes every time during loading new content, maybe due to my poor VPN network connection.
All functions including new post, rely and comment work in new navigation page instead of a pop-over dialog. And the developer promoted that it works better on Pinephone, boots and runs faster on slow hardware.
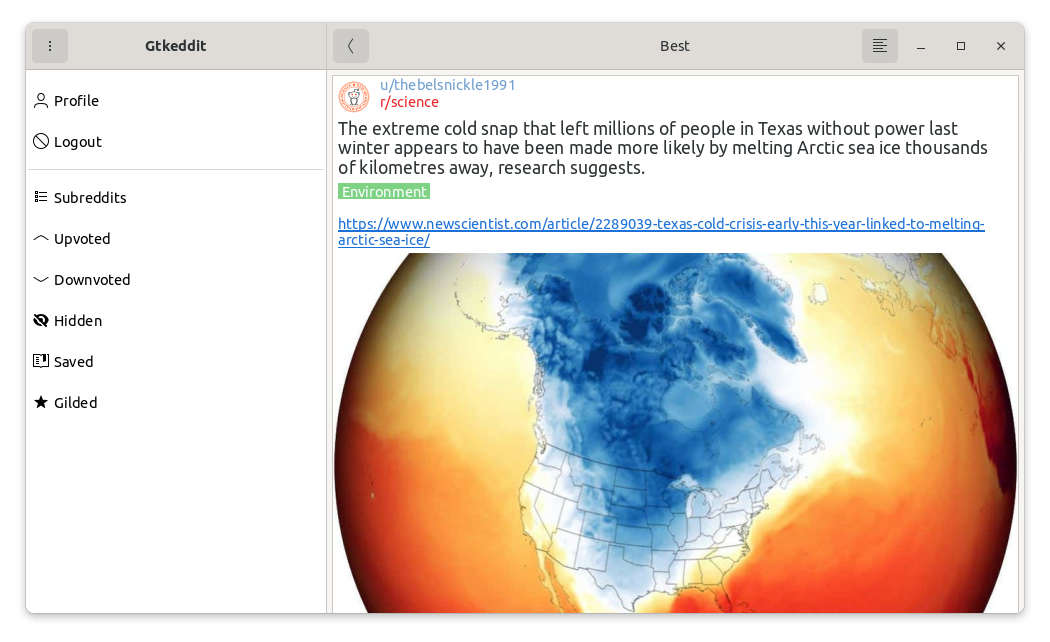
Browse user Saved/Upvoted/Downvoted/Hidden/Gilded posts
Browse user Subreddits
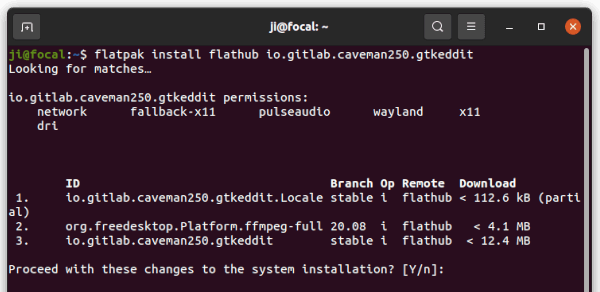
How to Install Gtkeddit:
Most Linux can install the app via the Flatpak package from the flathub page. For Ubuntu users, there’s a step by step guide for Ubuntu 18.04, Ubuntu 20.04 and higer.
1.) Firstly, open terminal (Ctrl+Alt+T) and run command to install the daemon if you don’t have it:
sudo apt install flatpak
Flatpak supports Ubuntu 18.04 and even Ubuntu 16.04, you have to add the Ubuntu PPA first!
2.) Then add the flathub repository, the preferred place to get Flatpak apps.
For Gnome fans, Apostrophe is a clean and intuitive Markdown editor you should try!
Apostrophe is one of the Gnome Circle Apps that provides a modern and distraction-free writing environment for Linux.
The editor supports for inputting via Pandoc’s Markdown, CommonMark, GitHub Flavored Markdown, MultiMarkdown and Plan Markdown formats.
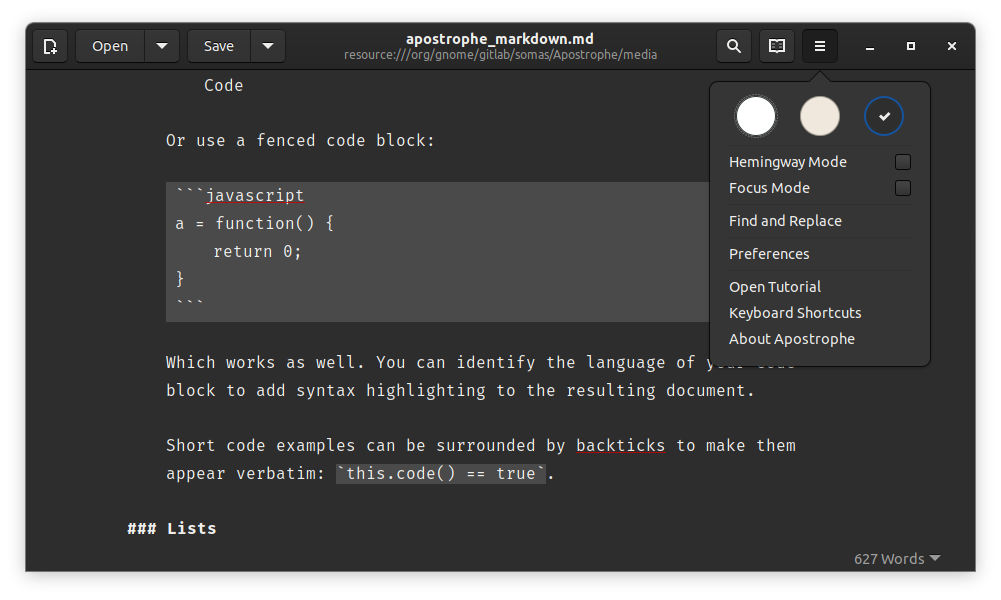
The app has Light, Dark, and Gray (maybe) UI appearance. The ‘Hemingway Mode’ is available which will disable the backspace key. And ‘Focus Mode’ will highlight the current line, remove header and bottom bar to provide a zen-like environment when writing.
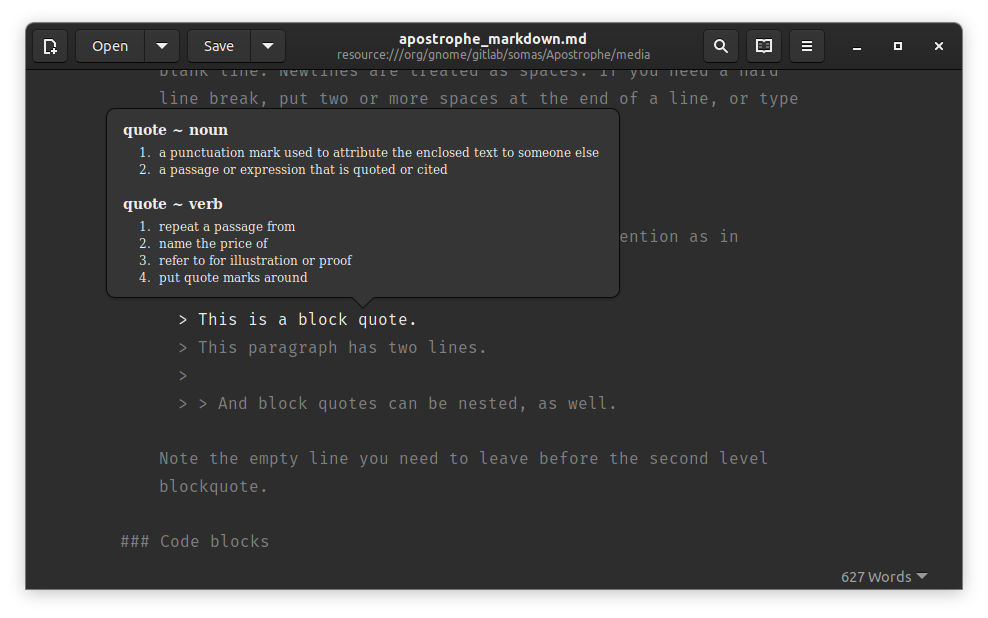
With inline preview, it formats your text automagically for you. By Ctrl+Clicking on anything, it shows popover preview, links, footnotes, equations.
Live Preview can be set to full window, right / bottom part, or a separate window. In bottom right it indicates how many words you wrote. It also counts characters, sentences, paragraphs, and read time.
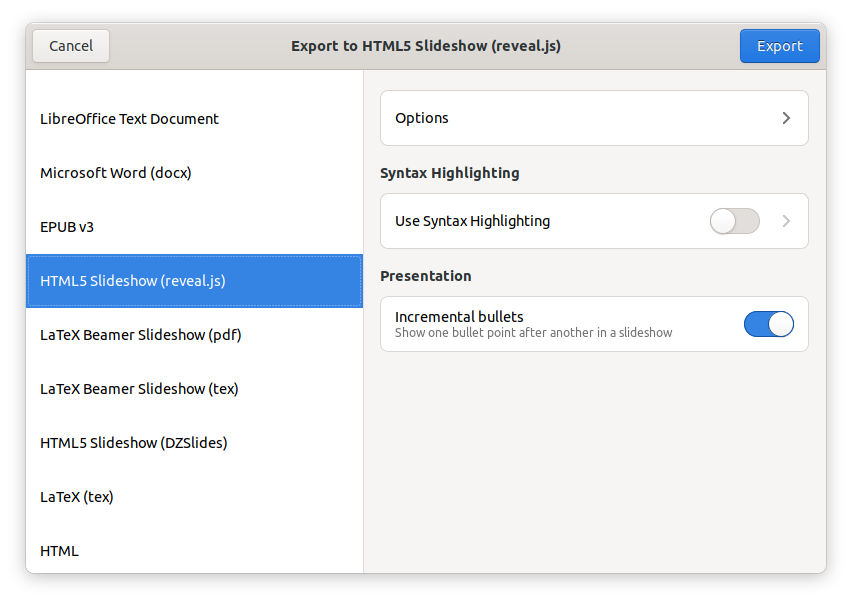
And you can save you work as PDF, HTML, ODT. An advanced export dialog allows exporting to more formats including:
LibreOffice Text Document.
Microsoft Word(docx).
EPUB v3.
HTML5 Slideshow (reveal.js, DZSlides)
LaTeX (tex)
LaTeX Beamer Slideshow (tex, pdf)
Textile, Texinfo, and more.
How to Install Apostrophe in Ubuntu Linux:
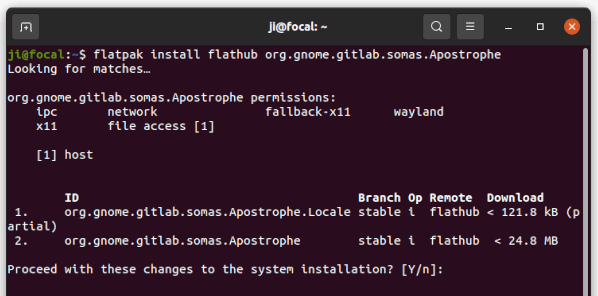
The software is available as universal Flatpak package. You can install it in Ubuntu 16.04, Ubuntu 18.04, Ubuntu 20.04 and higher via following steps:
1.) Open terminal from start menu, and run command to add the Flatpak PPA for Ubuntu 16.04 and Ubuntu 18.04:
sudo add-apt-repository ppa:flatpak/stable
And run sudo apt-get update command to update cache afterwards.
2.) Install the Flatpak daemon if you don’t have it:
sudo apt install flatpak
3.) Add Flathub repository (considered official) that hosts the package:
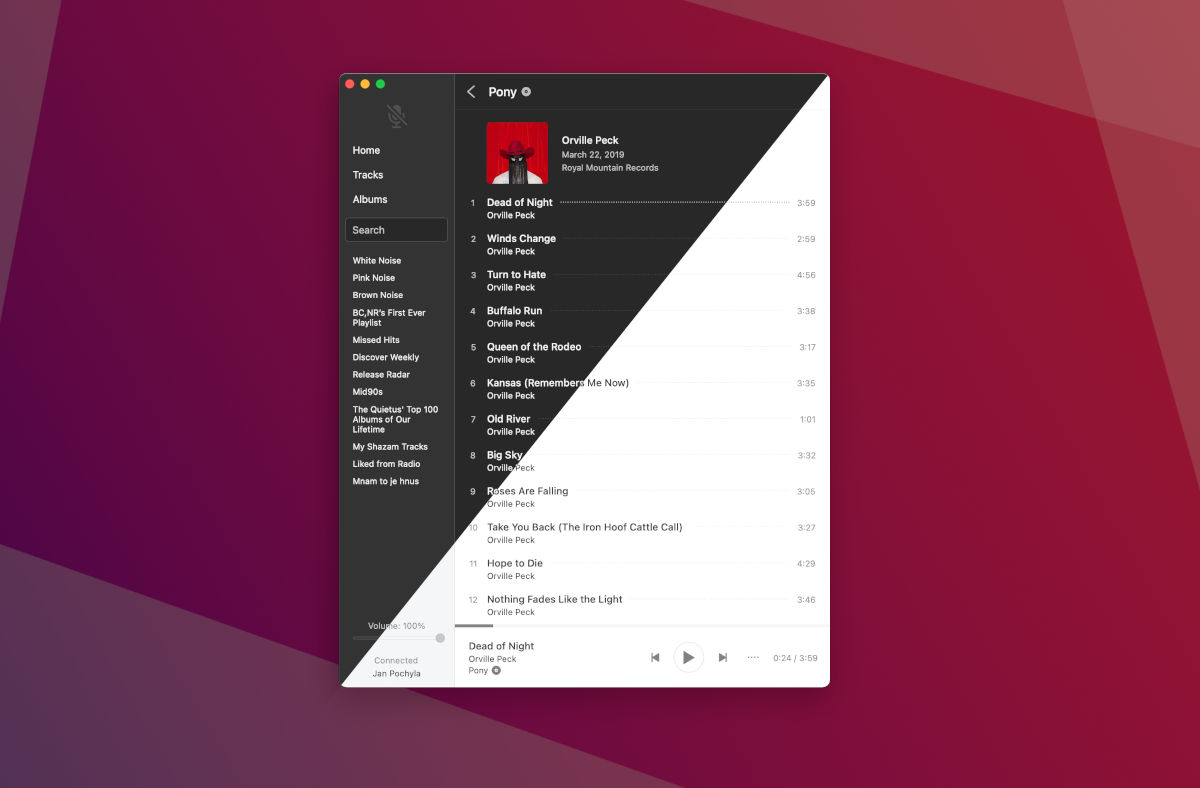
For those don’t like Electron apps, ‘Psst’ is a new GTK client for the Spotify music service.
Since the official Spotify app for Linux is a web app running via Chromium engine, native Linux apps may be preferred. And ‘Psst’ is a free open-source app written in Rust programming language with GTK framework for user interface. Besides Linux, it also works on Windows and macOS.
The software is in very early development stage. It lacks features and defaults to GTK and pure X11, with Wayland backend in the works. So far, it features:
Dark / Light mode.
Vorbis track playback
Browsing saved albums and tracks
Save / unsave albums and tracks
Browsing followed playlists
Search for artist, albums, and tracks
Audio volume control
Audio loudness normalization
Media keys control
Open Spotify links
Genre playlists and “For You” content
Like ‘Spot’, another GTK client for Spotify, it only works with premium accounts!! Though there’s a hack to make it work with free accounts.
How to Install Psst in Ubuntu:
The app so far provides pre-build binary packages, available to download at the link below:
For Ubuntu based systems, grab the ‘psst-deb.zip‘, extract and install the .deb package, either by double-clicking or using Gdebi package installer (install Gdebi from Ubuntu Software).
NOTE: The app so far even don’t have a logo icon. When launching from the start menu (‘Show Applications’), it will show a gear icon instead.