This simple tutorial shows how to install the most recent Clang compiler 23, 22, or 21 in current Ubuntu 26.04, Ubuntu 24.04, Ubuntu 22.04, and Ubuntu 20.04 LTS and correct the deprecated repository settings.
Ubuntu by default includes Clang package in its system repositories. But as time goes on, the Clang package in Ubuntu repository is getting old.
For those who need the most recent Clang compiler, it’s easy to install and keep it up-to-date from the developer team’s official repository.
Step 1: Download the Automatic installation script
The official Clang repository, so far supports Ubuntu 20.04, Ubuntu 22.04, Ubuntu 24.04, and Ubuntu 25.10. It has a script to make adding repository and installing Clang as easy as few Linux commands.
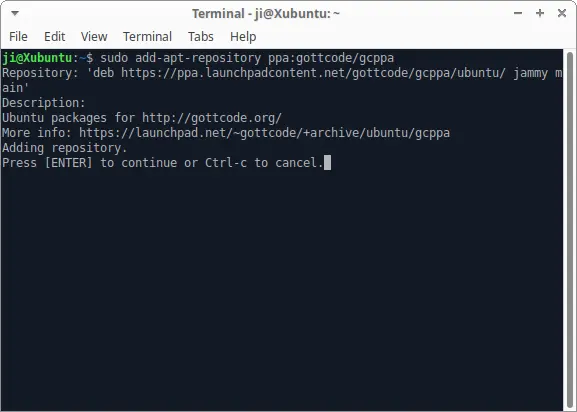
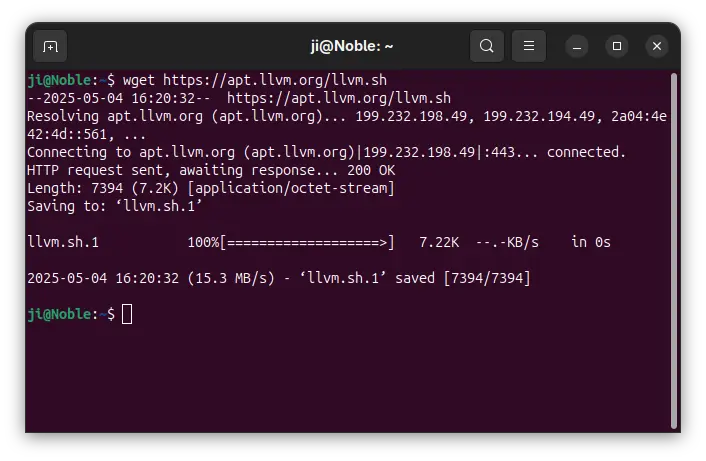
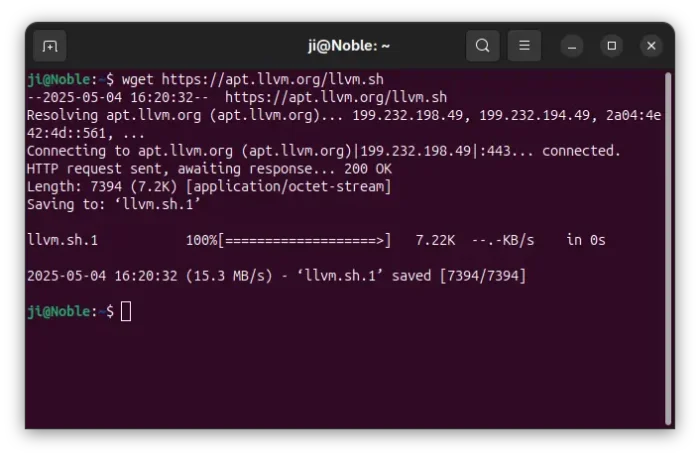
1. First, press Ctrl+Alt+T on keyboard to open terminal. When terminal opens, run command to download the official installation script:
wget https://apt.llvm.org/llvm.sh
You may also use the script in Debian stable, though you may need to install wget first.
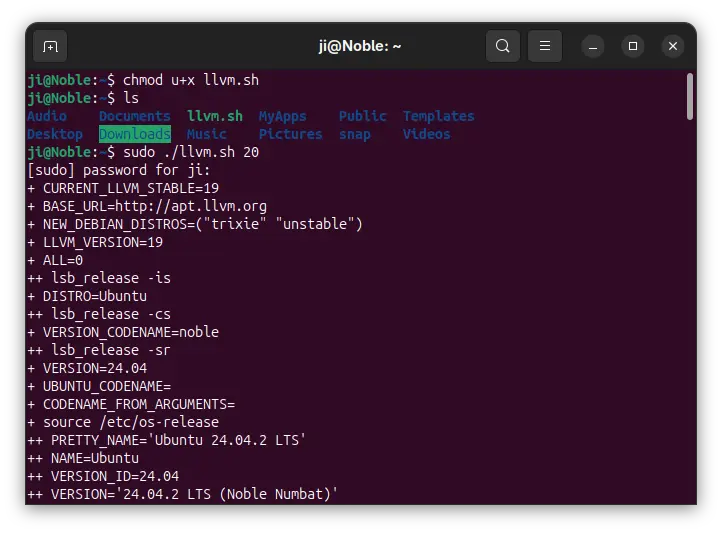
2. After downloading the script, add executable permission by running command:
chmod u+x llvm.sh
Step 2: Use the script to install Clang
The script automate the process of adding the official apt repository, updating package cache, and installing specific Clang version into your system.
All this can be done by running a single command. For example, install Clang-20:
sudo ./llvm.sh 20
Replace 20 with 21, 22, or 23 depends on which version you want to install.
NOTE: Ubuntu 24.04 has Clang version from 14 – 19, Ubuntu 22.04 has Clang 11 ~ 15 in system repositories!! Don’t use the script to install Clang that’s already in your system repository.

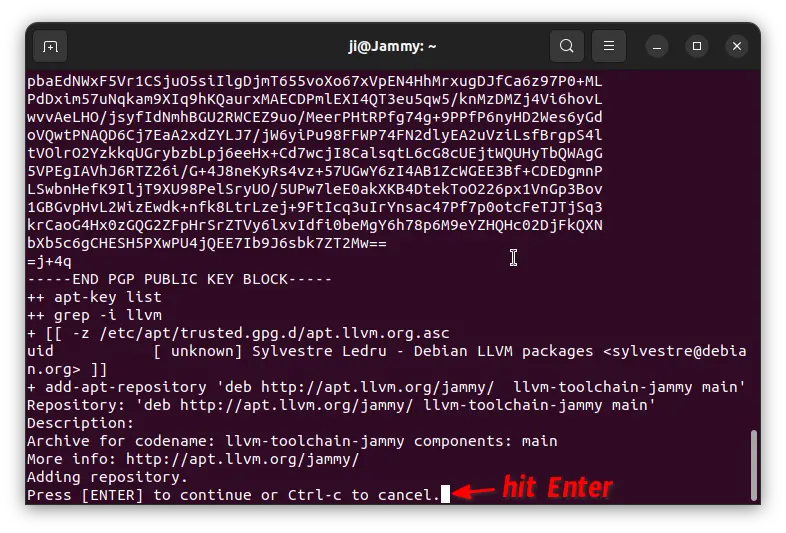
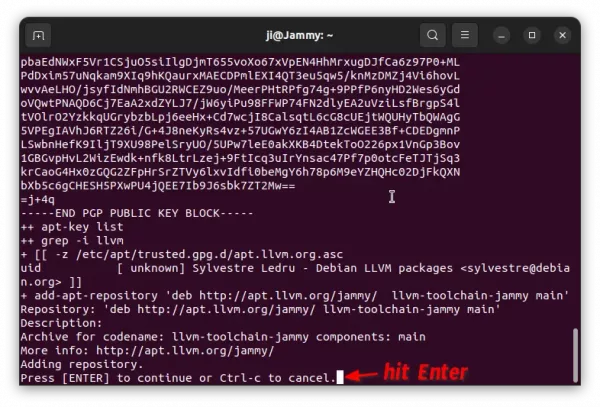
During the process, it will ask to hit Enter to confirm adding the apt repository. Then, you may just wait until the process done.
Step 3: Modify Clang repository
The command you run in step 2 will automatically download the key file and add Clang apt repository into your system.
However, it still uses the old method that’s deprecated due to security reason! It’s recommended to do following steps to modify it to follow the new Debian policy.
NOTE: If you installed multiple Clang versions from the commands above in Step 2, then you need to do this step multiple times.
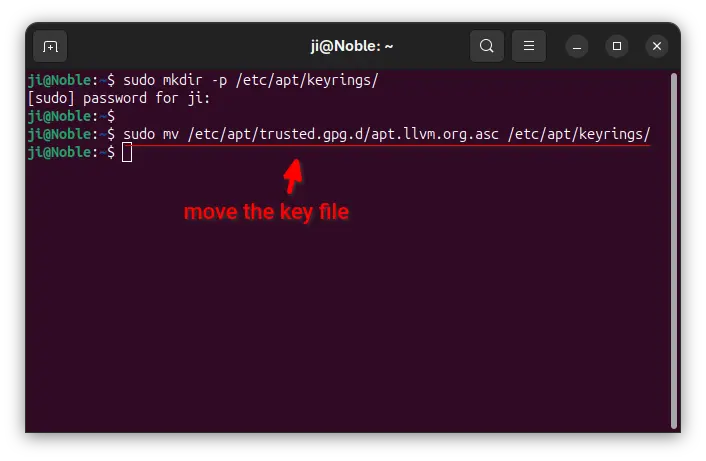
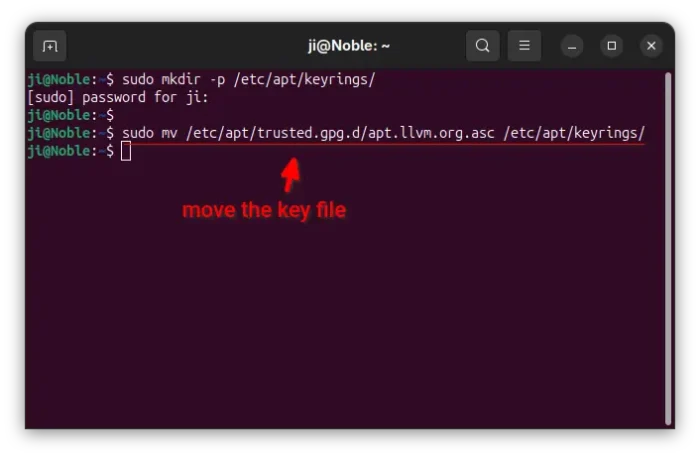
1. First, open terminal (Ctrl+Alt+T) and run commands below one by one to first make sure /etc/apt/keyrings directory exist, then move the key file from the deprecated /etc/apt/trusted.gpg.d/ to that location:
sudo mkdir -p /etc/apt/keyrings
sudo mv /etc/apt/trusted.gpg.d/apt.llvm.org.asc /etc/apt/keyrings/
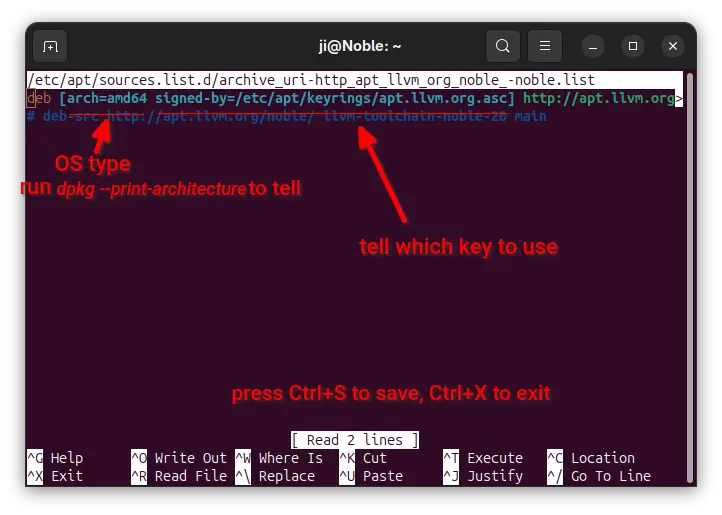
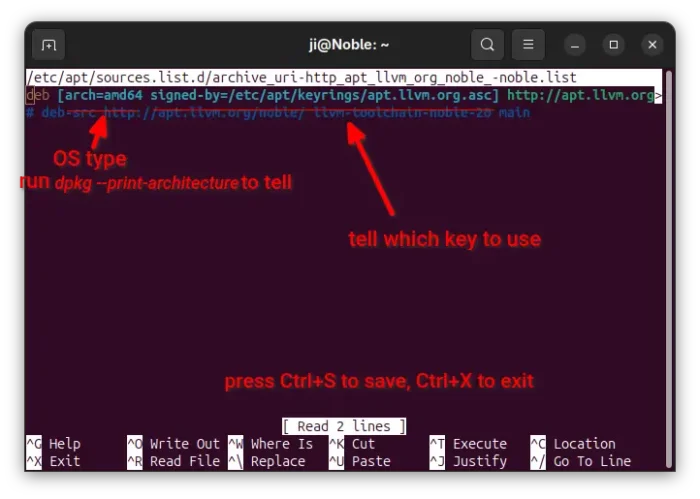
2. Next, run command to edit the source file for the clang repository:
sudo nano /etc/apt/sources.list.d/archive_uri-http_apt_llvm_org_noble_*.list
When file opens in terminal window, add following in between “deb” and “http://apt.llvm.org/…”:
[arch=amd64 signed-by=/etc/apt/keyrings/apt.llvm.org.asc]
Here:
arch=amd64, tells your OS type is amd64 (Intel/AMD). For non-Intel/AMD platform, run dpkg --print-architecture command tell OS type, and replace amd64 with the output. So far, arm64 and s390x are also supportedsigned-by=/path/to/key-file, specify the key file.
If you installed multiple Clang versions via the script, then you’ll have more lines in this file start with “deb”. Just add the “signed-by” section in each line and finally press Ctrl+S to save file, and Ctrl+X to exit.
3. Finally, run sudo apt update to apply change by refreshing package cache.
And, you may manually install/update the Clang packages by running command (replace number 20 according to which version you want to install):
sudo apt install clang-20 lldb-20 lld-20 clangd-20
Or, if you want to install everything, use the command below instead:
sudo apt install clang-tidy-20 clang-format-20 clang-tools-20 llvm-20-dev lld-20 lldb-20 llvm-20-tools libomp-20-dev libc++-20-dev libc++abi-20-dev libclang-common-20-dev libclang-20-dev libclang-cpp20-dev liblldb-20-dev libunwind-20-dev
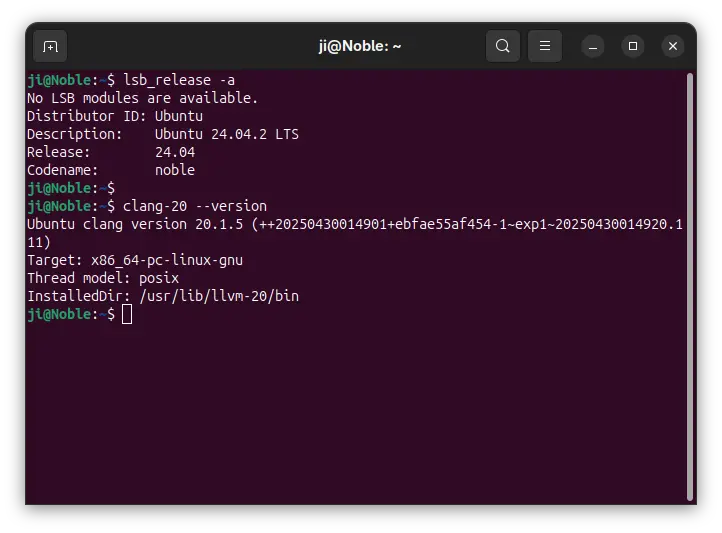
Step 4: Verify
If everything’s done successfully, just run clang-xx --version and/or locate clang-xx to verify.

Uninstall
To remove the repository added by the script, just open terminal (Ctrl+Alt+T) and run command to remove the corresponding source file:
sudo rm /etc/apt/sources.list.d/archive_uri-http_apt_llvm_org_*.list
And, remove the repository key file via command:
sudo rm /etc/apt/trusted.gpg.d/apt.llvm.org.asc
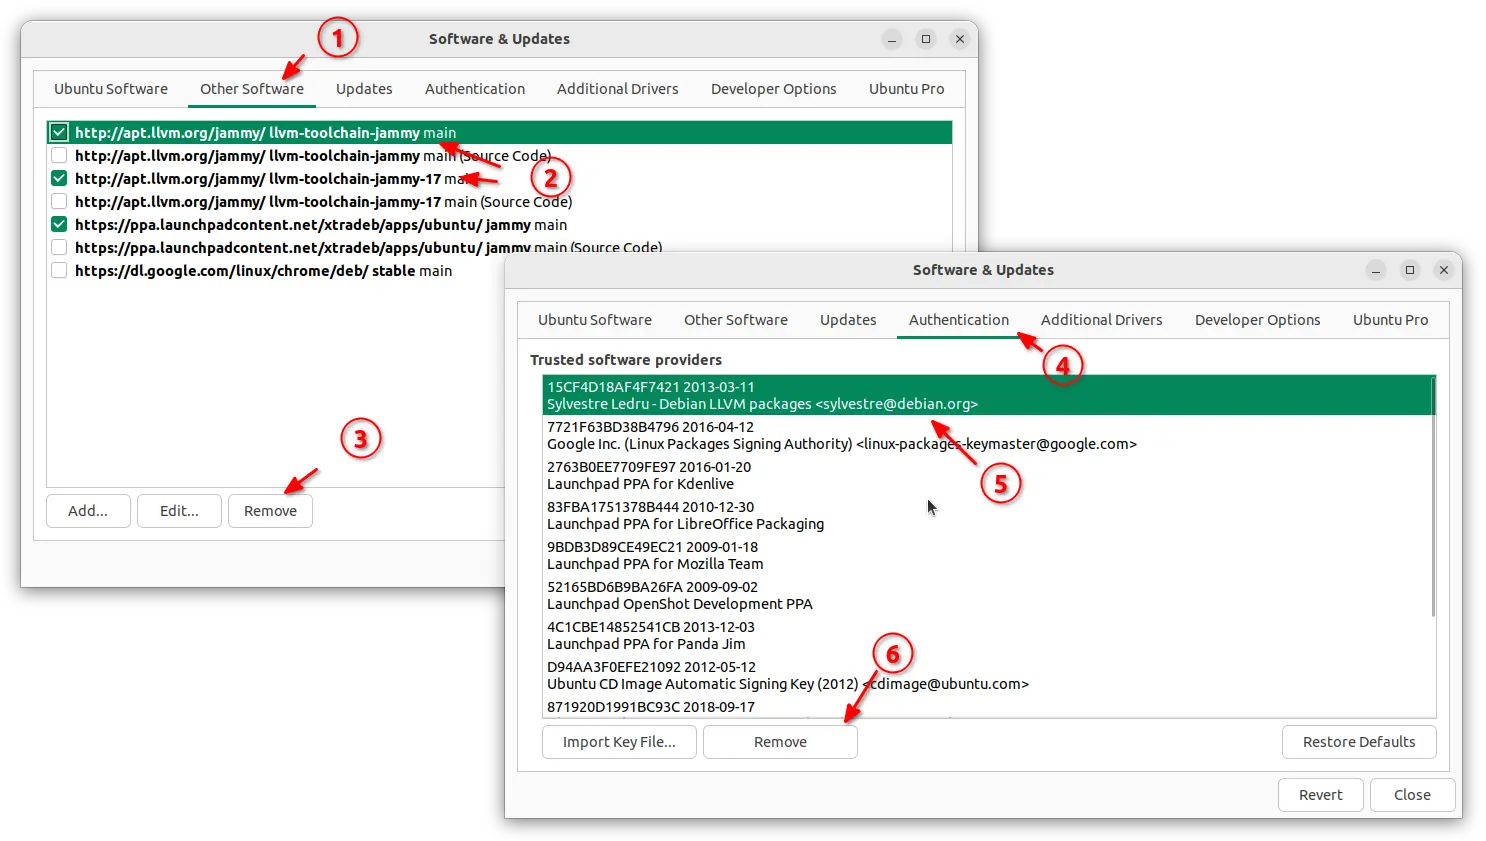
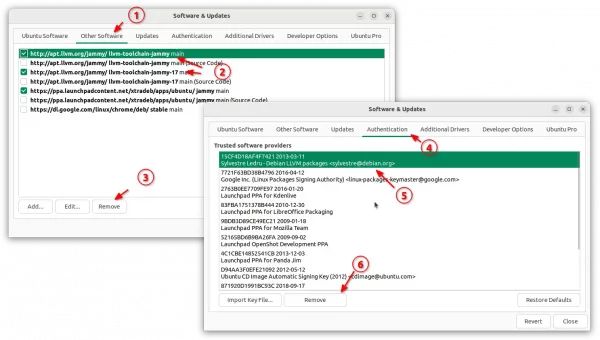
Or, launch “Software & Updates” and remove source line and key from “Other Software” and “Authentication” tabs.
To remove Clang packages (replace 20 accordingly), just run command:
sudo apt remove --autoremove clang-20 lldb-20 lld-20 clangd-20