![]()
As you may know, icons on Ubuntu desktop is handled by an extension called “Desktop Icons NG”. While GNOME has been moving to GTK4, the extension so far still uses GTK3 toolkit to implement all the functions.
A GTK4 port of this extension now is in development, with all previous functions, bug-fixes, as well new features.
The new version works as another extension as it’s not been merged upstream. It comes with GSconnect integration, and features drag and drop app icons from Ubuntu Dock (Dash-to-Dock) to the desktop.
- Drag and drop from left dock panel to desktop will REMOVE app icon from favorites.
- Hold Ctrl + drag and drop will REMOVE from favorites, and ADD onto desktop.
- Hold Shift + drag and drop will ADD icon to desktop without removing it from favorites.
![]()
Also, it adds more functions to drag and drop files from file manager (Nautilus) to the desktop. By default, drag and drop between desktop and Nautilus will MOVE the files from one to another directory. With the new extension, you can also:
- Press and hold Ctrl + drag’n’drop to COPY files.
- Press and hold Alt + drag and drop to select between ‘MOVE’, ‘COPY’, ‘LINK’ actions.
As well, it has a GNOME 43 style file context menu when you right-clicking on desktop. When looks more native in Ubuntu 22.04, except for the arrow …
Install GTK4 port of Desktop Icons NG:
1. Ubuntu 22.04+ users can first search for and install ‘Extension Manager’ app from Ubuntu Software.

Install Extension Manager in Ubuntu 22.04+
2. Then press Super (‘Windows’ logo) key on keyboard to open overview, search and open the tool.

3. Finally, search ‘DING’ and install the new extension under ‘Browse’ tab.
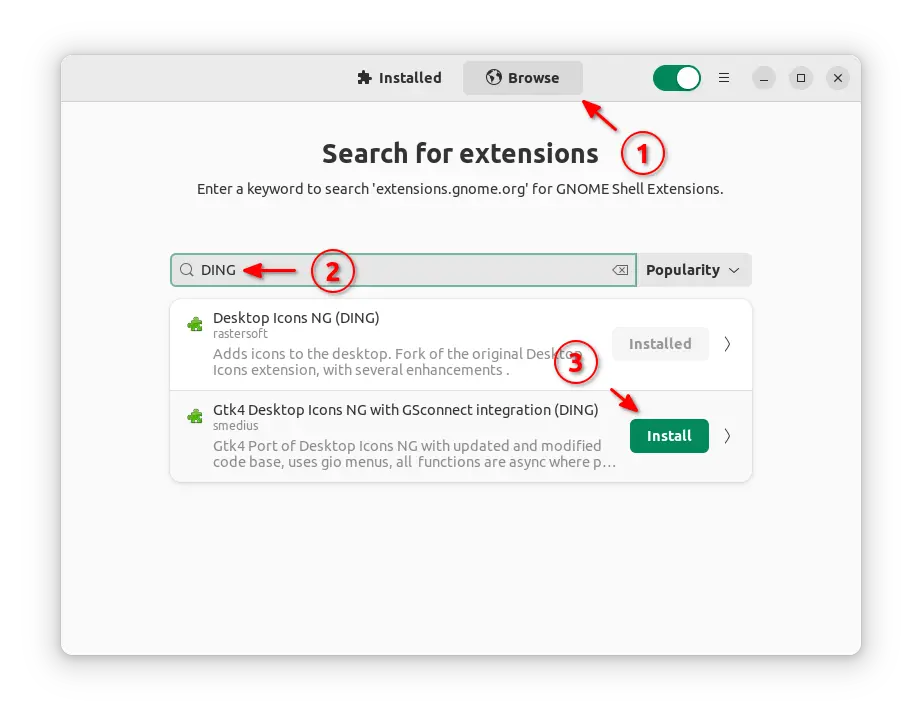
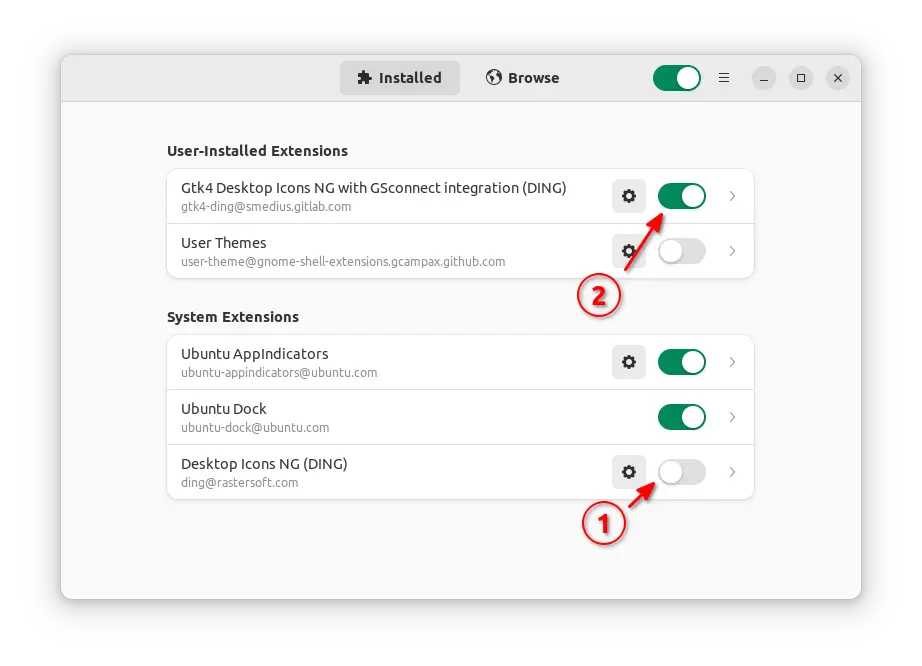
4. To use the extension, user has to disable the system built-in ‘Desktop Icons NG’ extension, and enable the new GTK4 version.
To restore, just re-enable ‘Desktop Icons NG’, disable or remove the GTK4 version via Extension Manager.