For those sticking to the open-source graphics driver, the latest Mesa 3D graphics library is easy to install via an Ubuntu PPA.
Mesa is an open-source software implementation of OpenGL, Vulkan, VDPAU, VA-API, and other graphics API specifications.
Ubuntu uses Mesa as OpenGL implementation if no proprietary driver is in use. It is however always old. For users want to play some games with the open-source RadeonSI, RADV, Intel, or Nouveau drivers, you may try the latest Mesa via PPA.
Install Mesa via Ubuntu PPA:
A trustworthy Ubuntu PPA is available that contains the latest stable Mesa packages for Ubuntu 26.04, Ubuntu 24.04 on amd64, armhf/arm64, and i386 CPU platforms.
1. Add the PPA:
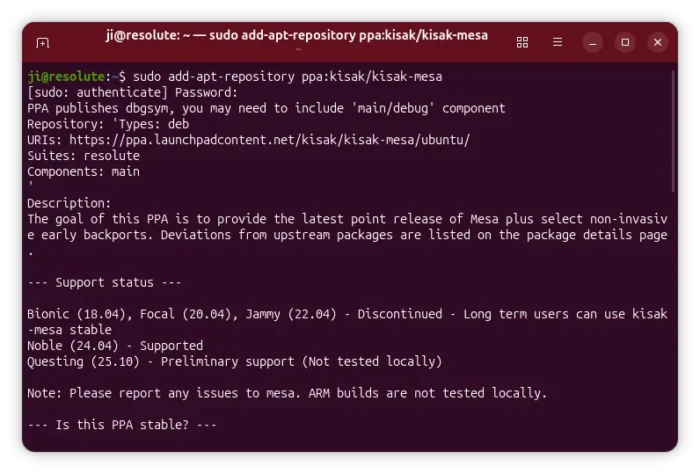
Search for and open terminal from system app launcher. When it opens, run command to add the PPA:
sudo add-apt-repository ppa:kisak/kisak-mesa
Type user password, no visual feedback, when it asks. Read the PPA description as you want and hit Enter to continue.
2. Install Mesa packages:
For, Linux Mint, you need to update package cache though it’d done automatically in Ubuntu while adding PPA.
sudo apt update
Finally install available upgrades of all packages including Mesa library via command:
sudo apt full-upgrade
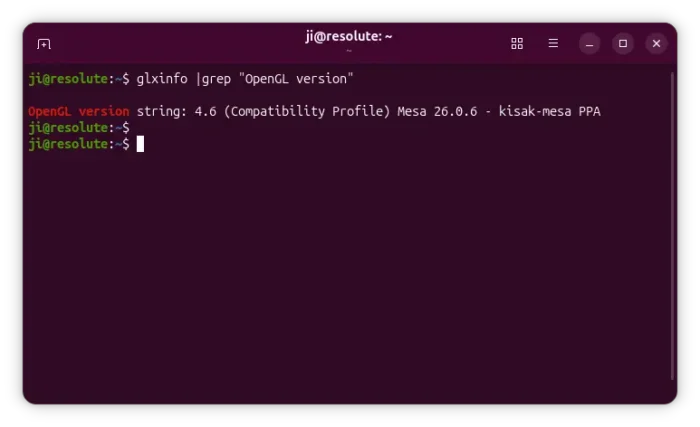
3. Check mesa version:
To find out the package version, use command:
glxinfo | grep "OpenGL version"
Run sudo apt install mesa-utils if glxinfo command not found.
Restore Original Mesa packages:
To restore your graphics driver to the original status, firstly install ppa-purge via command:
sudo apt install ppa-purge
Next purge the Ubuntu PPA which will downgrade all the installed packages:
sudo ppa-purge ppa:kisak/kisak-mesa
For Linux Mint 22, it’s recommended to add -d noble flag to work safely:
sudo ppa-purge -d noble ppa:kisak/kisak-mesa
Here noble is the code-name of Ubuntu 24.04 that Linux Mint 22.x is based on. And, you may run cat /etc/os-release to tell.