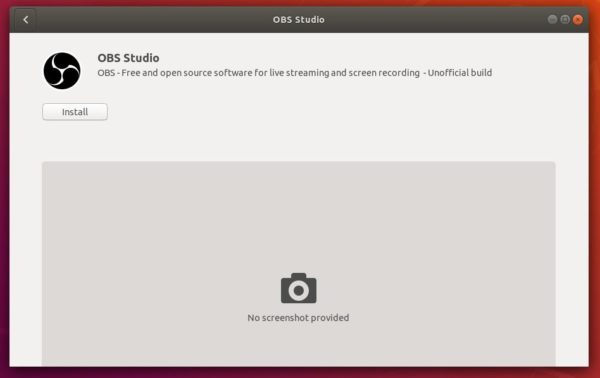
For those who don’t want to add third-party repositories, the free and open-source streaming and recording program OBS Studio now can be easily installed in Ubuntu via Snap package.
Snap is an universal Linux package format. Snap application runs in sandbox and it auto-updates itself once a new release is out and snapped by the maintainer.
The latest OBS Studio 21.1.2 is now available as snap package. You can easily install it from Ubuntu Software:
For Ubuntu 16.04 users who never installed a snap package, run command sudo apt install snapd first to install the daemon.
Or run command in terminal (Ctrl+Alt+T) to install the OSB Studio snap package:
snap install obs-studio
You may found that the snap package is kinda large in file size that because it bundles almost all its dependencies.
NOTE: To access webcam and content on external storage, you need to run 2 two commands:
For those who want to try out the latest Cinnamon Desktop 3.8, without downloading Linux Mint 19, here’s how to install Cinnamon 3.8.x via PPA in Ubuntu 18.04.
Cinnamon 3.8 will be included in the upcoming Linux Mint 19. This Gnome based desktop environment has received better support for GTK+ 3.22 and client-side decorated windows, fully ported to Python 3, backported various changes from upstream GNOME, and more.
For Ubuntu 18.04 LTS, a stable PPA has built the Cinnamon 3.8 packages, so the desktop can be easily installed via following steps.
1. Open terminal either via Ctrl+Alt+T keyboard shortcuts, or by searching for ‘Terminal’ from app launcher. When it opens, run command:
sudo add-apt-repository ppa:embrosyn/cinnamon
Input your password (no visual feedback) when it prompts and hit Enter. Read the PPA description and finally hit Enter to add the PPA.
2. Then run command to install Cinnamon Desktop 3.8:
sudo apt-get install cinnamon
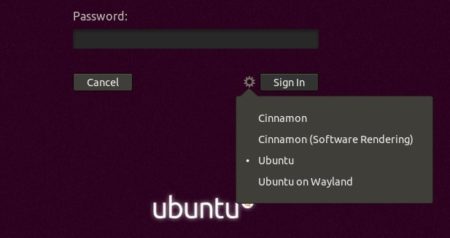
3. Finally restart your computer. When you’re at Gnome login screen, click on your username and then click the gear button to select ‘Cinnamon‘ desktop session.
Uninstall:
To remove Cinnamon desktop, open terminal and run command:
MKVToolNix 24.0.0, free and open-source Matroska software, was released 2 days ago. Here’s how to install it in Ubuntu 18.04, Ubuntu 16.04, Ubuntu 17.10.
mkvmerge: MP4 reader: improved the detection of edit lists consisting of two identical entries, each spanning the file’s duration as given in the movie header atom.
mkvmerge: JSON identification: the “display unit” video track property is now reported as ‘display_unit’.
mkvmerge, mkvextract: AVC/h.264: empty NALUs will now be removed.
mkvextract: VobSub extraction: empty SPU packets will now be dropped during extraction
mkvmerge: E-AC-3 parser: fixed determining the number of channels for streams that contain an AC-3 core with dependent E-AC-3 frames.
Updated Niels Lohmann’s JSON library to v3.1.1.
Updated pugixml library to v1.9.
Various bug-fixes.
How to Install MKVToolNix 24.0.0 in Ubuntu:
The official apt repository offers the latest packages for Ubuntu 16.04, Ubuntu 17.10, and Ubuntu 18.04 so far.
Open terminal via Ctrl+Alt+T or by searching it from app launcher. When it opens, do following steps:
Avidemux video editor 2.7.1 was released a few days ago with new encoder support and various improvements. Here’s how to install it in Ubuntu 18.04, Ubuntu 17.10, Ubuntu 16.04.
Linux Kernel 4.17 was finally announced yesterday. Linus Torvalds wrote in lkml.org:
So this last week was pretty calm, even if the pattern of most of the stuff coming in on a Friday made it feel less so as the weekend approached.
And while I would have liked even less changes, I really didn’t get the feeling that another week would help the release in any way, so here we are, with 4.17 released.
No, I didn’t call it 5.0, even though all the git object count numerology was in place for that. It will happen in the not _too_ distant future, and I’m told all the release scripts on kernel.org are ready for it, but I didn’t feel there was any real reason for it. I suspect that around 4.20 – which is I run out of fingers and toes to keep track of minor releases, and thus start getting mightily confused – I’ll switch over. That was what happened for 4.0, after all.
As for the actual changes since rc7 – the shortlog is appended – it’s mostly drivers, networking, perf tooling, and a set of nds32 fixes. With some random other stuff thrown in. Again, the shortlog is obviously only the last calm week, the overall changes since 4.16 are much too big to list in that format.
The big 4.17 stuff was mentioned in the rc1 email when the merge window closed, but I guess it’s worth repeating how 4.17 is actually a slightly smaller kernel than 4.16, thanks to the removal of a number of effectively dead architectures (blackfin, cris, frv, m32r, metag, mn10300, score, and tile). Obviously all the other changes are much more important, but it’s always nice to see spring cleaning like that.
…..
Linux Kernel 4.17 release highlights:
AMDGPU DC enabled by default for the new display code stack.
Intel Cannonlake graphics support enabled by default.
Improved AMDKFD support for pre-Vega discrete GPUs.
Clean up lots of code for obsolete CPU architectures
A significant power-savings improvement on some hardware
And many more other changes.
How to Install Linux Kernel 4.17 in Ubuntu:
A graphical tool UKUU makes it easy to install the latest Kernels in Ubuntu.
For those who don’t want to use any third-party tool, here’s how to manually download and install Kernel 4.17 in Ubuntu (tested in Ubuntu 18.04, though it should work on all current Ubuntu releases).
The mainline kernel PPA has made the new kernel binaries for Ubuntu, available for download at the link below:
Depends on your OS type, download and install the packages in turns:
Select generic for common system, and lowlatency for a low latency system (e.g. for recording audio), amd64 for 64bit system, i386 for 32bit system, or armhf, arm64, etc for other OS types.
To get the Kernel 4.17 from the command console, run the commands below one by one:
Start/restart your machine and select boot with the previous kernel in ‘Grub2 -> Advanced Option for Ubuntu’. Then use Ubuntu Tweak, or run command to remove Linux Kernel 4.17.0: