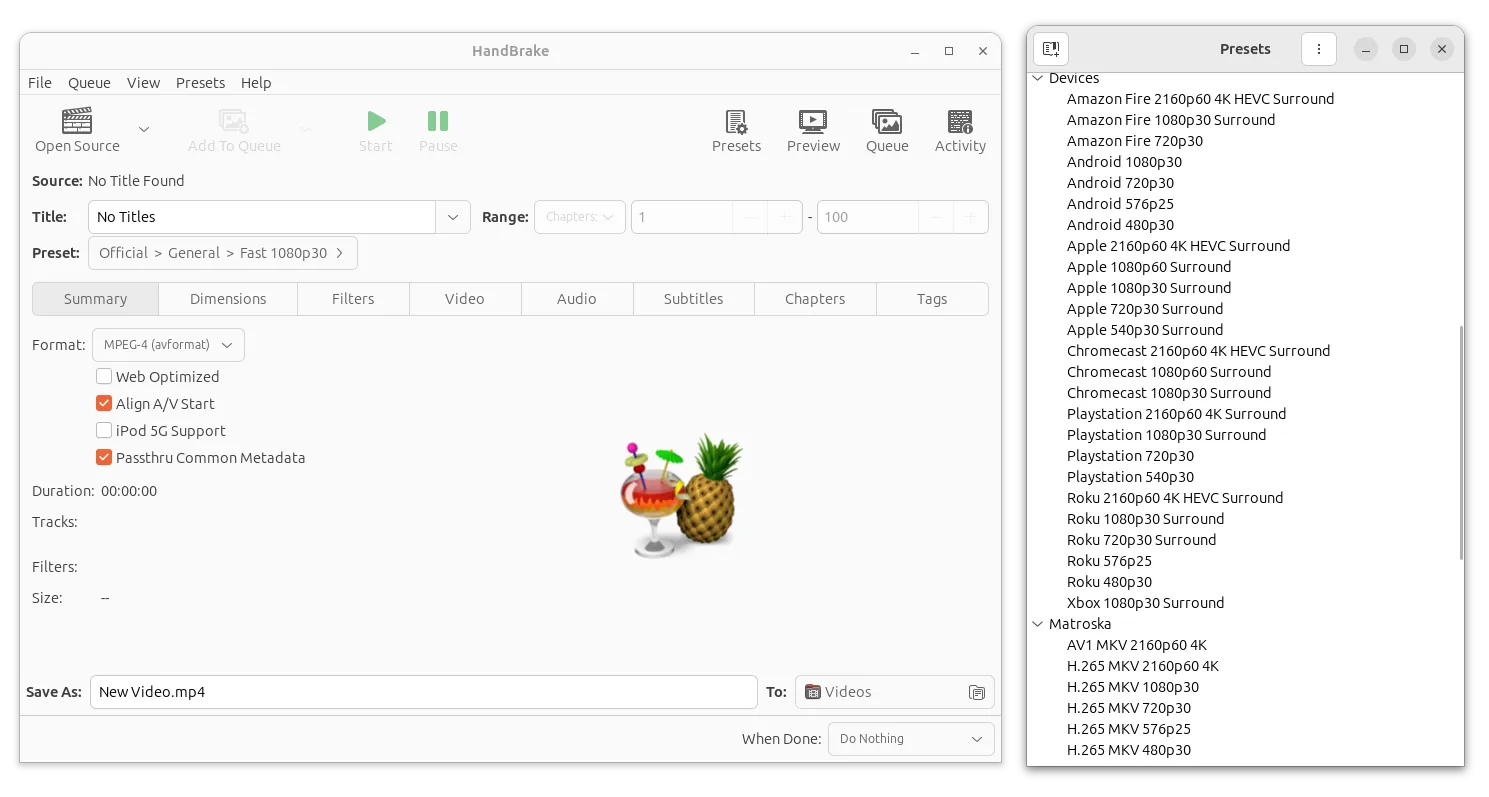
Archives For News

Free open-source software updates and Linux news

Ksnip, the popular free open-source screenshot and annotation tool, released 1.10.1 version yesterday.

Ksnip is a Qt based screenshot tool with editing features, that works in Windows, macOS, and Linux on both Wayland and Xorg. It’s one of my top favorite applications for adding annotations in screenshot.

The app just released version 1.10.1 one day ago as the first point release for the 1.10 release series. It’s a small release with a new feature: KDE support for scale factor. Meaning it’s now working better in KDE desktop (such as KUbuntu, Ubuntu Studio) with different scaling factor.

Other changes include:

  • Fix drag and drop issue for Ksnip installed as Snap.
  • Fix sticker resizing issue when bounding rect flipped.
  • Show tab tooltips on initial tabs.
  • Fix for unnecessary scrollbars when a screenshot has a smaller size than the previous one
  • Fix that loading image from stdin single instance client runner side doesn’t work

How to Install KSnip 1.10.1 in Ubuntu / Linux Mint

Option 1: Snap package

The easiest way to install the tool in Ubuntu is using the official Snap packages. Simply open Ubuntu Software, then you can search for and install it via few clicks.

Install Ksnip via Ubuntu Software

Option 2: AppImage / Deb

The software project page also provides AppImage and Deb packages, as well as Windows and Mac OS packages for download under ‘Assets’ section:

For most Linux, you may download the non-install AppImage package, make it executable via right-click menu “Properties” dialog -> “Permissions” tab, and finally click run the package to launch it.

For Debian and Ubuntu based system, download the .deb package and install it by running command in terminal (press Ctrl+Alt+T to open terminal):

sudo apt install ~/Downloads/ksnip-*.deb

NOTE for Ubuntu 22.04, double-click installing this local deb via “Software Install” option may not work properly. It refers to the Snap package, rather than installing the local package.

Option 3: Ubuntu PPA (unofficial)

For those prefer Ubuntu PPA, here’s an unofficial repository with Ubuntu 20.04, Ubuntu 22.04, Ubuntu 22.10 and Ubuntu 23.04 support.

Simply press Ctrl+Alt+T on keyboard to open terminal, and run the commands below one by one will add the PPA and install the screenshot tool from it.

sudo add-apt-repository ppa:ubuntuhandbook1/ksnip
sudo apt update
sudo apt install ksnip libkimageannotator0 libkcolorpicker0

Install the OCR plugin:

The OCR plugin is available to install as a separate package. It’s available to download at the link below:

Click to expand the ‘Assets‘ section, download & install the .deb package for Debian and Ubuntu based system.

Uninstall Ksnip

For the snap package, simply click ‘uninstall’ button in Ubuntu Software.

For deb package, press Ctrl+Alt+T on keyboard and run the command below to remove it:

sudo apt remove --autoremove ksnip libkimageannotator0

And, remove the Ubuntu PPA (if added) by running command:

sudo add-apt-repository --remove ppa:ubuntuhandbook1/ksnip

The free open-source Inkscape vector graphics editor got a new maintenance release for the 1.2 series.

The is the second update for Inkscape 1.2, which finally makes OpenClipart import available for Windows and Linux user using AppImage. And, Color extensions works on patterns again.

For macOS, spellchecking finally works and undo/redo options are back in the menu. For Linux, the snap package is no longer possible to install with --classic option. Meaning the snap won’t be able to access data outside of user’s home directory.

Other changes in Inkscape 1.2.2 include:

  • no longer freezes when rotating objects with snapping activated under certain conditions
  • Dithering now disabled by default due to performance loss.
  • Several fixes to the DXF14 export
  • TIFF export now supports transparency
  • DPI attribute is preserved for JPG and TIFF raster export
  • Correct PNG file permission in Linux.
  • Measure tool now indicates correct positions and sizes for shapes

There are as well various other bug-fixes and improvements, see the release note for details.

How to Install Inkscape 1.2.2 in Ubuntu & other Linux

Inkscape website offers official Windows, macOS, Linux, and source tarball, available to download at the link below:

For Linux, it’s available to install via AppImage, Snap, and deb (through PPA), and Flatpak.

Option 1: Snap

Snap is an universal package that runs in sandbox. Ubuntu 20.04 and higher can simply search for and install Inkscape as Snap from Ubuntu Software:

Install inkscape as Snap from Ubuntu Software

Option 2: AppImage

AppImage is a portable package works in most Linux. No installation required, just grab the package (via link above), enable ‘Allow executing file as program‘ in file Properties dialog. Finally, click Run the package to launch the editor.

Option 3: Ubuntu PPA

For the native .deb package, it has an official stable PPA contains the latest package for Ubuntu 20.04, Ubuntu 22.04, and Ubuntu 22.10.  Not only for modern 64-bit OS, the PPA now also supports for arm64/armhf architecture types.

1. First, press Ctrl+Alt+T on keyboard to open terminal. When it opens, run command to add the PPA:

sudo add-apt-repository ppa:inkscape.dev/stable

Type user password (no asterisk feedback) when it asks and hit Enter to continue.

2. Then either install the image editor as native .deb package via:

sudo apt install inkscape

NOTE: Linux Mint user need to refresh package cache via sudo apt update first.

Or use ‘Software Updater’ to upgrade from an old version:

Option 4: Flatpak

Flatpak is another universal package format that runs in sandbox. Different to previous package formats, Inkscape as Flatpak is maintained by the open-source community.

Ubuntu 20.04 and higher and follow the steps below to install Inkscape as Flatpak package:

  • 1. First, open terminal and install Flatpak daemon via command:
    sudo apt install flatpak
  • 2. Then install Inkscape as Flatpak using command:
    flatpak install https://dl.flathub.org/repo/appstream/org.inkscape.Inkscape.flatpakref

Uninstall Inkscape:

Depends on which package you installed, choose from the methods below:

  • For Snap package, remove it from Ubuntu Software.
  • For AppImage, just remove the package file.
  • To remove the Inkscape PPA, open terminal and run command:
    sudo add-apt-repository --remove ppa:inkscape.dev/stable

    Also remove the editor if you want via command:

    sudo apt remove --autoremove inkscape
  • For the Flatpak package, use command:
    flatpak uninstall --delete-data org.inkscape.Inkscape

    And run flatpak uninstall –unused to remove useless runtime libraries.

The popular Qt based screenshot tool KSnip 1.10.0 was released few days ago with some cool new features. Here’s how to install it in Ubuntu.

For those never heard of KSnip, it’s a free open-source cross-platform (supports Windows, Linux and MacOS) screenshot tool with some annotation tools, upload options and more.

By releasing the new 1.10.0 release, it adds new command line options:

  • -p or --saveto <path> to specify where to save image.
  • -o or --upload to upload screenshot via default uploader without opening in editor.

For other command options, simply run ksnip --help in terminal.

With a new OCR plugin, the release now supports for extracting plain text from images. Just open an image, then click on the “Options -> OCR” menu option to use it. Though, it seems to be in very early stage, which is not working in my case.

Other changes in KSnip 1.10.0 include:

  • Add FTP uploading support.
  • Add debug logging.
  • New Save all option.
  • Search in preference.
  • Add support for RGBA colors with transparency.
  • Editing feature improvements.
  • And various bug-fixes.

How to Install KSnip 1.10

Option 1: Snap package

The easiest way to install the tool in Ubuntu is using the official Snap packages. Simply open Ubuntu Software, then you can search for and install it via few clicks.

Install Ksnip via Ubuntu Software

Option 2: AppImage / Deb

The software project page also provides AppImage and Deb packages, as well as Windows and Mac OS packages for download under ‘Assets’ section:

For most Linux, you may download the non-install AppImage package, make it executable via right-click menu “Properties” dialog -> “Permissions” tab, and finally click run the package to launch it.

For Debian and Ubuntu based system, download the .deb package and install it by running command in terminal (press Ctrl+Alt+T to open terminal):

sudo apt install ~/Downloads/ksnip-*.deb

NOTE for Ubuntu 22.04, double-click installing this local deb via “Software Install” option may not work properly. It refers to the Snap package, rather than installing the local package.

Option 3: Ubuntu PPA (unofficial)

For those prefer Ubuntu PPA, here’s an unofficial repository with Ubuntu 20.04 and Ubuntu 22.04 support.

Simply press Ctrl+Alt+T on keyboard to open terminal, and run the commands below one by one will add the PPA and install the screenshot tool from it.

sudo add-apt-repository ppa:ubuntuhandbook1/ksnip
sudo apt update
sudo apt install ksnip libkimageannotator0 libkcolorpicker0

Install the OCR plugin:

The OCR plugin is available to install as a separate package. It’s available to download at the link below:

Click to expand the ‘Assets‘ section, download & install the .deb package for Debian and Ubuntu based system.

Uninstall Ksnip

For the snap package, simply click ‘uninstall’ button in Ubuntu Software.

For deb package, press Ctrl+Alt+T on keyboard and run the command below to remove it:

sudo apt remove --autoremove ksnip libkimageannotator0

And, remove the Ubuntu PPA (if added) by running command:

sudo add-apt-repository --remove ppa:ubuntuhandbook1/ksnip

Most torrent clients today have ability to detect clipboard for magnet links. However, after copied an URL link, user has to manually open the downloading app and then click ‘Open URL’ (or ‘Add Torrent Link’) option to let it paste the link automatically.

Instead of using web browser pop-up to choose app to open an URL, KDE desktop has a built-in feature ‘Klipper Actions‘ that detects clipboard contents and automatically pops-up a menu allows to open link with desired app.

Picture 1: Click the pop-up option will automatically launch the app and open the link from clipboard

So just copy a magnet link. It opens the previous context menu (see the picture above) automatically, allows to click the menu option to launch your desired app and open the URL.

Setup the Klipper Actions for Magnet link in KDE:

1.) Firstly, find out the ‘Clipboard’ indicator in system tray on panel (or click the ‘triangle‘ icon). Then right-click on the icon and choose ‘Configure Clipboard‘.

Open Klipper settings

2.) When the settings dialog opens, go to ‘Actions‘ in left pane and click on ‘Add Actions‘ button.

Add a Klipper action

3.) In next dialog, do:

  • input regular expression ^magnet:.*. It means any content started with ‘magnet:‘ (without quotes). See more about regular extension.
  • Add description (optional).
  • Click ‘Add Command’ and use qbittorrent %s or ktorrent %s. Use any torrent client as you prefer.
  • Type description for command (will display as text in pop-up menu).

4.) After adding an action, the settings dialog will look like the screenshot below. Here I added two actions to handle magnet link and url ends with torrent with qBittorrent client.

Actions for magnet links and url ends with .torrent

After clicking Apply (OK), copy a magnet link and the menu should pop-up automatically, allows to single click launching qBittorrent and open the download.

And, there are keyboard shortcuts: Ctrl+Alt+X to enable/disable Klipper actions, and Ctrl+Alt+R to trigger the menu (Picture 1) manually.

After more than half a year of development, the qBitTorrent app released version 4.4.0 with many new features and various bug-fixes.

qBitTorrent 4.4.0 added Qt6 support. It offers better HiDPI compatibility for Windows 10+ and Linux using AppImage package. Though, it has known issue about text display on the progress bar. The Qt5 build is still the primary packages, though the next major release will probably drop Qt5 support.

The new release also supports BitTorrent v2 protocol and libtorrent 2.0.x, that use SHA-256 to provide a safer cryptographic hash function.

There are also some other new features, including announce to all trackers if IP changed, “Checking” filter in side pane, “Forced metadata downloading” state, “Skip hash check” option, double-click to show torrent options, temp folder per torrent/category, folder based UI themes, and more.

Other changes in qBitTorrent 4.4.0 include:

  • Remember last viewed page in options.
  • Add ‘Notification timeout’ option.
  • Add context menu to toggle content tab columns.
  • Add windows-clang support and update python installer URL for Windows.
  • Prolong wait time for shutdown for qbittorrent-nox for Linux.
  • Install vector program icon for Linux.
  • Add detection for OpenBSD, Haiku in configure script
  • Update Mac icons for Big Sur
  • Stick Unread row to top in RSS feed list
  • Setting to store/load fastresume/torrent files in an SQLite database
  • More tool-tips, web UI updates, and bug-fixes.

How to Install qBitTorrent 4.4.0:

For Windows, MacOS, Linux AppImage, and source tarball, go to the official download page:

For Linux, the AppImage package is the only way to get the Qt6 build. Just grab it from the link above, make executable in file “Properties” dialog under ‘Permissions’ tab. Finally, click run the package to launch the torrent client.

qBitTorrent is also available as native .deb package for Ubuntu based system via its official Ubuntu PPA. The package will be available in next few days. However, Ubuntu 20.04 is no longer supported because its system Qt5 library does not meet the minimum requirement.

It’s also available to install as universal Flatpak package. Though it takes more disk space due to run-time libraries, the Flatpak was built with GUI lock support.

Ubuntu 21.10 Impish Indri Final Beta Released

Last updated: September 24, 2021

The Ubuntu team announced the release of Ubuntu 21.10 Beta, code name ‘Impish Indri’. The release features Linux Kernel 5.13 and GNOME 40 desktop.

Ubuntu 21.10, codenamed “Impish Indri”, continues Ubuntu’s proud tradition of integrating the latest and greatest open source technologies into a high-quality, easy-to-use Linux distribution. The team has been hard at work through this cycle, introducing new features and fixing bugs.

Ubuntu 21.10 final will be released on October 14, with support for 9 months until July 2022. It is powered by Linux Kernel 5.13 with most recent hardware support. The Desktop edition include GNOME 40 features a new and improved Activities Overview design.

Workspaces are now arranged horizontally, and the overview and app grid are accessed vertically. And it supports three-finger touchpad gestures to toggle overview and switch workspaces.

The “standard” app layout, dark header-bar along with light window color, has been removed. Now Ubuntu 21.10 includes only “light” and “dark” mode to choose from the ‘Appearance’ settings page.

GNOME 40 by default logs into the overview screen. Gladly, Ubuntu decides to disable this design and revert to blank desktop just as before. However, Firefox web browser in Ubuntu 21.10 defaults a Snap app runs in sandbox.

Though the classic Firefox deb is still available out-of-the-box, clicking the default browser icon on left dock will open the Snap app. For users don’t like Snap may remove the icon from dock and add the native one as favorite.

Ubuntu 21.10 has TWO Firefox packages and defaults to SNAP

Download Ubuntu 21.10

This Beta release includes disc images from Ubuntu Desktop, Server, Cloud products, as well as official Ubuntu flavors including Kubuntu, Lubuntu, Ubuntu Budgie, UbuntuKylin, Ubuntu MATE, Ubuntu Studio, and Xubuntu.

To download Ubuntu 21.10 desktop and server iso images, go to the link button below:

For Ubuntu flavors and other downloads go to cdimage.ubuntu.com. And the full release notes for Ubuntu 21.10 Beta can be found at HERE.

After half a year of development, the GNOME project announced version 41 of its popular Linux desktop environment.

GNOME 41 comes with some exciting new features. The upper right corner system tray menu now includes option to make it easy to switch Power Mode between “Balanced” and “Power Saver”. It’s said that “Performance mode” is only visible on hardware that supports this feature, though I don’t understand which hardware required, may be a dedicated graphics card.

The GNOME Settings panel introduced two new items in the left pane: Multitasking and Mobile Network.

The “Multitasking” pane offers options to toggle top-left hot-corner to open Activities overview, app window auto-resizing function when dragging against screen edges; set dynamic or fixed number of workspaces; show workspace on primary only or all displays; super + tab switching for apps on all workspaces or current workspace only.

The “Mobile Network” pane is only visible when a supported modem is present, e.g., 2G, 3G, 4G, and GSM/LTE. It allows to set the network type, whether to use mobile data and data roaming. And it supports multiple SIMs and modems, allows to easy switching network modes.

Other changes in Gnome 41 include:

  • New “Connections” remote desktop app with VNC and RDP support.
  • Overhaul Gnome Software.
  • Redesigned Gnome Music.
  • Faster response to keyboard & pointer input on Wayland.
  • New default GL renderer for GTK4.
  • Create encrypted .zip archives in Files.
  • Import events to Calendar from .ics files.
  • Code cleanup in Mutter, and more.

How to Get Gnome 41:

Usually, the newest GNOME desktop will be first made into Fedora and Arch Linux. Users are recommended to wait your Linux distribution to include the desktop environment.

For testing and development purpose, you can try the GNOME OS either in virtual machine or real computer. Or download the iso image from the link button below:

gThumb image viewer and organizer announced version 3.12.0 as the new stable release series!

gThumb 3.12.0 is the new stable series since the last 3.10.x, while the 3.11.x is the development release.

What’s New in gThumb 3.12.0:

The new release includes many new features compare to the previous stable 3.10.x. They are all introduced in the 3.11 development releases, so you may already enjoy using them for a period of time.

With libheif library, gThumb now opens AVIF, HEIF (include Apple’s HEIC) images, and allows to save images as AVIF. And it supports JPEG XL images using the jpeg-xl library. A template editor is available to edit text values with special codes, for use in script commands, rename templates, print header and footer, etc.

Besides that, it improved file navigation for directory contains thousands of images. The file list now starts more thumbnailers in parallel, status bar has button to show the progress dialog. And the color picker tool shows colors in two more formats: rgb in % and hsl. Others include:

  • Allow to set shortcuts to activate filters.
  • Allow to mount unmounted volumes.
  • Add file actions to the viewer context menu.
  • Read color profiles from png files as well.
  • Option to show/hide the status bar.

For those already running gThumb 3.11.4, there are only bug-fixes and translation updates.

How to Install gThumb 3.12.0 in Ubuntu:

The software does not provide official binary package. Besides building from the source tarball, you may install it via the unofficial Ubuntu PPA.

1. Add the Ubuntu PPA.

The PPA so far provides packages for Ubuntu 20.04, Ubuntu 21.04, Ubuntu 21.10, and Linux Mint 20. It contains package for Ubuntu 18.04 but lacks JPEG XL support.

Firstly open terminal either from start menu or by pressing Ctrl+Alt+T on keyboard. When it opens, paste the command below into terminal and hit run:

sudo add-apt-repository ppa:ubuntuhandbook1/apps

2. Update system package cache.

Adding PPA will automatically refresh the package cache in Ubuntu 20.04 and higher. However old versions and some Ubuntu based systems does not. To do it manually, simply run command in terminal:

sudo apt update

3. Install / Upgrade gThumb.

Finally, either run the apt install command in a terminal window to install the image viewer:

sudo apt install gthumb

Or use the Software Updater (Update Manager) utility to receive package updates. Un-check other packages from the PPA if you don’t want them.

Uninstall / Restore gThumb:

You can restore to the stock version of the image viewer and organizer by purging the PPA repository. To do so, simply run command:

sudo apt install ppa-purge && sudo ppa-purge ppa:ubuntuhandbook1/apps

You may also keep the gThumb package but remove the Ubuntu PPA, since it contains many other software packages that you don’t prefer. To do so, either run command in terminal:

sudo add-apt-repository --remove ppa:ubuntuhandbook1/apps

Or remove the repository line under ‘Other Software’ tab via Software & Updates utility.

The Six Point Release Ubuntu 18.04.6 LTS is Out!

Last updated: September 17, 2021

The Ubuntu team announced the six point release for Ubuntu 18.04 today for the Desktop and Server.

Ubuntu 18.04.6 refreshed the disc images for the amd64 and arm64 architecture, re-enabling the usage on Secure Boot enabled systems due to the key revocation related to the BootHole vulnerability.

In August 2020, a set of security vulnerabilities in GRUB2 (the GRand Unified Bootloader version 2) collectively known as BootHole were disclosed. Today, another set of vulnerabilities in GRUB2 were disclosed, with similar implications.

See more in this blog post.

The release also includes many other security updates for additional high-impact bug fixes, with a focus on maintaining stability and compatibility with Ubuntu 18.04 LTS.

Download Ubuntu 18.04.6:

Ubuntu 18.04 has 5 year standard security support, and additional 5 year Extended Security Maintenance (esm) free for personal use.

To download Ubuntu 18.04.6, go the the link below:

For Ubuntu 16.04 LTS, it’s able to upgrade to Ubuntu 18.04.6 using the Update Manger. See the documentation for more.

Oracle announced the release of Java 17 as the new Long-Term Support (LTS) release.

Java 17 LTS comes with thousands of performance, stability, and security updates, as well as 14 JEPs (JDK Enhancement Proposals). And Oracle will provide 8-year support for the release with security, performance, and bug-fix updates until 2029.

According to the release note, the next LTS will be Java 21 planned for September 2023, which changes the LTS release circle for every three years to two years.

What’s New in Oracle Java 17:

JDK 17 includes new language enhancements, updates to the libraries, support for new Apple computers, removals and deprecations of legacy features, and work to ensure Java code written today will continue working without change in future JDK versions. It also offers a language feature preview and incubating APIs to gather feedback from the Java community.

Updates in the release include:

  • Sealed classes and interfaces restrict which other classes or interfaces may extend or implement them.
  • Restore Always-Strict Floating-Point Semantics
  • New interface types and implementations for Pseudo-Random Number Generators (PRNGs), including jumpable PRNGs and an additional class of splittable PRNG algorithms (LXM).
  • Implement a Java 2D pipeline for macOS using the Apple Metal API.
  • New Arm 64-based Apple Silicon computers support.
  • Deprecate the Applet API for removal
  • Remove the Remote Method Invocation (RMI) Activation mechanism
  • Remove the Experimental AOT and JIT Compiler
  • Deprecate the Security Manager for removal
  • Strongly encapsulate all internal elements of the JDK, except for critical internal APIs such as sun.misc.Unsafe.
  • Pattern matching for switch expressions and statements, along with extensions to the language of patterns.
  • Improves Foreign Function and Memory API and Vector API.

How to Install Oracle Java 17 in Ubuntu:

Thanks to the “Linux Uprising” team ppa, an installer script has been created to automatically downloads and installs Oracle JDK 17 package, and sets Java 17 as the default Java version (setting JAVA_HOME, etc.) on 64-bit PC and arm64 devices, e.g., Rasperry Pi and Microsoft HoloLens 2.

1.) Firstly, open terminal either from system start menu or by pressing Ctrl+Alt+T on keyboard. When it opens, run command to add the PPA:

sudo add-apt-repository ppa:linuxuprising/java

Type user password when it asks (no asterisk feedback) and hit Enter to continue.

2.) Refresh system package cache. The PPA provides packages for Ubuntu 18.04, Ubuntu 20.04, Ubuntu 21.04, Ubuntu 21.10, as well as two old Ubuntu LTS (14.04 and 16.04). And old Ubuntu releases need to manually update system cache by running the command below in terminal:

sudo apt-get update

3.) Finally install the script package via command:

sudo apt-get install oracle-java17-installer

Once the script starts, it brings you to the screen for the license. Press Tab key on keyboard to select OK and hit Enter.

Then answer “Yes” via arrow keys and hit Enter to start downloading Java 17 package from oracle website.

Terminal will indicate the downloading and installing process for you. When everything’s done successfully, use java --version or javac --version command to verify the installation.

That’s all. Enjoy!